

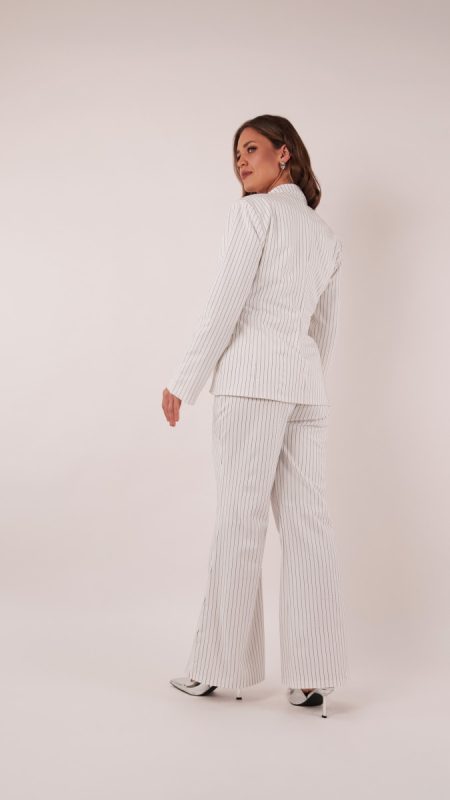
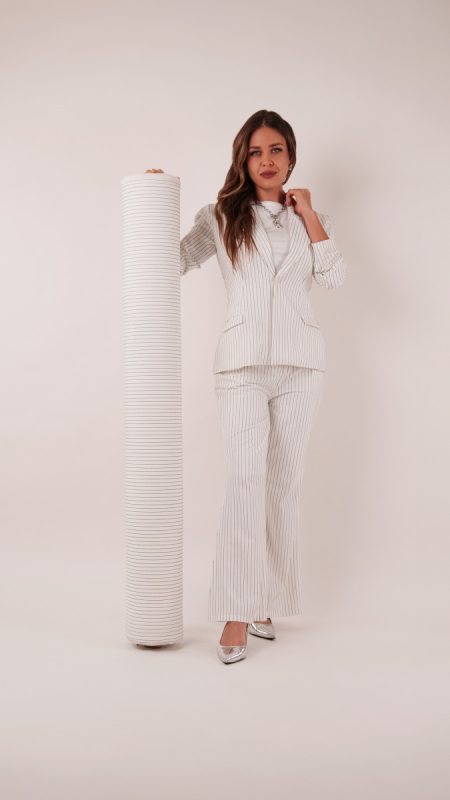
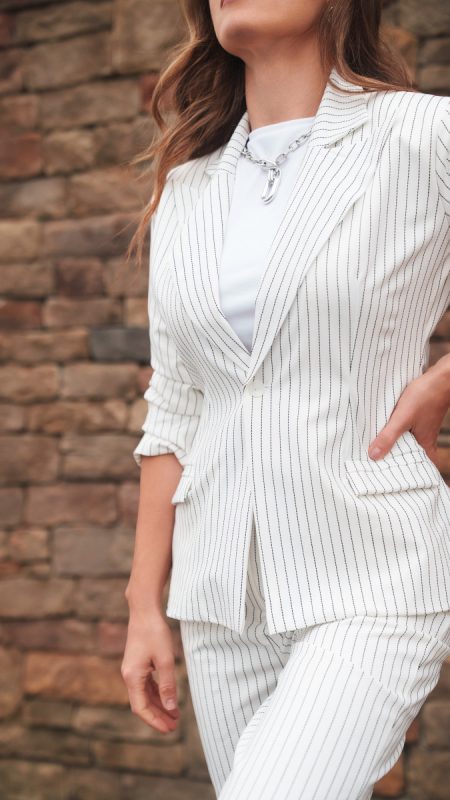
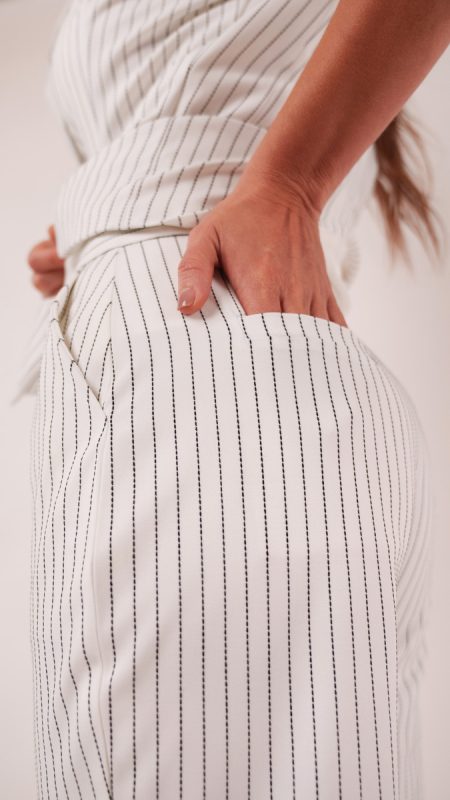
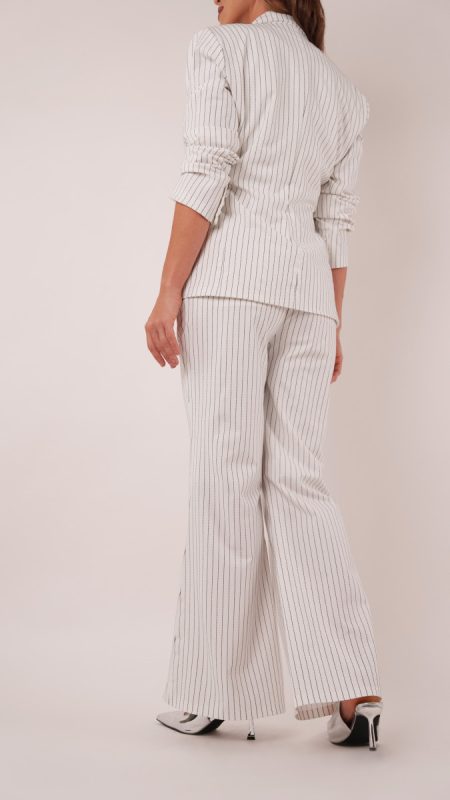
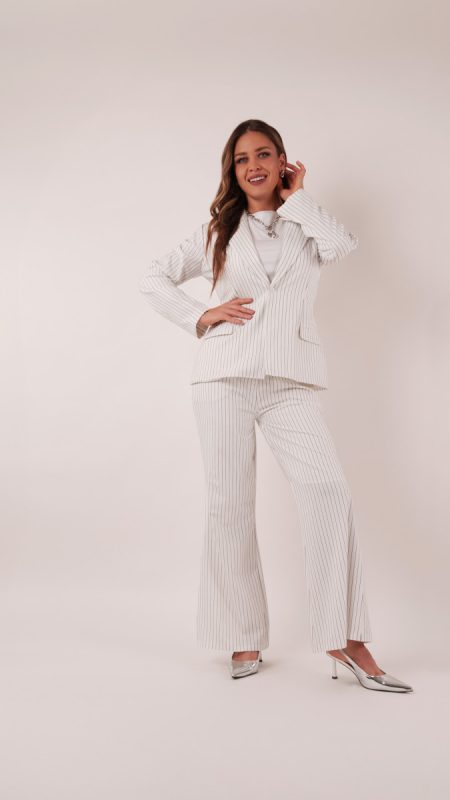
Power dressing never really goes out of style. The Heir Blazer and Flared Trousers bring together timeless tailoring and vintage-inspired silhouettes to create a suit that feels just as at home in the boardroom as it does on the runway. Crafted from a stretch woven cotton-polyester blend with a sophisticated vertical chalk stripe, this ensemble delivers polished, structured comfort with every wear.
This is one of our more advanced sewing patterns, and it’s designed for sewists looking to take their garment-making skills to the next level.Take your time, trust the process, and before you know it, you’ll have a custom-tailored suit that fits you better than anything off the rack. Whether you’re dressing for a big presentation, a job interview, a special event, or your next fashion show, the Heir Blazer and Flared Trousers are ready to rise to the occasion.
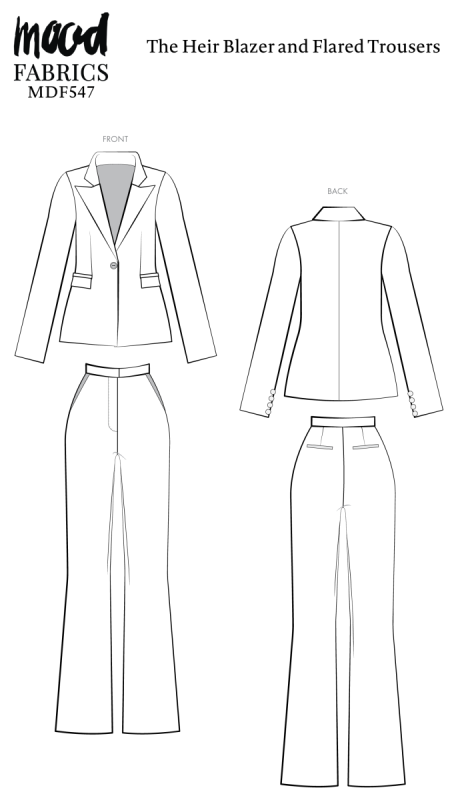
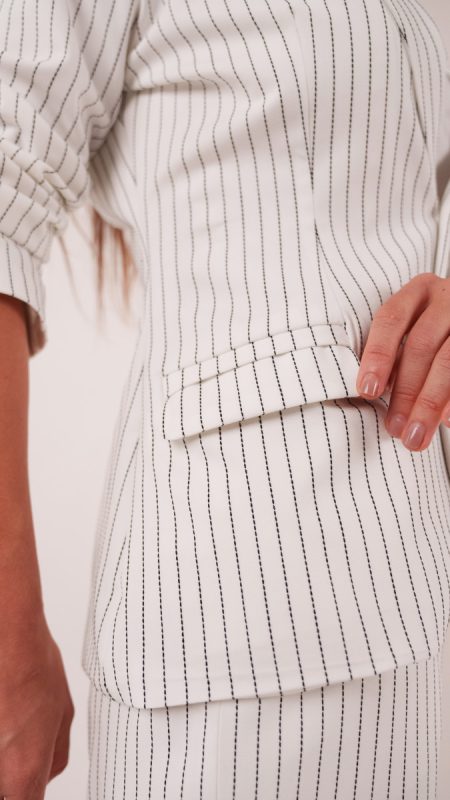
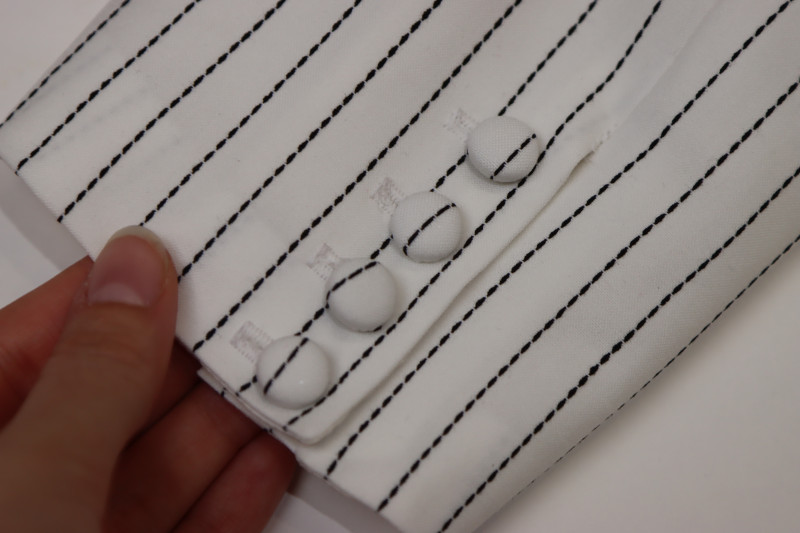
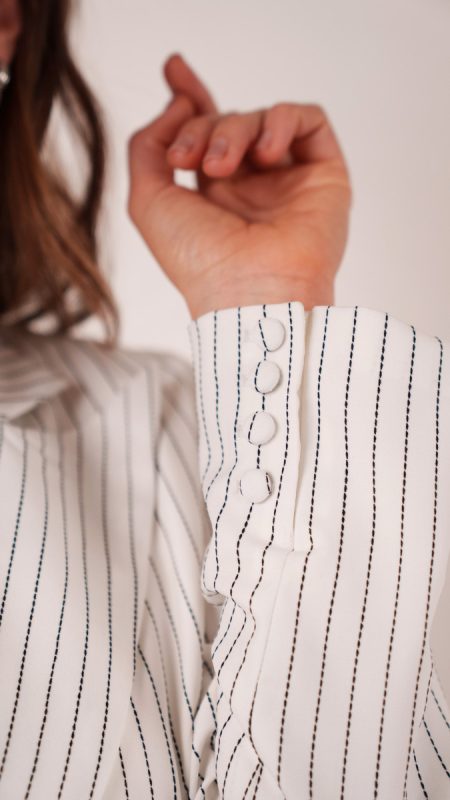
The beauty of this pattern lies in its thoughtful tailoring details. You’ll recognize the clean welt pockets from some of our previous patterns, but the elegant sleeve plackets add an elevated, bespoke finish that we don’t feature very often. Combined with the dramatic oversized lapels, carefully placed vertical stripes, and sweeping flared trousers inspired by iconic 1970s tailoring, every detail works together to create a sleek, refined garment.
Despite its impressive finished look, much of the construction is surprisingly approachable once you break it down step by step. Each technique builds on the last, making this an incredibly rewarding project for anyone ready to challenge themselves and expand their sewing repertoire. By the time you sew on the final button, you’ll have more than just a beautiful suit. You’ll have the confidence that comes from mastering classic tailoring techniques and a wardrobe staple that will fit right in with the rest of your wardrobe.


Essential Materials & Sizing Guide for the Heir Blazer and Flared Trousers
Continue reading for a breakdown of what knowledge and materials you need for creating your very own blazer and flared trousers! We’ve got you covered with the recommended materials we used—if you want to follow along exactly—as well as a curated list of alternative fabric type recommendations if you want to customize your own version. The Heir Blazer and Flared Trousers free sewing pattern download includes technical drawings for seam and blazer and flared trousers visibility, plus a size chart to help you find your perfect fit!
Purchase Products Used Below:
Quantities indicated are for sewing a size medium blazer and flared trousers. Toggle the ‘SHOP THIS LOOK’ box to find quantity estimates for other sizes.
- 5 yards of Italian White and Black Broken Chalk Stripe Stretch Woven
- 4.5 yards of Twill Bemberg Lining – Marshmallow – Lustro Collection
- 1 each of Maxant Button Cover Kit-20
- 1 each of Plastic 2-Hole Button – 28L/18mm – Ivory Shimmer Flat
- 1 each of Gutermann Sew All Thread 500m – 20 White
- 1 each of Dritz Black and Nickel Sew-On Skirt Hook & Eye Closures – 4ct
- 1 pair of 5 Layer Cotton Shoulder Pads – 8.5″ x 5″ x .5″
- 1 each of Regular Zipper 9″ by YKK – 501 White
- 1 yard of Super White Hot Rolling Nonwoven Fusible Interfacing
- MDF547 – Heir Blazer and Flared Trousers Sewing Pattern (Free download below!)
Additional Products Used:
*Quick Tip! The ‘SHOP THIS LOOK’ box defaults to full-yard quantities. To order an exact half-yard quantity for any fabric, simply use the decrease quantity button (-) to subtract by the half yard. Then click “ADD TO CART” to add all materials to your cart. (Our system can only display full-yard quantities initially.)
Alternative Fabric Type Recommendations:
The Heir Blazer and Flared Trousers sewing pattern is best suited for light or medium weight fashion fabrics. Explore other fabric types or colors from our featured collections for your blazer and flared trousers with the links below.
Download Your Free Sewing Pattern
Submit your name and email in the form below to receive the download link for the Heir Blazer and Flared Trousers free sewing pattern directly in your inbox. Mood Sewciety Patterns will send your free download link via email with the subject line: ‘Your Free Download from Mood Sewciety – The Heir Blazer and Flared Trousers’ (in PDF format for A4 and letter-size printing).
© MoodFabrics.com / MoodSewciety.com – Mass production, resale, or distribution of this pattern in any form is strictly prohibited.
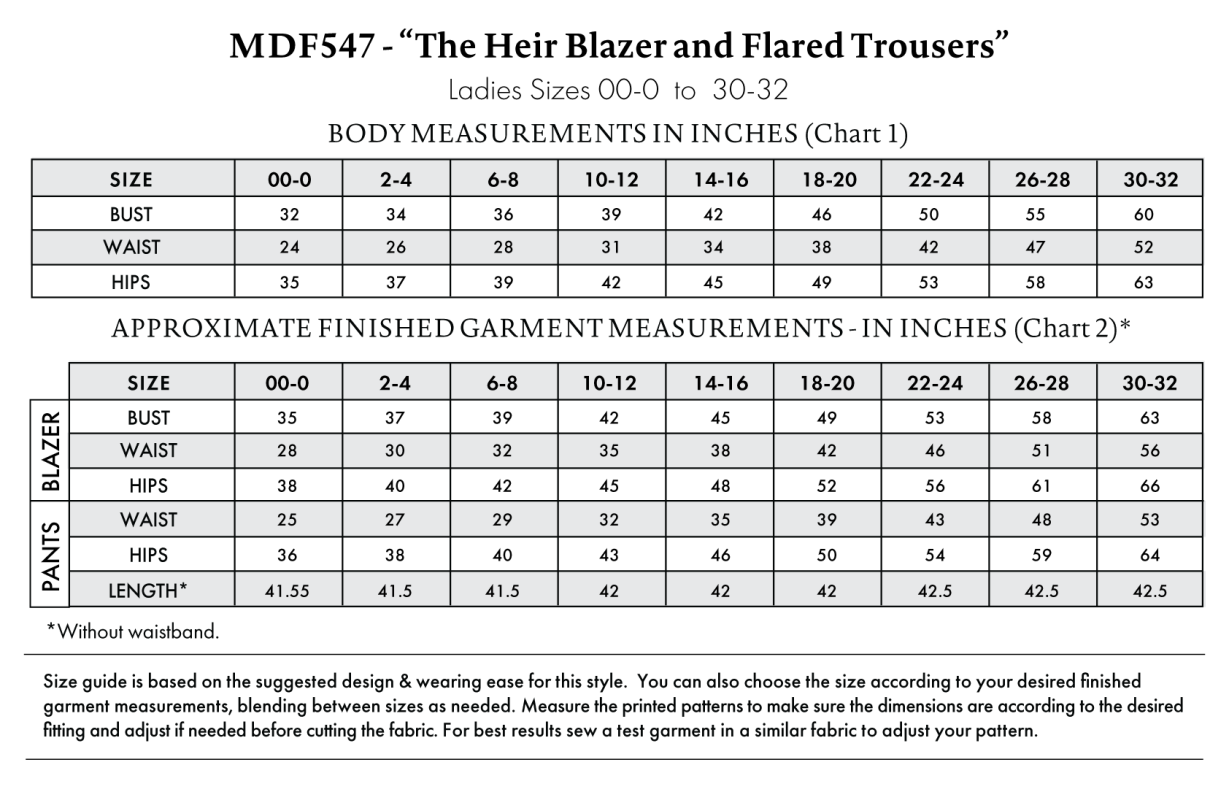
Find Your Perfect Fit
The Heir Blazer and Flared Trousers Sizing Guide is based on the suggested design & wearing ease for this style. You can also choose the size according to your desired finished garment measurements, blending between sizes as needed. Measure the printed patterns to make sure the dimensions are according to the desired fitting and adjust if needed before cutting the fabric. For best results, sew a test garment in a similar fabric to adjust your pattern.
Note: Always read all the instructions before cutting the fabric!
How to Sew The Heir Blazer and Flared Trousers
The instructions provided below are designed to guide you through sewing the Heir Blazer and Flared Trousers from start to finish.


3 Tips for Sewing with Stretch Woven Fabric
⇒ Prewash and shrink your fabric before cutting out the pattern.
⇒ Since this fabric is striped, make sure that the grainline of all your pattern pieces is parallel with the stripes on the fabric.
⇒ The iron is your best friend when making a suit. Make sure to press your seams open and flat after pretty much every step.

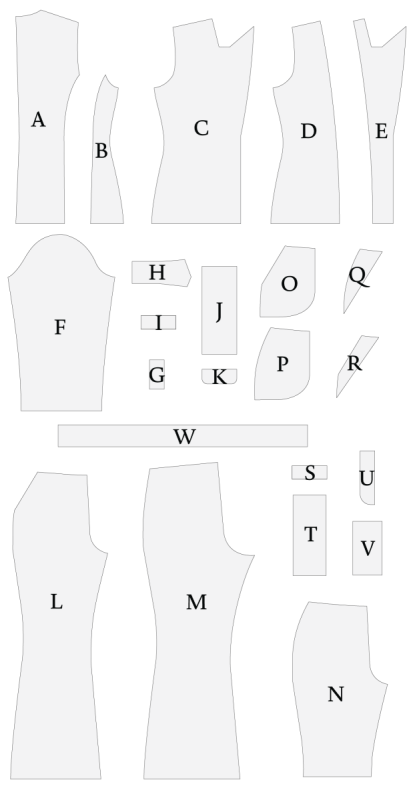
Pattern Pieces & Fabric Cuts Needed
(A) BLAZER BACK CENTER
Fabric – Cut 2 Mirrored
Lining – Cut 2 Mirrored
(B) BLAZER BACK SIDE
Fabric – Cut 2 Mirrored
Lining – Cut 2 Mirrored
(C) BLAZER FRONT
Fabric – Cut 2 Mirrored
(D) BLAZER FRONT LINING
Lining – Cut 2 Mirrored
(E) BLAZER FRONT FACING
Fabric – Cut 2 Mirrored
(F) SLEEVES
Fabric – Cut 2 Mirrored
Lining – Cut 2 Mirrored
(G) SLEEVE BUTTON PLACKETS
Fabric – Cut 2 Mirrored
Lining – Cut 2 Mirrored
(H) COLLAR
Fabric – Cut 2 On Fold
(I) BLAZER POCKET WELT
Fabric – Cut 4
(J) BLAZER POCKET BAG
Lining – Cut 2
(K) BLAZER POCKET FLAPS
Fabric – Cut 4
(L) PANTS FRONT
Fabric – Cut 2 Mirrored
(M) PANTS BACK
Fabric – Cut 2 Mirrored
Lining – Cut 2 Mirrored
(N) PANTS FRONT LINING
Lining – Cut 2 Mirrored
(O) PANTS SIDE POCKETS A
Lining – Cut 2 Mirrored
(P) PANTS SIDE POCKETS B
Lining – Cut 2 Mirrored
(Q) PANTS POCKETS B FACING
Fabric – Cut 2 Mirrored
(R) PANTS POCKETS A FACING
Fabric – Cut 2 Mirrored
(S) PANTS BACK POCKETS WELT
Fabric – Cut 2
(T) PANTS BACK POCKETS BAG
Lining – Cut 2
(U) ZIPPER FLY
Fabric – Cut 2
(V) ZIPPER FLY SHIELD
Fabric – Cut 1
(W) WAISTBAND
Fabric – Cut 1

Sew with a 1/2″ seam allowance for all seams unless otherwise specified.
Step 1
POCKET FACINGS
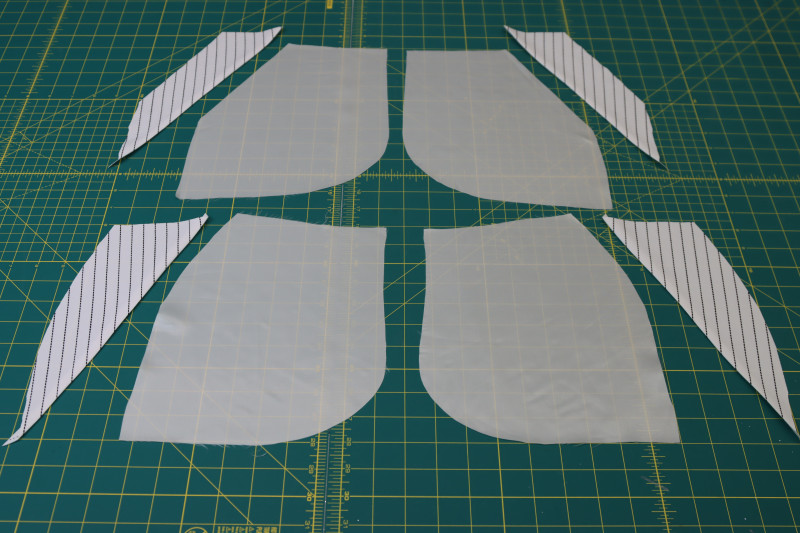
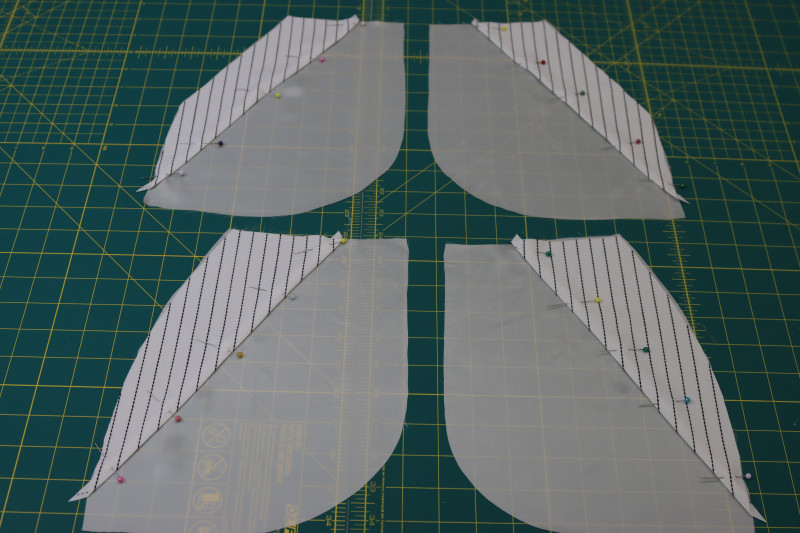
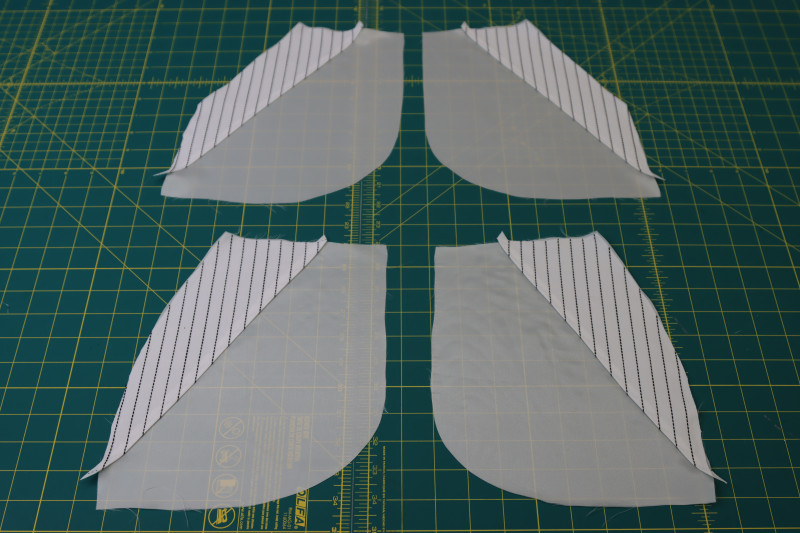
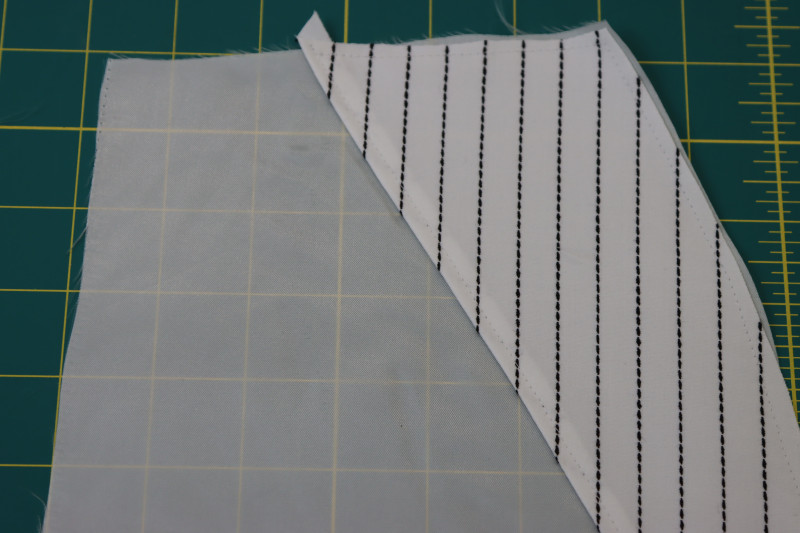
- Press a ½ inch fold into the diagonal inner edge of each of the pocket facing pieces as shown in the first photo below.
- Place the wrong side of the pocket facings on the right side of the pocket bags, making sure the A pocket facings are on the A bags and the B pocket facings are on the B bags.
- Pin the pocket facings to the pocket bags.
- WITHOUT BACKSTITCHING, topstitch around the entire pocket facing with a ⅛ inch seam allowance. Make sure the beginning and end of your stitch line up with each other perfectly.
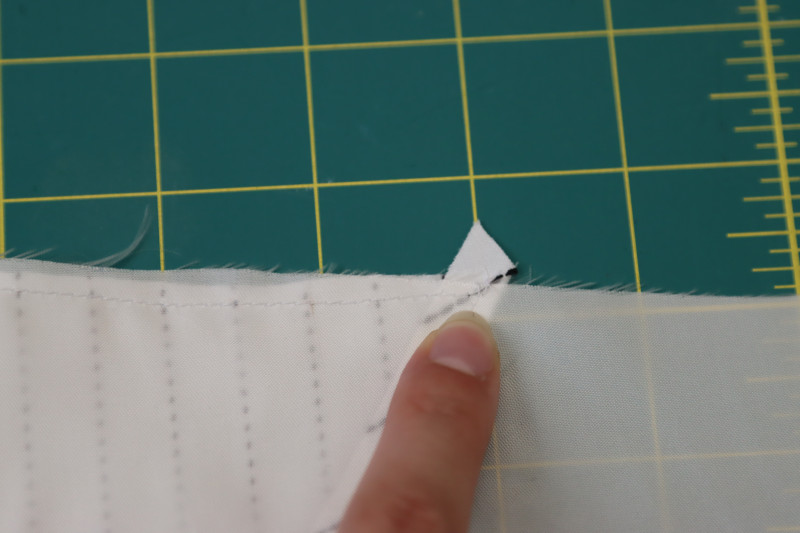
- Pull all 4 threads (top and bottom from both the beginning and end of the stitch) toward the back of the fabric.
- Tie all 4 threads in a triple knot on the wrong side of the fabric. The reason we just did this is to prevent the backstitching from causing the fabric to be bulky and warped. This is an especially useful technique when sewing with super thin fabrics like chiffon, charmeuse, or even an acetate lining like this. Use this technique throughout the garment for cleaner finishes, especially on any visible topstitching.
Step 2
ATTACH POCKETS
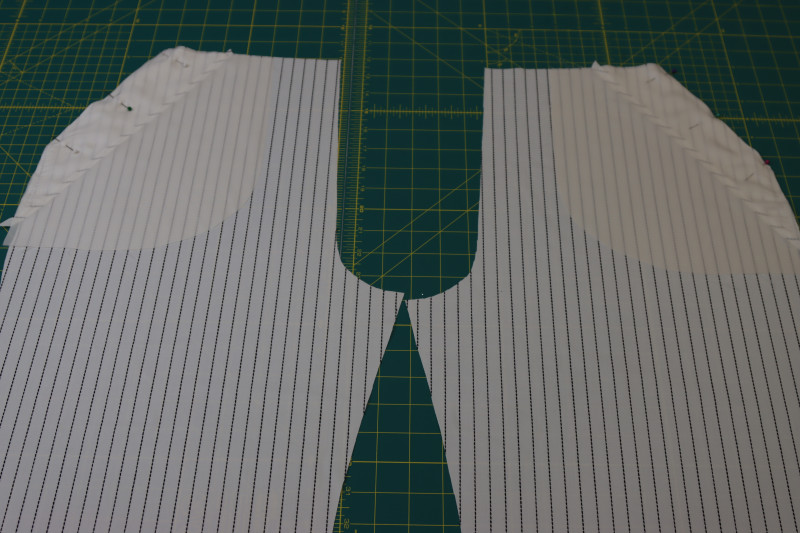
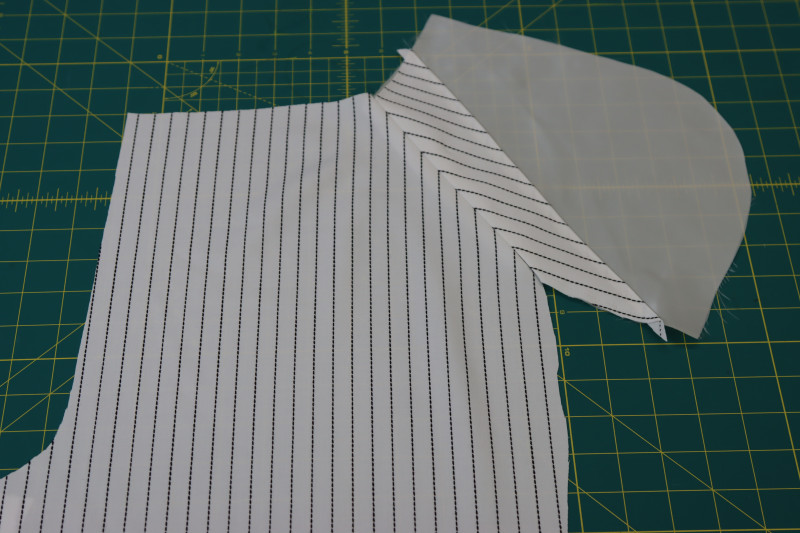
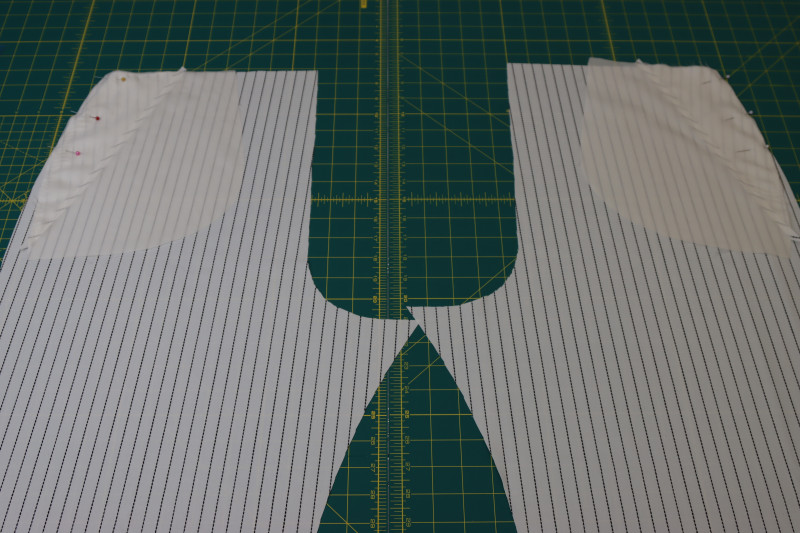
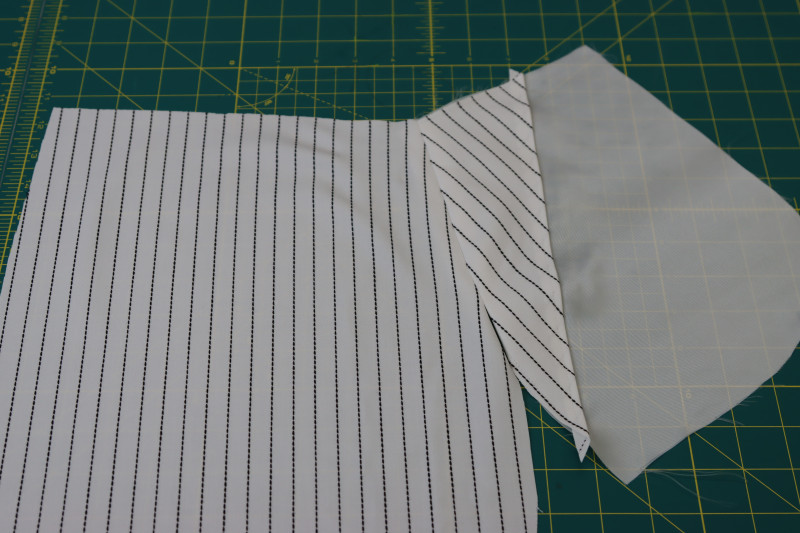
- Place the A pocket bags right sides together on top of the front pants pieces with the side seams lined up.
- Pin the top half of the pocket bags to the side seams (only the diagonal part, see the first photo below).
- Sew the pinned section of the pocket bags to the fronts of the pants at the side seams.
- Press that seam open with the seam allowance pressed against the pocket bag.
- Repeat the same process for the back pants pieces with the B pocket bags.
Step 3
SIDE SEAMS
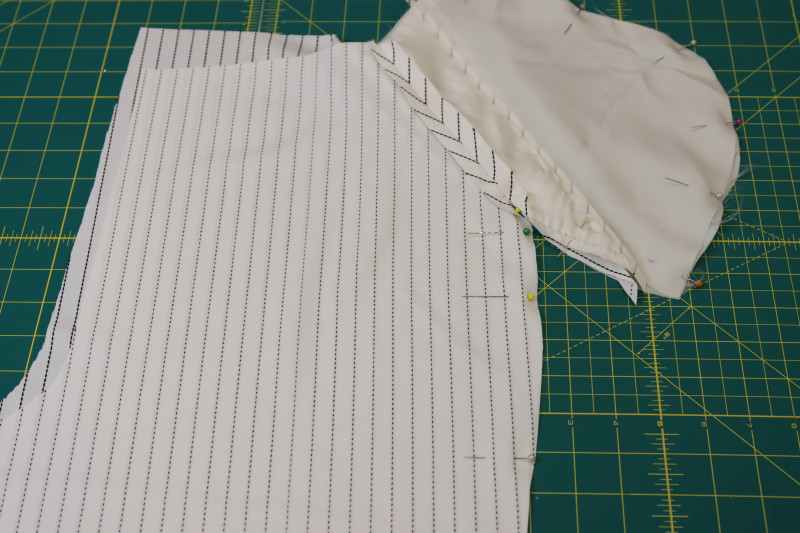
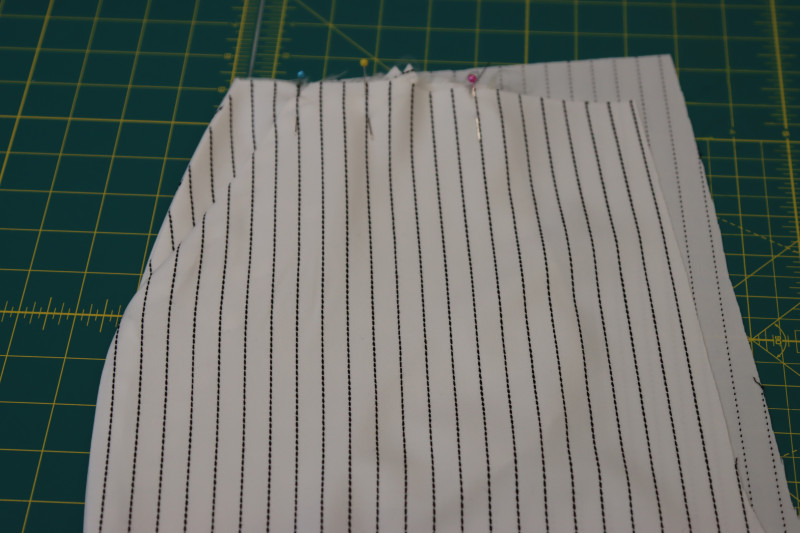
- Place the front pants pieces right sides together on top of the back pants pieces with the pocket bags and side seams lined up.
- Pin around the perimeter of the pocket bags and the side seams of the pants, making sure the ends of the A and B pocket seams are lined up at the corner where the pocket meets the pants.
- Sew along the pins.
- Press the side seams open and flat.
- Press the pocket toward the front of the pants.
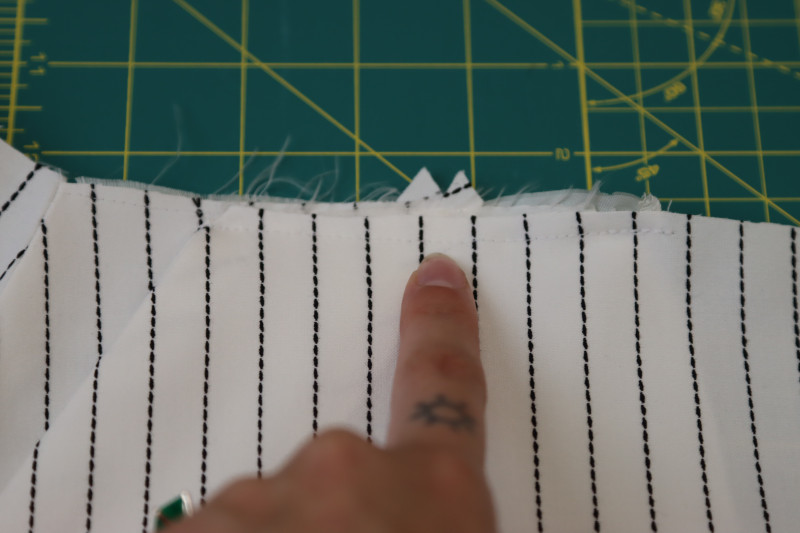
- Pin the top edge of the pocket bags to the front waistline of the pants.
- Sew a basting stitch with a ¼ inch seam allowance to secure the top edge of the pocket bags to the waistline of the pants.
Step 4
DARTS
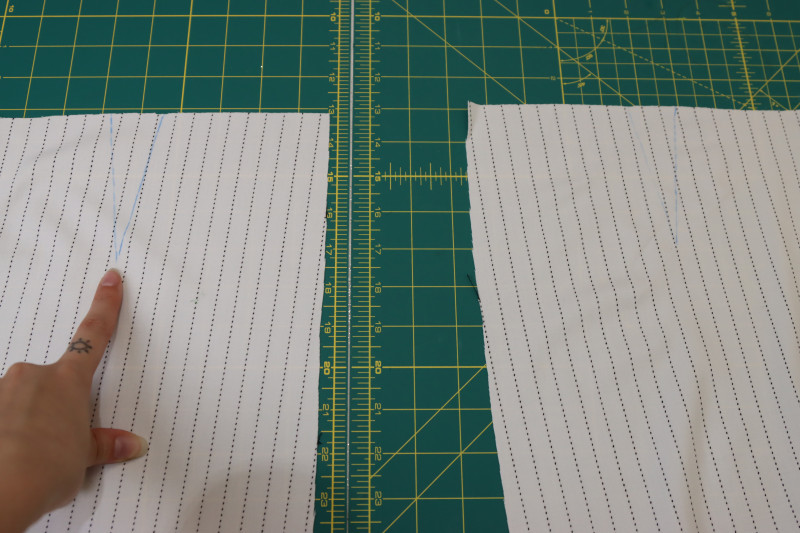
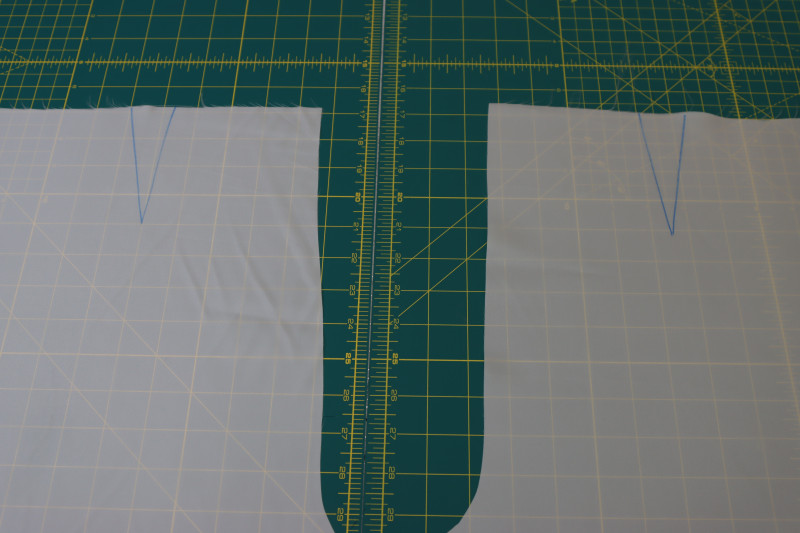
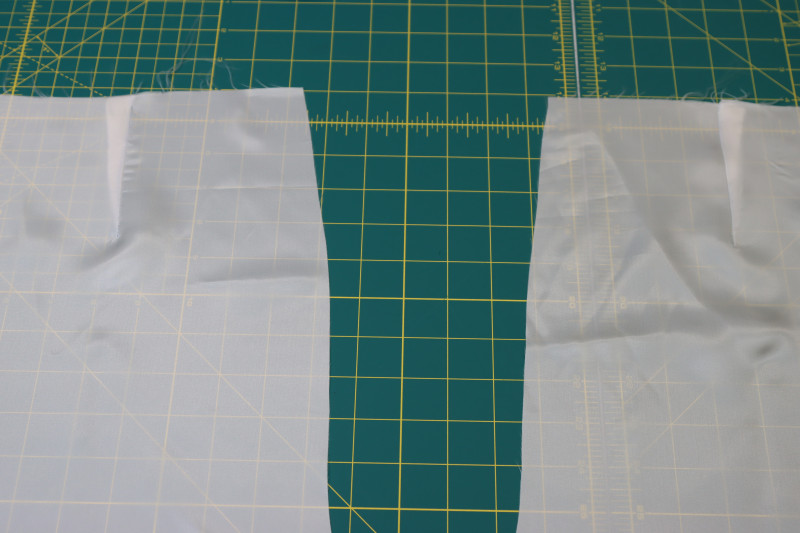
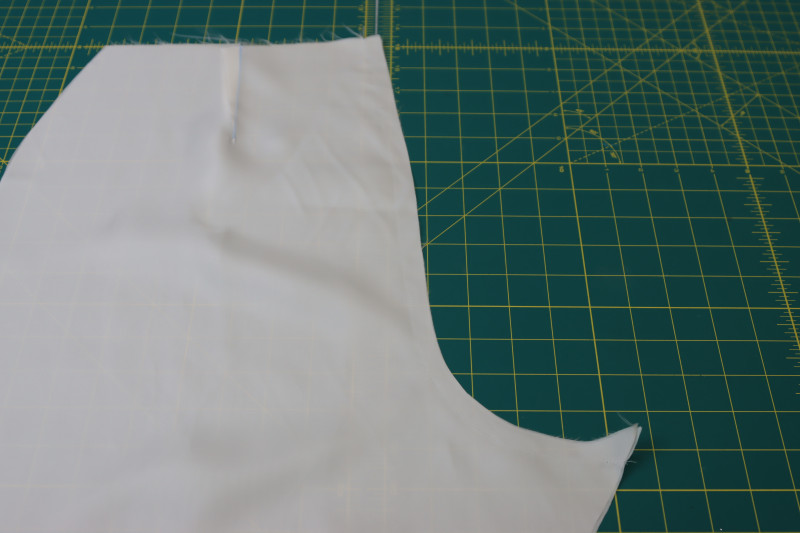
- Mark the darts on the wrong sides of the backs of the pants using tailor’s chalk.
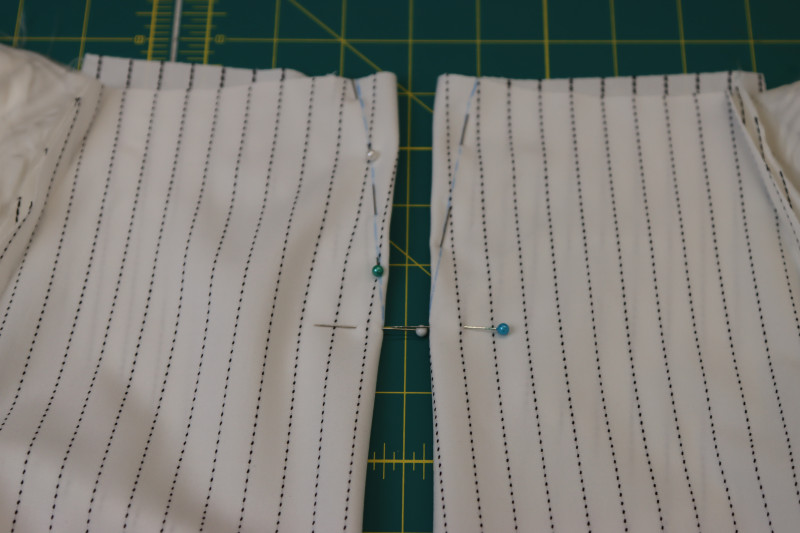
- Fold the waistline of the pants right sides together with the center of the dart right on the fold.
- Pin the darts in half so that the chalk lines are lined up on either side of the dart.
- Sew along the chalk lines.
- Press the darts toward the side seams.
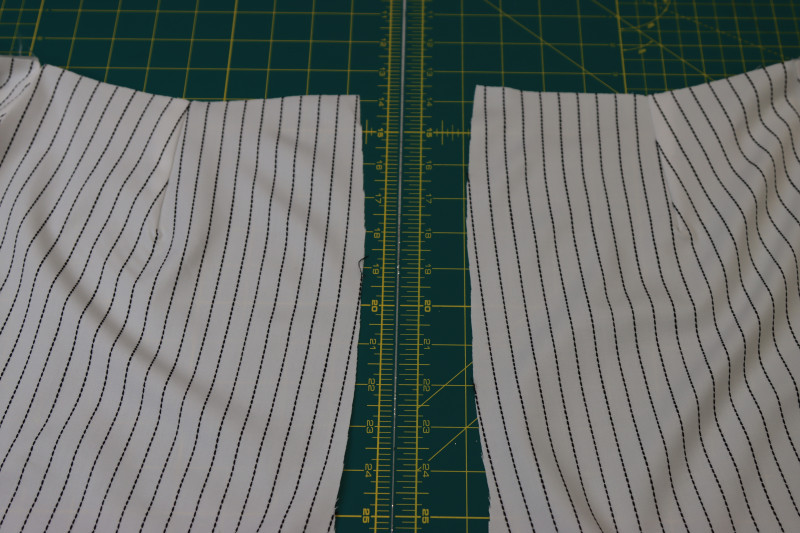
Step 5
BACK CROTCH SEAM
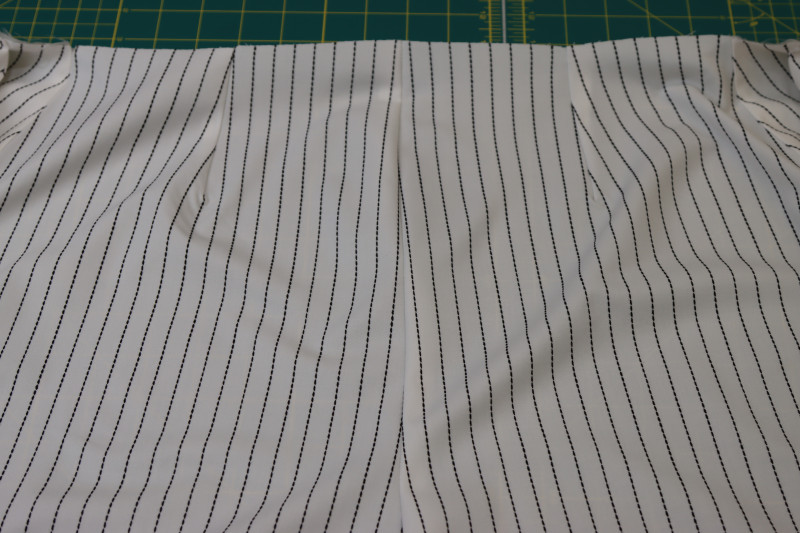
- Place the two separate pants pieces on top of each other, right sides together with the back crotch curves lined up.
- Pin and sew the back crotch seam.
- Press the back crotch seam open and flat.
Step 6
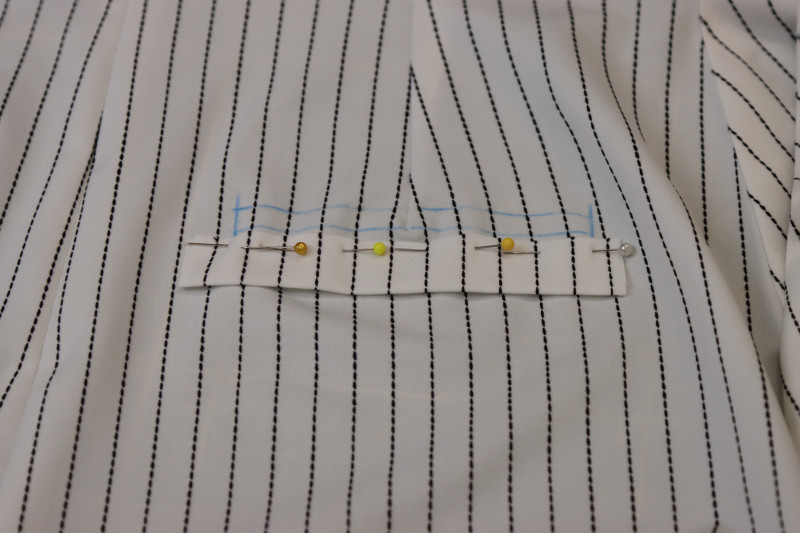
WELT POCKETS
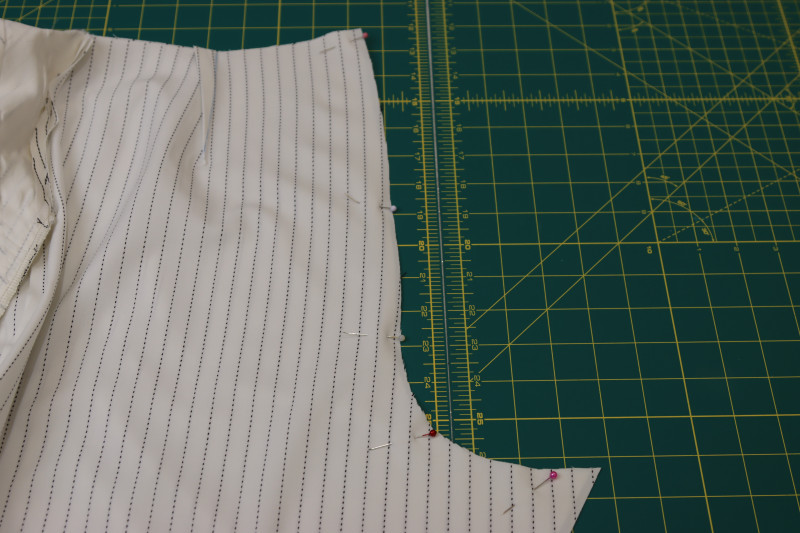
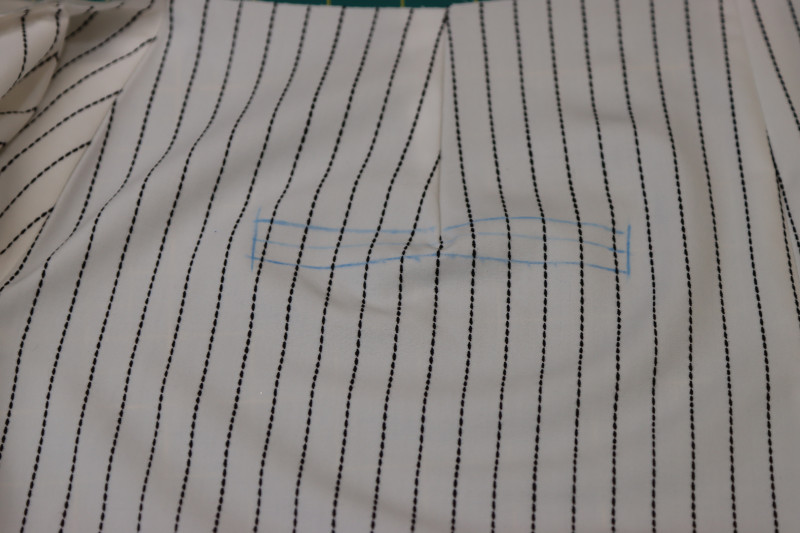
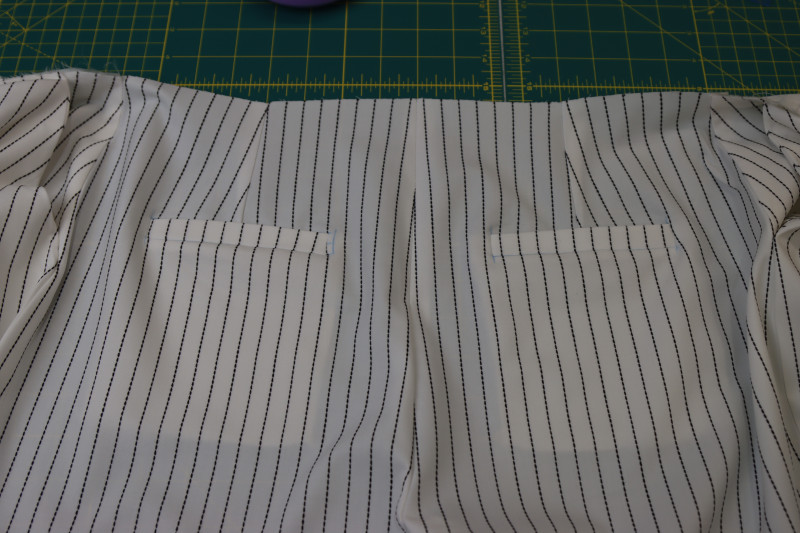
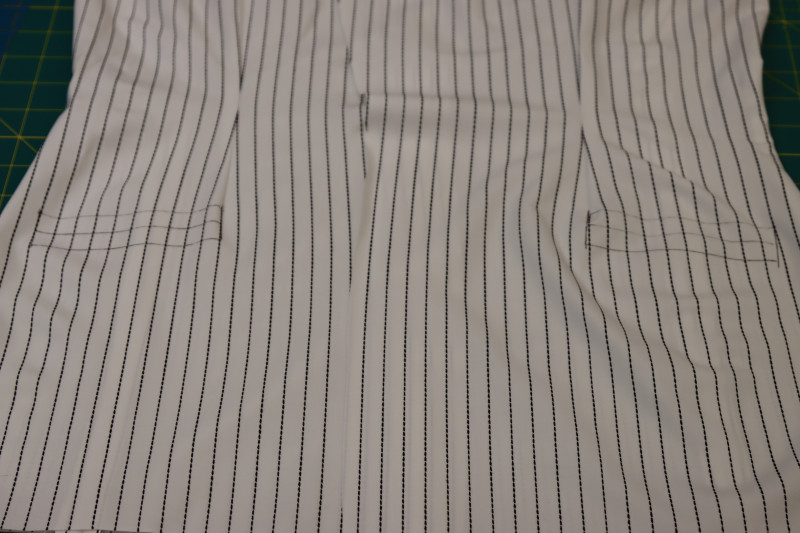
- Mark the location of the welt pockets according to the pattern using tailor’s chalk. Make sure the also mark the center line of the rectangle for the welt pocket, this is important.
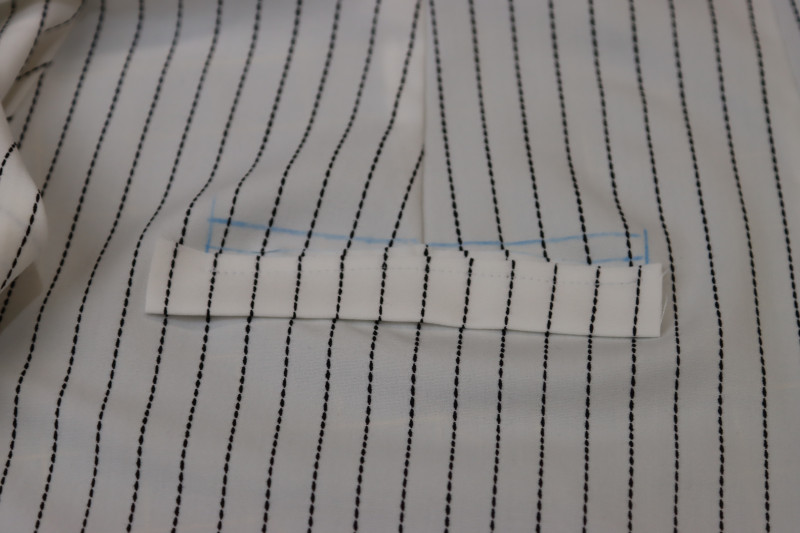
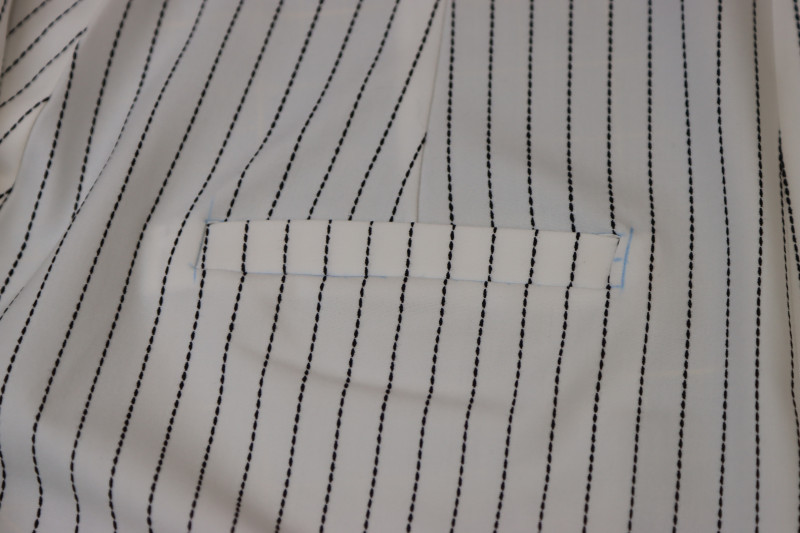
- Pin the welt right sides together to the bottom line of the welt marking. The height of the welt should be equal to the height from the bottom chalk line to the top chalk line.
- Sew the welt to the bottom chalk line.
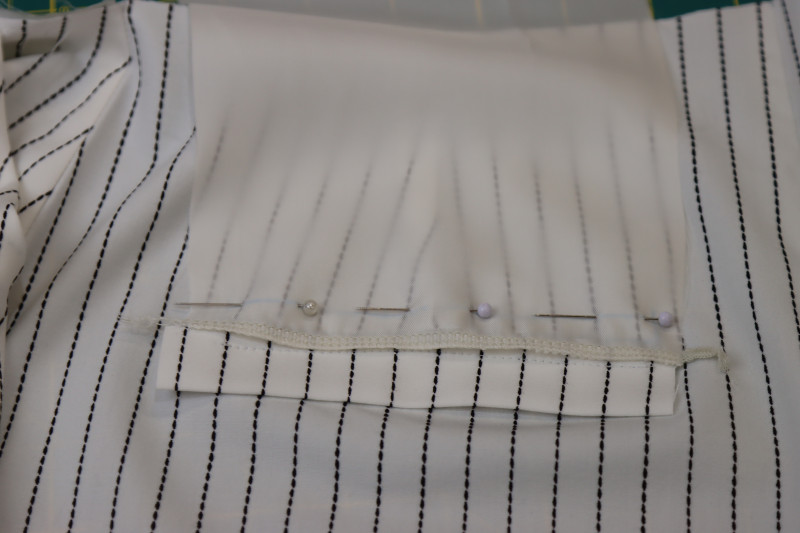
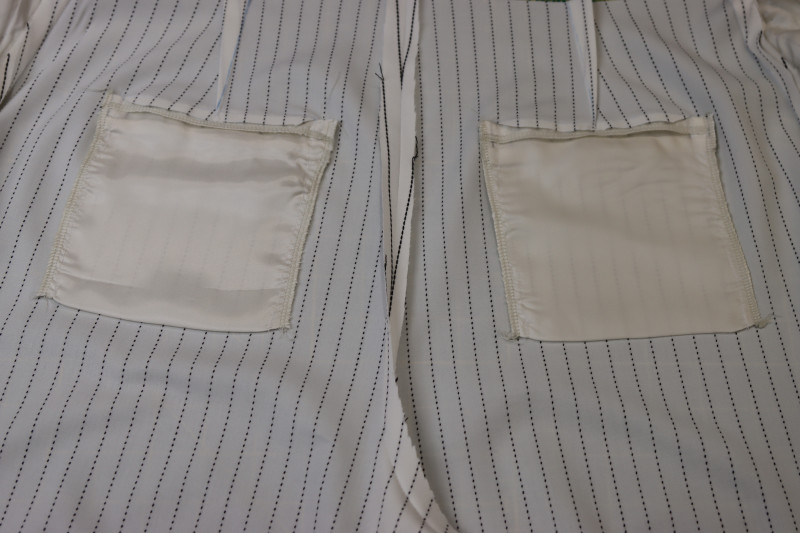
- Serge or baby hem the top and bottom edges of the pocket lining.
- Pin the pocket lining to the TOP chalk line on the right side of the pants.
- Sew the pocket back to the top chalk line.
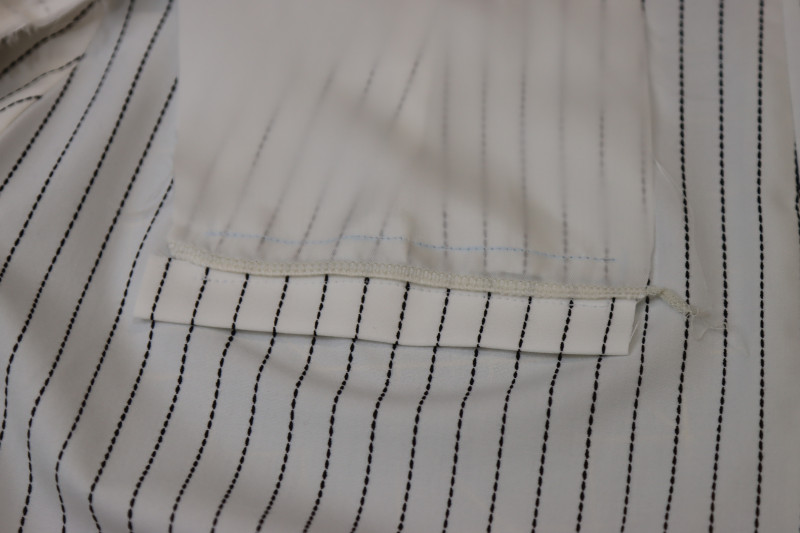
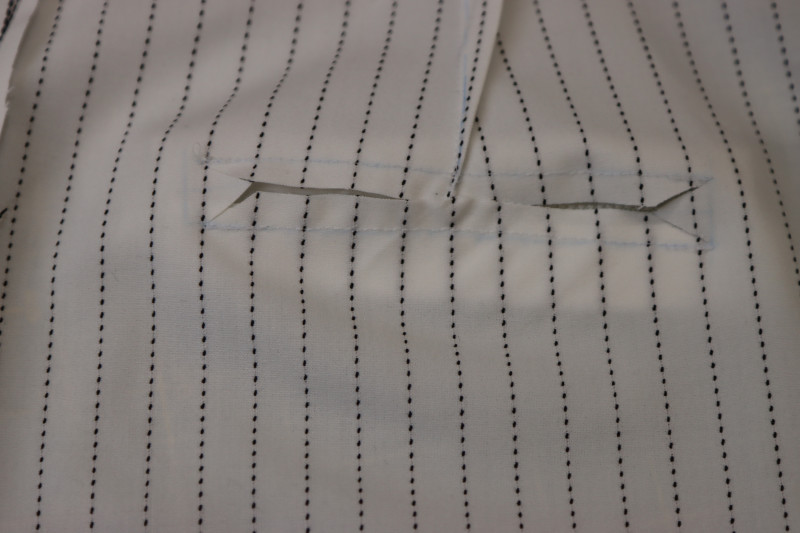
- Cut a slit along the center line of the welt with triangular notches at the ends as shown below.
- Flip the welt and the pocket lining toward the inside of the pants and press the pocket as flat as you can.
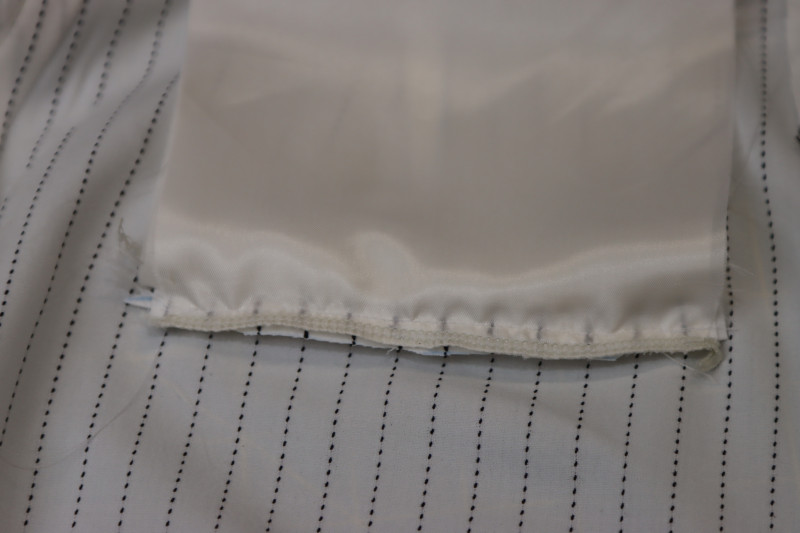
- Pin the other end of the pocket lining to the seam allowance of welt at the bottom of the pocket.
- Sew the bottom of the pocket lining to the welt seam allowance.
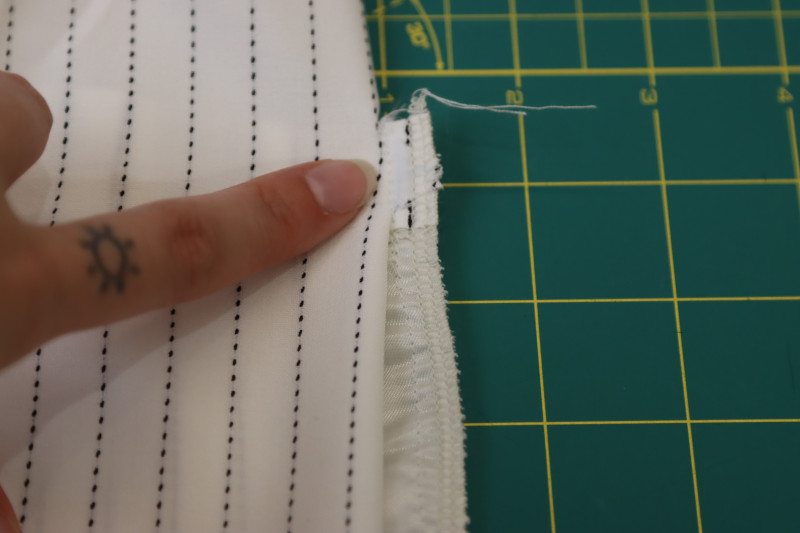
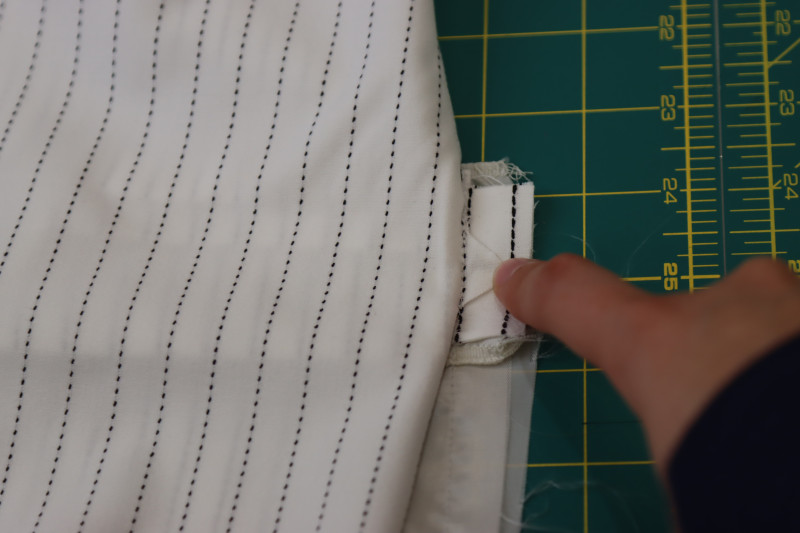
- Pin and sew the side seams of the pocket linings, making sure to also catch the triangular notch that you cut earlier in step 6, as shown in the very last photo in this step.
Step 7
PANTS LINING (OPTIONAL)
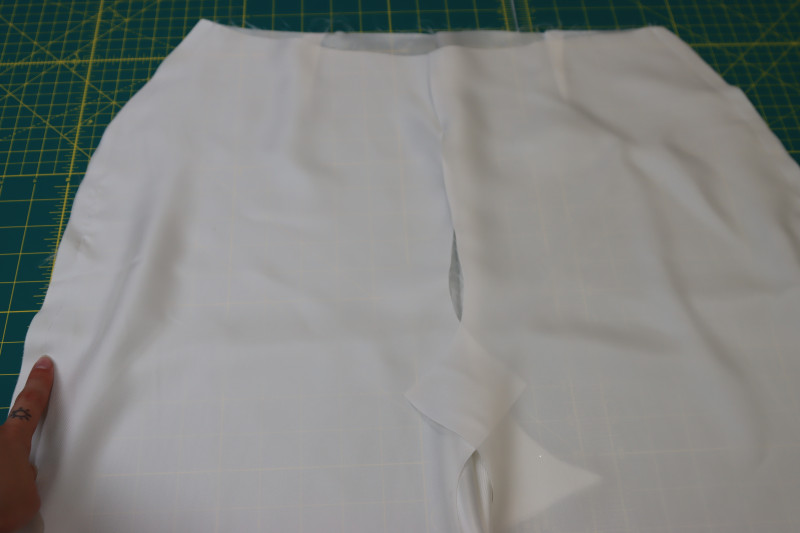
- If your outer fabric is slightly see-through like mine is, you’ll have to make a pair of lining shorts to go inside of the pants.
- Sew darts into the lining shorts the same way you did with the pants.
- Pin and sew the back crotch seam of the lining shorts the same way you did with the pants.
- Place the front lining shorts right sides together on top of the back lining shorts with the side seams lined up.
- There are no pockets in the lining shorts, so just pin and sew the side seams right sides together.
- Press all your lining seams open and flat
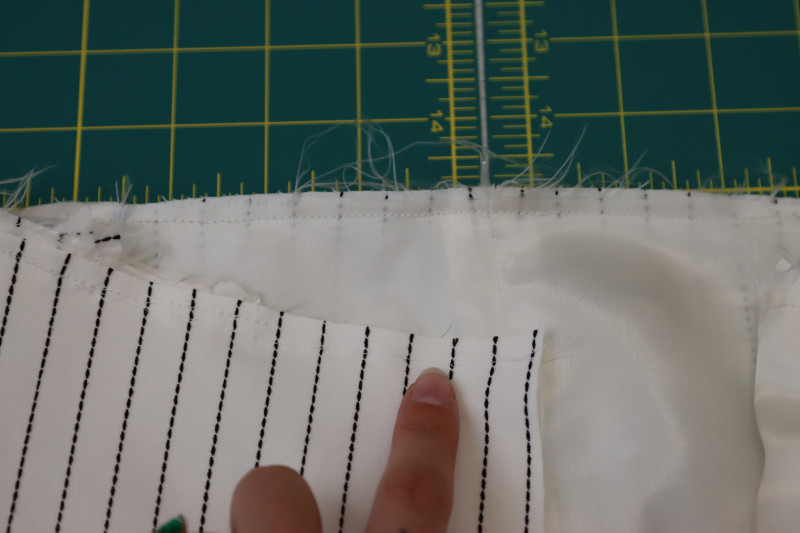
- Place your lining shorts into your outer pants wrong sides together.
- Pin the waistline of the lining shorts to the waistline of the pants.
- Sew a basting stitch with a ¼ inch seam allowance around the waistline of both pants so they’re attached.
Step 8
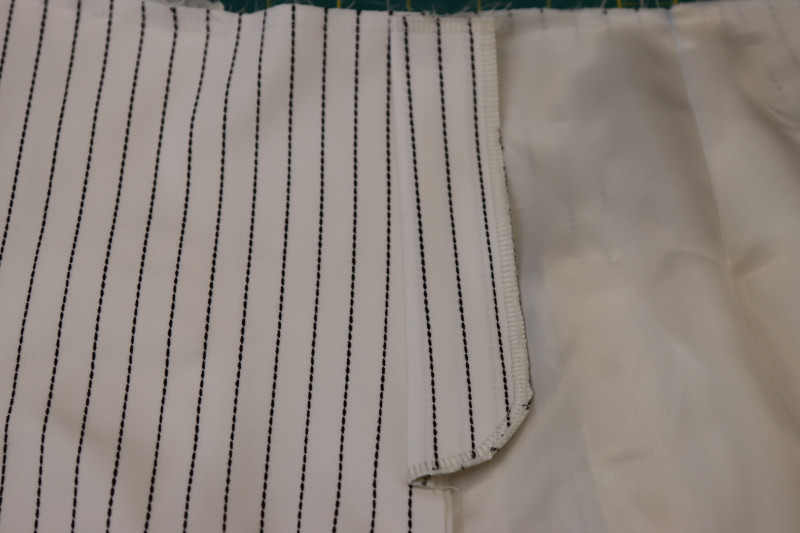
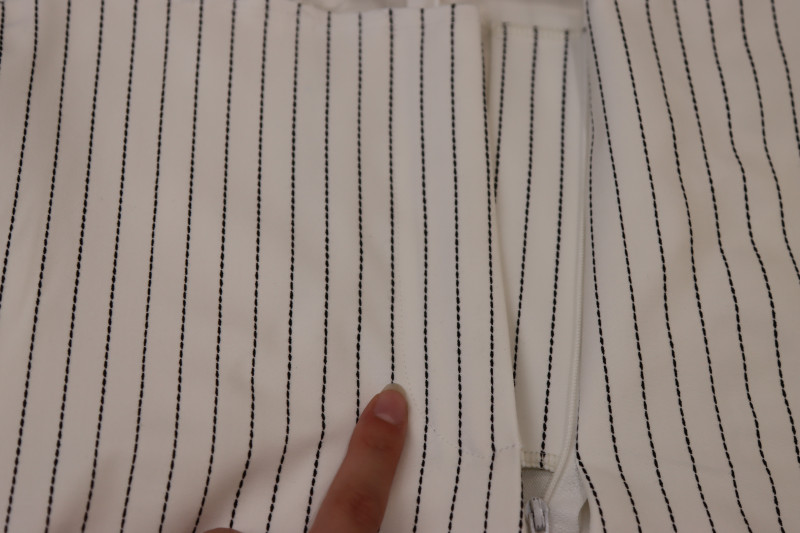
ZIPPER FLY
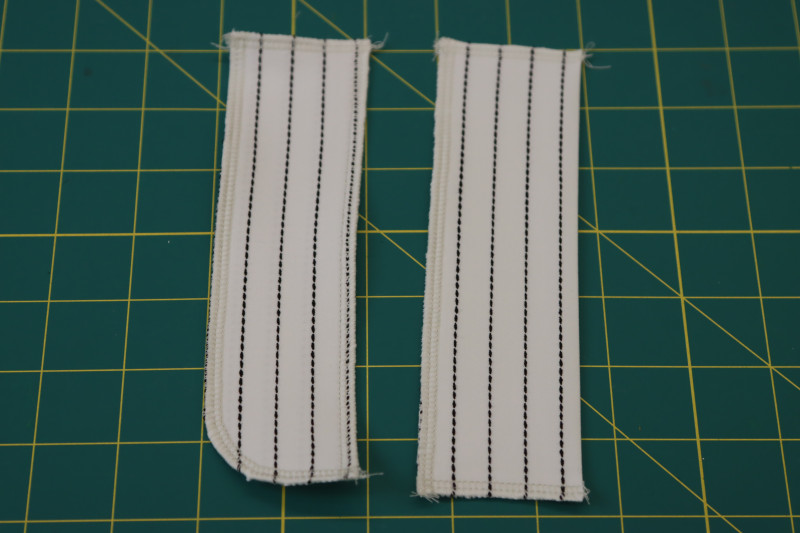
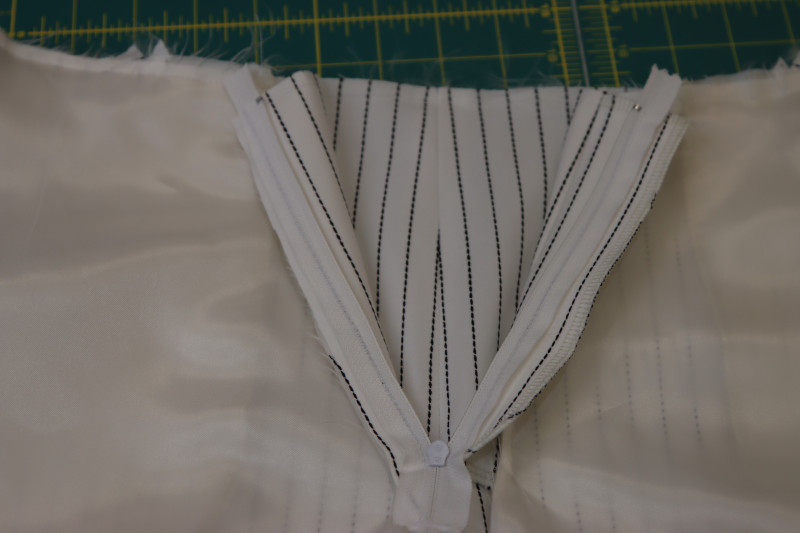
- Fold the fly shield in half longways, wrong sides together, and serge or zigzag around the raw edges.
- Place the fly facing pieces wrong sides together and serge or zigzag around all the raw edges.
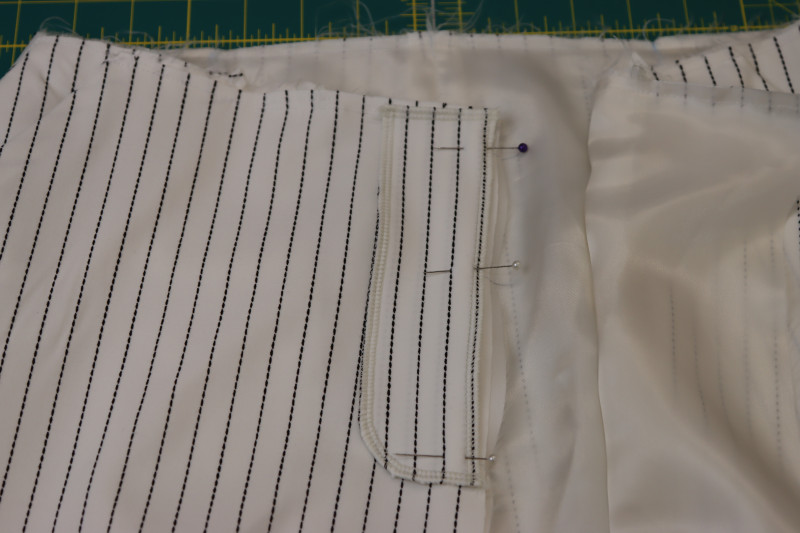
- Place the fly facing right sides together with the wearer’s right side of the center front of the pants.
- Pin and sew the fly facing to both the lining and the pants center front right side.
- Press the fly facing open.
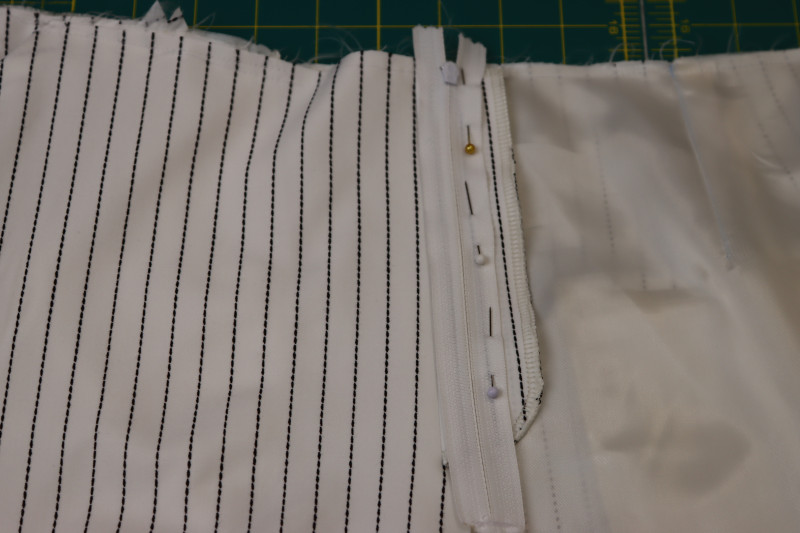
- Place the zipper right sides down on the open fly facing.
- Pin and sew the outer edge of the zipper tape to the fly facing as shown below.
- Turn the pants inside out.
- Place the other side of the zipper tape right sides together with the center front of the wearer’s left side of the pants.
- Pin and sew the zipper tape right sides together with the other side of the pants.
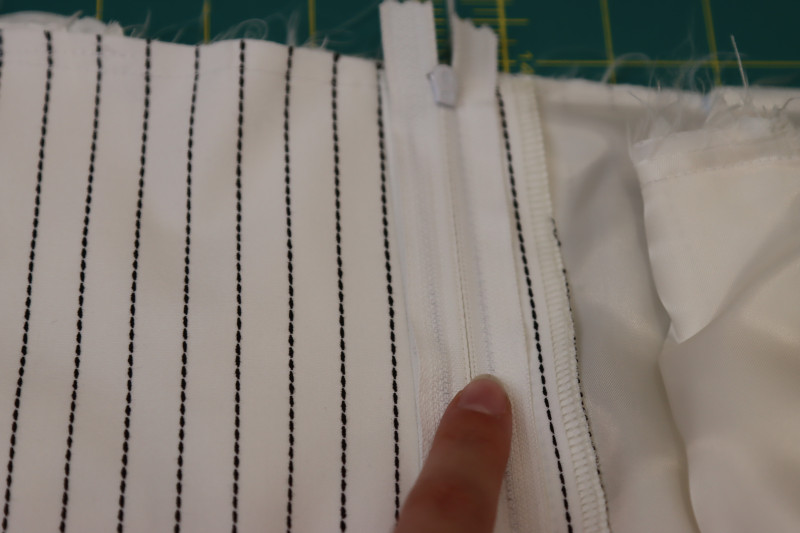
- Place the fly shield directly on top of the side of the zipper without the fly facing, making sure the serged edge of the fly shield is lined up with the raw edge of the center front of the pants.
- Pin and sew the fly shield directly on top of the zipper.
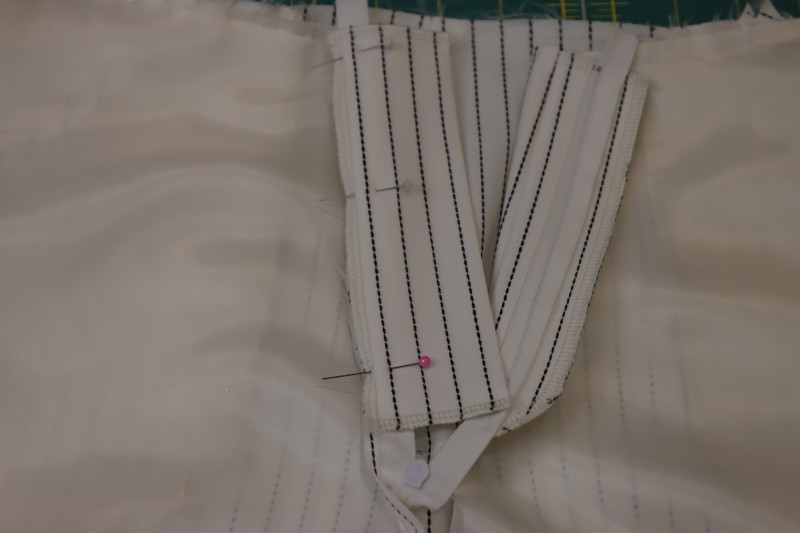
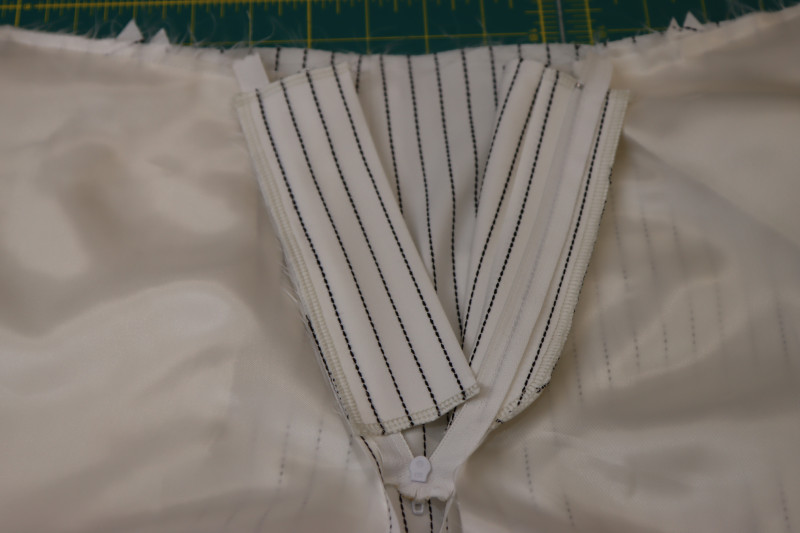
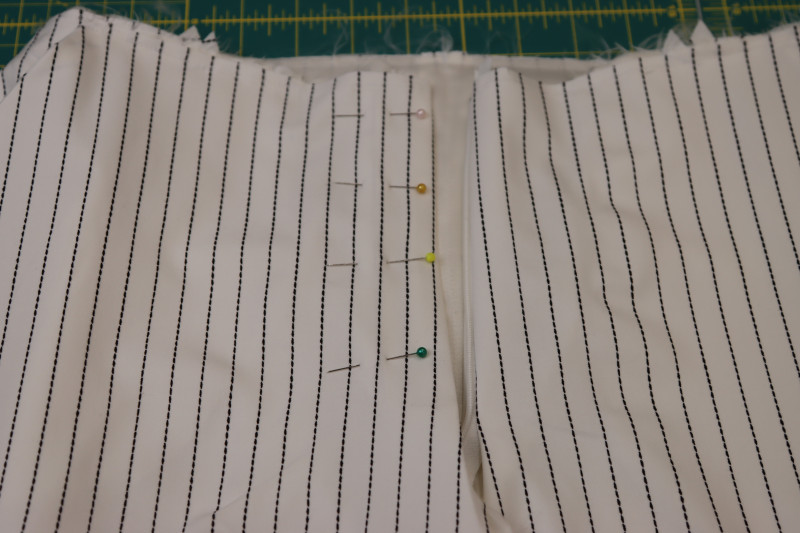
- Flip the pants right sides out.
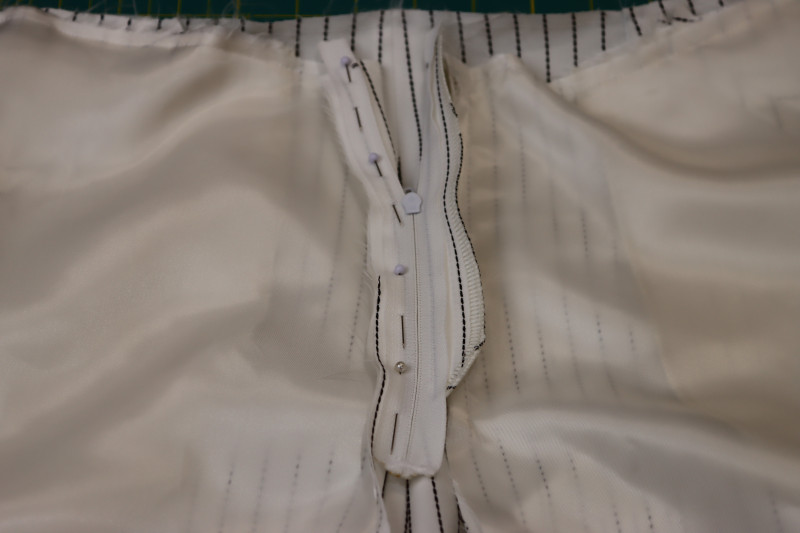
- Press the fly facing into the wearer’s right side of the pants.
- Pin the fly facing to the inside of the wearer’s right side of the pants. Pin the fly shield away on the wearer’s left side of the pants so that it is out of the way for now.
- Topstitch around the perimeter of the fly facing.
- Remove the pins from the fly shield and facing.
Step 9
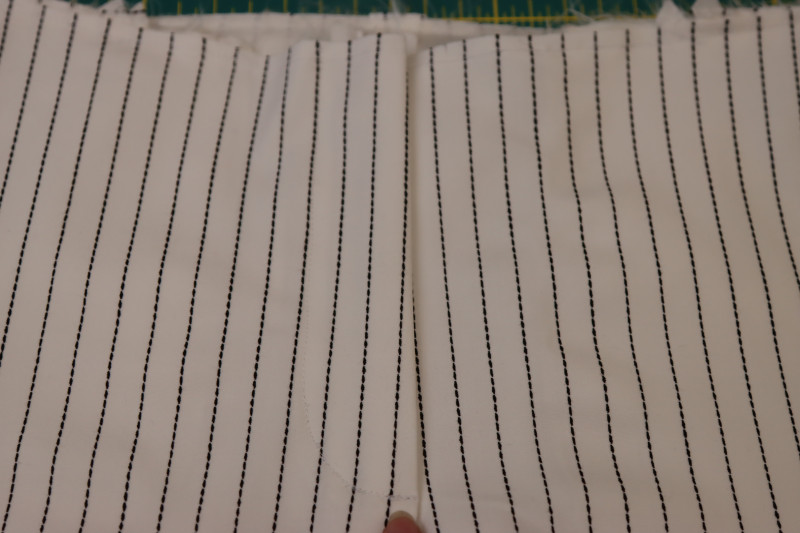
FRONT CROTCH
- Pin and sew the front crotch seam right sides together for the outer pants until you reach the bottom of the zipper seam.
- Pin and sew the front crotch seam right sides together for the lining shorts until you reach the bottom of the zipper seam.
- Sew a tack at the bottom of the fly facing topstitching to stop the zipper and secure the front crotch seam.
Step 10
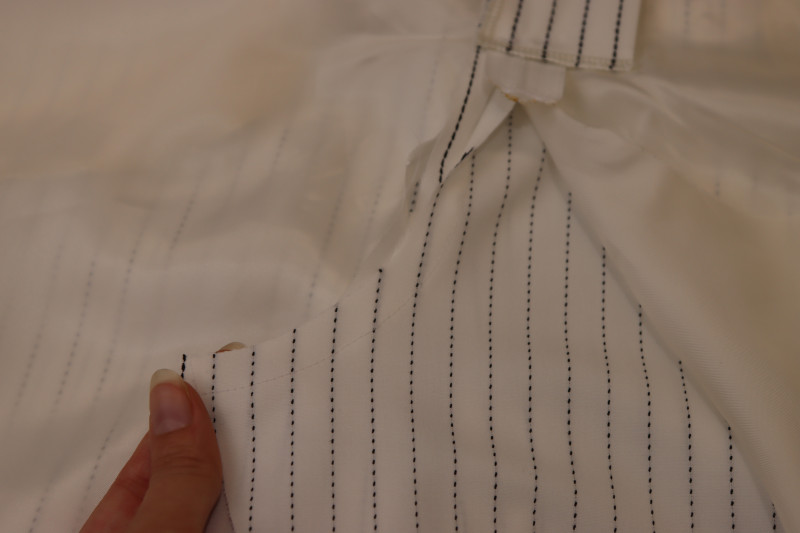
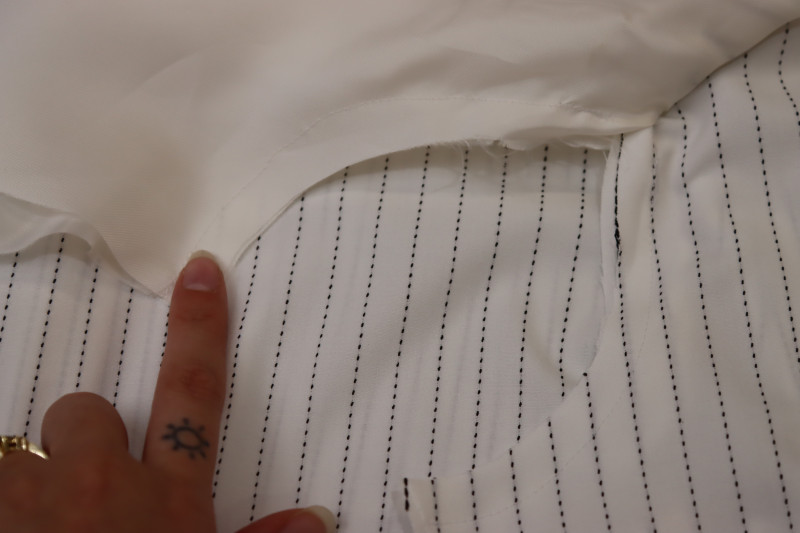
INSEAMS
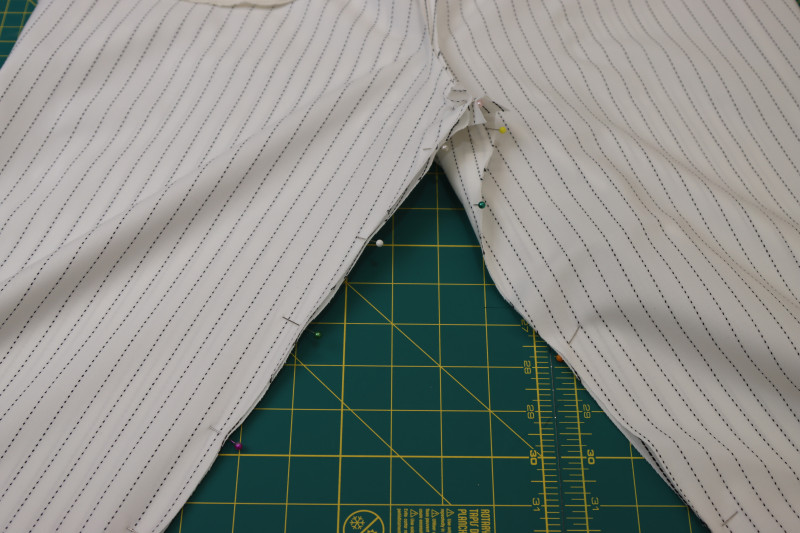
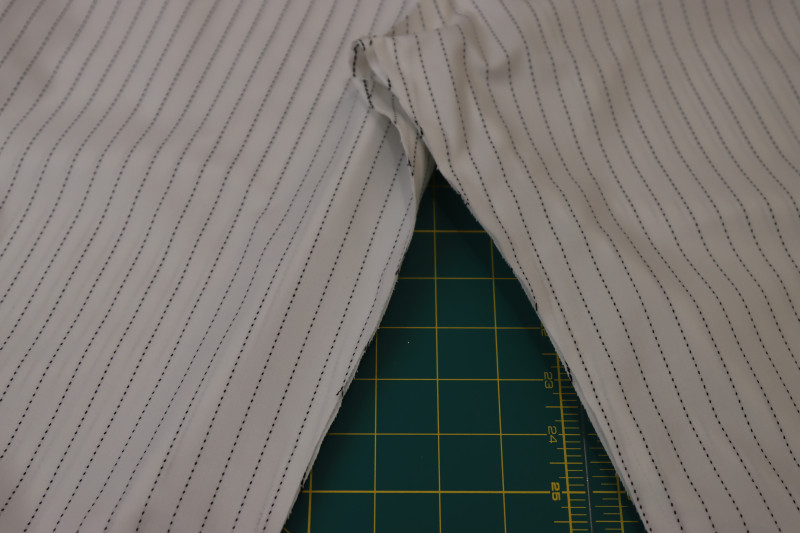
- Pin and sew the pants inseam right sides together.
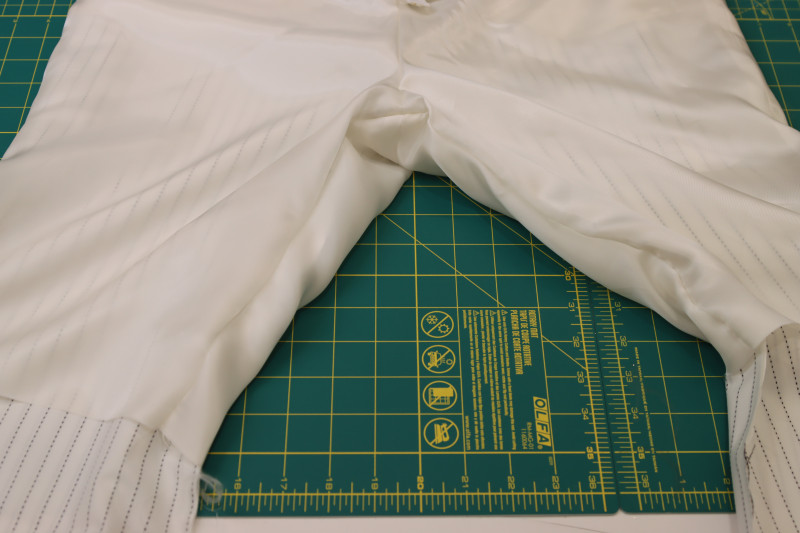
- Pin and sew the lining shorts inseam right sides together.
- Press both inseams open and flat.
Step 11
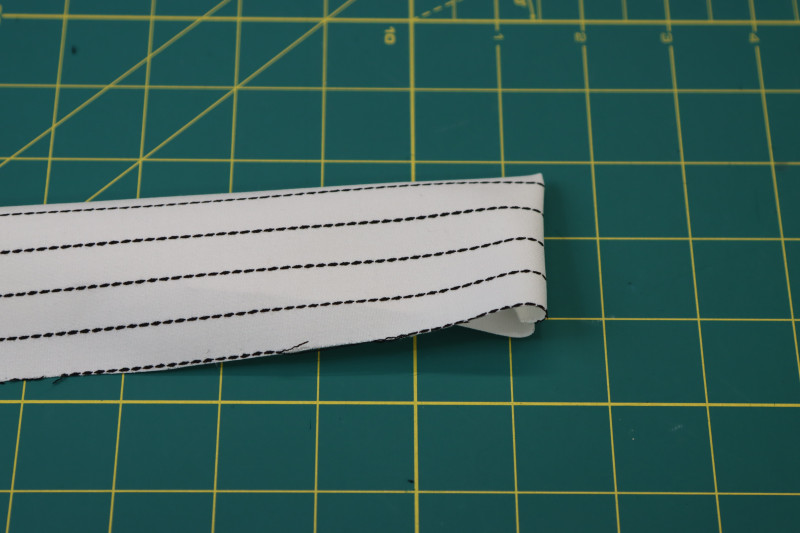
WAISTBAND
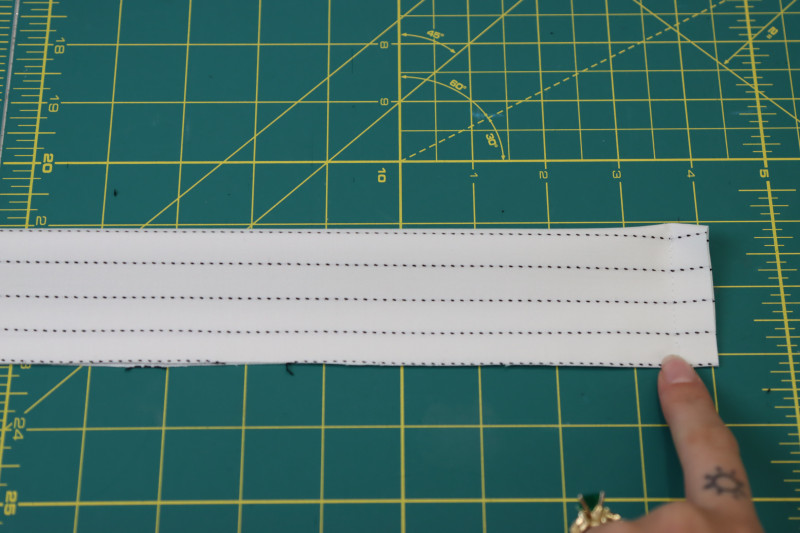
- Fold the waistband in half longways, right sides together.
- Sew the short ends of the waistband to secure the fold.
- Flip the waistband right sides out and press.
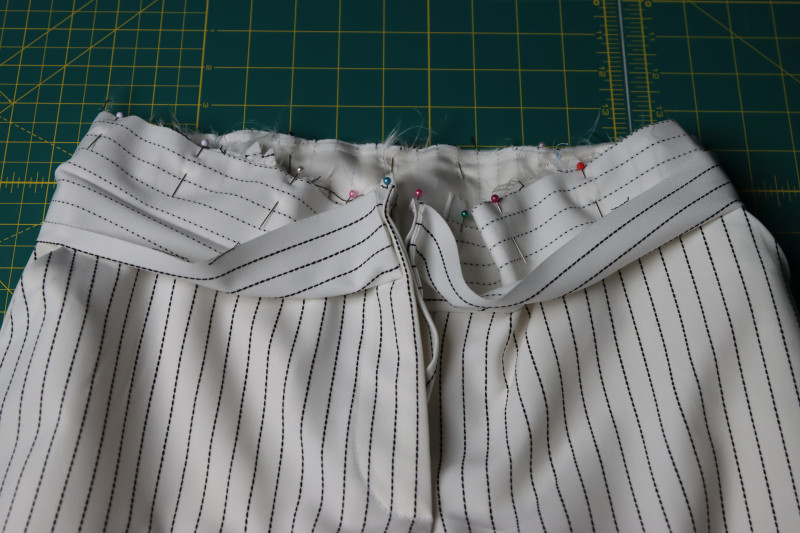
- Pin one of the raw edges of the waistband to the waistline of the pants, right sides together.
- Sew the waistband to the waistline.
- Flip the waistband up and press the seam.
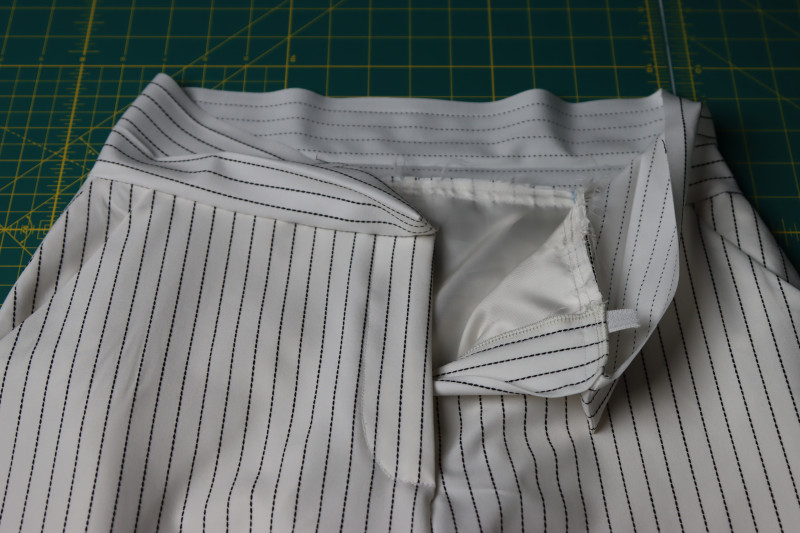
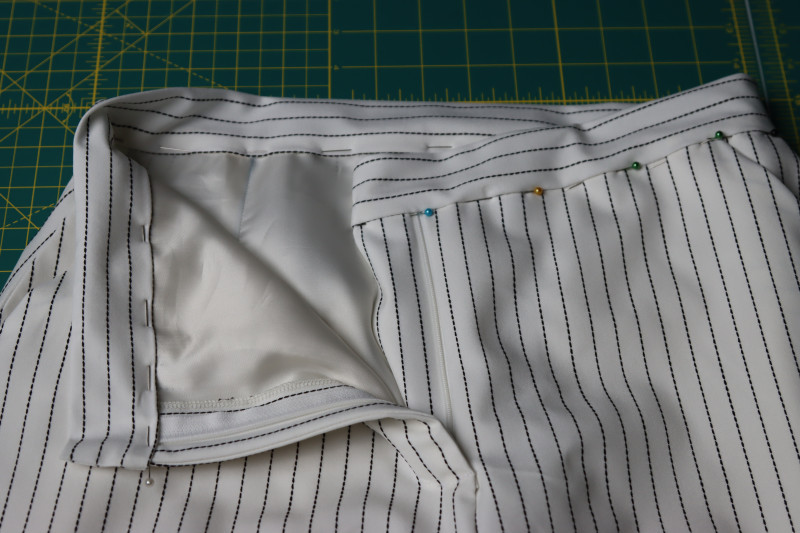
- Press a ½ inch fold into the other raw edges of the waistband (the inner edge) to tuck it inside itself.
- Pin that folded edge of the waistband directly on top of the waist seam you just sewed.
- Sew a stitch in the ditch of the waistband seam to attach the inner waistband seamlessly.
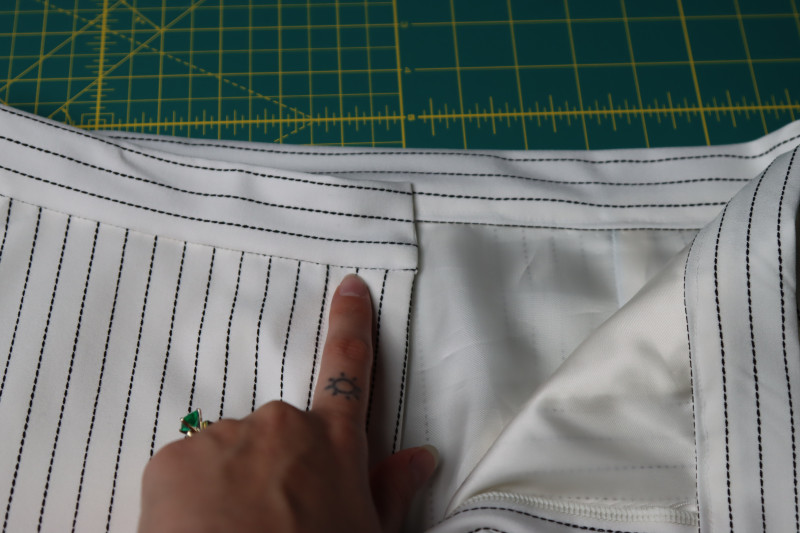
Step 12
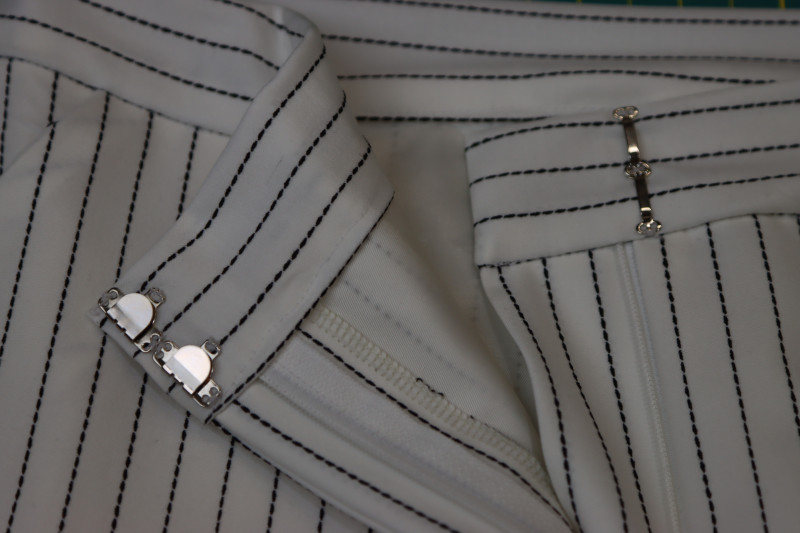
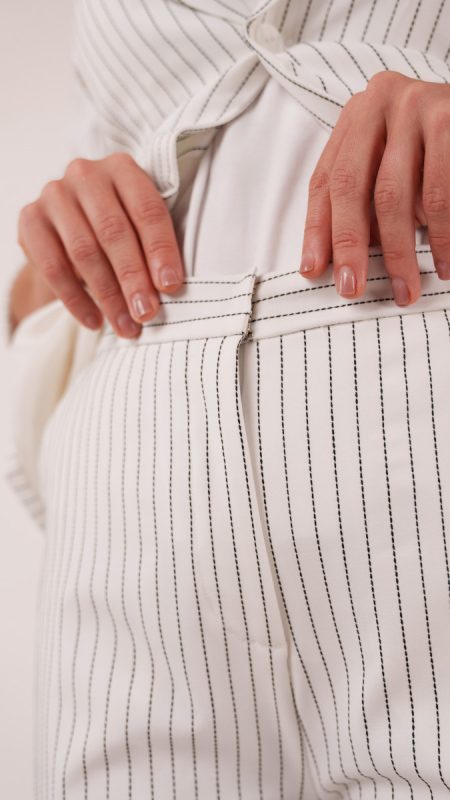
HOOK CLOSURE
- Hand sew skirt hooks to the opening of the pants above the zipper.
Step 13
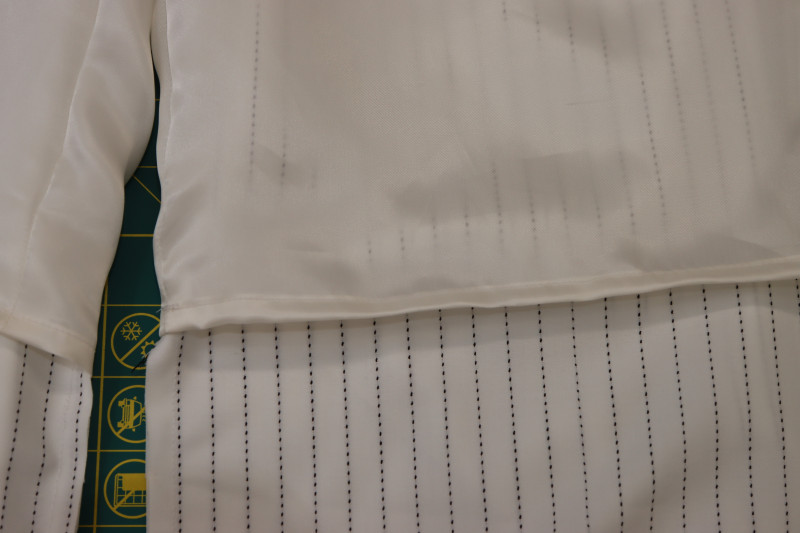
HEM PANTS
- Sew a double rolled ¼ inch baby hem into the bottoms of the lining shorts
- Hem the bottoms of the pants using a method of your choice (I ended up using stitch witchery hem tape and a wide 1 inch hem so that it was a completely blind hem, but you can use the blind hem foot on your machine or just do a straight hem.
Step 14
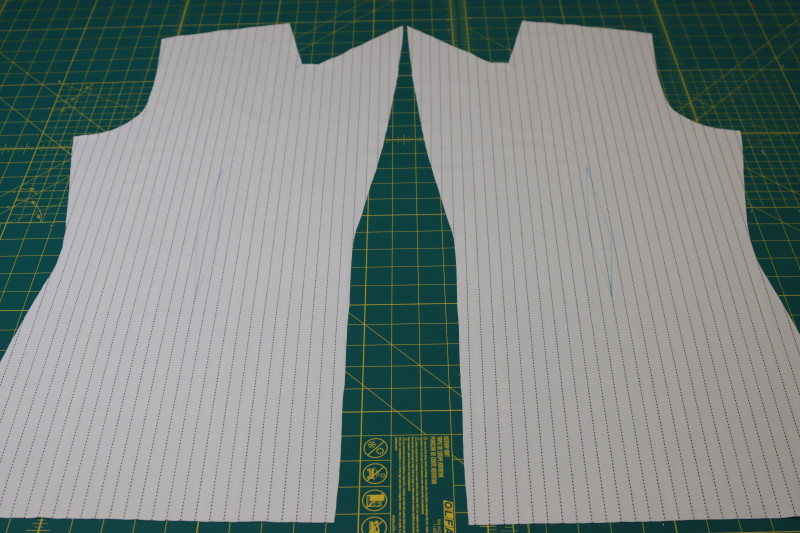
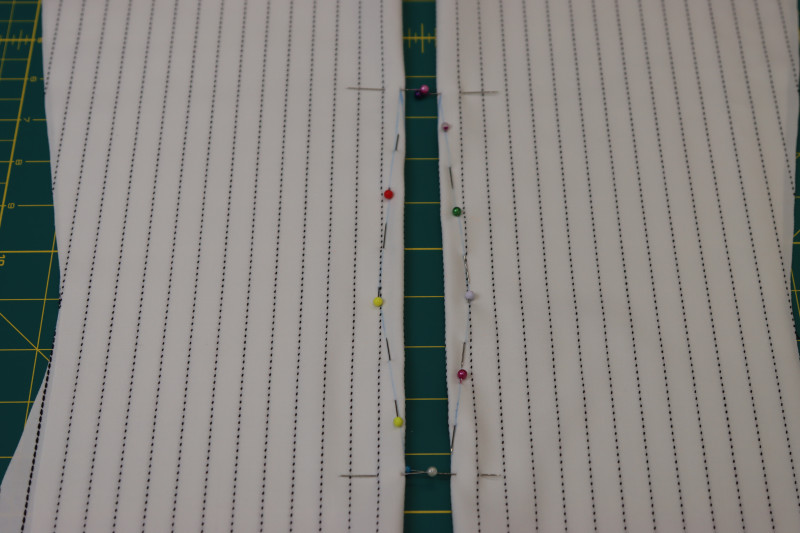
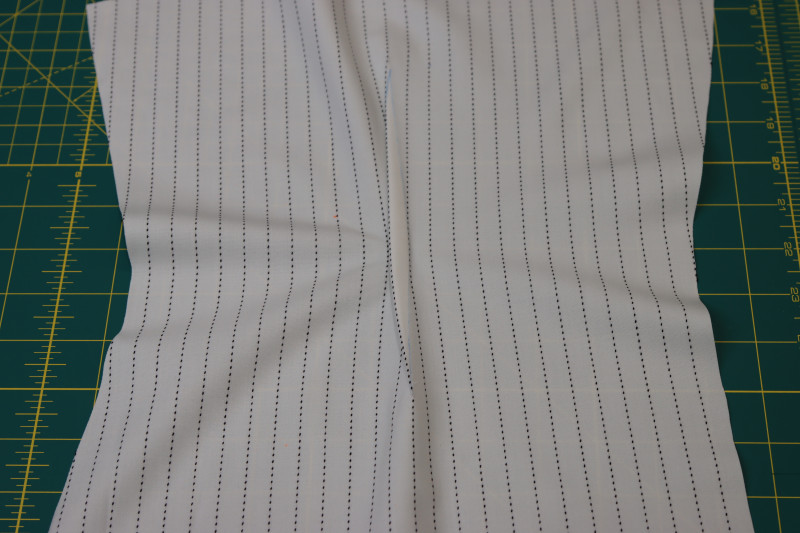
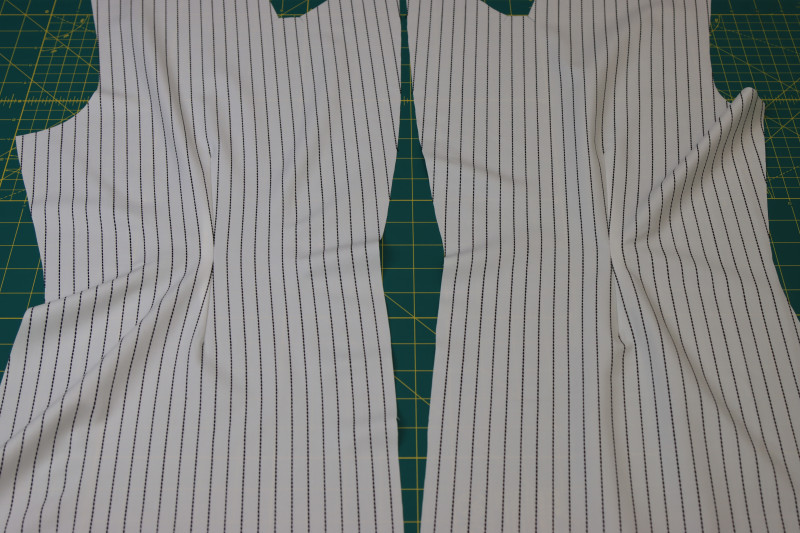
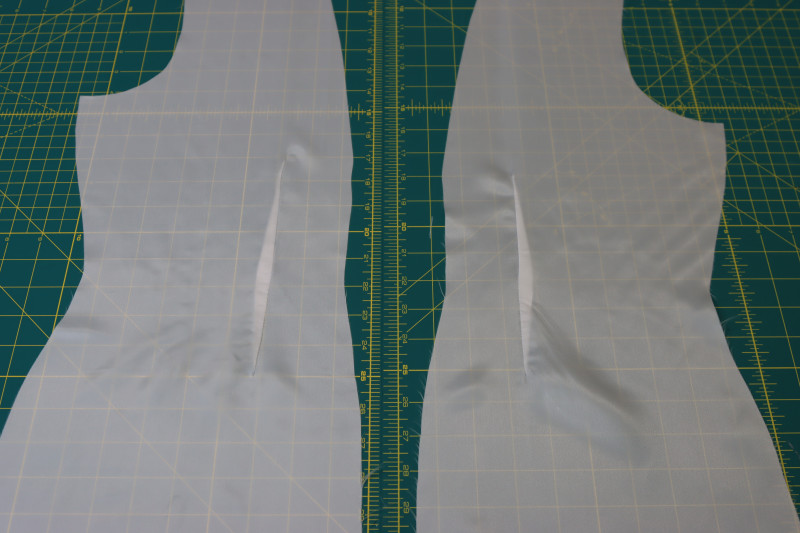
BLAZER DARTS
- Mark the darts on the fronts of the blazer using tailor’s chalk.
- Fold the fronts of the blazer right sides together with the fold centered on the darts.
- Pin the darts in place.
- Sew along the chalk lines.
- Press the darts toward the side seams of the blazer.
- Repeat for the front lining pieces.
Step 15
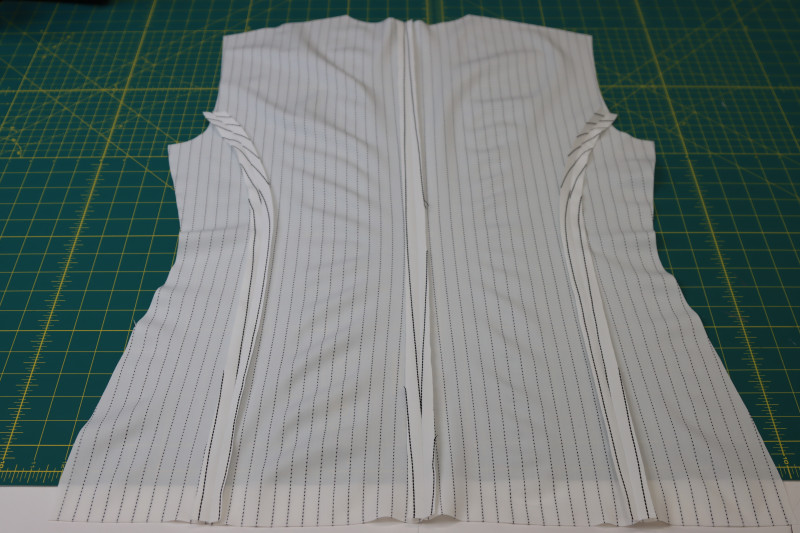
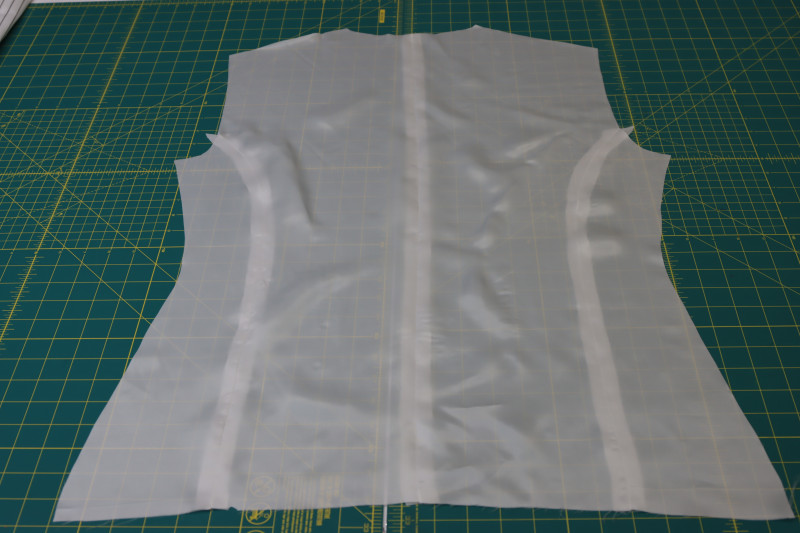
BLAZER BACK
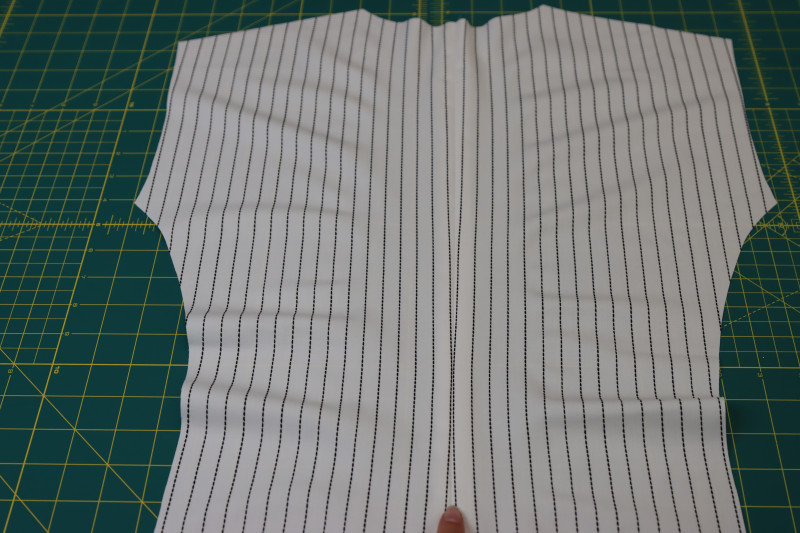
- Place the two mirrored center back pieces on top of each other right sides together.
- Pin and sew the center pack seam of the blazer.
- Press the center back seam open and flat.
- Layout the back side pieces next to the curved edges of the center back piece.
- Pin and sew the back side pieces right sides together with the center back piece.
- Press the back side seams open and flat.
- Repeat this process for the back lining.
Step 16
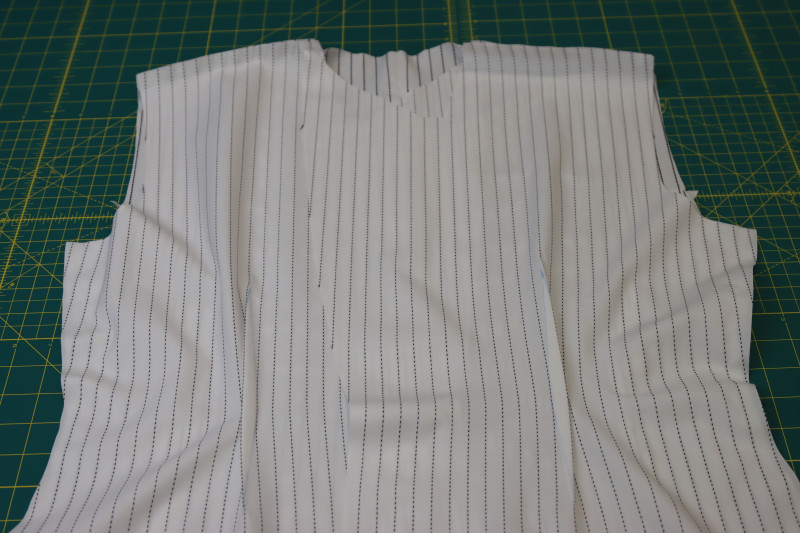
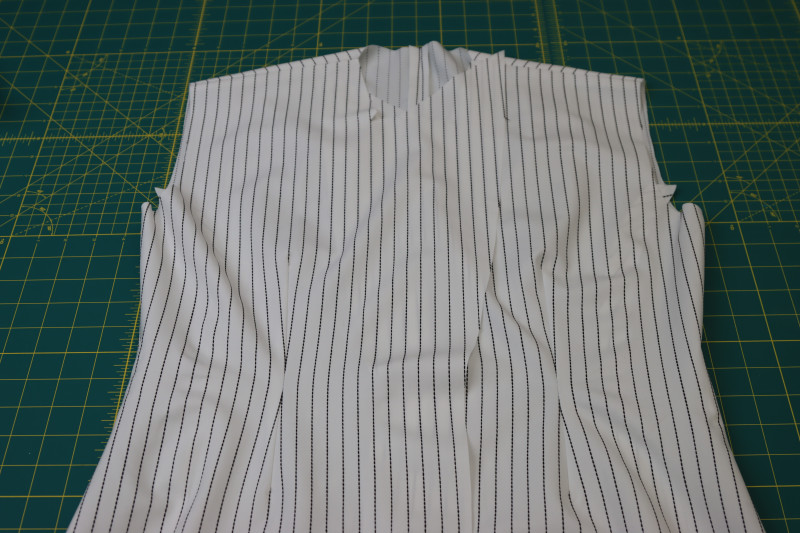
SHOULDER & SIDE SEAMS
- Place the front blazer pieces right sides together on top of the back blazer piece.
- Line up the sides and shoulders of the pieces.
- Pin and sew the front and back pieces together at the shoulder and side seams.
- Press the shoulder and side seams open and flat.
Step 17
FRONT LINING
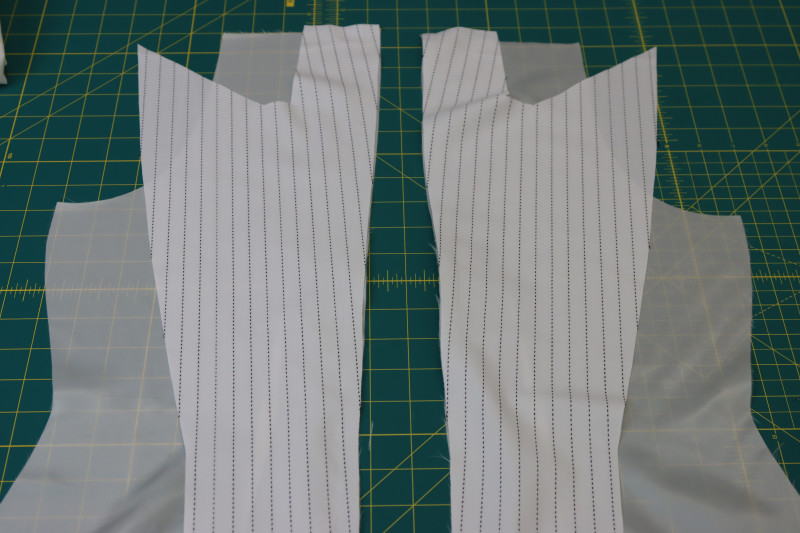
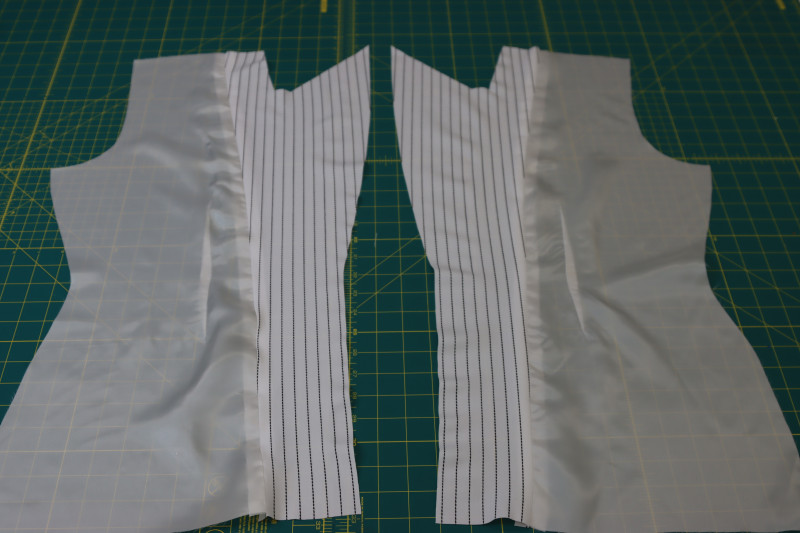
- PRESS FUSIBLE INTERFACING INTO THE FRONT FACING PIECE BEFORE SEWING IT TO THE FRONT LINING. Thank you.
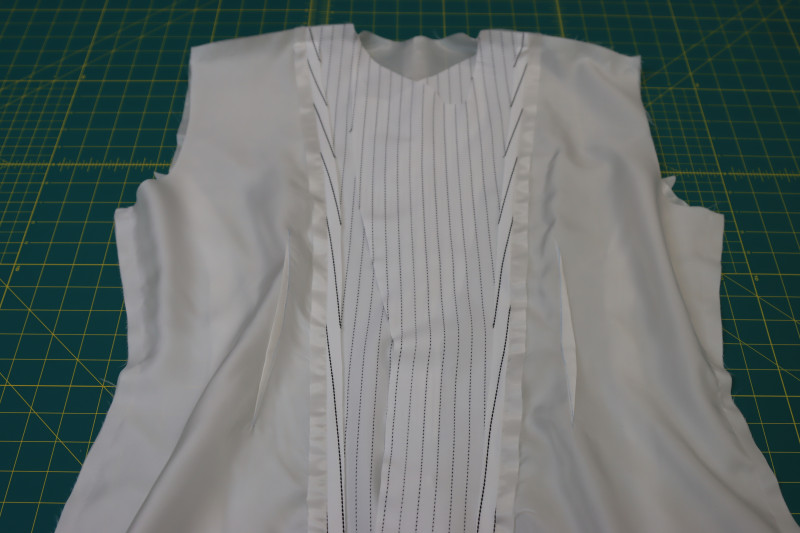
- Place the front facing pieces right sides together with the front lining pieces.
- Pin and sew the front facings to the front linings.
- Press the front facing seam open and flat.
- Pin and sew the front and back lining pieces together at the shoulder and side seams the same way you did for the outer fabric in step 16.
Step 18
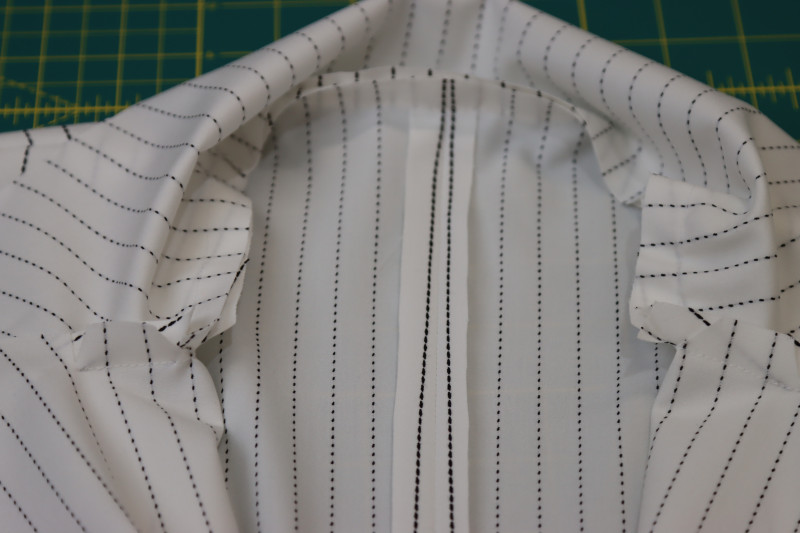
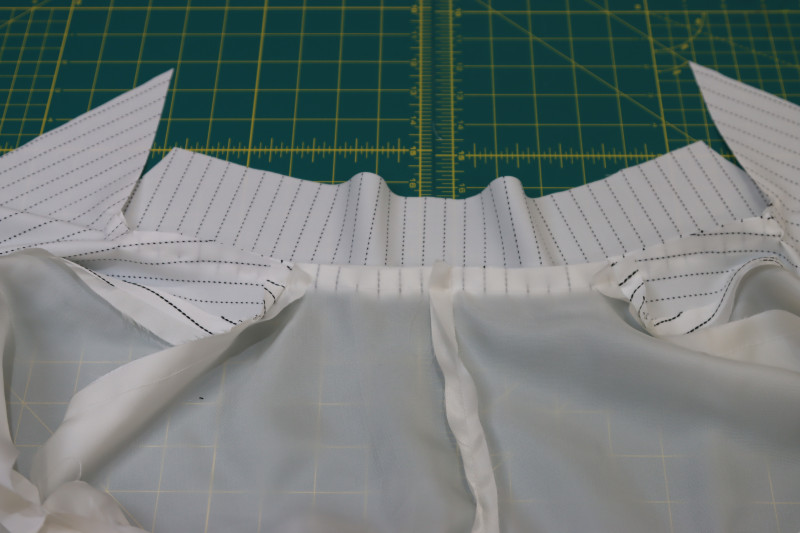
COLLARS
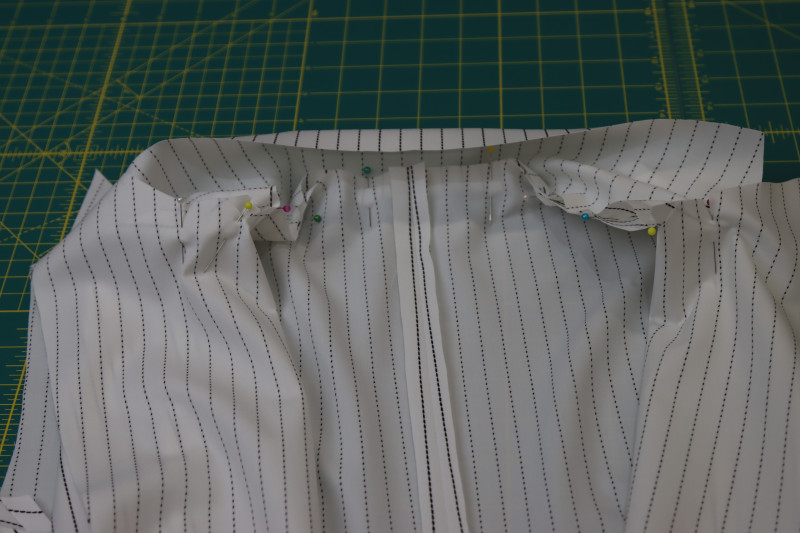
- PRESS FUSIBLE INTERFACING INTO THE COLLAR BEFORE ATTACHING IT TO THE LINING. YOU DO NOT NEED TO PRESS IT INTO BOTH COLLAR PIECES.
- Pin the collar without the fusible interfacing to the neckline of the blazer, making sure to line up all the notches.
- Sew along the pins to attach the collar to the blazer.
- Repeat the same process with the interfaced collar and the lining jacket.
Step 19
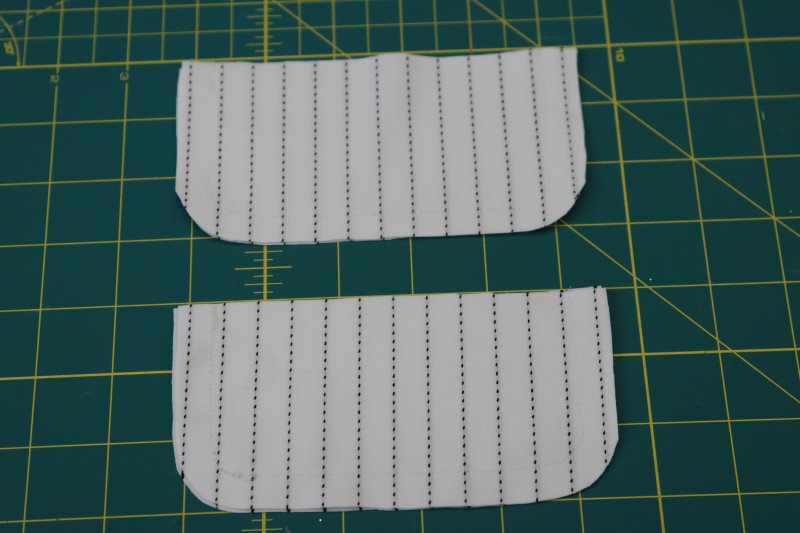
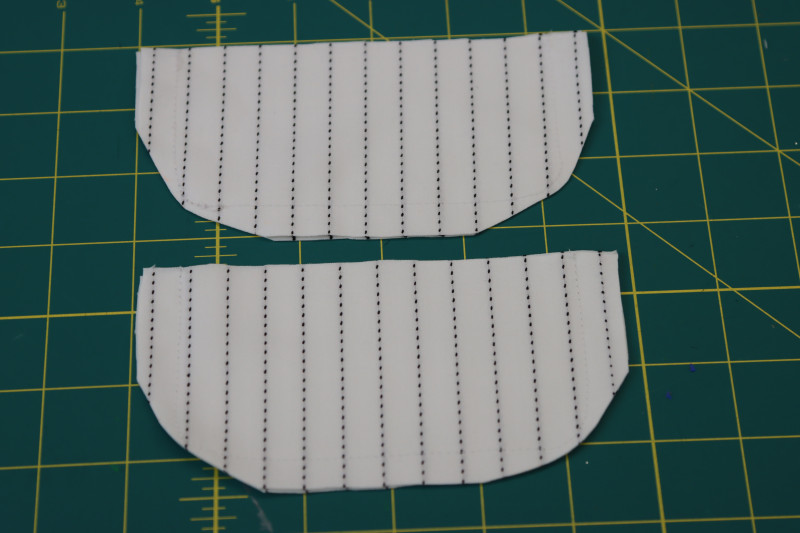
POCKET FLAPS
- Place the two sets of pocket flaps on top of each other right sides together.
- Pin and sew along the curved edges of the pocket flaps, leaving the flat edge unsewn.
- Clip the rounded edges of the pocket flaps.
- Flip the pocket flaps right sides out and press the seams.
Step 20
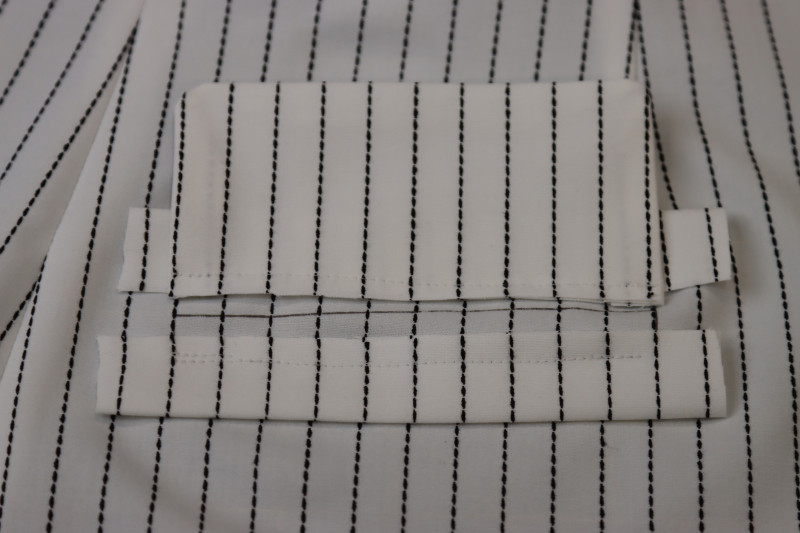
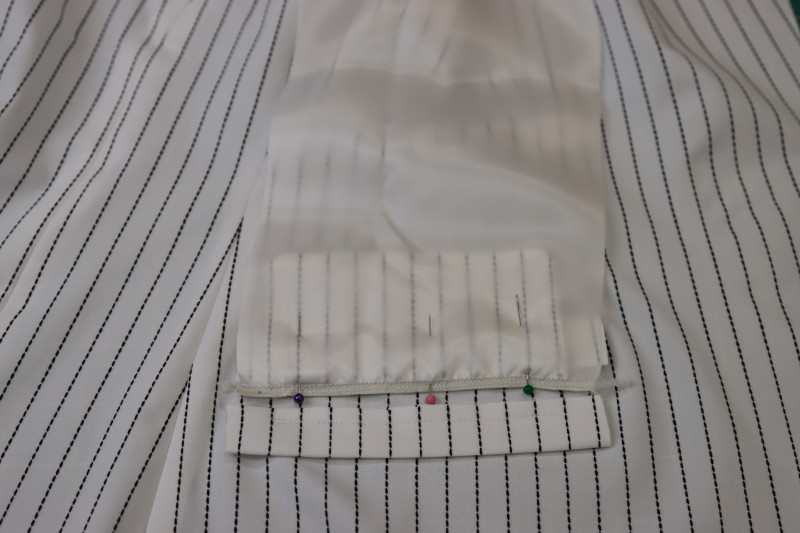
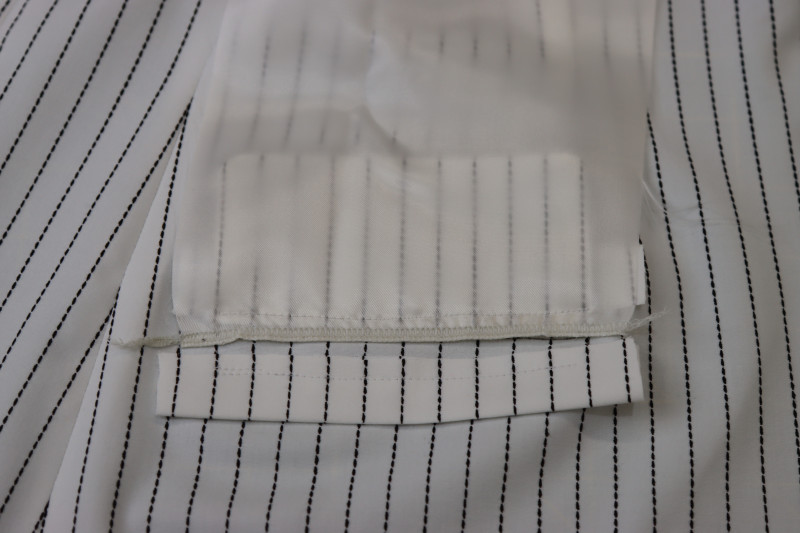
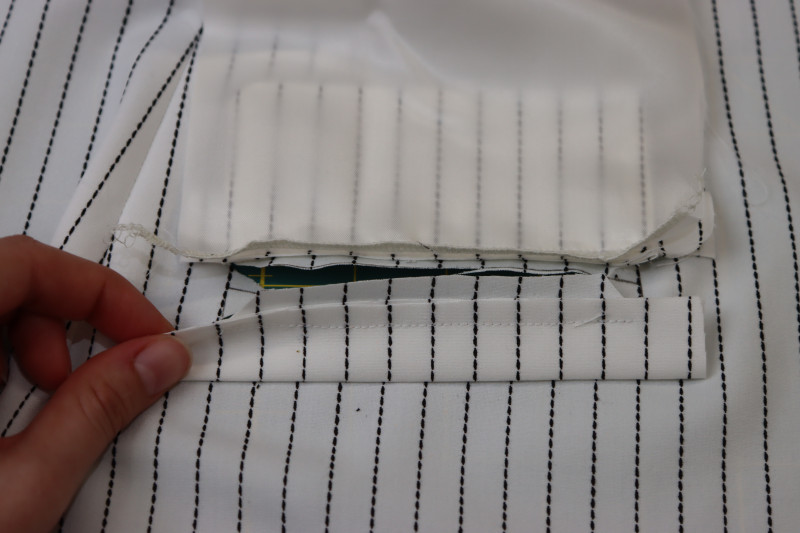
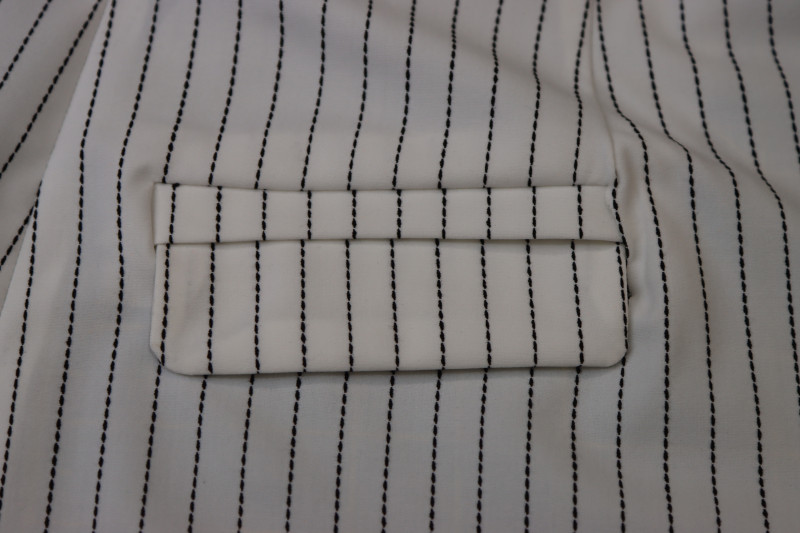
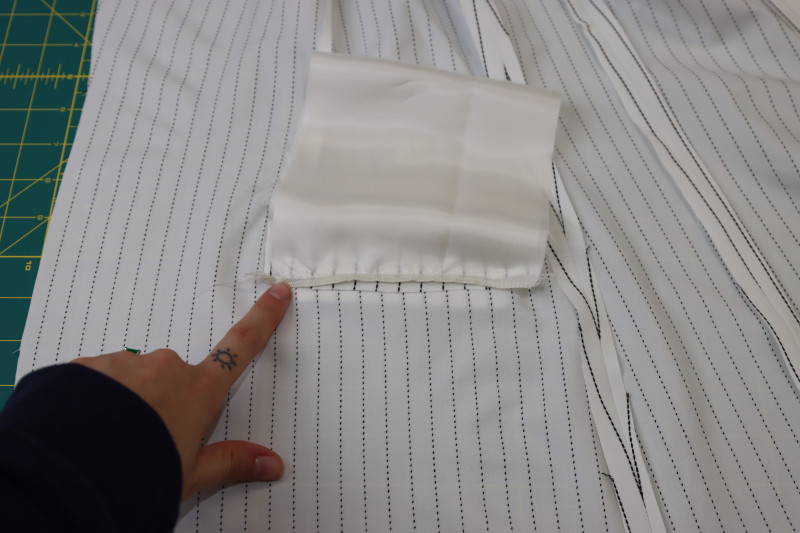
BLAZER WELT POCKETS
- Mark the welt pockets on the front of the blazer using tailor’s chalk or a fabric marking pen the same way you did on the pants in step 6.
- The only difference between these pockets and the pants pockets is that these are DOUBLE welt pockets, and the other ones were SINGLE welt pockets.
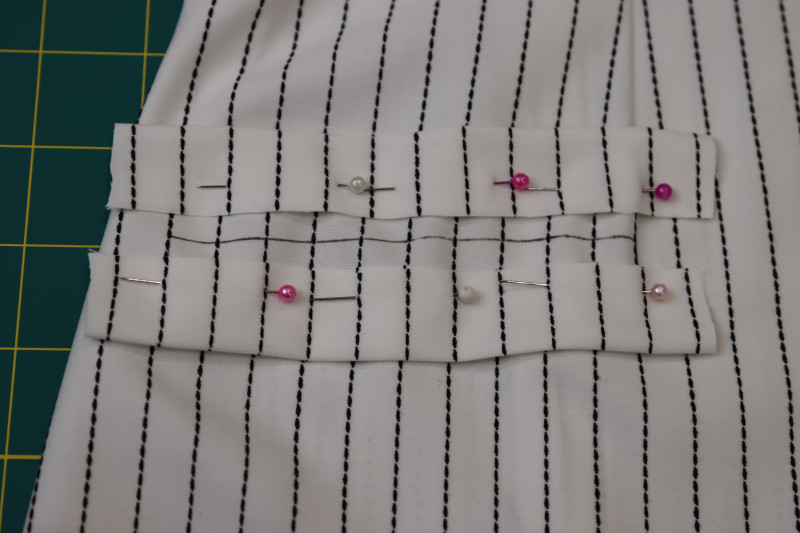
- Pin the welts on the top AND bottom lines of the welt markings.
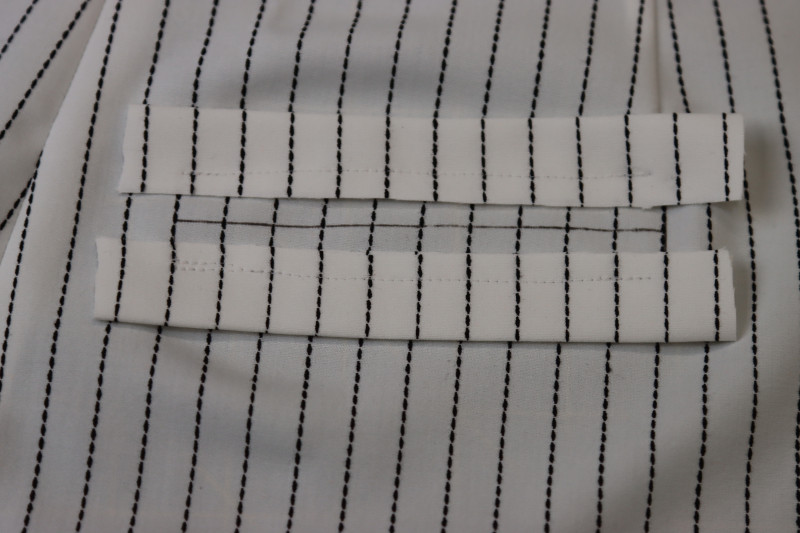
- Sew the welts directly to the lines.
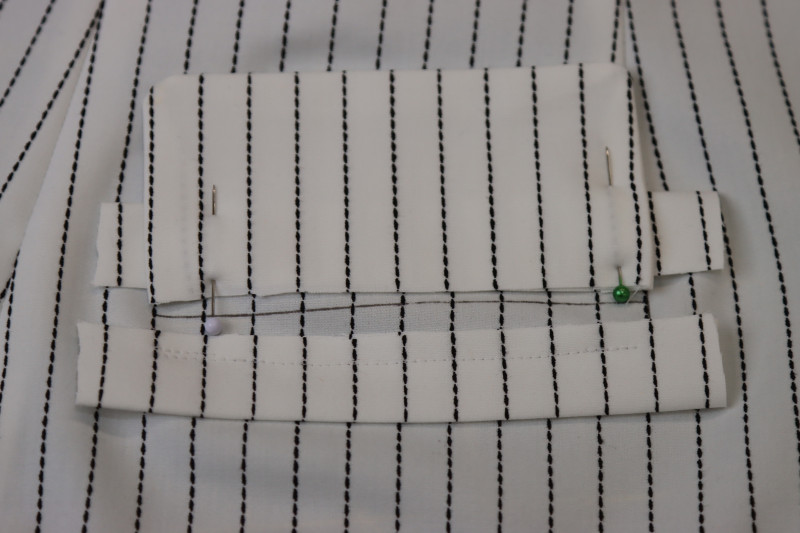
- Pin the pocket flat directly on top of the top welt with the raw edges lined up.
- Sew the pocket flap on the top welt seam.
- Attach the pocket lining the same way you did in step 6.
- Cut the slit and the notches in the welt the same way you did in step 6.
- Press ALL the pocket pieces toward the inside of the blazer the same way you did in step 6, except this time, make sure the pocket flap is on the OUTSIDE of the blazer, not tucked inside.
- Attach the bottom of the pocket lining to the bottom welt the same way you did in step 6.
- Finish the side seams of the pocket lining with the welt notch the same way you did in step 6.
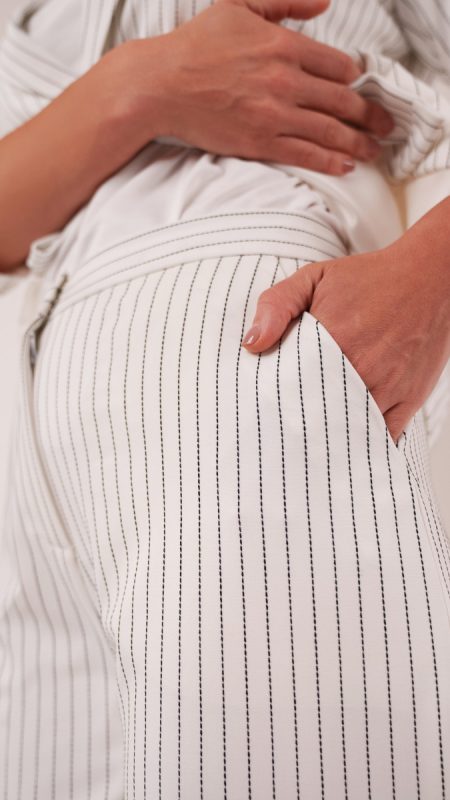
- Repeat on both sides of the front of the blazer.


Step 21
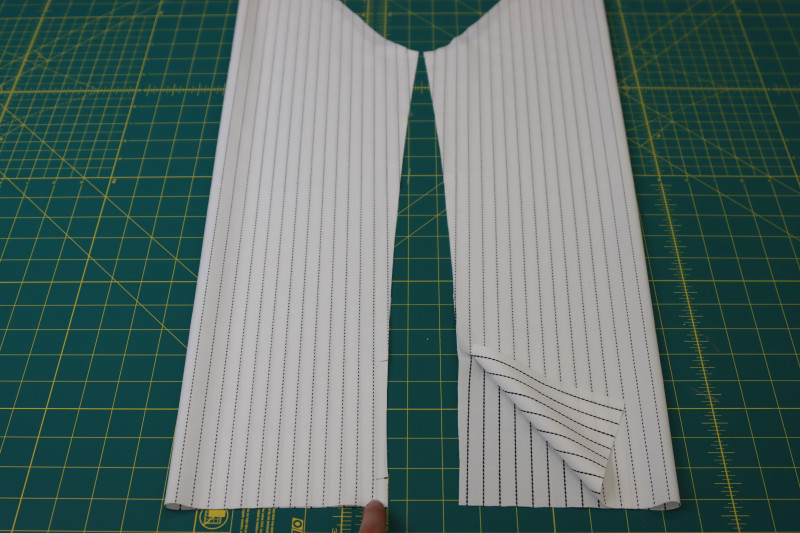
SLEEVES
- Fold the sleeves right sides together.
- Pin and sew the sleeve inseams but ONLY down to the first notch on the sleeve. Leave the bottom of the sleeve under the first notch OPEN.
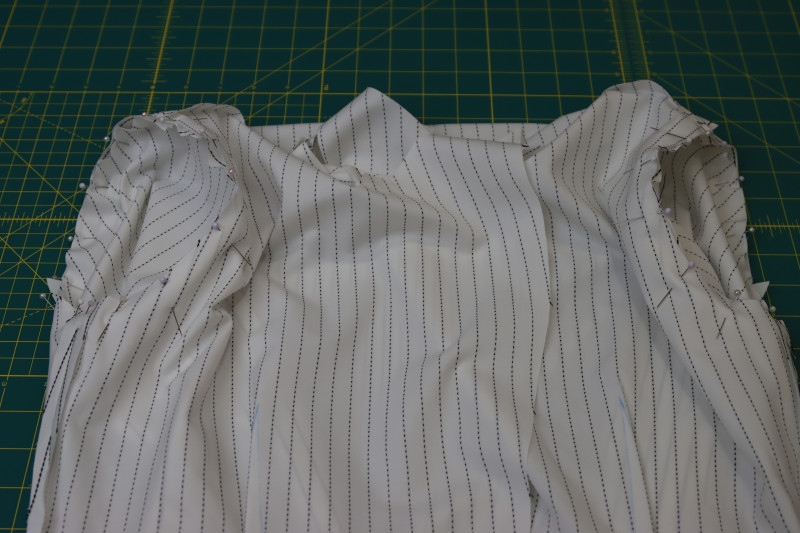
- Flip the blazer inside out and the sleeves right sides out.
- Insert the sleeves into the blazer and the sleeve caps into the armscyes, making sure that the fronts of the sleeves are facing the front of the blazer.
- Pin and sew the sleeves into the blazer.
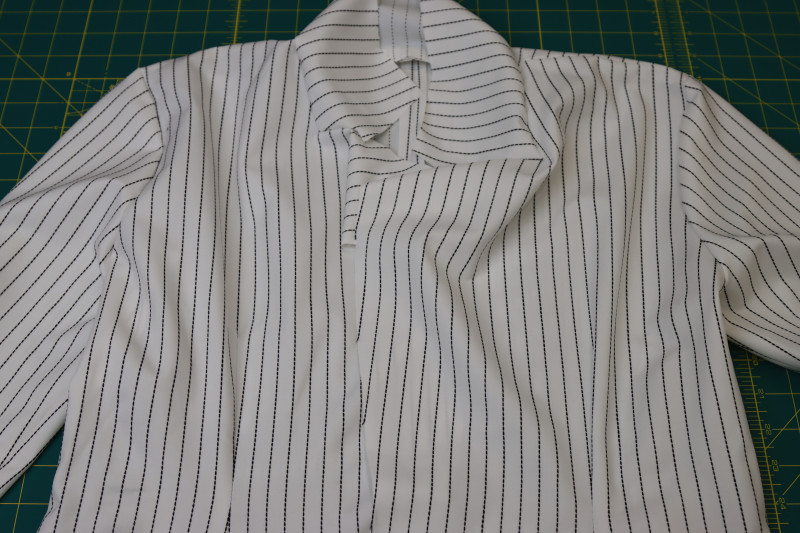
- Clip the seam allowance at the underarm and flip the blazer right sides out.
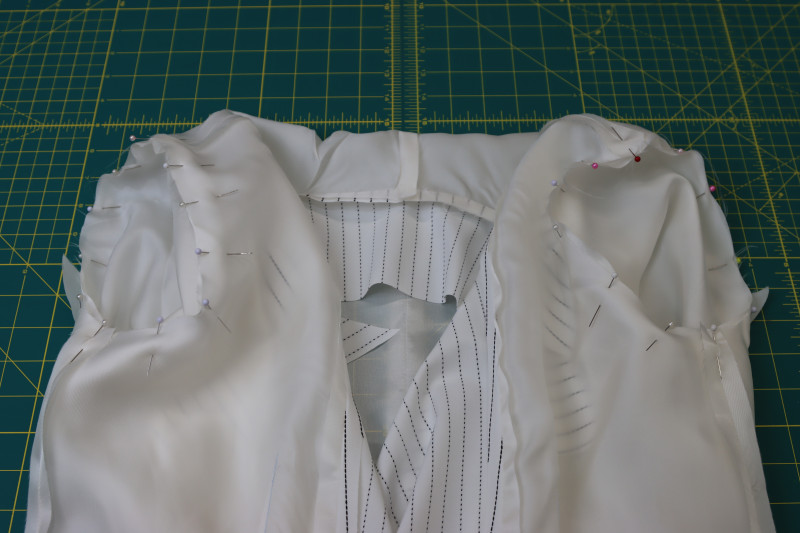
- Repeat the same process for the lining sleeves and lining blazer.
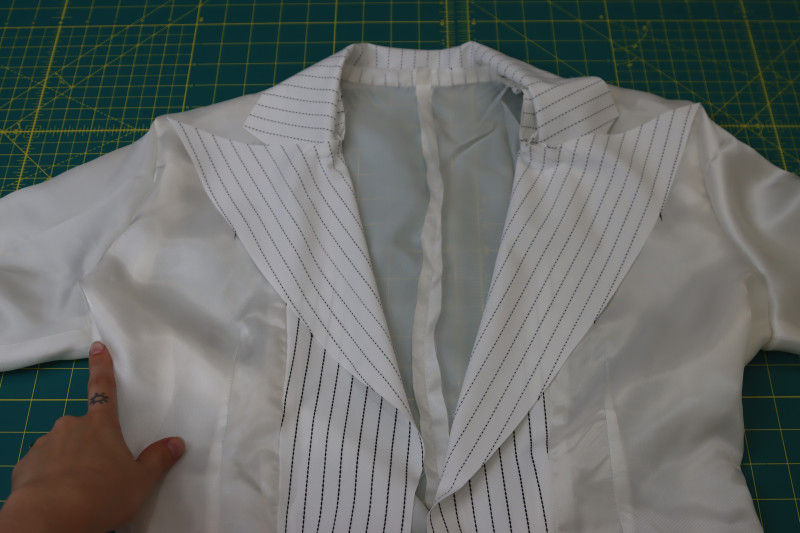
Step 22
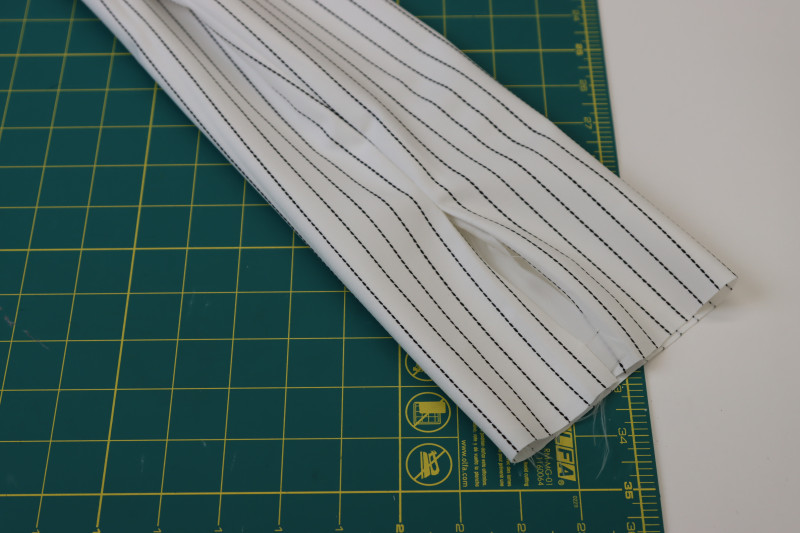
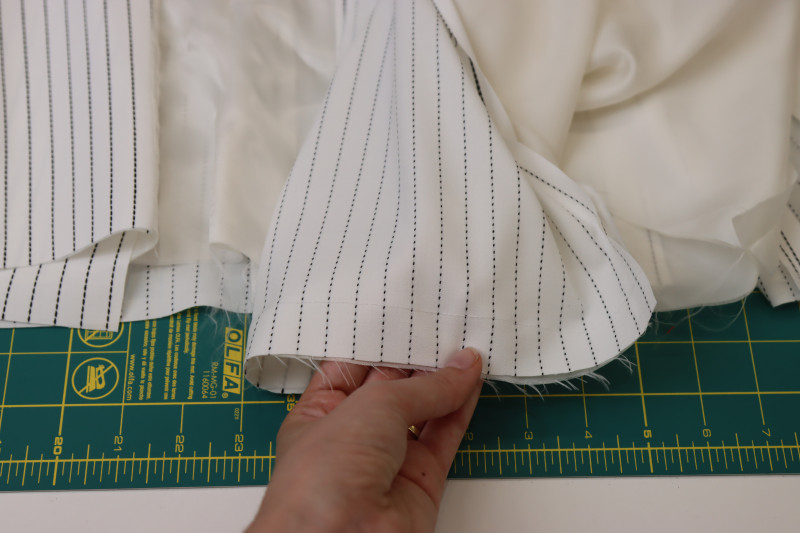
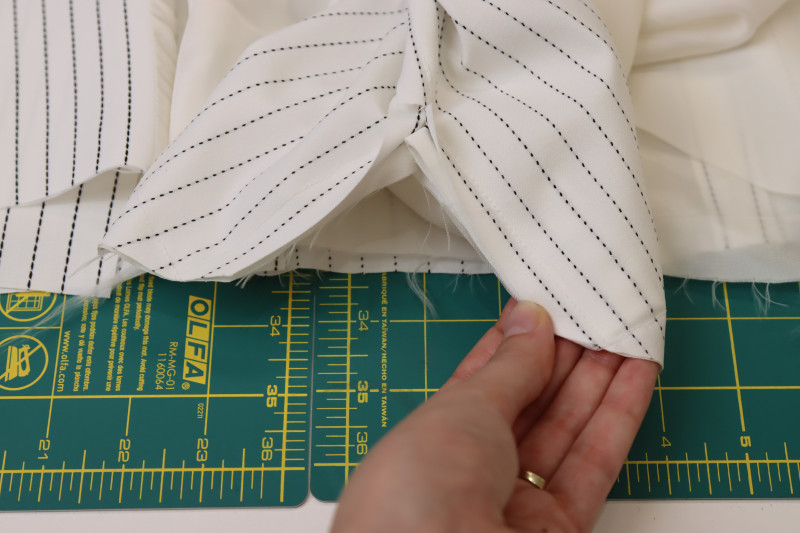
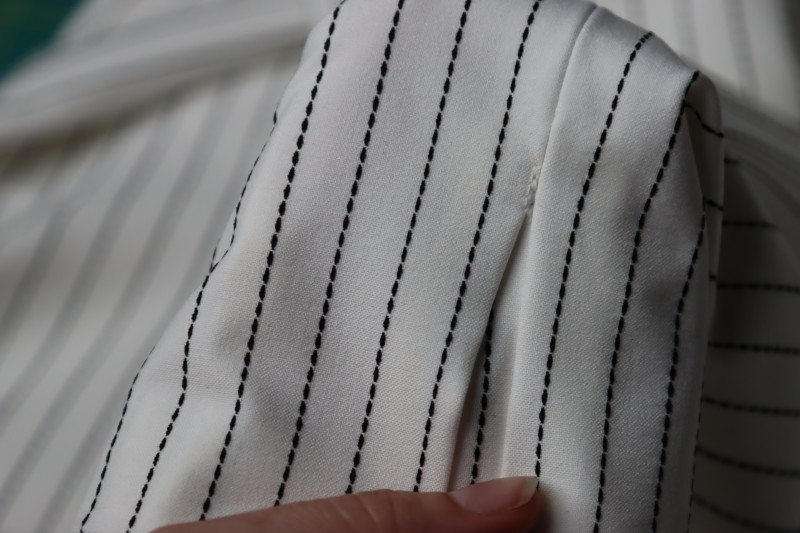
SLEEVE PLACKET
- Place the lining blazer inside of the main fabric blazer, wrong sides together.
- Fold the sleeve placket extension pieces longways right sides together
- Sew the short overlapping ends of the sleeve placket extension.
- Flip the sleeve placket right sides out and press.
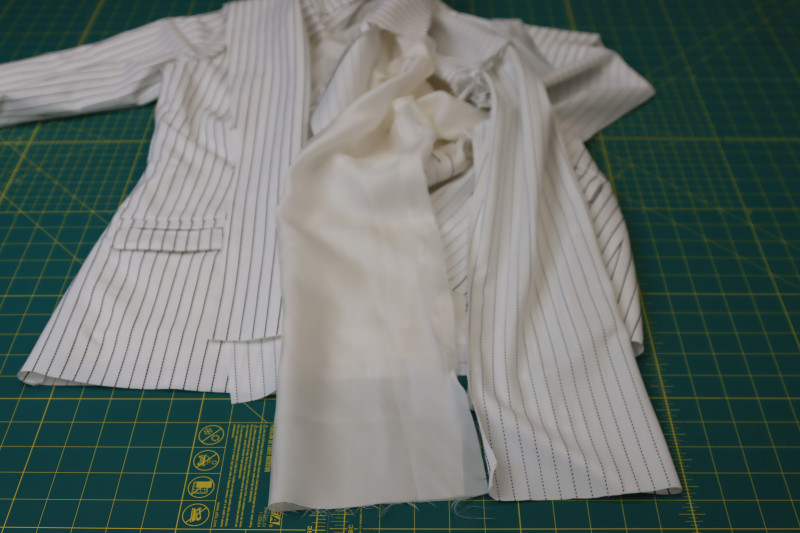
- Pull the lining sleeve out of the main sleeve and flip it so that it’s inside out.
- Flip the main sleeve on the same side of the jacket inside out as well.
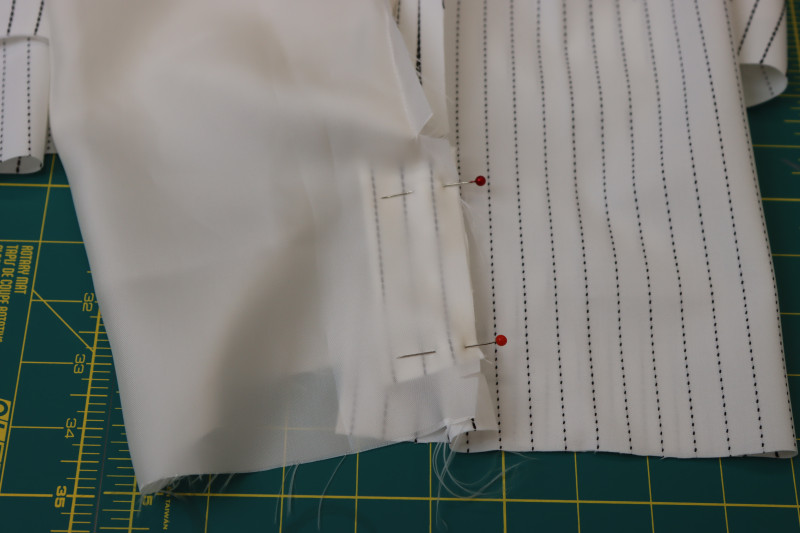
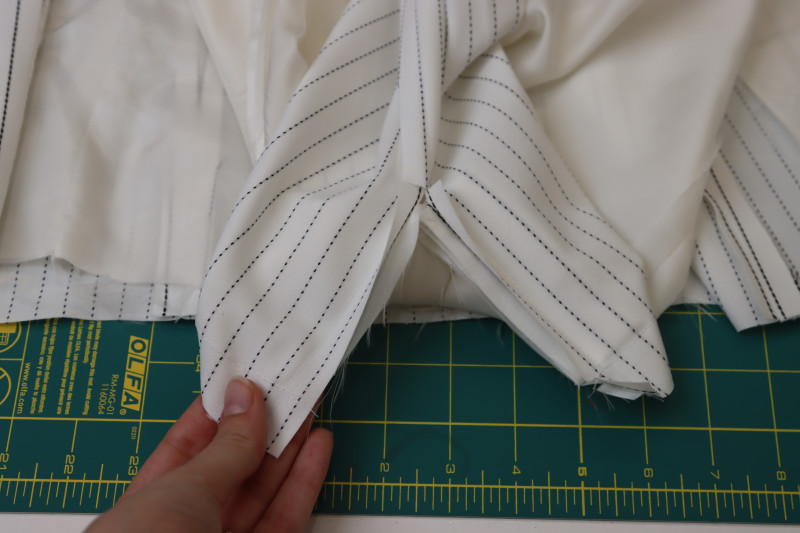
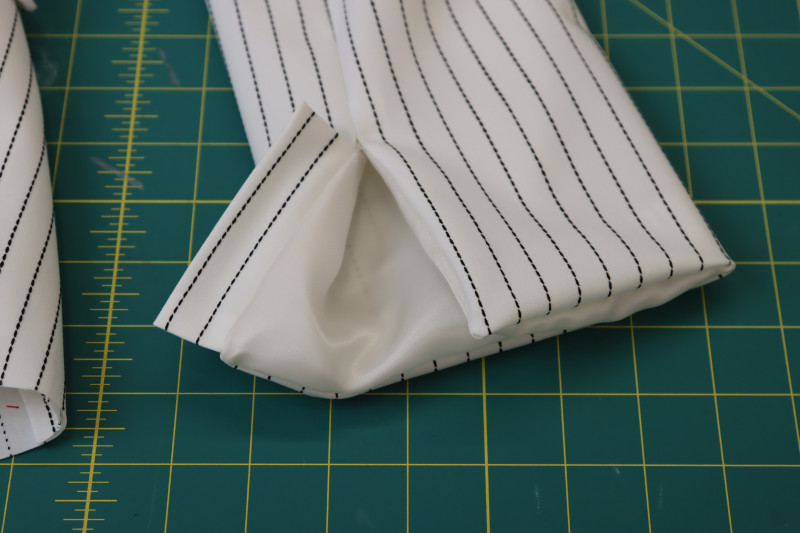
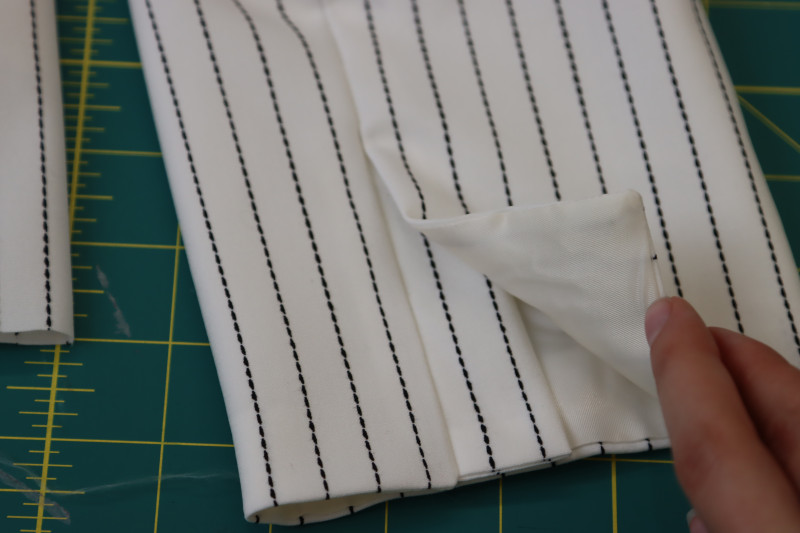
- Line up the slits at the ends of the lining sleeve and the main sleeve so that they are mirroring each other in front of you, as shown in the 5th photo below.
- Sandwich the sleeve placket in between the lining and main fabric at the end of the sleeve between the notches, making sure that the lining and main fabric sleeves are RIGHT SIDES TOGETHER sandwiching the placket and that the placket will end up toward the BACK of the slit (we will put buttons on the front of the slit, you’ll see later).
- Sew the placket into the sleeve, then sew the opposite side of the slit where there is no placket, attaching the lining directly to the main fabric at the slit.
- Sew the lining to the main fabric at the hem of the sleeve, making sure the seam lines up with the bottom of the placket.
- Clip the corners of the end of the sleeve.
- Flip all the sleeve pieces right sides out with the lining inside of the main fabric.
- Press the sleeve openings flat so that the lining stays inside the sleeve.
- Repeat for both sleeves.
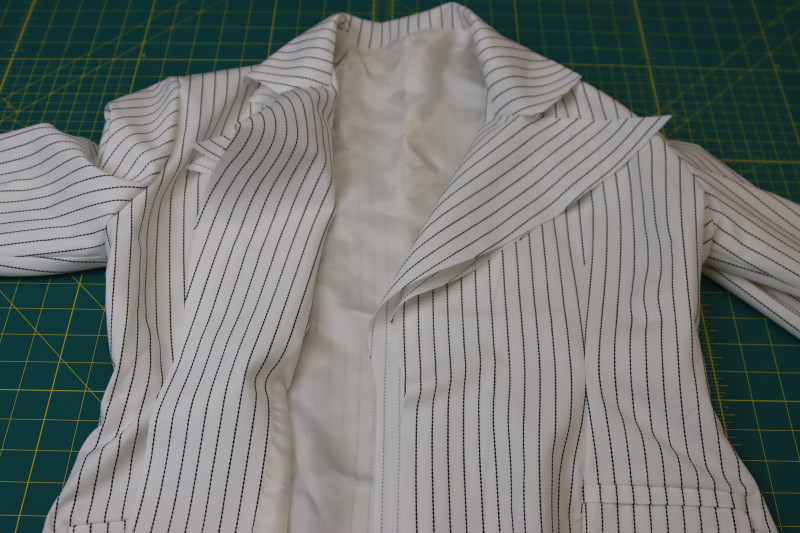
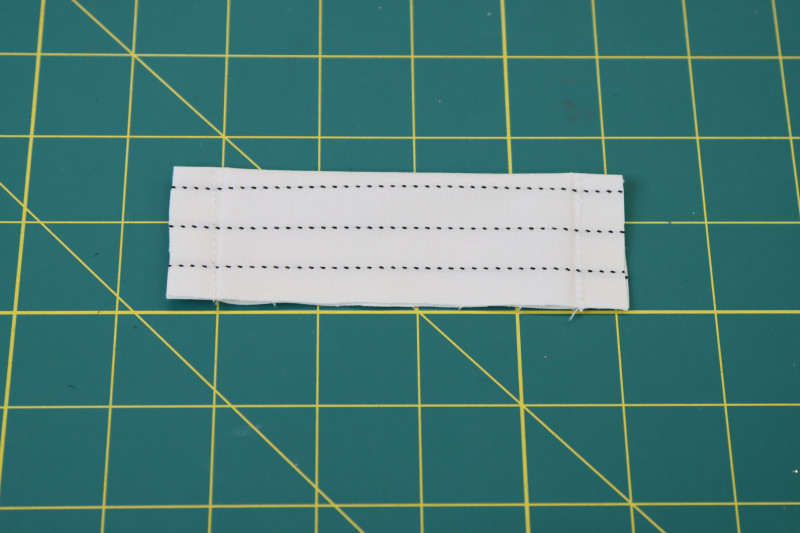
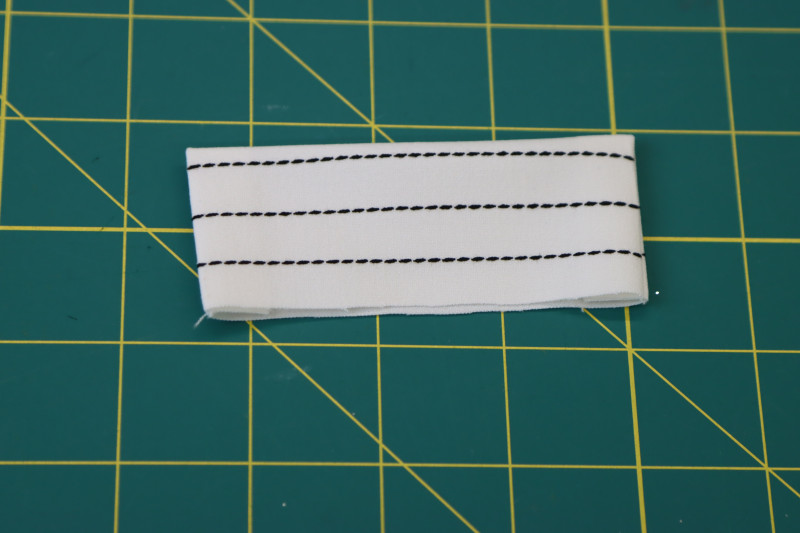
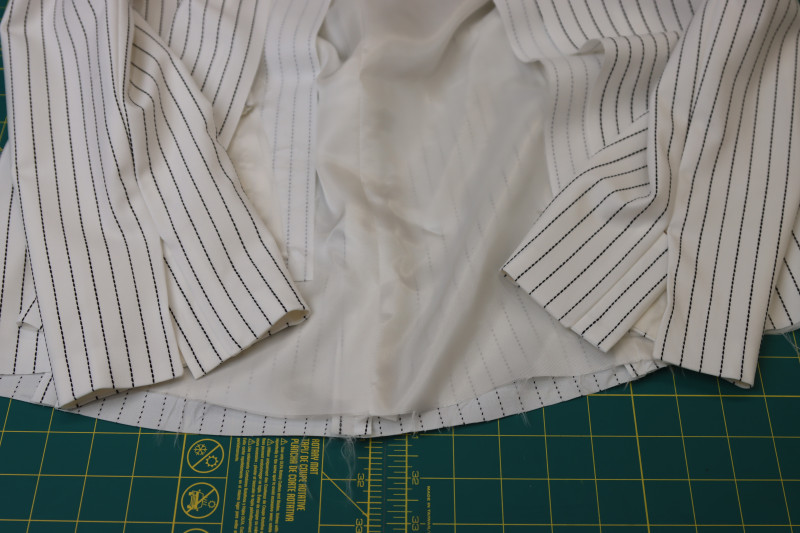
Step 23
CLOSE NECKLINE
-
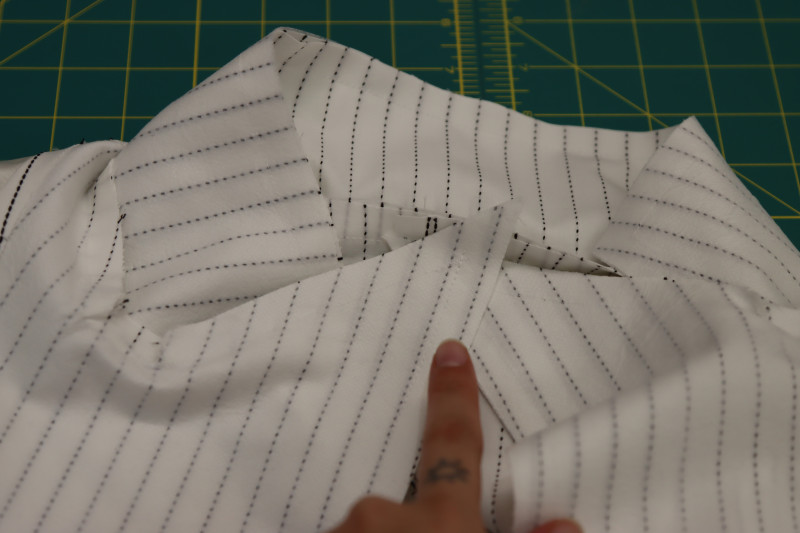
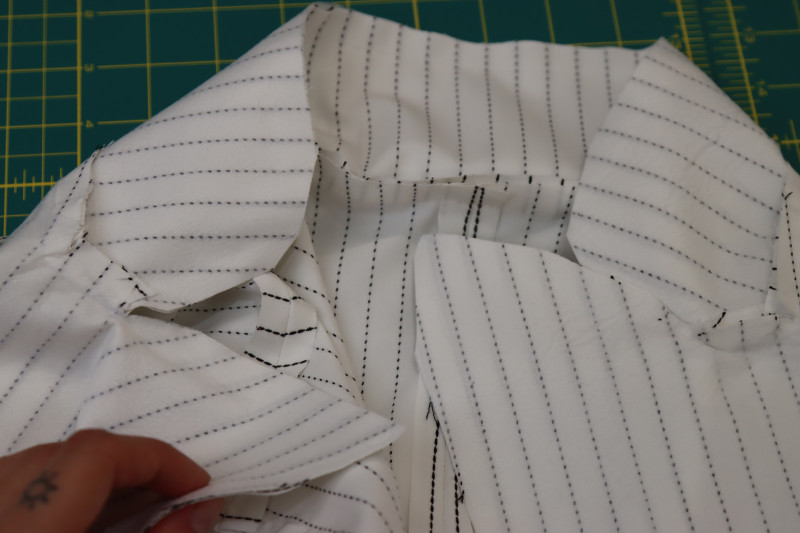
- With the lining still inside of the main blazer, wrong sides together, orient the necklines of both the lining and the main blazer so that they are right sides together.
- Pin and sew the lining to the main blazer around the entire front opening and collar
- Clip the corners around the collar.
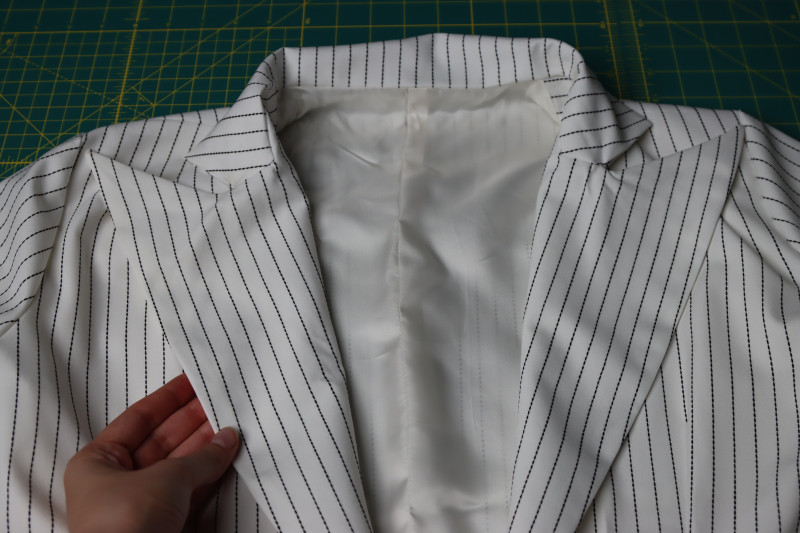
- Flip the blazer right sides out again
- Press the seams flat to make the corners of the collar nice and pointy.
- NOTE: If you plan on using shoulder pads, now is your last opportunity to put them between the lining and the main fabric. To install the shoulder pads, line up the FLAT edge of the pad with the armscye seam, centered on the shoulder seam. Pin the shoulder pads between the lining and the main fabric and hand baste OR tack the shoulder pads at a few different points to the lining.
Step 24
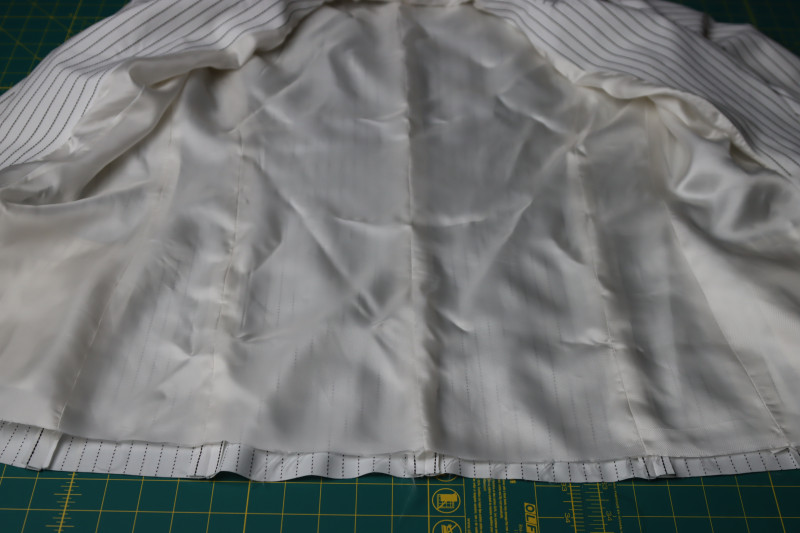
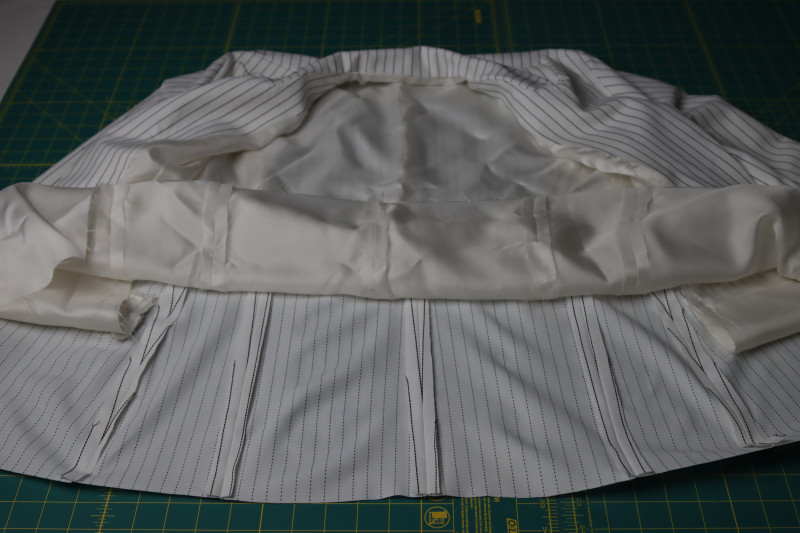
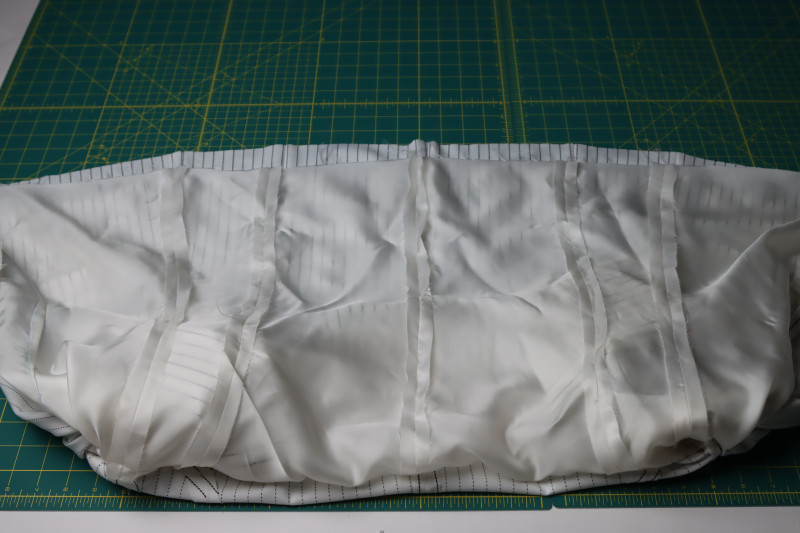
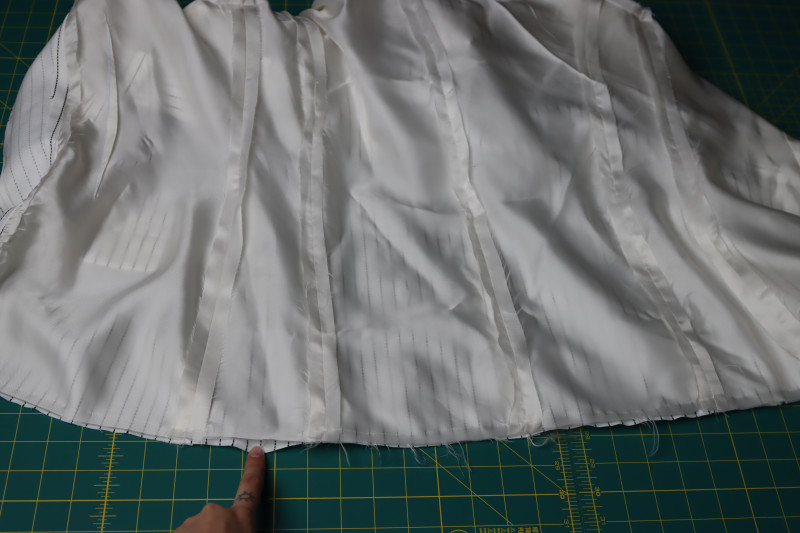
BLAZER HEM
- Layout the blazer right sides out with the hem laid out flat.
- Separate the lining hem from the main fabric hem.
- Place the two hems right sides together.
- Pin and sew the hems together, leaving a small gap through which to flip the blazer right sides out again.
- Flip the blazer right sides out, poke out the corners, and press the hem.
- Close the gap in the hem using a needle, thread, and a ladder stitch.
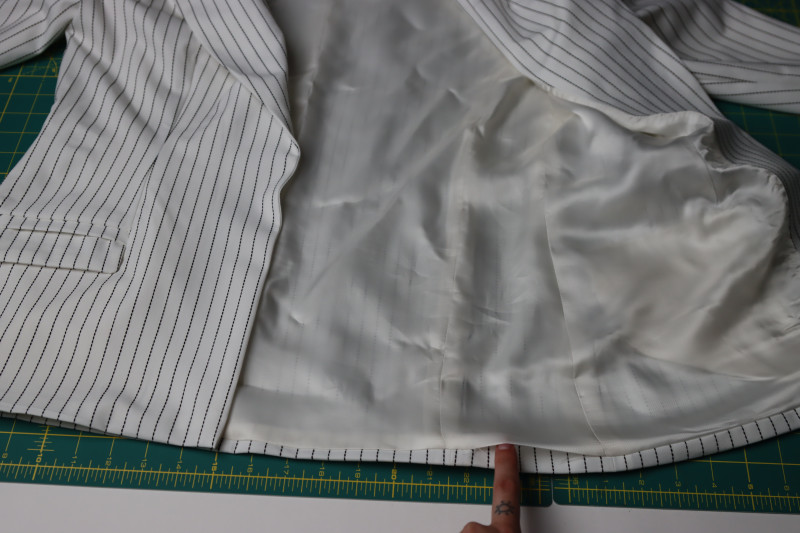
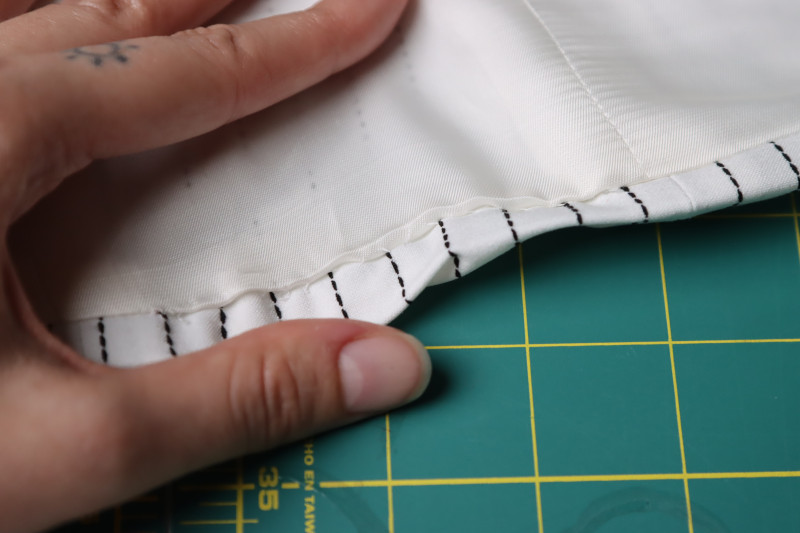
Step 25
FRONT CLOSURE
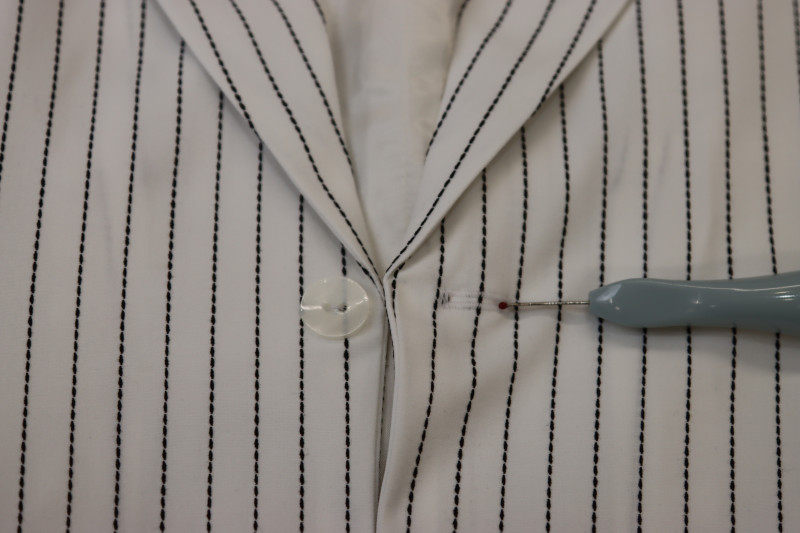
- Using tailor’s chalk or a fabric marking pen, mark the location of the button and button hole closure on the center front of the blazer, directly under where the lapels end.
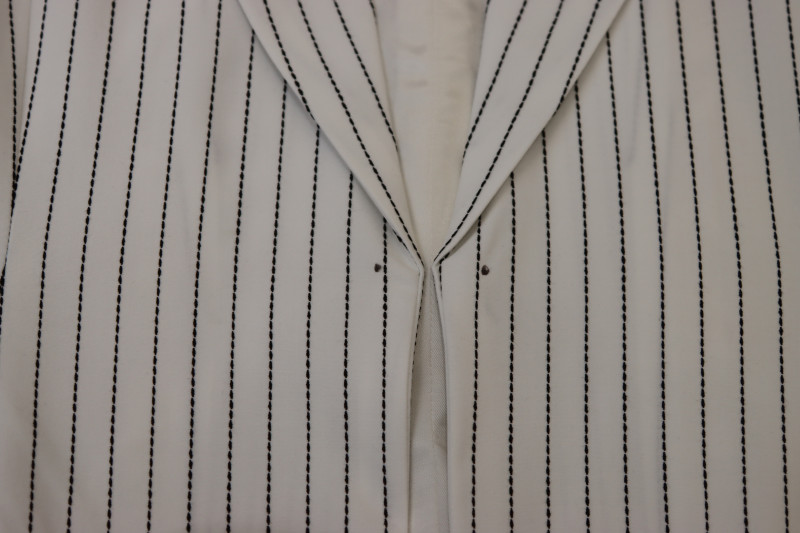
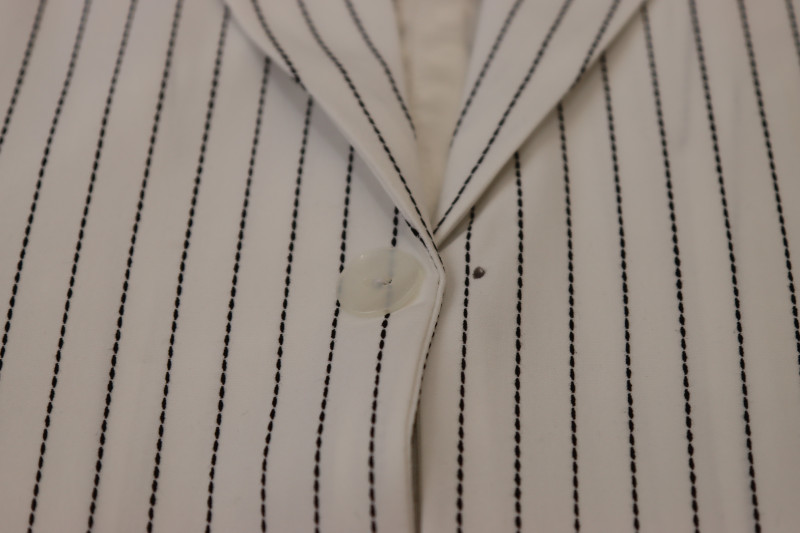
Step 26
SLEEVE PLACKET CLOSURE
- Sew a tiny bartack at the top of the sleeve placket to hold everything in place.
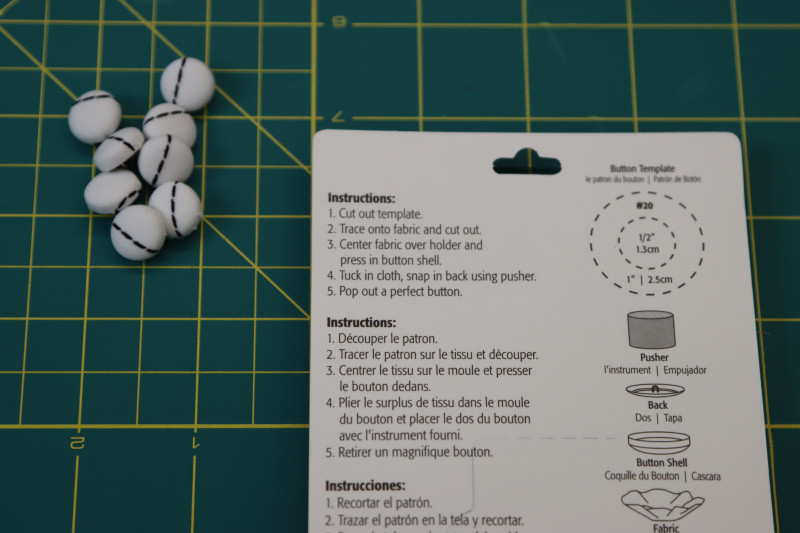
- Make 8 fabric covered buttons for the sleeve placket.
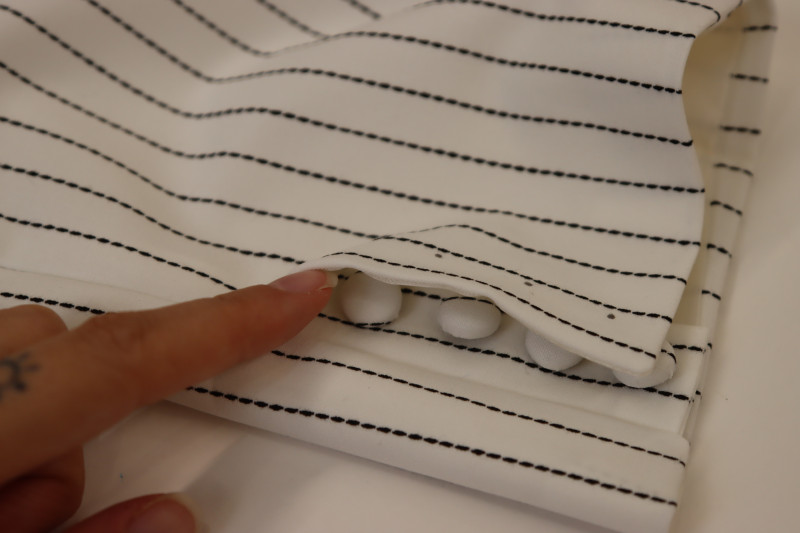
- Mark 4 evenly spaced dots on the inside AND outside of the sleeve placket. Your buttons will go inside on the placket extension and the button holes will go on the outside.
- Hand sew the buttons to the placket extension.
- Use the buttonhole foot on your sewing machine to make 4 button holes opposite to the buttons, making sure the length of the button holes is perpendicular to the length of the sleeve. This will ensure that your buttonholes aren’t gaping open when the buttons pull on them.
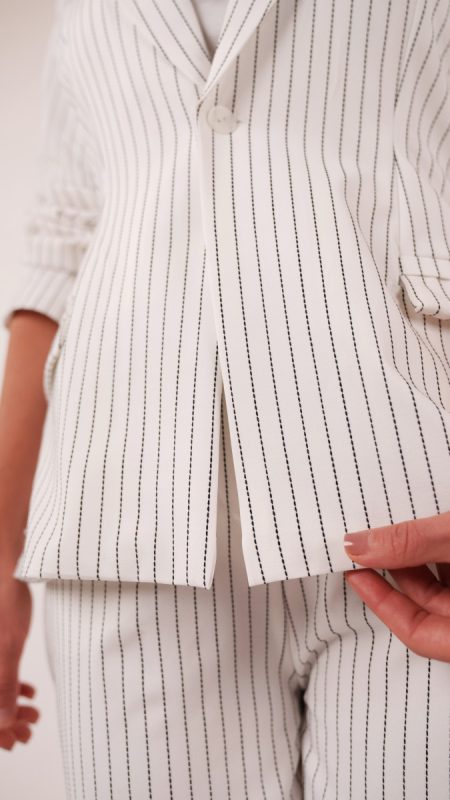
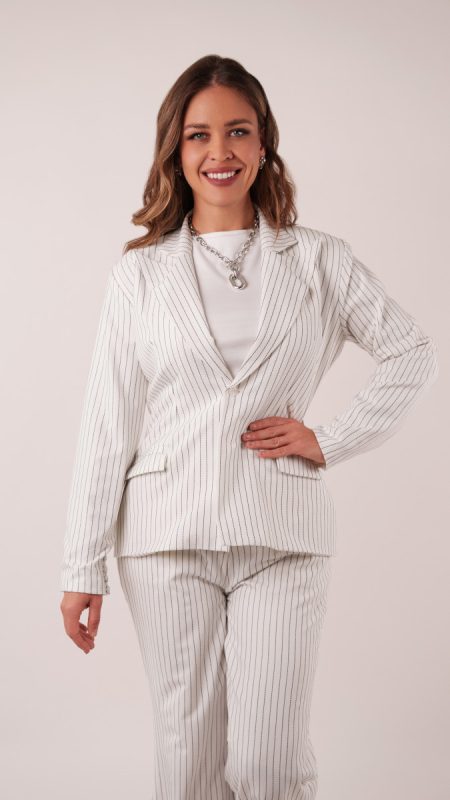
Sewing Success: The Finished Heir Blazer and Flared Trousers
Share this post with a friend (or two!), download the Heir Blazer and Flared Trousers free sewing pattern, and show us which fabrics and colors you choose, using the hashtags #MoodHeirPattern & #MadeWithMood—and don’t forget to tag us @MoodFabrics, too.







Free Sewing Pattern Inspiration for Your Next Project
With 540+ free sewing patterns and counting, your opportunities for sewing with Mood are endless!
We hope you had as much fun sewing this blazer and flared trousers pattern as we did! As always, we want to hear from you—share your thoughts and comments below and let us know where you’ll be wearing the Heir Blazer and Flared Trousers free sewing pattern!
Can’t get enough sewing with Mood? Browse your next make with our latest free sewing patterns.
