
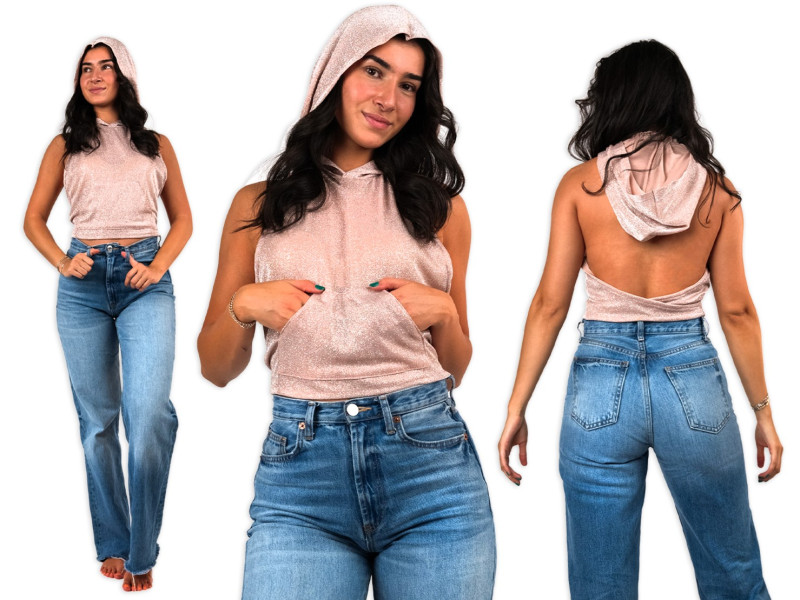
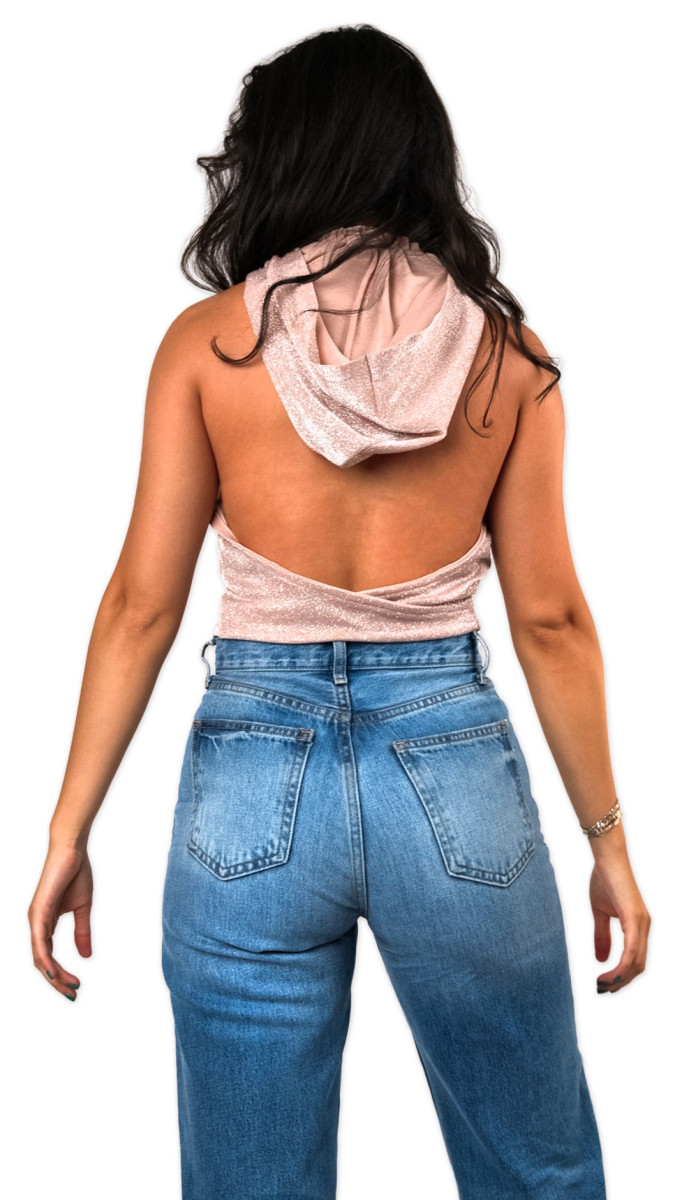
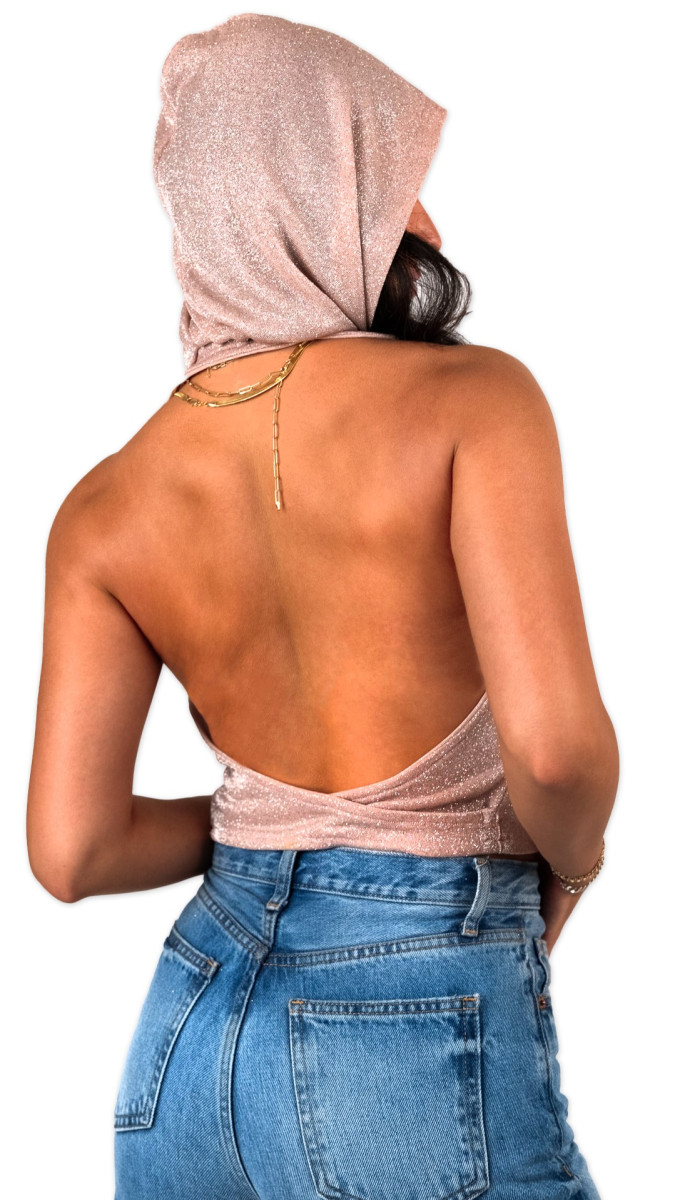
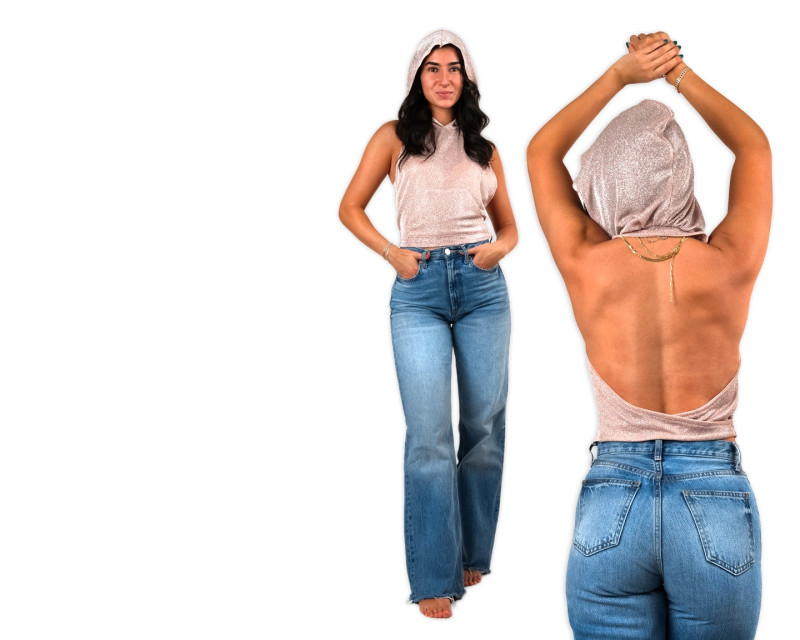
In a world where the line between athleisure and haute couture blurs, the backless hoodie stands as a testament to our yearning for innovative sartorial expression. This redux gives us a look back at The Boxwood Hoodie, giving Y2K a dazzling, modern-day look. Born out of a desire to push the boundaries of conventional fashion, this daring piece merges functionality with show-stopping aesthetics. In this redux, the traditional hoodie is reimagined, infusing a backless design to create a unique wow-factor.
Constructed out of Glitter Nylon Knit Jersey, this fabric shimmers with a subtle sparkle, adding an edge of glamour to this design. It is perfect for those who crave a blend of comfort and eye-catching style.


Getting started:
Step 1
Download our Boxwood Hoodie pattern and print out only pages 1-19, 23-25, and 29-31. For this project, I cut out a size 4/6 and accounted ½” seam allowance for all pattern pieces.
Step 2
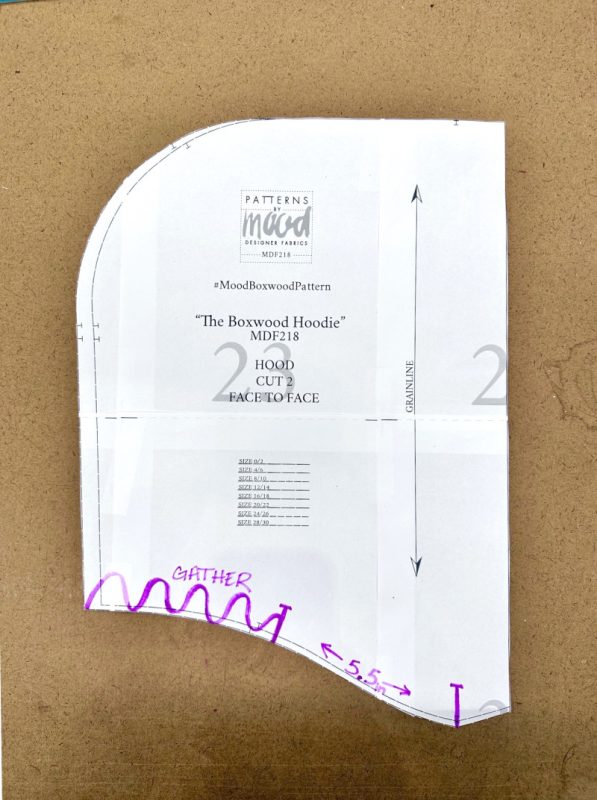
To make the hood adjustment, measure 5 ½” from the fold line at the front and mark an indication from this point to the back of the hood that will be gathered with a basting stitch.
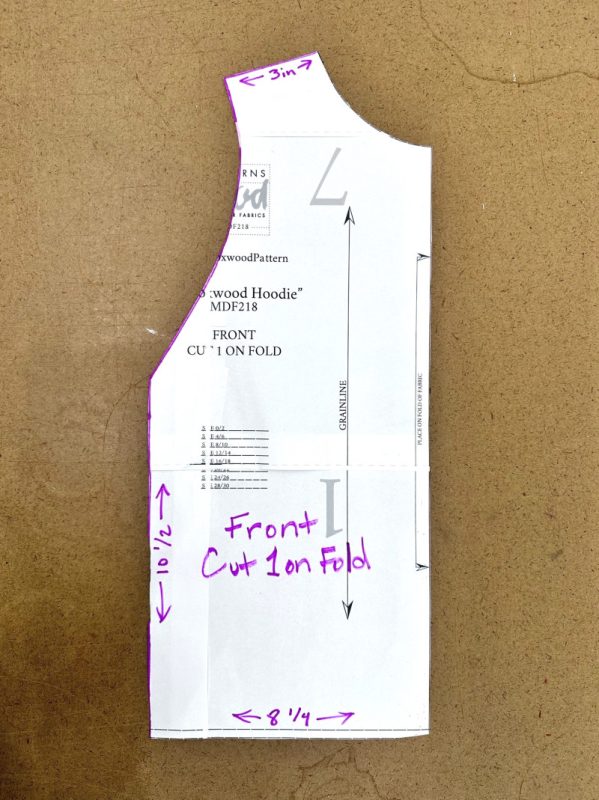
How to make the front bodice:
Step 1
Lower the shoulder height by 1 ½” and reduce the width to 3”.
Step 2
Bring in the armhole by 3 ½”.
Step 3
Bring in the width of the side seam by 2 ¾”.
Step 4
The height of the side seam should be 10 ½”.
Step 5
The width of the bottom will be 8 ¼”.
Step 6
Trim the front neckline to the measurement of a size 0/2.

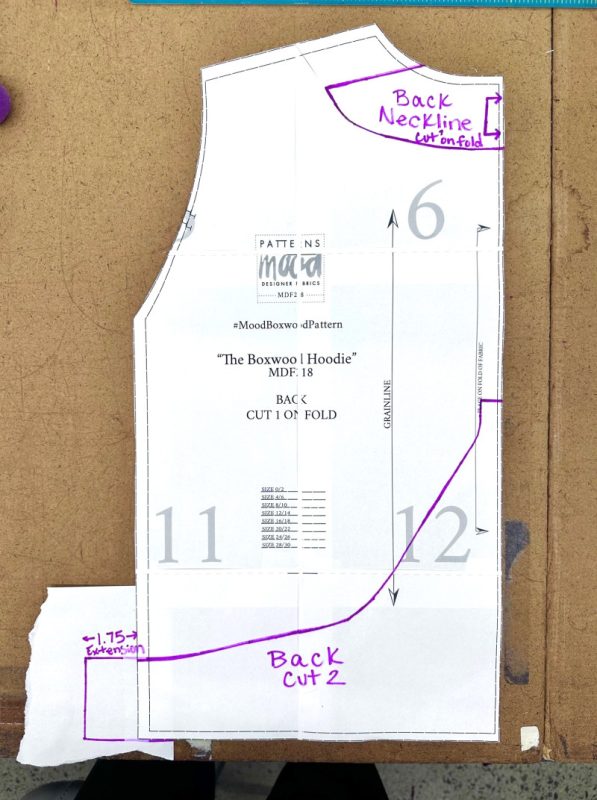
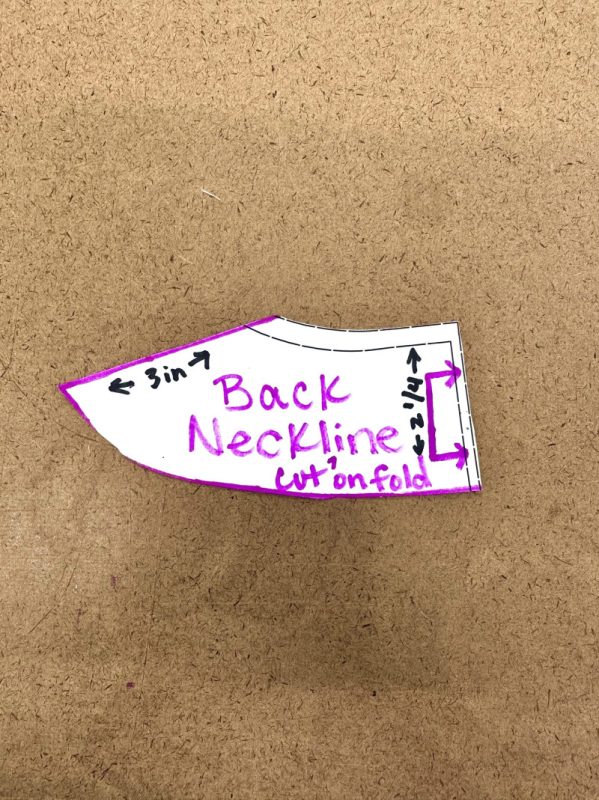
How to make the back neckline:
Step 1
Bring down the height of the shoulder by 1 ½”.
Step 2
Measure 2 ¼” for the width of the neckline.
Step 3
For the back pattern piece at the bottom, convert center back into a side seam measuring 10 ½” in length and ½” in width at the top.
Step 4
Use a small piece of paper to add an extension of 1 ¾” to the end of the opposite side seam with 2 ½” in height. The total width at the bottom is 13″.
Step 5
Use a French ruler to curve out a line connecting the point at the bottom to the point at the top.

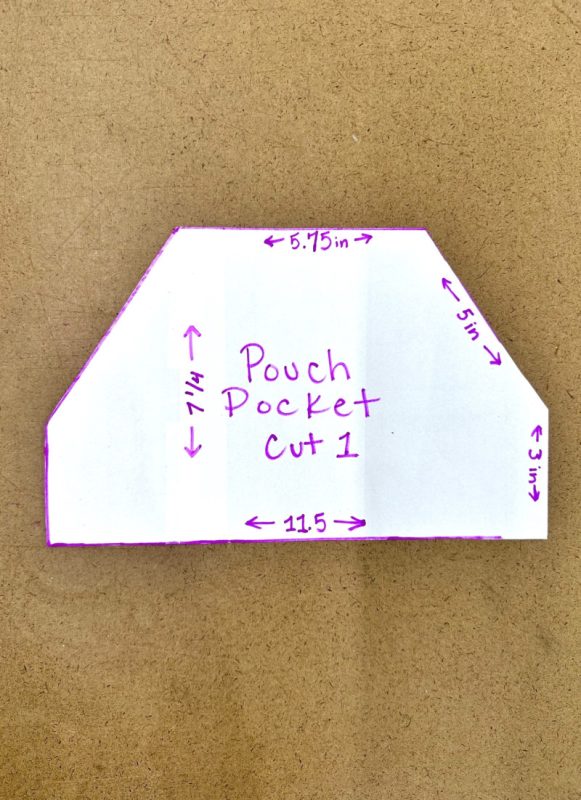
How to draft the pouch pocket:
Step 1
Make 2 vertical lines measuring 11 ½” for the bottom and 5 ¾” for the top. Leave a space between the top and bottom of 7 ¼”.
Step 2
Measure 3” upward from the corners at the bottom.
Step 3
Connect these points to the top with diagonal lines measuring 5”.
This pocket draft was created for a size 4/6. If you are sewing a different size, you will need to alter the length and width.
How to sew this project:
Step 1
Sew the pouch pocket first onto the front bodice.
Step 2
Sew both sides of the back neckline onto the shoulders of the bodice.
Step 3
Sew the lower back pieces onto the side seams of the front bodice, then wrap around the back and sew the ends onto the opposing side seams.
Step 4
Gather the back side of the hood, then sew around the neckline.
Step 5
Cut out 2 long strips of fabric on the bias to create 1 longer bias binding and sew across the raw edges of the back.
Step 6
Cut out a smaller strip of bias binding for the raw edges on the neckline.
Step 7
Fold over ½” twice at the bottom to finish sewing the hem.
Thanks. I may try it
Thats a lovely fabric, goes perfectly with the garment.
One question, everything is in inches, rite? I need to know if I have to convert it to centimeters.
Thanks in advance.
Thank you! and yes everything is in inches.
magnifique !!!
I’m more of a size 11 and I tried this, but I tweaked the numbers a little more for my size and the fit was really goofy. I’m going to try with a 4/6 and use your exact alterations to see if it works better. I’d love to know how you came up with the different numbers to alter your pattern though! It’s so cute; I hope this one works!
Hi Tamara, we’re sorry for the delay in responding to your question! We get dozens of comments and questions each day, and so many questions get buried and, unfortunately, unanswered. We are now focusing user support on patterns 2 years and newer. We hope this will prevent questions on our more current patterns from going unanswered. Although this is late, we wanted to respond in case anyone else has the same question: to get the exact sizing, we recommend using a muslin first to get your fit correct. Since this was created using a stretch knit, using a slightly different fabric will alter the fit as well.
As a beginner I like this pattern. I wish it was already cut out. I don’t understand the pattern measurements just yet.