
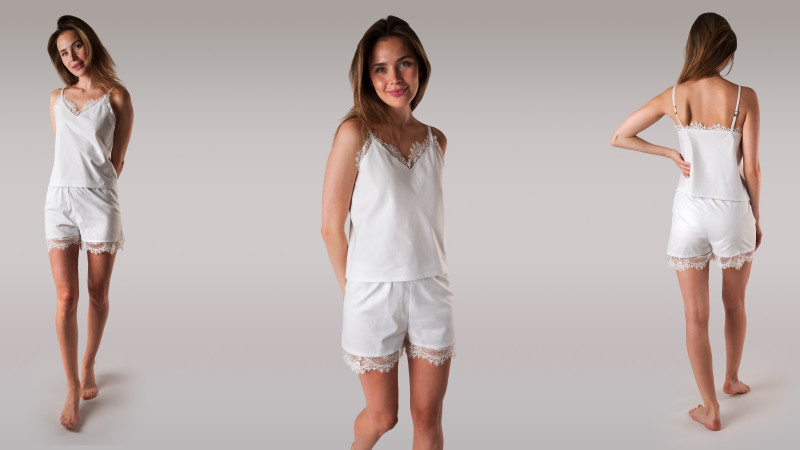
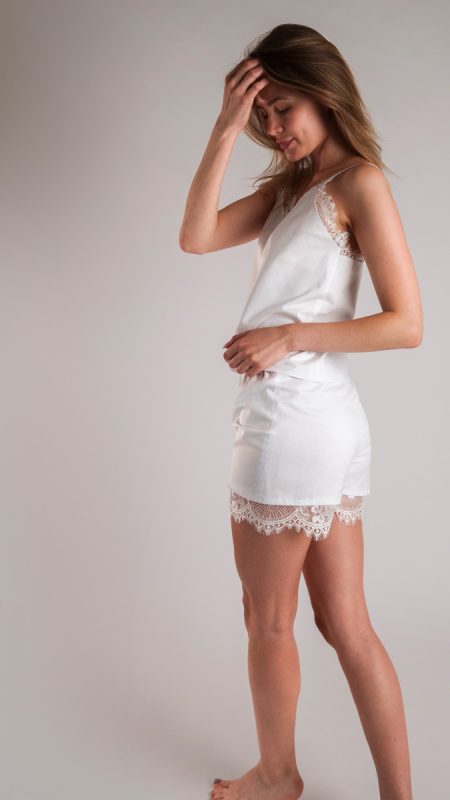
Sweet dreams await with The Mackenzie Sleep Set Free Sewing Pattern!
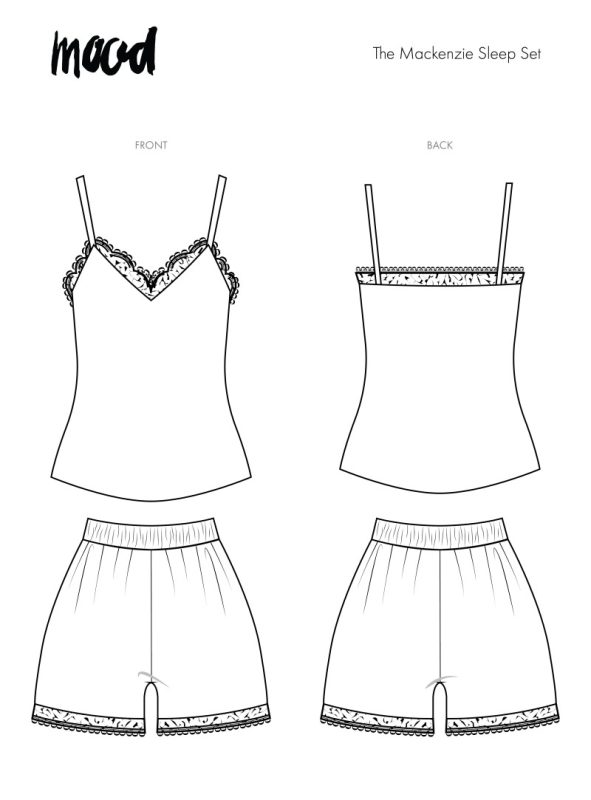
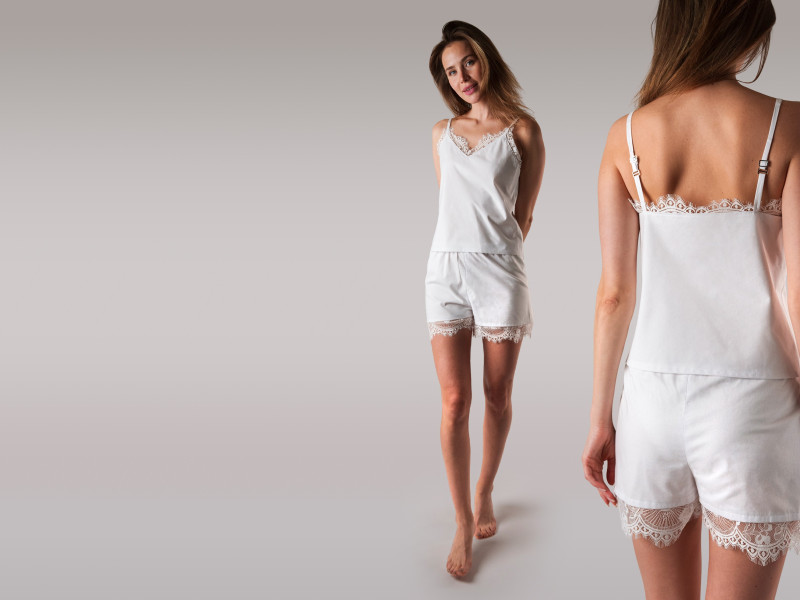
There’s nothing like slipping into a chic sleep set that consists of a tank top with shorts. Made with eyelash lace trim and 100% Egyptian cotton voile, this fabric is known for its lightweight, breathable, and ultra-soft qualities.
Feeling good in what you wear to bed can boost your overall mood and wellbeing! So, create a cute and comfy set for those restful nights and relaxing mornings with The Mackenzie Sleep Set.
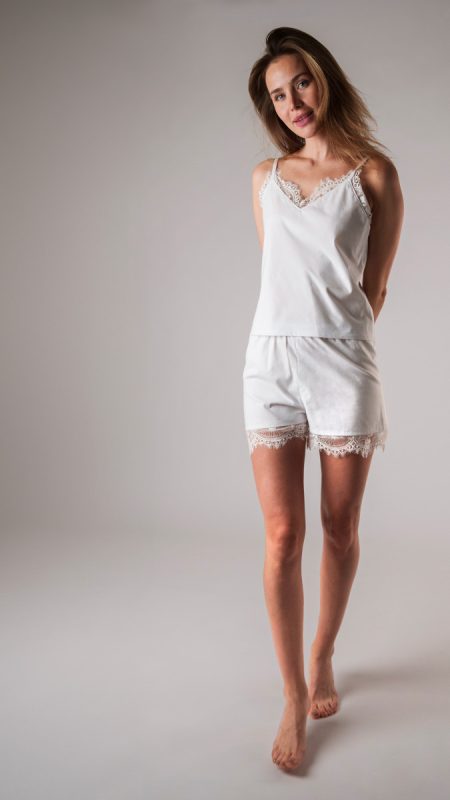
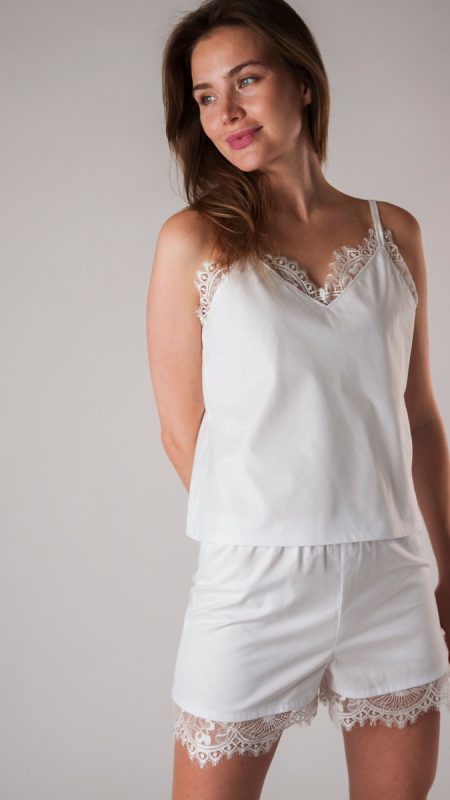
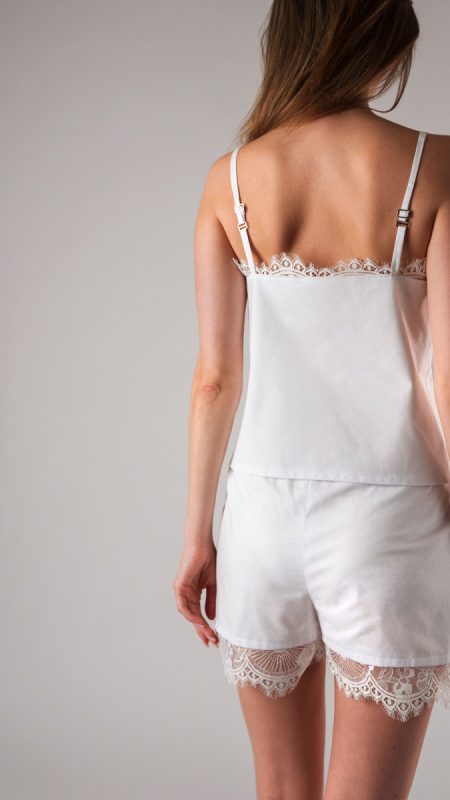
Purchase Products Used Below:
- 2 yards of Mercerized Organic Egyptian Cotton Voile – White – Toulouse Collection
- 3 yards of European White Medallion Scalloped Eyelash Lace Trim – 6.5″
- 1 each of Dritz White Underwear and PJ Elastic – 1 in x 1.25 yd
- 1 each of Nickel Metal Slider for 5/16″ Strap – Set of 4
- 1 spool of 1006 White 250m Gutermann Natural Cotton Thread
- MDF389 – The Mackenzie Sleep Set Sewing Pattern (Free download below!)
Alternative Recommended Fabrics:
How To Sew The Mackenzie Sleep Set Free Sewing Pattern:
*Use a 1/2″ seam allowance for all seams unless otherwise specified.
Step 1
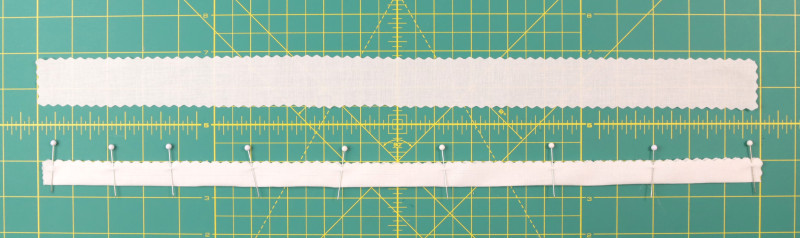
Create the shoulder straps by folding right sides together and sewing 1/4″ seam allowance.
Step 2
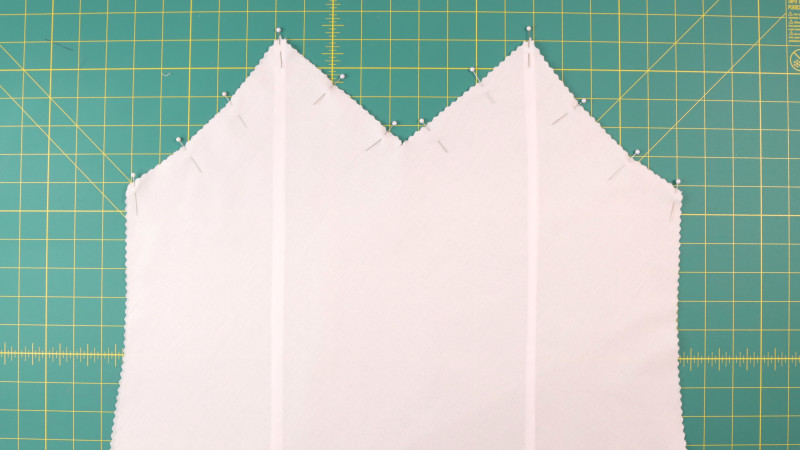
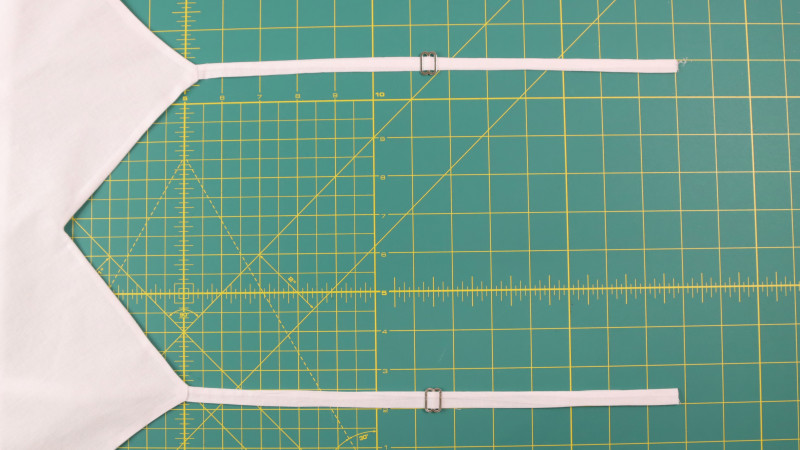
Sew the 2 front layers together at the neckline with the straps sandwiched in between the seam allowance.
Step 3
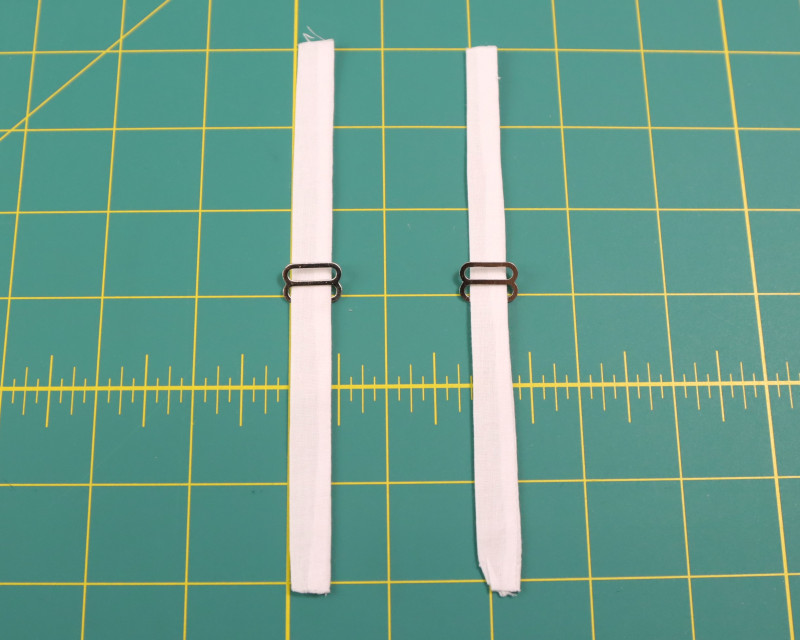
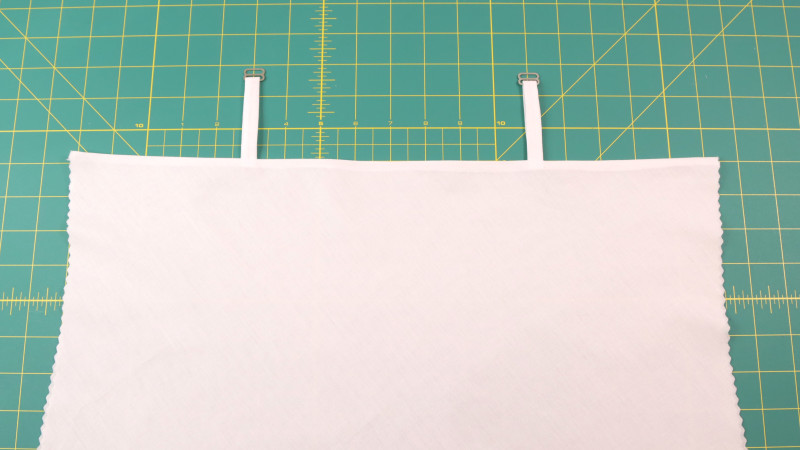
To create the back loops, cut 6″ from the straps and place them through one side of the metal slider.
Step 4
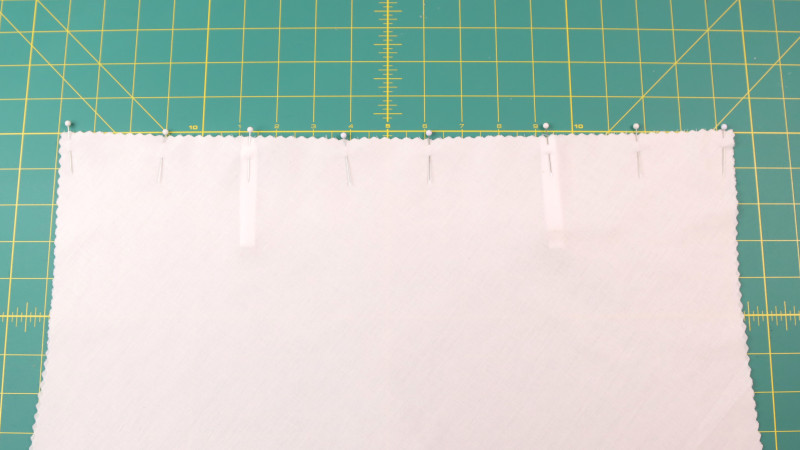
Sew the 2 back layers at the neckline with the back loops sandwiched in between the seam allowance.
Step 5
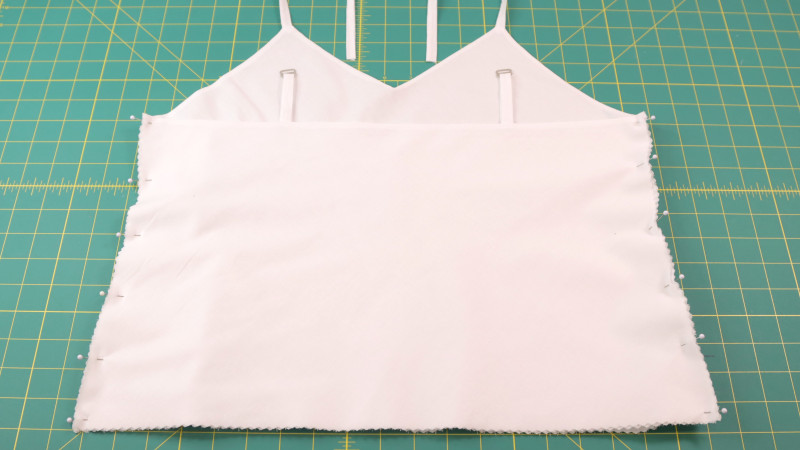
Sew front and back together at the side seams., right sides facing each other.
Step 6
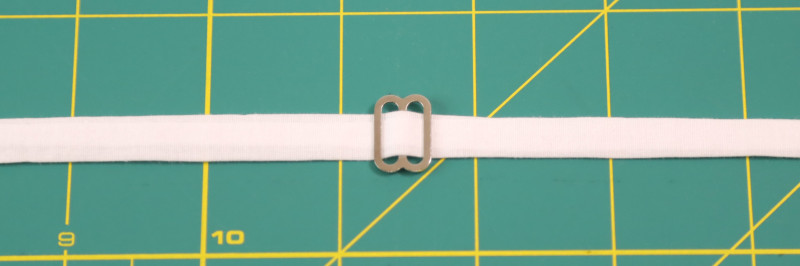
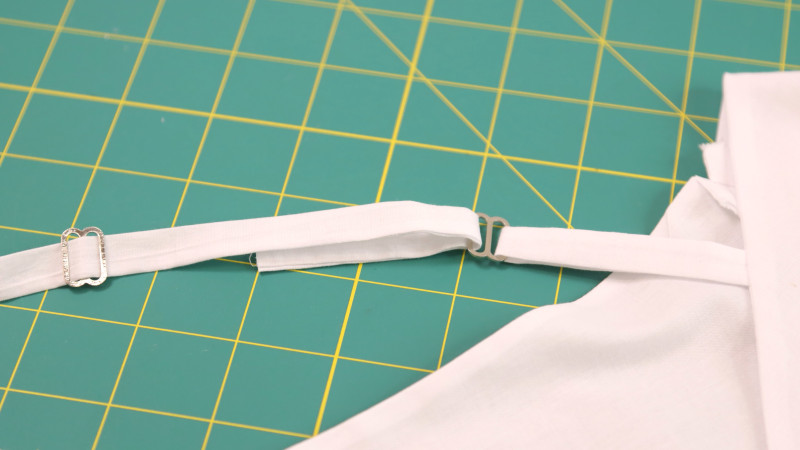
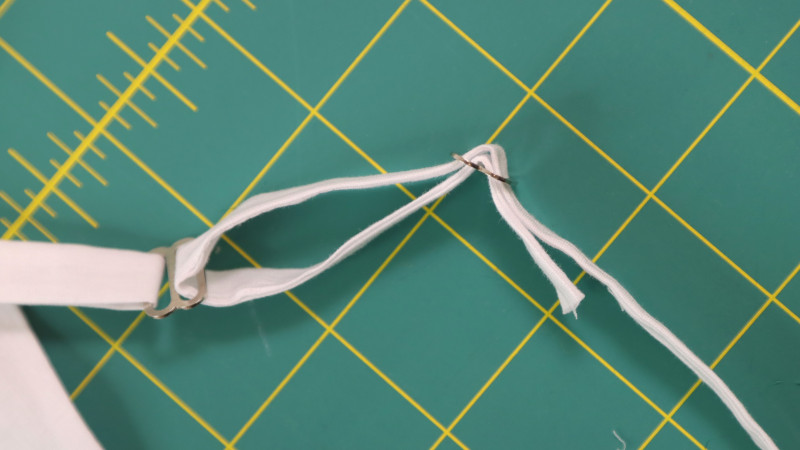
To create the adjustable straps, pass the long strap under the metal slider first then over. Bring the long strap across the back and pass through the top of the back loop. Bring the end back to the first slider and pass it under the first route again. Sew the end to the side of the strap with the metal slider.
Step 7
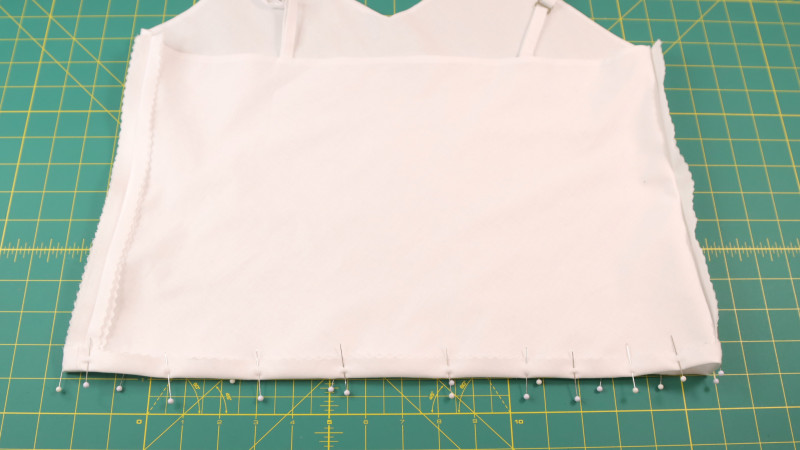
Sew the hem around the bottom with 1/2″ seam allowance.
Step 8
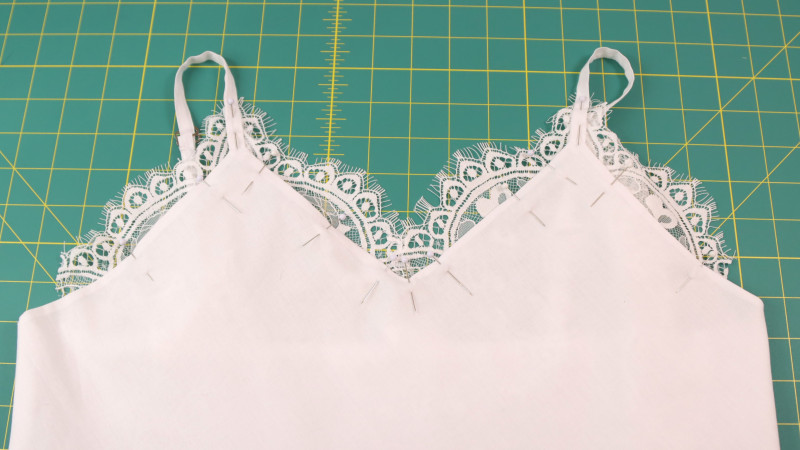
To complete the top, place and sew the lace trim around the neckline. This can be sewn over the garment, sandwiched in between the self and lining, or sewn behind the garment as shown.
Step 9
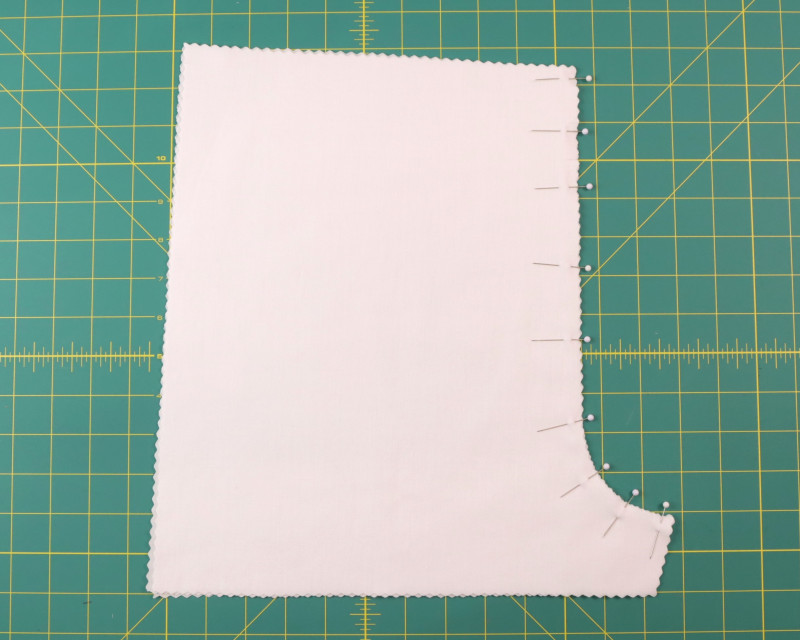
Sew the 2 front short layers at center front.
Step 10
Sew the 2 back short layers at center back.
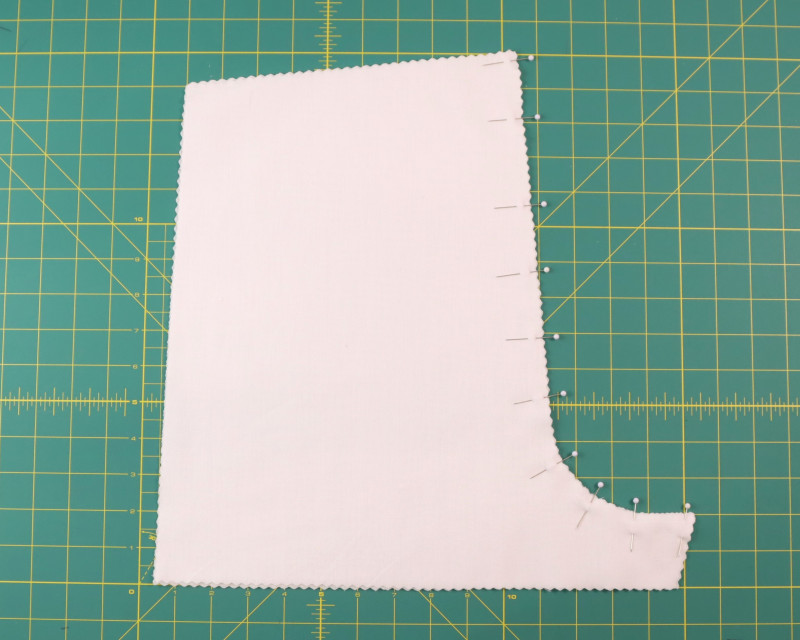
Step 11
Sew front and back together at the side seams.
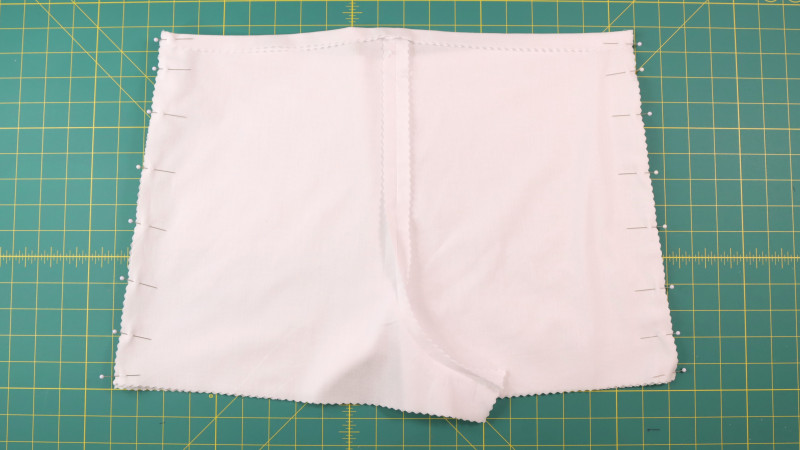
Step 12
Fold over the waistband and sew around, leaving a 1″ opening at center back.
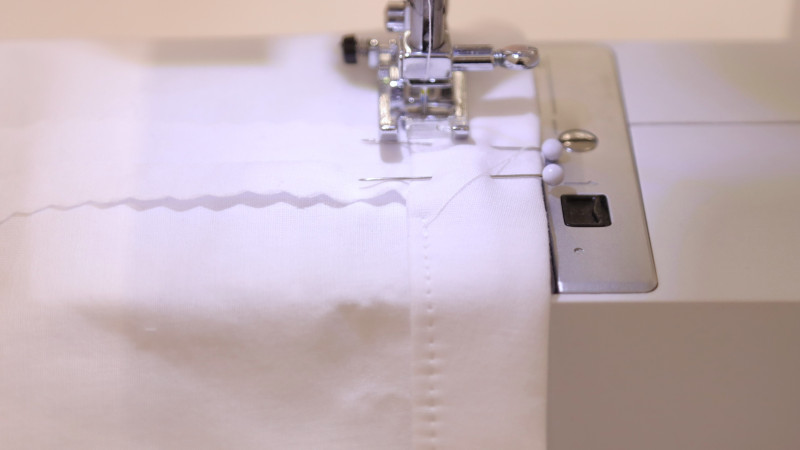
Step 13
Use a safety pin to get the elastic through one side of the waistband and back out the other side.
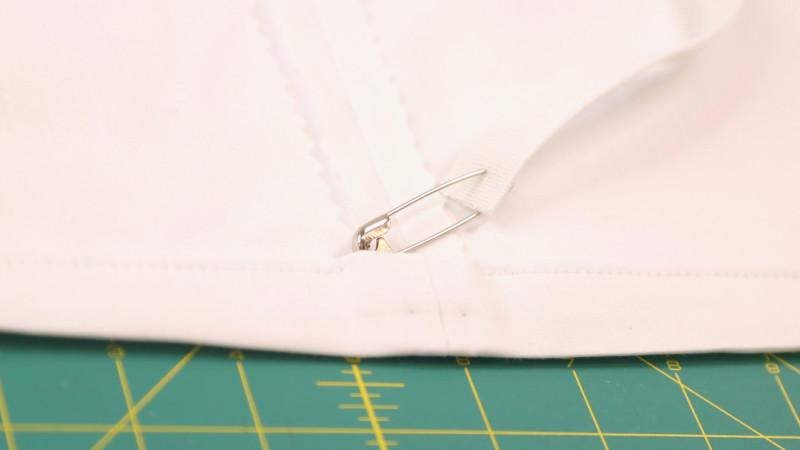
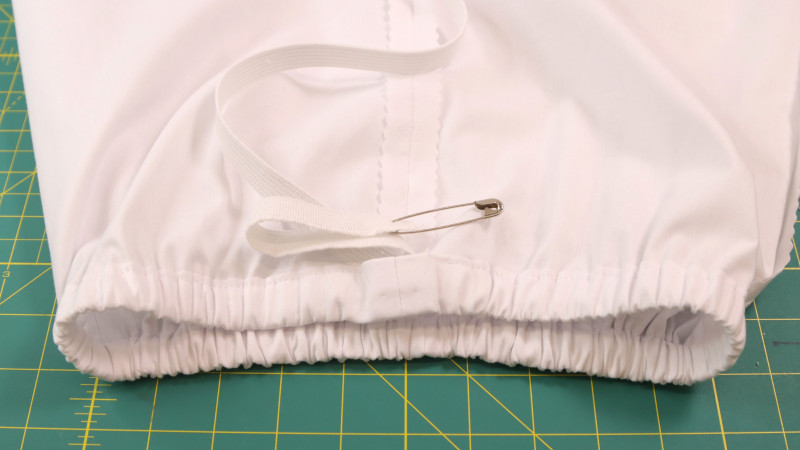
Step 14
Cinch the waist and sew the elastic together with a zig-zag stitch. Trim the remaining elastic.
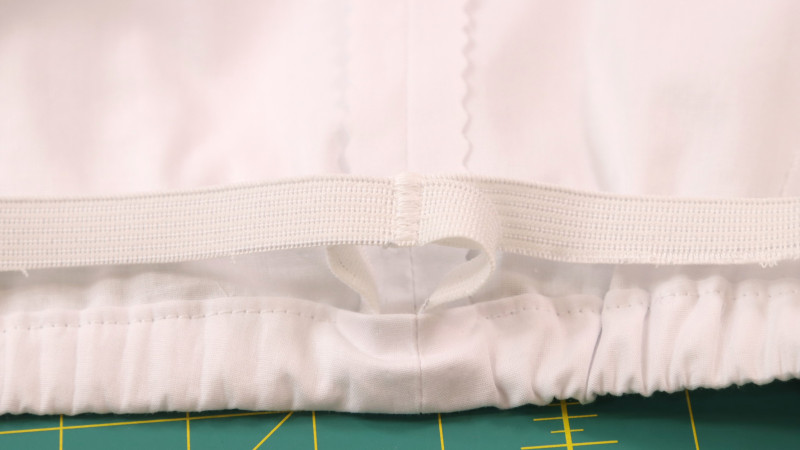
Step 15
Sew and close the 1″ opening after the elastic is placed inside.
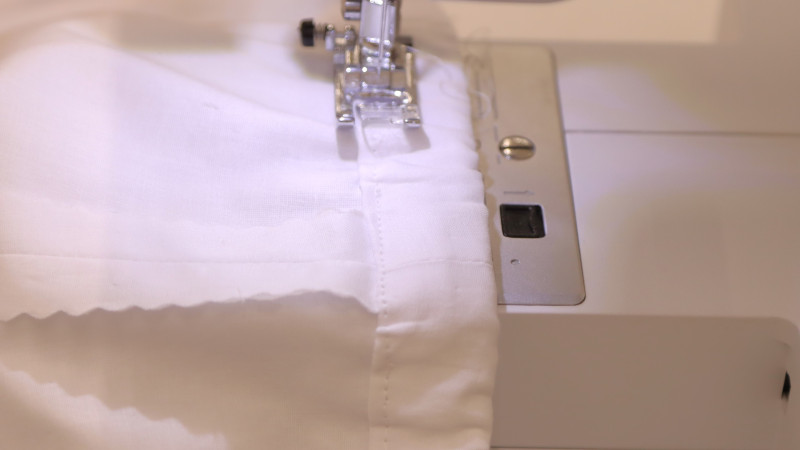
Step 16
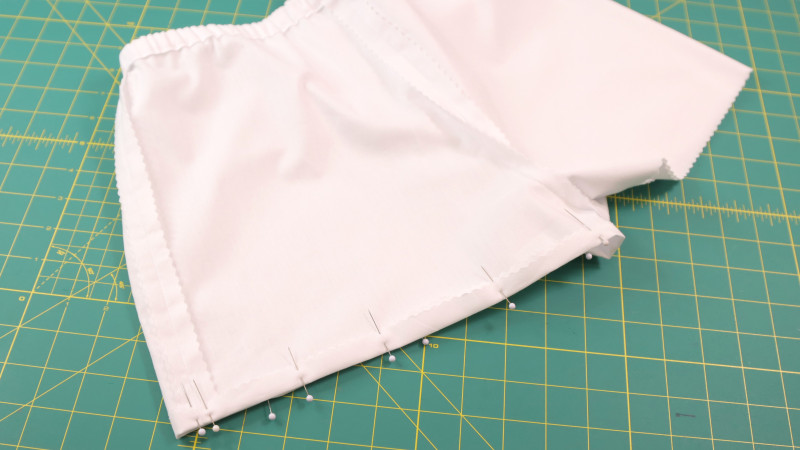
Sew front and back together at the inseam of the shorts.
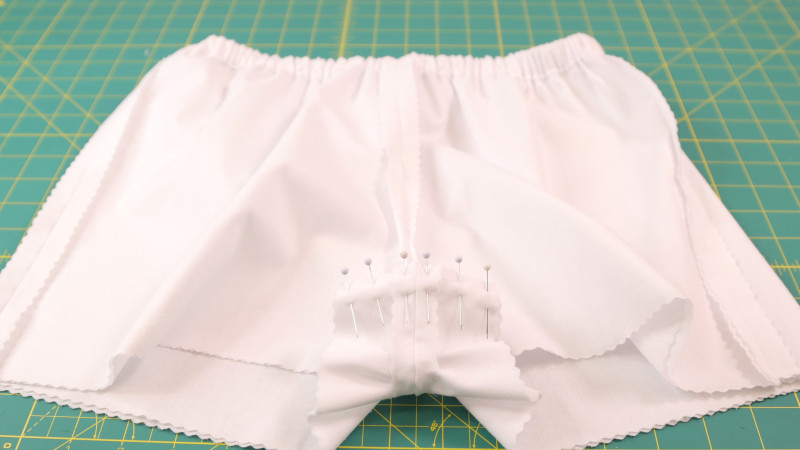
Step 17
Sew the bottom hem for both sides of the shorts.
Step 18
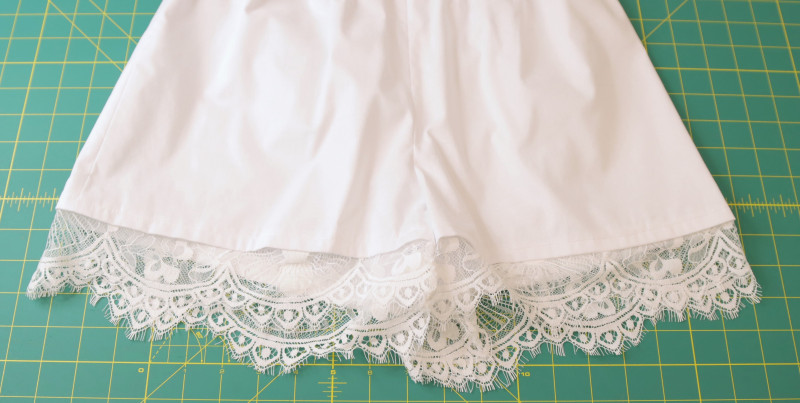
Sew the lace trim around the bottom of the shorts.
Feel free to share your completed sleep set pattern on social media to inspire others and showcase your hard work! Share this post with a friend (or two!), download The Mackenzie Sleep Set Free Sewing Pattern, and show us which fabrics and colors you choose, using the hashtags #MoodSleepSetPattern & #MadeWithMood.

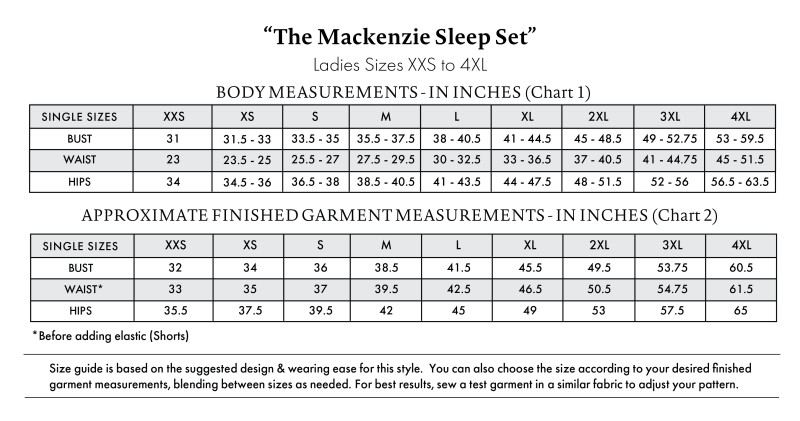
Just printed this new pattern out, can someone help? Body and garment measurements are in xxs to 4xl, however the pattern is drawn to size 00 to 32. How do I know what a 2xl is on the pattern?
Hello, please excuse the error, the pattern download has now been updated to match the XXS – 4XL sizing.
Just once, it would be nice to see the designs modeled on an average size woman or a variety of sized women. It gets old seeing the size 2.
We appreciate your request and will keep it in mind for future patterns.
Happy Sewing!
The MoodSewciety Team
As a teenage girl with a ‘average size woman’ who is far from a size two, I have experienced the harsh reality of how or world views the female body and beauty standards, and how most models are in fact much slimmer than I am, however I want to remind you that leaving comments worded like this put down the woman modeling this set, because she is ALSO an average size woman, and when you put her down, you are also shaming her body too. Even if you are trying to say that you want more variety, you don’t have to add the implements attitude with the “just once” and “it gets old.” I agree with you in the sense that a variety of sizes is really important, but wording is everything when you say it like that. A helpful way to convey your opinion would be; “I would like to see are larger variety of sizes for the women modeling the clothes.” Or, “Can you please include plus size and medium size models to the display pictures?”
Body positivity and inclusivity goes all ways. If we want to see models like us, we need to be kind the models who are different, just like we want for medium+ women. Also, when you ask kindly, you are so much more likely to get what you want.
Hi folks, this is a little confusing as the pattern download says to cut 1 x front and 1 x back… And here you have 2 x front and 2 x back… Do the pattern / instructions need adjusting?
Hello,
Due to the translucent fabric, we cut 2 of each pattern piece to self line the garment. If you are using a fabric that is opaque, you can sew this sleep set by cutting 1 of each pattern piece and hemming the raw edges.
The pattern pieces indicate only one top front and 1 top back need to be cut, but these instructions are asking for 2 layers of each to create a facing/lining. Will you please update either the pattern or these instructions? Thanks!
Hello,
Due to the translucent fabric, we cut 2 of each pattern piece to self line the garment. If you are using a fabric that is opaque, you can sew this sleep set by cutting 1 of each pattern piece and hemming the edges.
I downloaded the pattern and all the pieces for the top say to cut 1., nothing about a lining. Do I cut 2 of the same material or use different material for the second layer. that is referenced in Steps 2 and 4. Then does that mean the shorts are only 1 layer thick or should there be multiple layers there too.
Hello,
Due to the translucent fabric, we cut 2 of each pattern piece to self line the garment. If you are using a fabric that is opaque, you can sew this sleep set by cutting 1 of each pattern piece and hemming the edges.
Is seam allowance included with the pattern?
1/2″ seam allowance is included in all of our patterns.
Do you need to sew the bottoms inside out, it is hard to tell because of the white fabric
Yes, this way the seams allowance will be on the inside of the shorts.
Gracias me llego,
How to know which size to cut . I am a size M but i don’t know which size from 00 to 32 to cut can you help me
Hello, a size medium would translate between sizes 8-14.
There is a flaw in the descriptions. The pattern states just one front and one back piece, but the description states 2 front and 2 back pieces….
Hello,
Due to the translucent fabric, we cut 2 of each pattern piece to self line the garment. If you are using a fabric that is opaque, you can sew this sleep set by cutting 1 of each pattern piece and hemming the raw edges.
Hey Mike — The size chart shows XXS thru 4XL, while the pattern has sizes 00 thru 32 and many more sizes than the size chart. How do these correspond please? Thank you.
Hello, please excuse the error, the pattern download has now been updated to match the XXS – 4XL sizing.
Thanks!
Hola supongo sera este el formulario que debo llenar para ppder descargar…
Gracias x brindar tantos patrones y tan hermosos..
Saludos desde Argentina
Thank you for this pattern!!! I am a VERY BEGINNER sewer. I had to backpedal and redo the straps as I had them facing up and not down and sewed them into the wrong side of the garment. I assume this is a ‘beginner problem. All in all, I am VERY PLEASED with how this turned out. I can’t wait to tackle the next Mood project!!
Unfortunately the printed pattern sheets don’t meet correctly.
Sheets A7 to A10 are all incorrect even though all the markers for putting the sheets together are meeting.
I haven’t tried putting the rest together because I know it won’t fit.
The lines should align when the markers meet. The borders of the pages have to overlap each other, making sure the grey circles (found on each corner) match up one on top of the other. Follow the instructions on page 1 to assemble your pattern, choosing between the trimless and trimmed versions. Additionally, ensure that the Mood square on page 1 and the print test square on page A1 measure exactly 2 inches on each side. If they do not, adjust your printer settings accordingly.
Hi new to the site and not sure where to download the pattern from. Could someone please help?
Hello, to receive the free pattern, you will have to scroll down to the box that says “subscribe and download The Mackenzie Sleep Set Sewing Pattern” above the size chart.
Bonjour. Pour le haut si je ne double pas il faut des parmentures je suppose ? Merci par avance pour votre retour
Oui, si vous souhaitez le coudre avec une parementure, vous pouvez raccourcir le patron pour vous concentrer uniquement sur la couture des décolletés.
Hi there, my pattern isn’t showing on he neck piece for the bottoms.
If you mean waistband, it is included in the shorts pattern, see the lines at the top. Fold the middle line inward and sew at the bottom line to create the casing. The three lines of the elastic casing represent the seam allowance, the fold line, and the sewing line.
Should I turn the straps inside out after stitching the right sides together?
Yes, after sewing the straps, use a loop turner to turn the straps right side out. Trim the seam allowance so it doesn’t create bulk on the inside.
It would be nice to see how to put this pattern together, the numbers are confusing and the boxes aren’t lining up.
Hello, please have a look at our youtube tutorial on How to assemble PDF sewing patterns.
Hola me gustaría aprender hacer esta pijama saludos desde Caracas Venezuela
Hola, puedes descargar el patrón de costura gratuito y seguir las instrucciones en la publicación del blog.
Hi! I have just finished sticking the pattern together and have a question about piece D and E (shorts). When I look at the pattern lines, there are three “options” where I could cut the upper end. Where should I cut? Do these “options” another purpose? I’m a sewing beginner and have never made shorts or pants before.
Hello, the lines on the top of the shorts pattern represent the seam allowance and the fold line where you will create the casing to insert the elastic
He descargado el patrón. Según mis medidas el top es más pequeño que el pantalón .3xl y 4xl. Lo que no me queda claro es como coser el escote del top si solo voy a usar una tela sin forro..
Hola Sonia
Puedes usar diferentes tallas para el top y el short de acuerdo a tus medidas.
Si no vas a usar forro, te recomiendo que hagas un dobladillo tubular al escote y luego coses el encaje por el lado del revés como hicimos nosotros en el paso 8 para que el look te quede igual al de la modelo.
What is the cup size for the top? Is it different for the different sizes?
Hey Heather, the top doesn’t have structured cups and it is cut on the bias, so the area around the bust is able to stretch and give a little bit. Additionally, you can check the finished garment measurements against your own body measurements to decide how loose fitting you want the top to be around the bust. I hope that answers your question!
Is it better to cut along the lengthwise or crosswise grain for the pattern?
Hello, make sure you follow the arrows on each pattern piece, as you want the fabric of the garment to stretch in a horizontal direction.
When cutting the shorts front and back what do the different line segments at the top mean? Would these be cut depending on elastic width or based on the length you want them to be
Hi Katie! This is a great question. The top line on the shorts pattern indicates where you should fold the fabric to create a channel for the waistband. The bottom line on the short pattern indicates where you should sew a seam to close that channel. This will ensure that the channel is a consistent height on the entire waistband of the shorts. I hope this helps you on your sewing journey!
es recomandable cortar en el recto hilo??
Sí, debes cortar al bies a menos que estés utilizando una tela tejida o no elástica.
Hi if I just want to make the top how many yards should I buy?
For a size small, just a yard. For a medium or large you might want 1.5-2 yards.