

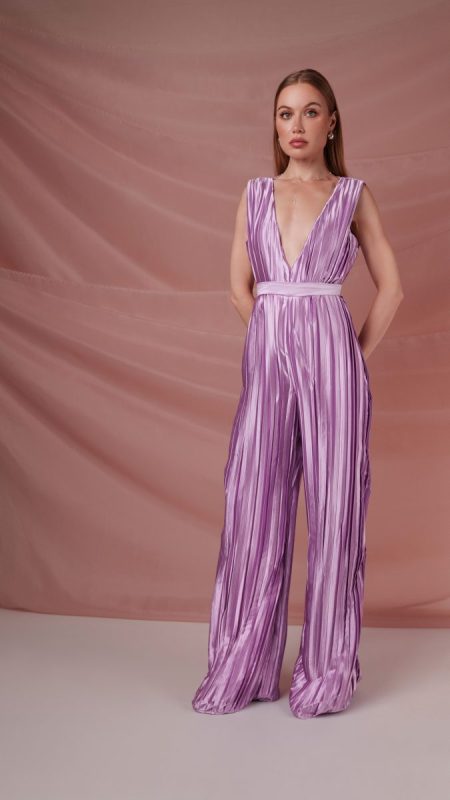
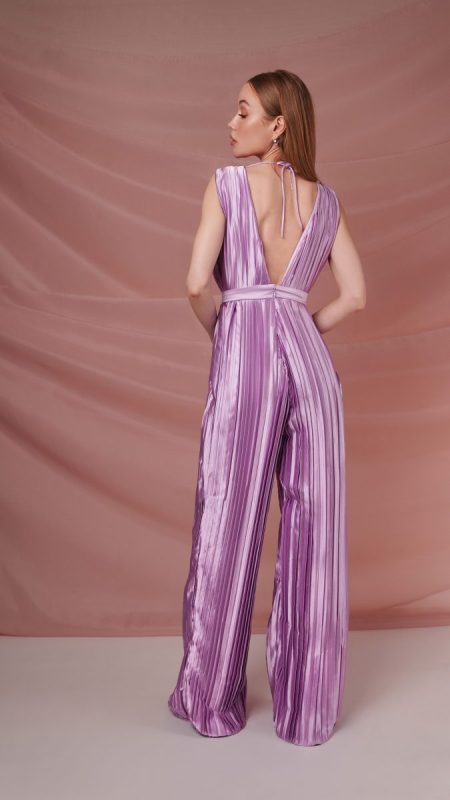
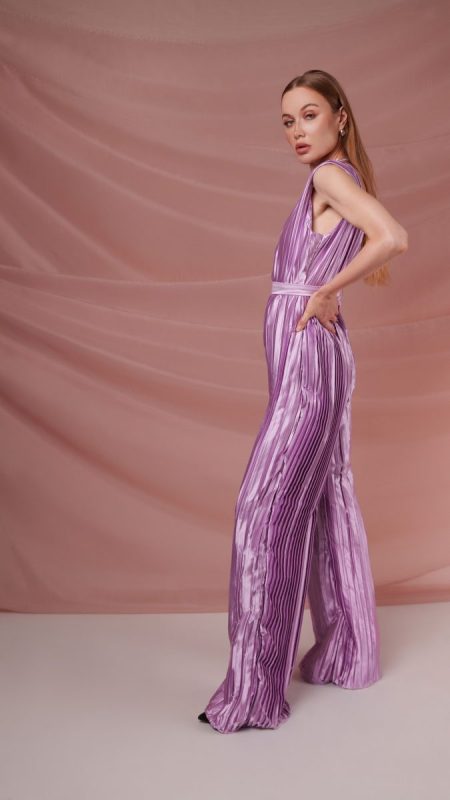
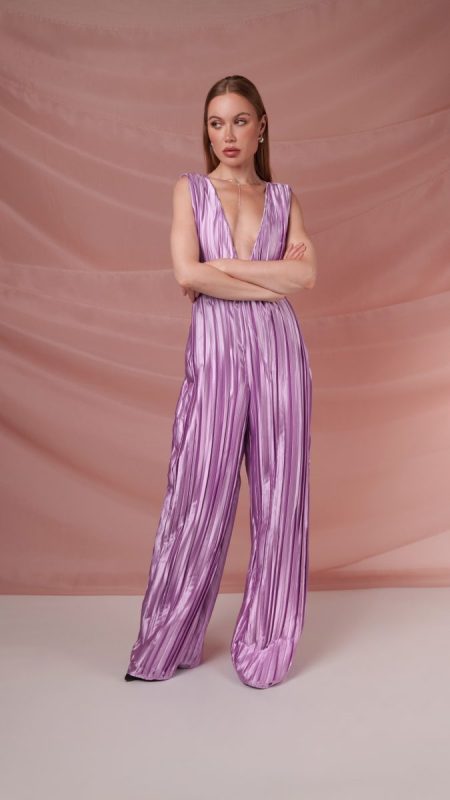
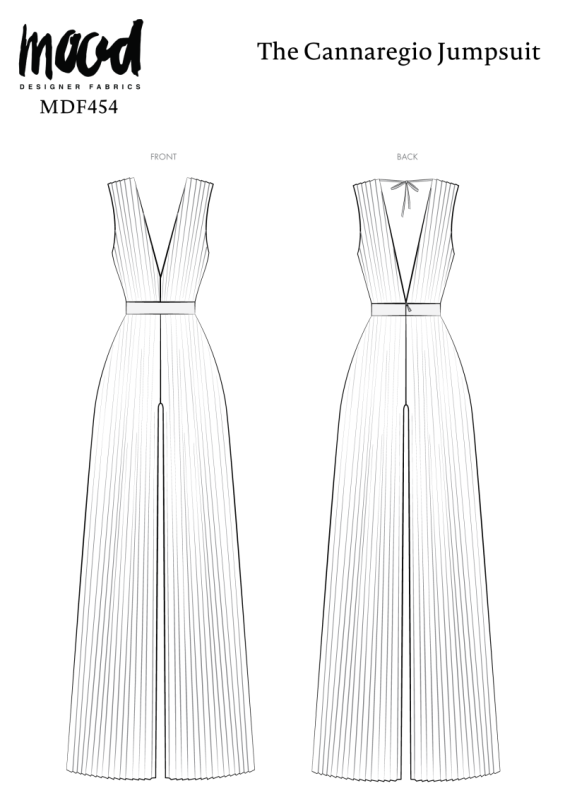
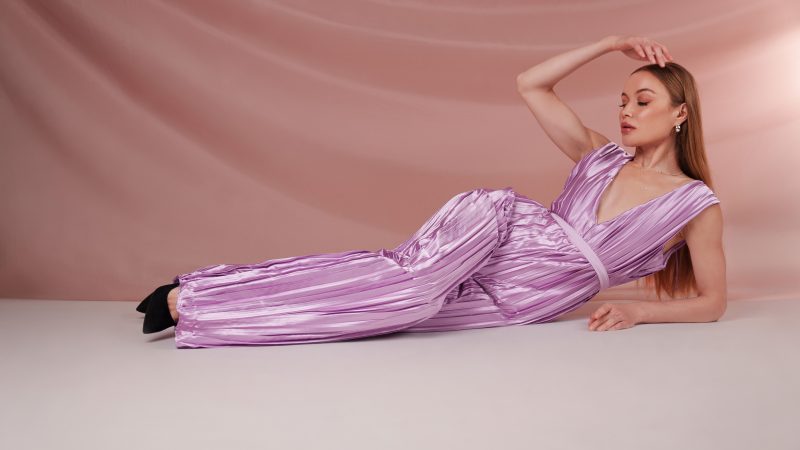
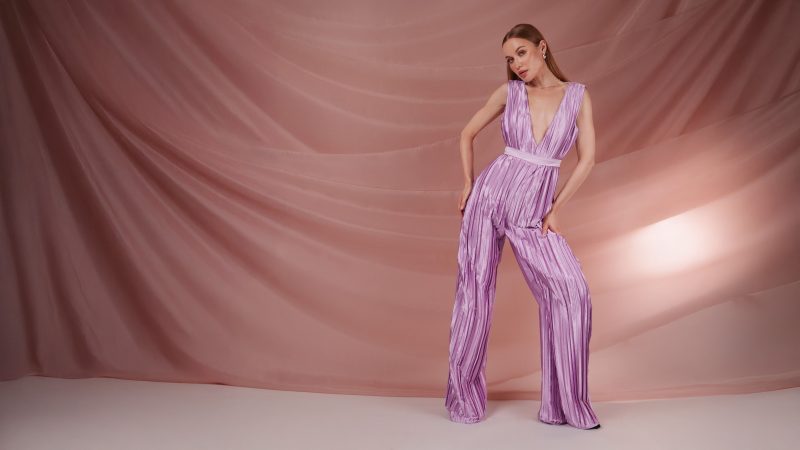
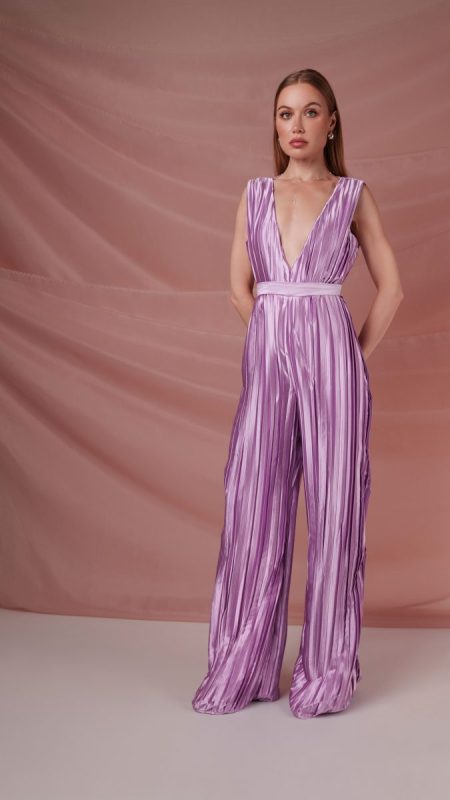
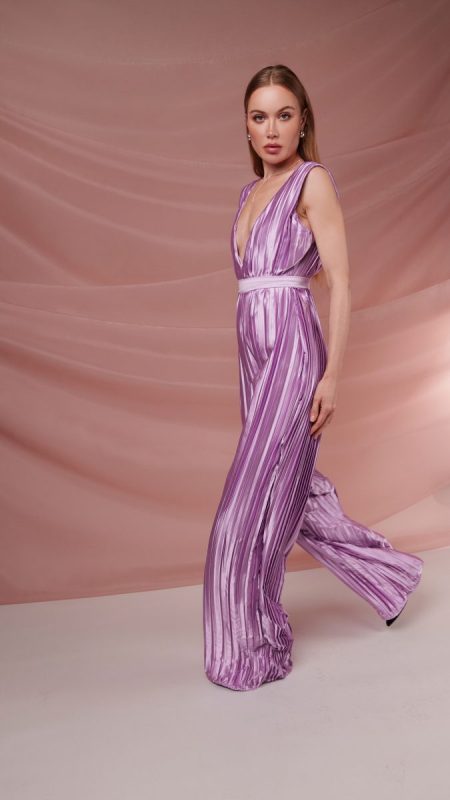
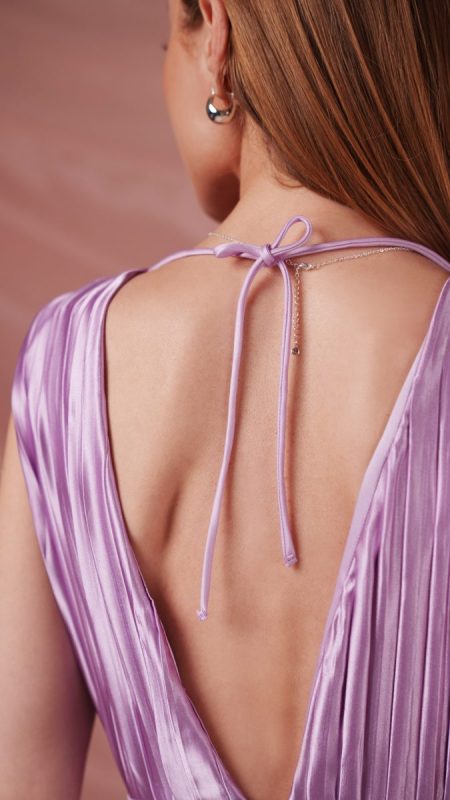
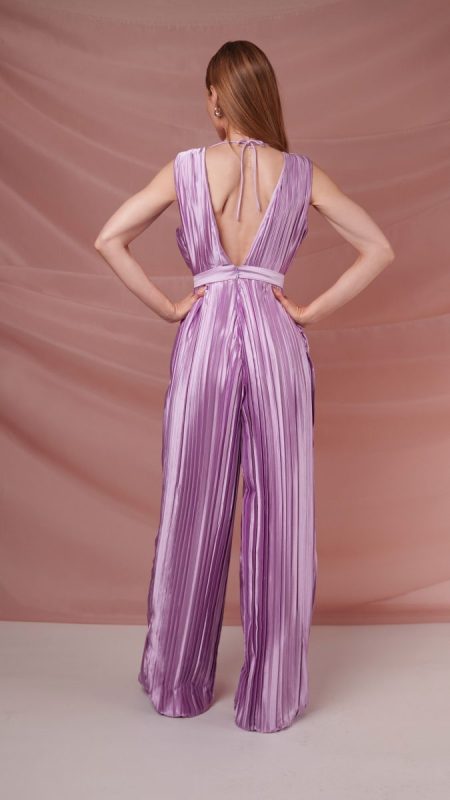
Say hello to the Cannaregio Jumpsuit, our newest free sewing pattern that’s a real pleat-ure to create. This isn’t just any jumpsuit—it’s a chic, ultra-wide-leg wonder that’s perfect for turning heads. The deep v-neckline and tie-back closure are the cherries on top of this beautiful design. While our original is a stunning orchid purple, imagine this jumpsuit in a range of fabrics from a sleek stretch satin in emerald green to a playful fuchsia crepe de chine.
Are you ready for a sewing pattern that’s sew-phisticated, yet sew-per comfy?
More than just a summer fling; the Cannaregio Jumpsuit is a versatile piece that will take you from sightseeing to nightlife and beyond. Inspired by the vibrant Cannaregio district of Venice, this jumpsuit is your perfect companion for relaxed conversations over dinner or a fun night out at a wine bar. It’s a true workhorse in your wardrobe and will quickly become a sewing staple you come back to again and again.
While our version is sleeveless and sewn in a gorgeous pleated satin, don’t forget you can mix it up! You can give your jumpsuit a more casual feel by choosing a cotton poplin or linen. For a winter-ready look, you could even try a cozy velour and layer it with a cardigan or sweater.
The styling opportunities for the Cannaregio Jumpsuit are truly un-sew-n. For a bit more coverage, you can easily sew a modesty panel or built-in tank from a sheer or opaque fabric, or simply layer a tank or long-sleeved shirt underneath. You can also increase the height of the center front seam to your desired length. While the pattern is pocketless, adding pockets to the side seams is a simple modification that will add a functional flair. If you’re feeling extra creative, you can gather the bottom of the pants and sew an elastic cuff for a trendy balloon-pant silhouette.
No matter how you choose to make and style it, the Cannaregio Jumpsuit is a pattern that’s sure to get you lots of compliments. So, grab your fabric, thread your machine, and let’s get sewing!
Essential Materials & Sizing Guide for the Cannaregio Jumpsuit
Continue reading for a breakdown of what knowledge and materials you need for creating your very own jumpsuit! We’ve got you covered with the recommended materials we used—if you want to follow along exactly—as well as a curated list of alternative fabric type recommendations if you want to customize your own version. The Cannaregio Jumpsuit free sewing pattern download includes technical drawings for seam and silhouette visibility, plus a size chart to help you find your perfect fit!
Purchase Products Used Below:
Quantities indicated are for sewing a size small jumpsuit. Toggle the ‘SHOP THIS LOOK’ box to find quantity estimates for other sizes.
- 3.5 yards of Pleated Stretch Satin – Radiant Orchid – Andreas Collection
- 3 yards of Polyester Satin – Lavender – Reverie Collection
- 0.5 yards of White Non Woven Single Side Fusible Interfacing
- 1 each of Invisible Zipper 24″ by YKK – 552 Orchid
- 1 each of Gutermann Sew All Thread 250m – 926 Orchid
- 4 each of Maxi-Lock Serger Thread 3000yds – Orchid
- MDF454 – Cannaregio Jumpsuit Sewing Pattern (Free download below!)
Additional Products Used:
- 1 each of Dritz Loop Turner
- 1 each of Dritz Extra-Fine Satin Pins Size 17 – 1-1/16″ – 400 ct
- 1 each of Schmetz Microtex Sharp Machine Needles – 70/10 – 5 ct
Alternative Fabric Recommendations:
The Cannaregio Jumpsuit sewing pattern is best suited for medium weight fashion fabrics. Explore other fabric types or colors from our featured collections for your silhouette with the links below.
- Crepe Fashion Fabrics
- Pleated Fashion Fabrics
- Plisse Fashion Fabrics
- Satin Fashion Fabrics
- Velour Fashion Fabrics
Fabric Collections Used in this Post:
Download Your Free Sewing Pattern
Submit your name and email in the form below to receive the download link for the Cannaregio Jumpsuit free sewing pattern directly in your inbox. Mood Sewciety Patterns will send your free download link via email with the subject line: ‘Your Free Download from Mood Sewciety – The Cannaregio Jumpsuit’ (in PDF format for A4 and letter-size printing).
Find Your Perfect Fit
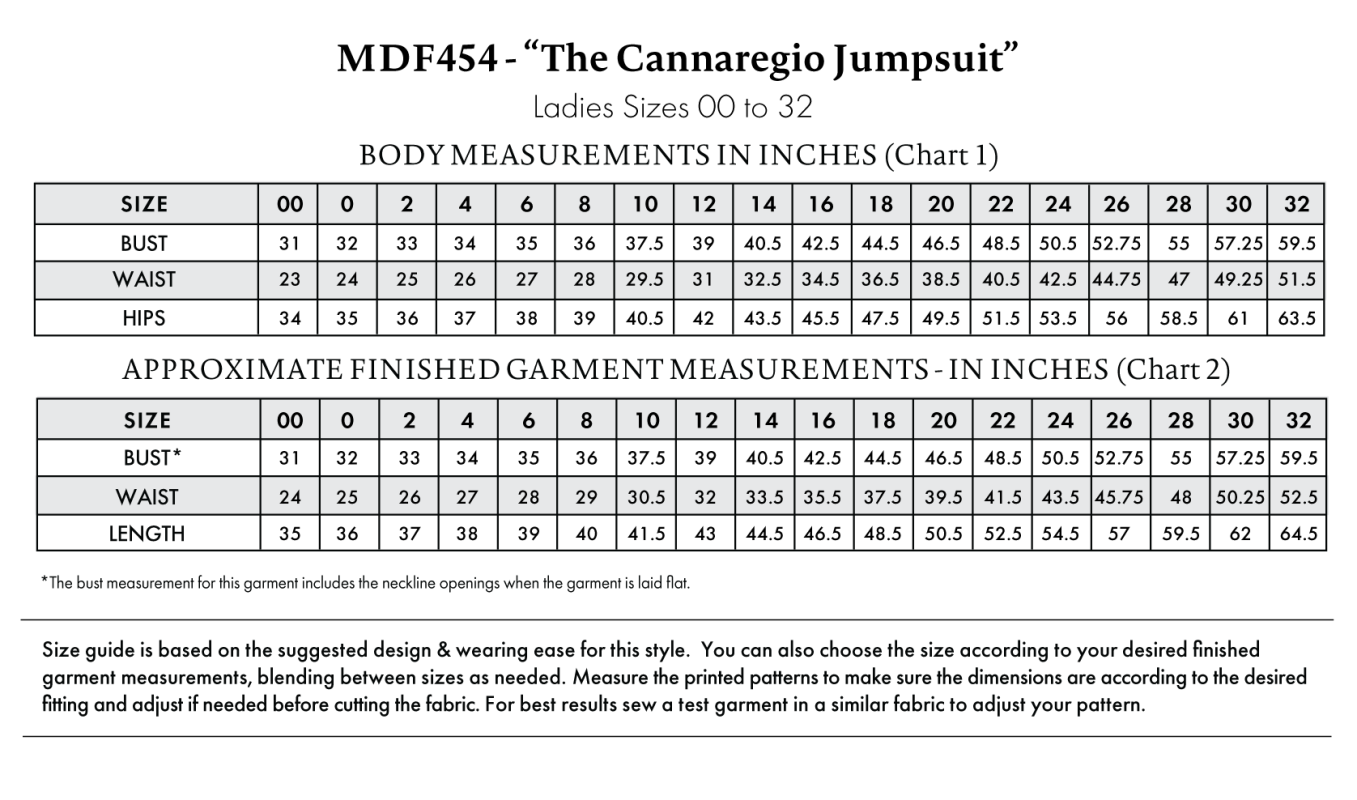
The Cannaregio Jumpsuit Sizing Guide is based on the suggested design & wearing ease for this style. You can also choose the size according to your desired finished garment measurements, blending between sizes as needed. Measure the printed patterns to make sure the dimensions are according to the desired fitting and adjust if needed before cutting the fabric. For best results, sew a test garment in a similar fabric to adjust your pattern
Note: Measurements may vary after adjustments. If using non-stretch or non-pleated fabrics, reference the approximate finished garment measurements chart to choose your size.
*The bust measurement for this garment includes the neckline openings when the garment if laid flat.
Important: Always read all the instructions before cutting the fabric!
How To Sew The Cannaregio Jumpsuit
The instructions provided below are designed to guide you through sewing the Cannaregio Jumpsuit from start to finish.
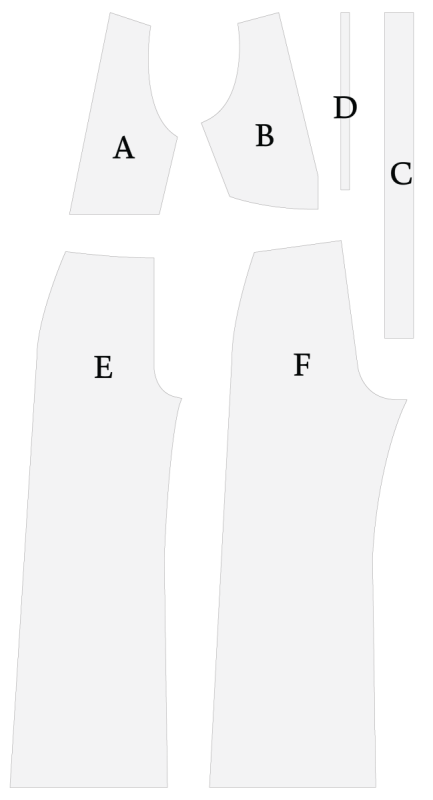
Pattern Pieces & Fabric Cuts Needed
- (A) TOP BACK
- Fabric – Cut 2 Mirrored
- Lining – Cut 2 Mirrored
- (B) TOP FRONT
- Fabric – Cut 2 Mirrored
- Lining – Cut 2 Mirrored
- (C) WAISTBAND
- Fabric — Cut 2 Mirrored
- Interfacing — Cut 2 Mirrored*
- (D) BACK CLOSURE TIES
- Fabric – Cut 2
- (E) PANTS FRONT
- Fabric – Cut 2 Mirrored
- Lining – Cut 2 Mirrored
- (F) PANTS BACK
- Fabric – Cut 2 Mirrored
- Lining – Cut 2 Mirrored
*Interfacing is optional.
5 Tips for Sewing with Stretch Pleated Satin
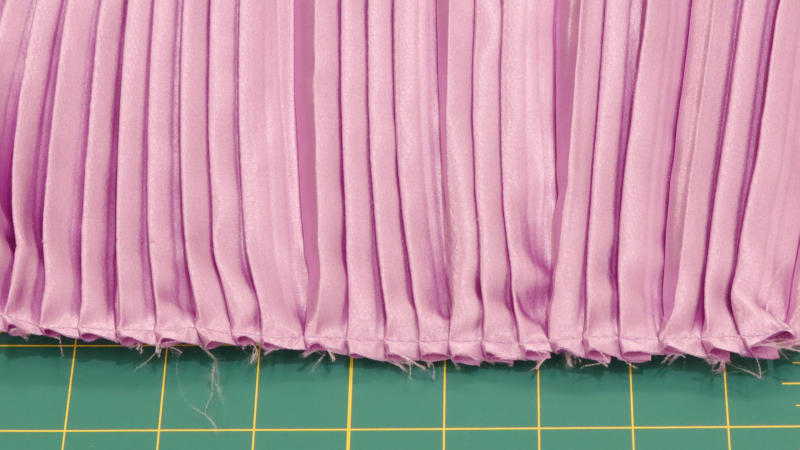
⇒ Baste stitching the pleats of the fabric before cutting out the pattern is highly recommended. The pleats may shift as you cut, which could cause a change in the size.
⇒ Cut a single layer of satin at a time in combination with pattern weights and a rotary cutter.
⇒ Avoid using any marking tools that require water to remove—as water can stain satin. Use tailor’s chalk, thread tacking, or a heat erasable pen, being sure to always test on a scrap piece of fabric first.
⇒ Since satin frays easily, it is important to finish your seams. For a clean, professional look, a serger is ideal; however, an overlock or zigzag stitch can work just as well.
⇒ Press pleats, rather than gliding the iron back and forth. If the pleats lose their shape, mix a water and white vinegar solution to re-press them—being sure to use a press cloth as well as testing a scrap piece of fabric first.
Sew with a 1/2″ seam allowance for all seams unless otherwise specified.
Step 1
BACK CLOSURE
(D) BACK CLOSURE TIES
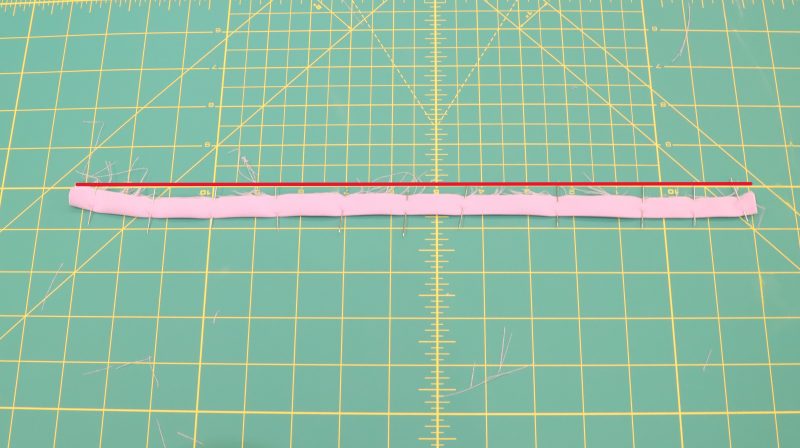
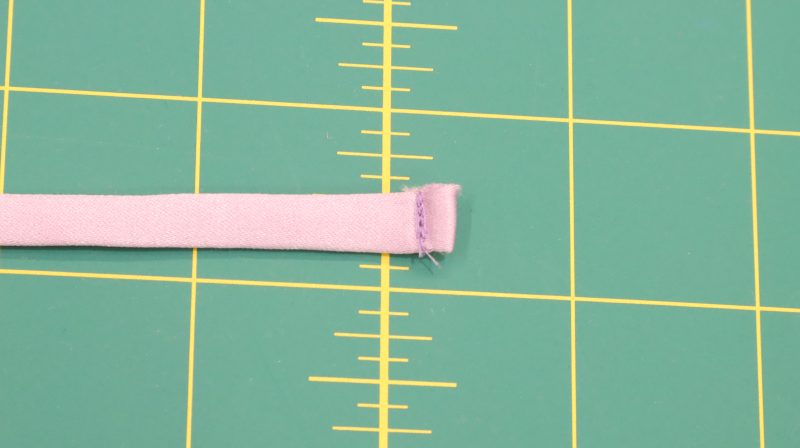
- Fold the bias cut straps in half—length-wise, and pin.
- Sew a straight stitch an ⅛” away from the open edges.
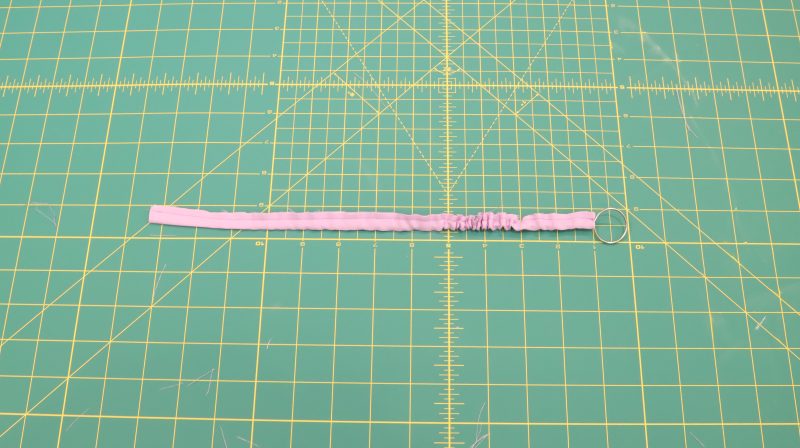
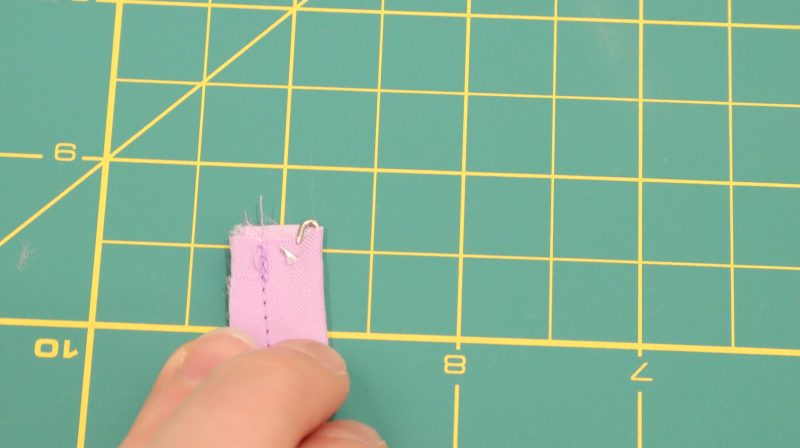
- Insert loop turner inside the strap.
- With the bottom of the hook, capture a small part of the fabric.
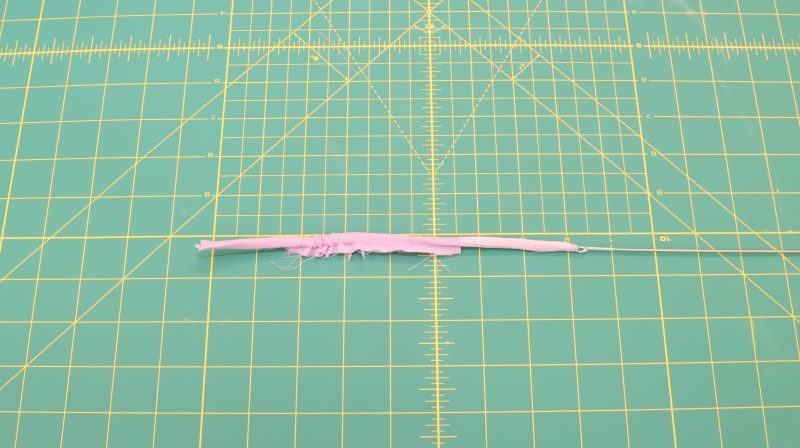
- Push the strap from the bottom up and slowly turn the strap to the outside.
- To finish the edge, fold twice and edge stitch the fold.
⇒ PRO TIP: Cut out the back closure ties on the bias.
Step 2
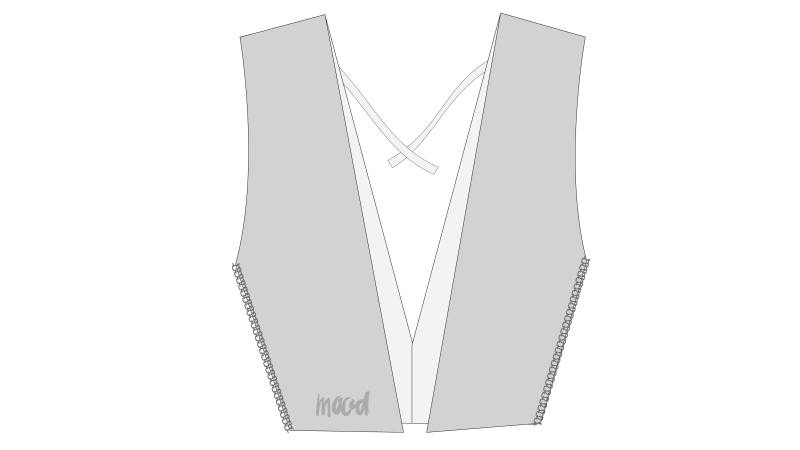
TOP BODICE
(A) TOP BACK, (B) TOP FRONT
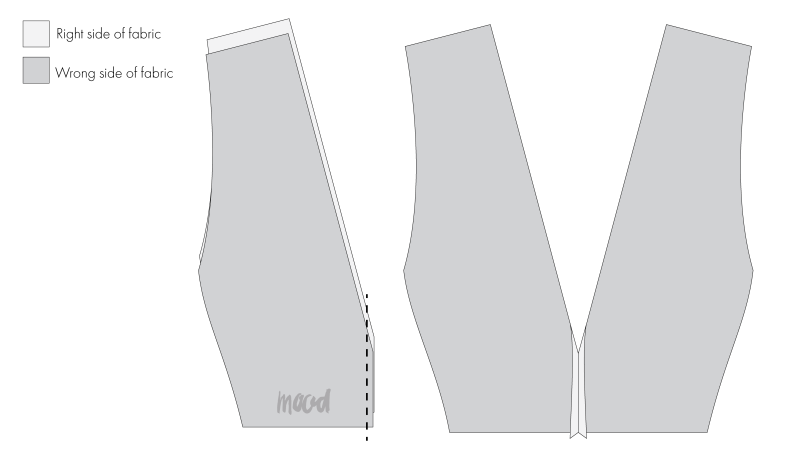
- Pin the top front pieces together at center front, with right sides facing together.
- Sew with a straight stitch down center front using a ½” seam allowance.
- Press the seam open.
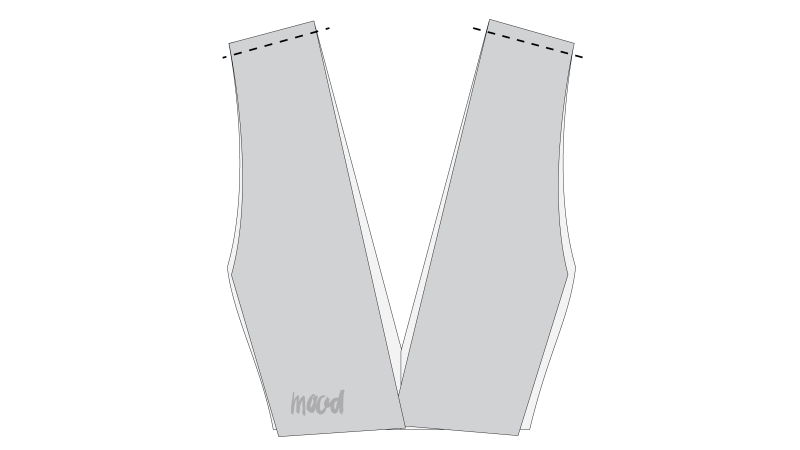
- Next, pin the top front and top back pieces together across both shoulders.
- Sew together using a straight stitch, allotting for a ½” seam allowance.
- Press the seams open.
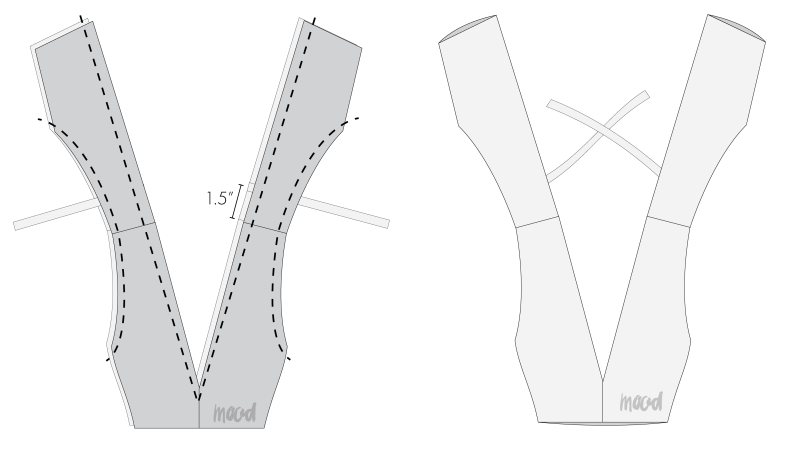
- Then, pin the lining to the shell bodice, with right sides facing together. Sandwich the straps, placing them in between the top back shell and lining, 1.5″ down away from the shoulder seam.
- Sew with a straight stitch down the necklines and armholes using a ½” seam allowance.
- Turn the bodice right side out.
Repeat the above steps for the front top and front back lining pieces.
- With the bodice wrong side out, match the front and back side seams, and serge them together.
- Alternatively, you can also finish this step with a French seam.
Step 3
PANTS
(E) PANTS FRONT, (F) PANTS BACK
- Make sure your pleats are basted around the waist, crotch, and hem. This will keep them in place as you sew the following steps.
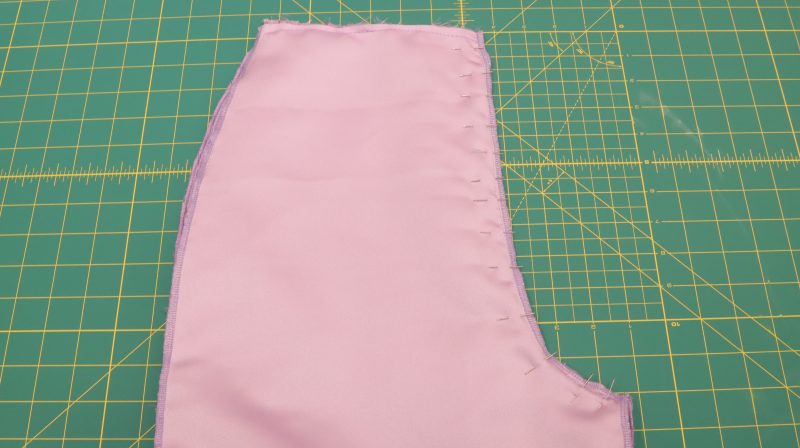
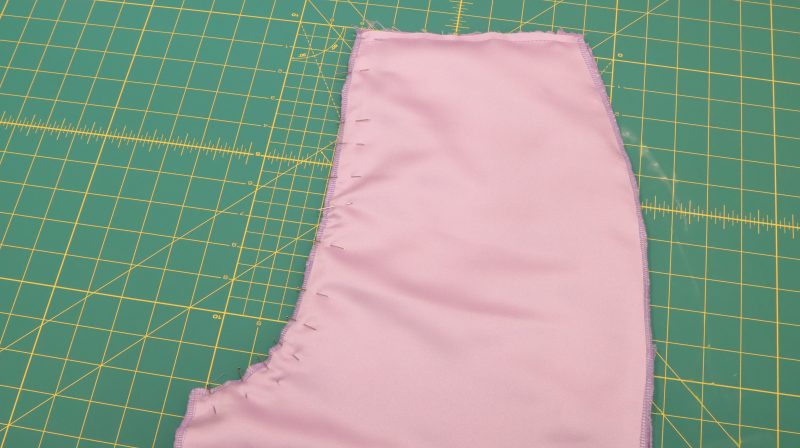
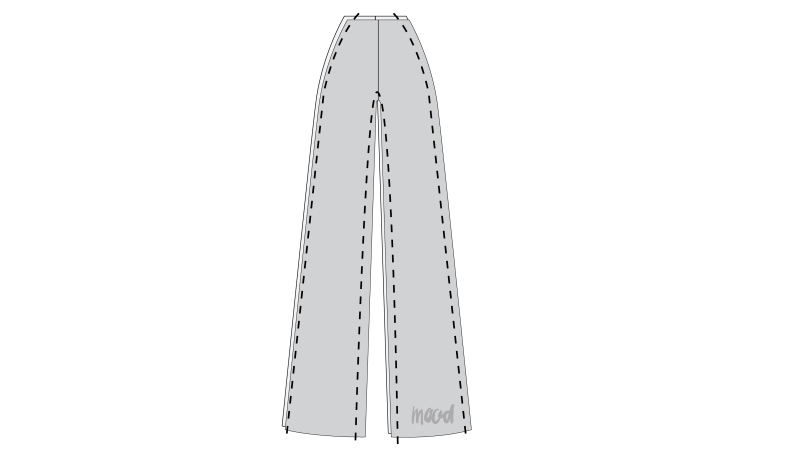
- Pin front sides facing right side to right side along the crotch line. Sew with a ½” seam allowance.
- Pin back sides facing right side to right side along the crotch line. Leave the section for the zipper open, starting from the waist down. (This opening typically ranges from 7″ to 10″, depending on the pant size). Sew using a ½” of seam allowance.
- Pin front and back pieces facing right side to right side along the outer and inner seams. Make sure to align the center crotch lines first. Sew using a ½” seam allowance.
- Repeat the same steps on the lining.
Step 4
PANTS HEM
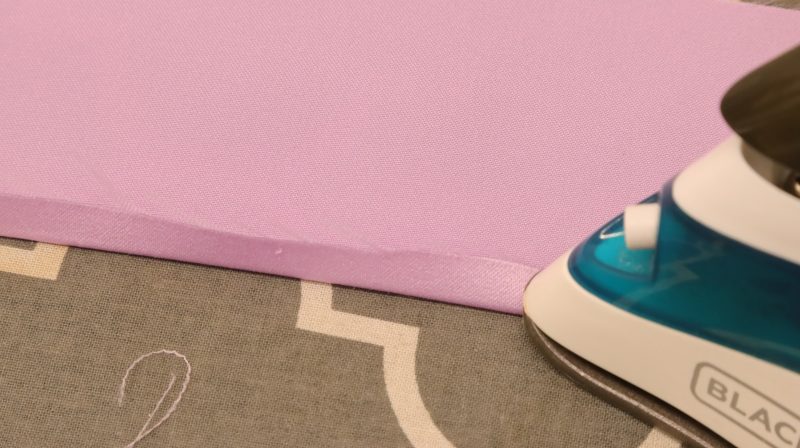
Hem the pants* using a rolled hem.
- Roll the hem up a ¼” to the wrong side.
- Press.
- Roll again, another ¼”; press.
- Then, edge stitch it.
Repeat the above steps for the pants lining.
*Keep scrolling for an alternative method.
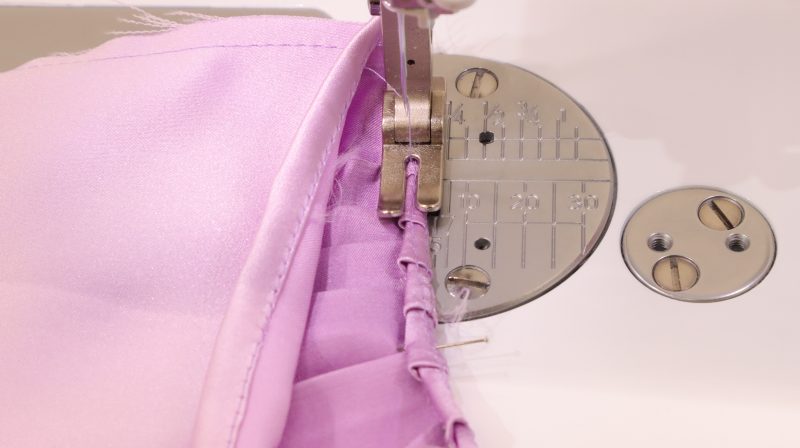
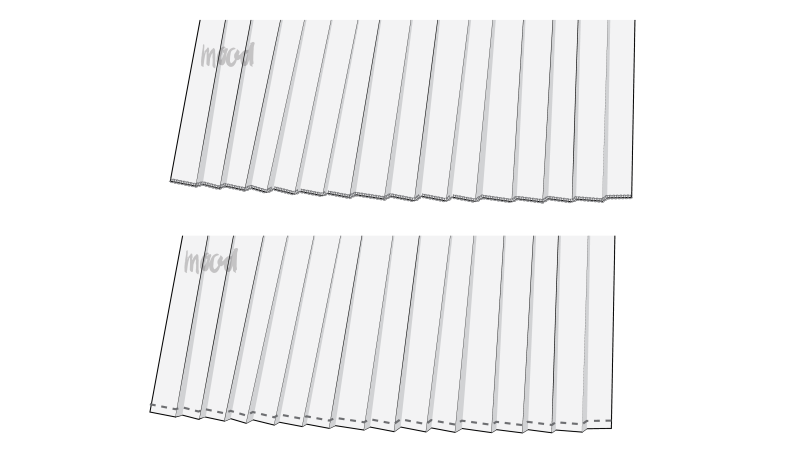
⇒ PRO TIP: You can also hem with the pleats open for a more fluid finish at the bottom of the pants.
- Sew a very narrow zig-zag stitch or serge as close to the raw pants hem as possible.
Step 5
ASSEMBLE WAISTBAND
(C) WAISTBAND
Optional: Lightweight Interfacing – Cut 2
- Cut two pieces of lightweight interfacing using the waistband pattern piece.
- Fuse interfacing to the wrong side of the waistband pieces.
Start here if not using interfacing:
- Fold a ½” along the short sides of each waistband to the wrong side; press.
- Place the waistband pieces together with right sides facing (wrong sides facing out), and pin along the top.
- Stitch from edge to edge across the top of the waistband, using a ½” seam allowance.
- Press the seam toward the one side of the waistband—this will be the “back-facing” side.
- Flip right sides out.
- Understitch the pressed seam to the waistband.
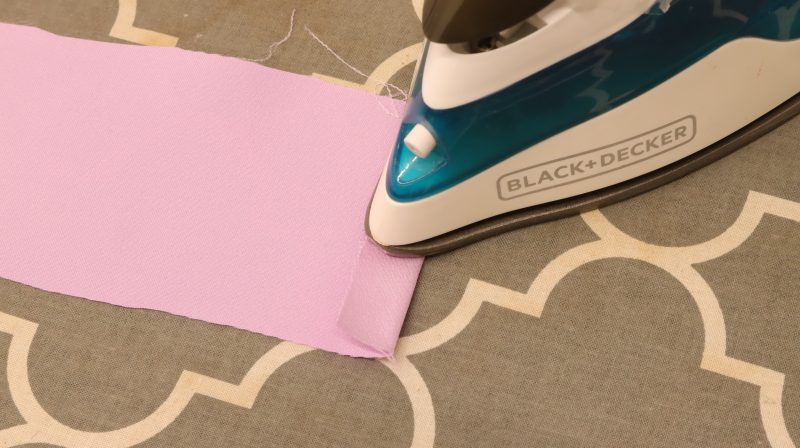
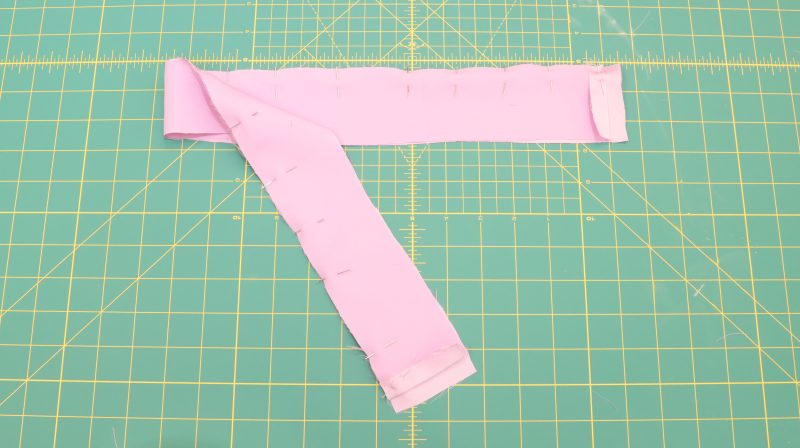
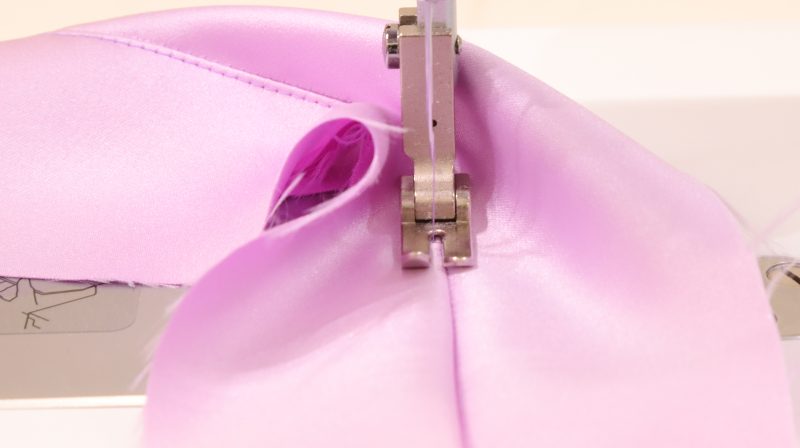
Step 6
PANTS LINING & ATTACHING WAISTBAND
- Turn the pants lining wrong side out and insert it into the pleated shell, which should be positioned with the right side facing out, so wrong sides are facing.
- Pin only the upper waistband along the pants waistline, aligning and securing all three layers together, (shell, lining, and waistband).
- Baste ⅜” away from the raw edge to hold all layers in place.
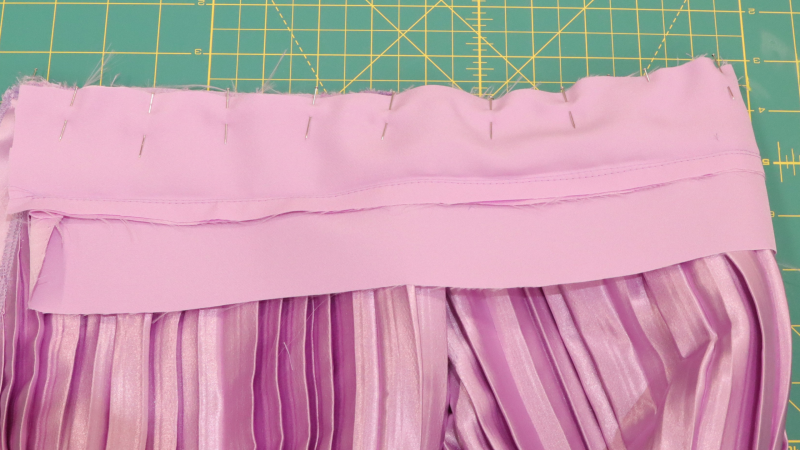
Step 7
INVISIBLE ZIPPER
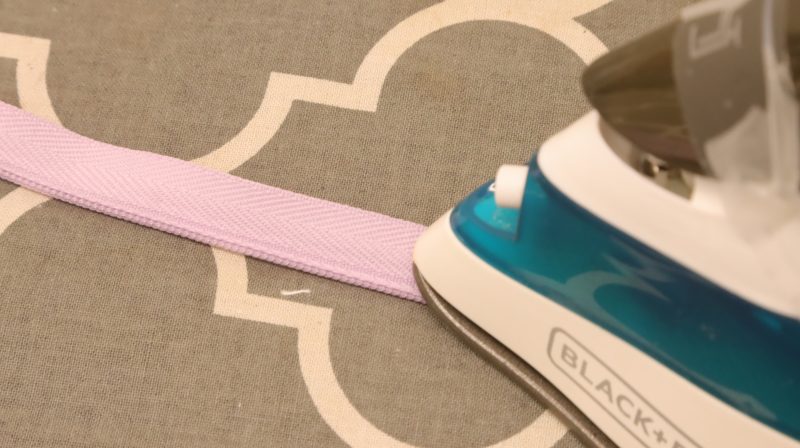
- Unzip the zipper; gently press the zipper coils flat (away from the zipper tape) with a warm iron (not too hot—it can melt plastic). This step makes stitching very close to the zipper teeth much easier.
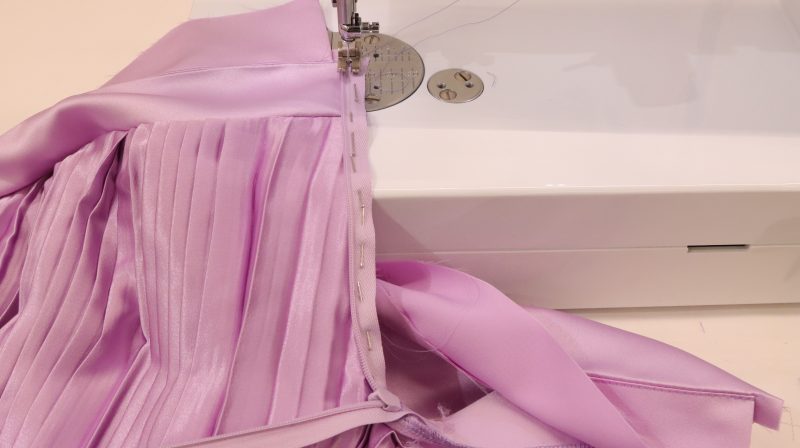
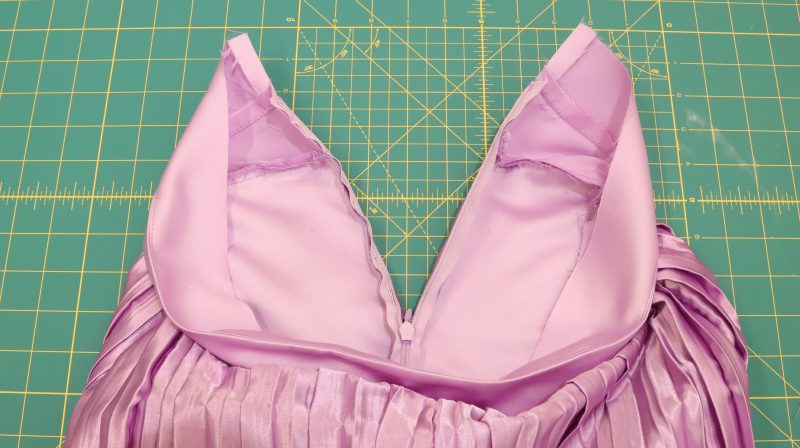
- With right sides together, align the zipper tape with the fabric edge while situating the zipper teeth outside the seam line (so that the teeth are a 1/16” past a ½” away from the fabric edge); ensure the zipper stopper is aligned with the top of the upper waistband*.
- Stitch close to the teeth, starting from the top.
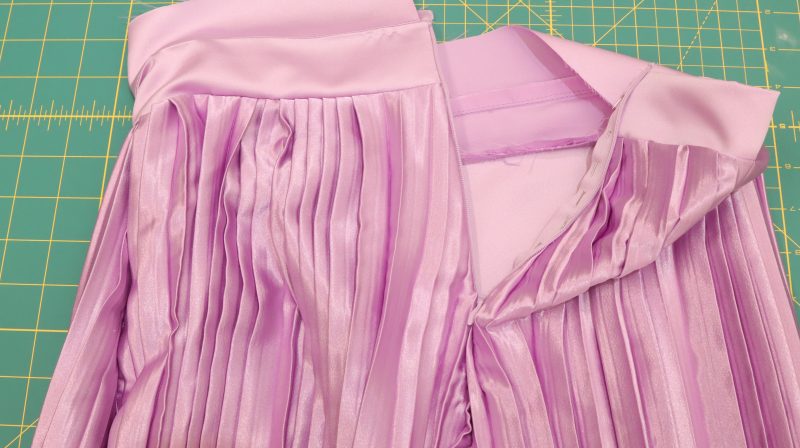
- Repeat steps 2–3 for the other side of the zipper: be sure to match the top edges, line up the zipper teeth with the seam line, and ensuring the waistline matches.
⇒ PRO TIP: *Sew a fine, narrow zig-zag stitch across the tops of the zipper tape, then trim the excess zipper tape. This will make it easier to match the zipper stopper/zipper pull to the top of the waistband. (Do this prior to sewing the zipper to the pants/waistband.
Step 8
BASTE INNER WAISTBAND
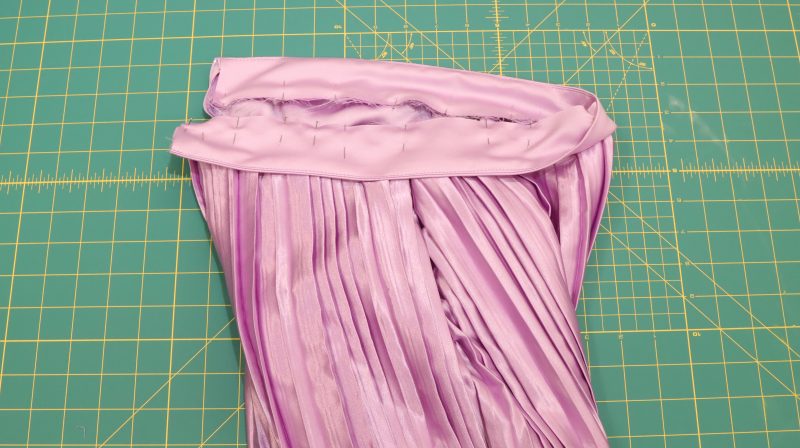
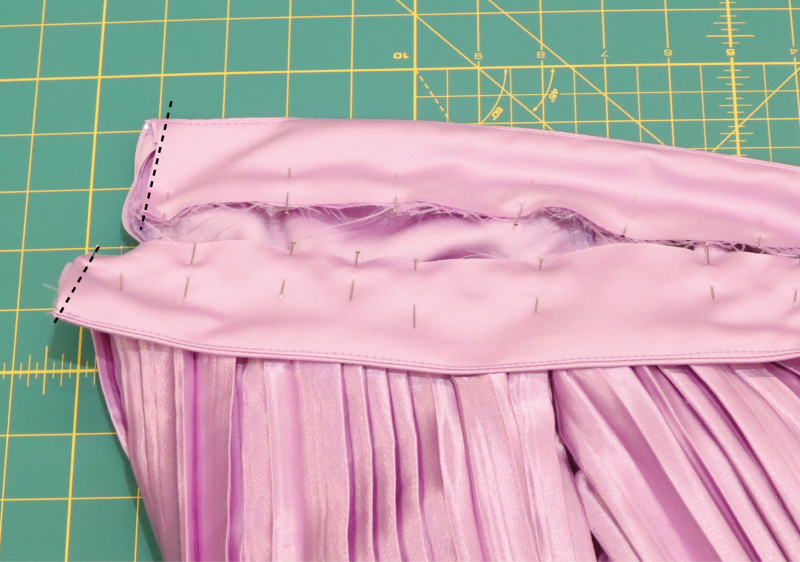
- Match the inner waistband edges down to the outer waistband edges and pin along the opened waistline edge.
- Baste ⅜” away from the edge.
- Sew the waistband opening near the top of the zipper.
Step 9
ATTACH BODICE AND PANTS
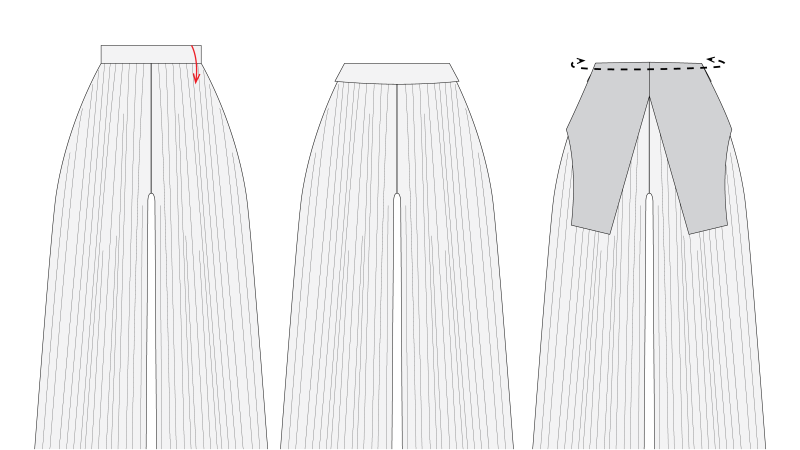
- Bring the waistband of the pants downward.
- Place the top over the pants, aligning the waistlines and matching the right sides together.
- Sew all layers of fabric together with a 1/2″ seam allowance. Make sure to start and end the stitch line before reaching the zipper teeth.
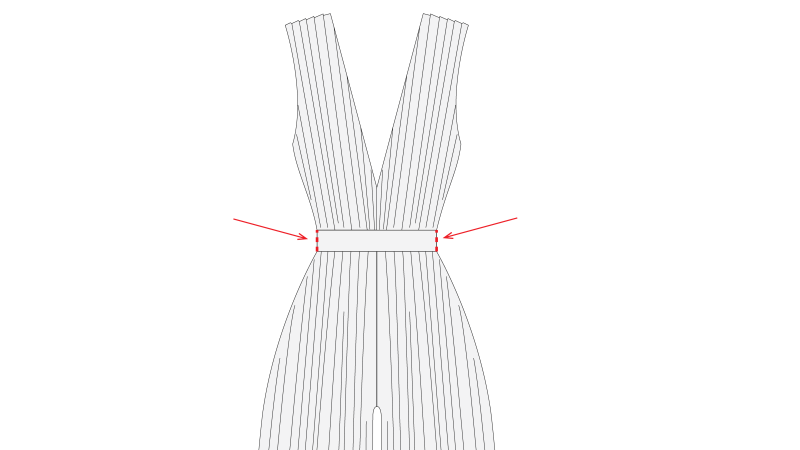
- Lift the waistband and secure it with a few stitches at the sides; these stitches should align with the side seams of the top.
- If you like, you can further secure the waistband with some invisible stitches along the top edge of the waistband.
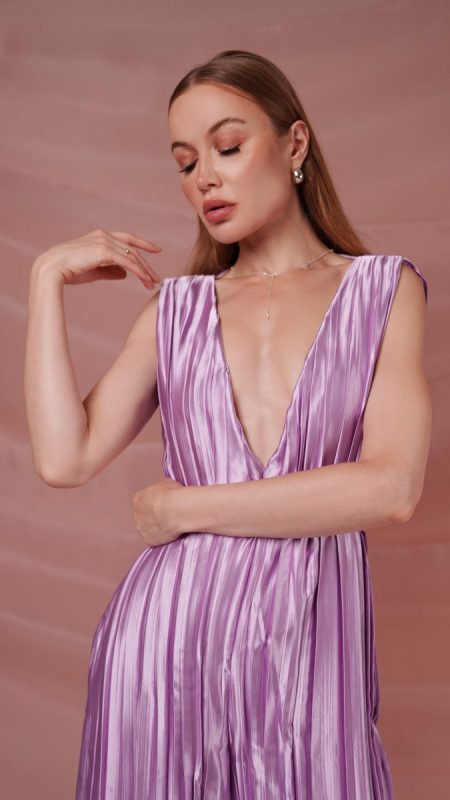
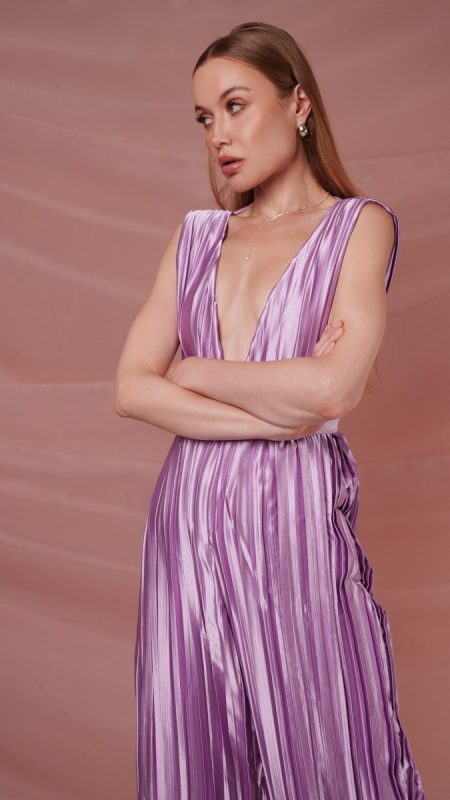
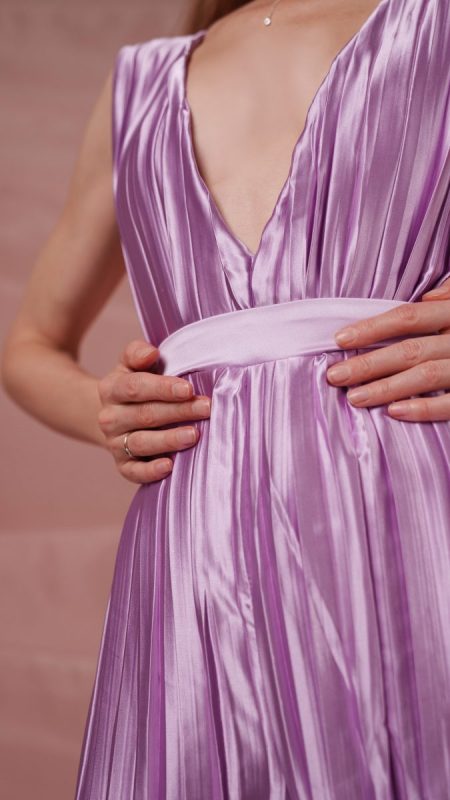
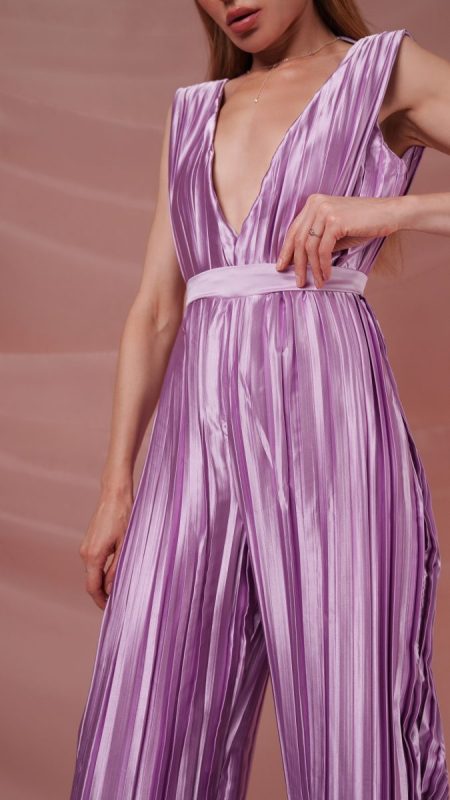
Sewing Success: The Finished Cannaregio Jumpsuit
Share this post with a friend (or two!), download the Cannaregio Jumpsuit free sewing pattern, and show us which fabrics and colors you choose, using the hashtags #MoodCannaregioPattern & #MadeWithMood—and don’t forget to tag us @MoodFabrics, too.
Free Sewing Pattern Inspiration for Your Next Project
With 450+ free sewing patterns and counting, your opportunities for sewing with Mood are endless!
We hope you had as much fun sewing this jumpsuit pattern as we did! As always, we want to hear from you—share your thoughts and comments below and let us know where you’ll be wearing the Cannaregio Jumpsuit free sewing pattern!

They are not plus sized available?
Hello, most of our patterns range from a US 00-32 pants/dress size and XXS-5XL alphanumeric size. Check our size chart with your measurements to see which size would fit you best!
This looks super fun! I will probably make it in a more casual fabric and wear with a t shirt underneath
Classy
Me gustaría el molde ,querida empresa porfa usted es muy buena