

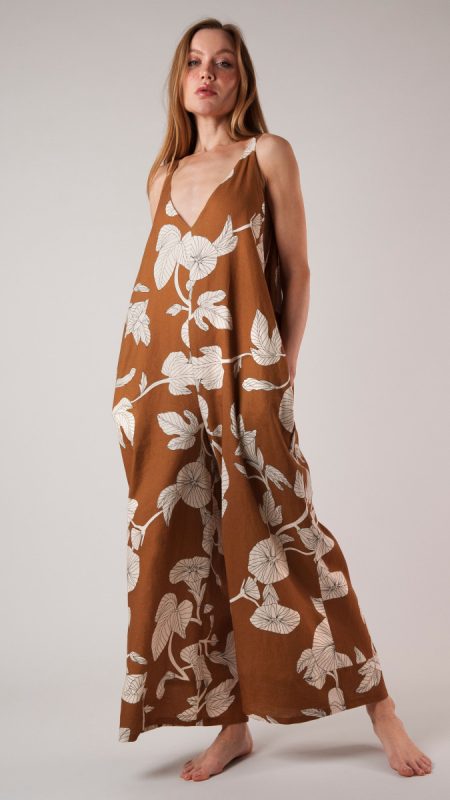
Discover the joy of easy lounging and simple sewing with The Marisol Jumper Free Sewing Pattern! This one-piece jumper is a light-weight sensation that captures the essence of relaxed sophistication.
In the world of modern-day fashion, versatility and comfort are prized commodities. The Marisol Jumper Free Sewing Pattern offers both in abundance, presented in a loose-fitting silhouette made from a delightful blend of Linen and Rayon Woven fabric.
Whether you’re relaxing by the seaside with your feet in the sand or exploring the city streets on a sunny day, The Marisol Jumper will be your go-to choice for feeling fresh and comfortable!


Purchase Products Used Below:
- 3 yards of Mood Exclusive Brown Floridian Nights Linen and Rayon Woven
- 1 spool of 875 Goldstone 100m Gutermann Sew All Thread
- MDF377 – The Marisol Jumper Free Sewing Pattern (Free download below!)
Alternative Recommended Fabrics:
Incorporating a touch of relaxed sophistication to your wardrobe has never been easier, thanks to the wide variety of Free Sewing Patterns that Mood has to offer!
Download your Marisol Jumper Free Sewing Pattern now:
How To Sew The Marisol Jumper Free Sewing Pattern
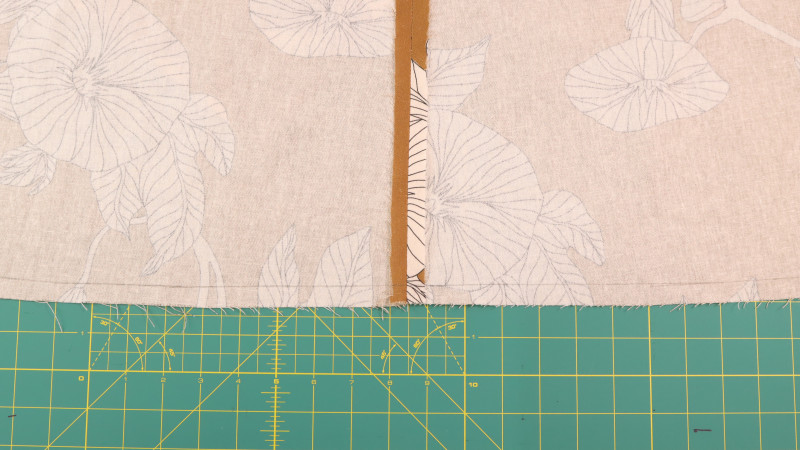
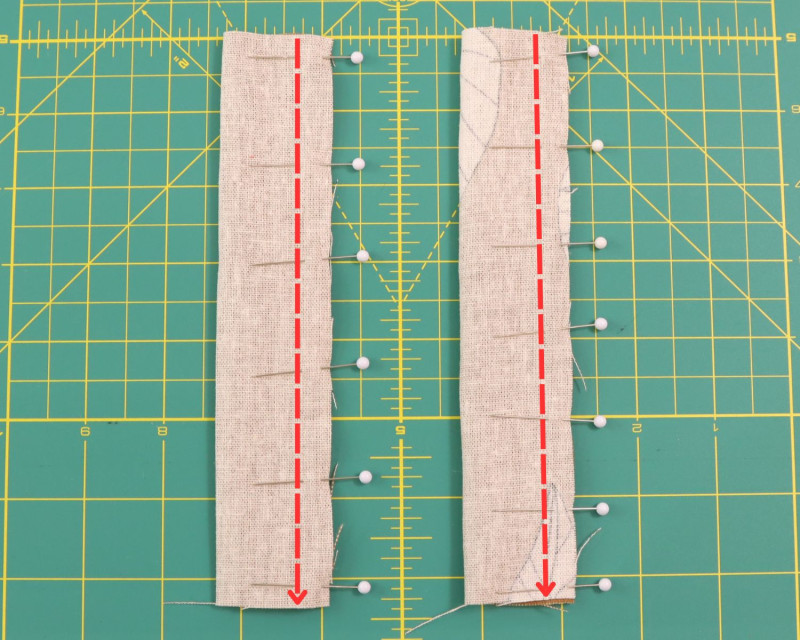
Step 1
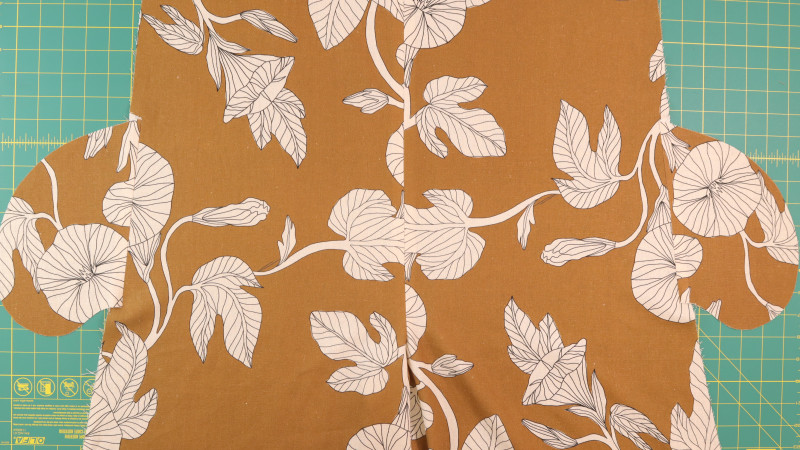
Pin both front pieces, right sides together, and sew 1/2″ seam allowance at center front.
Step 2
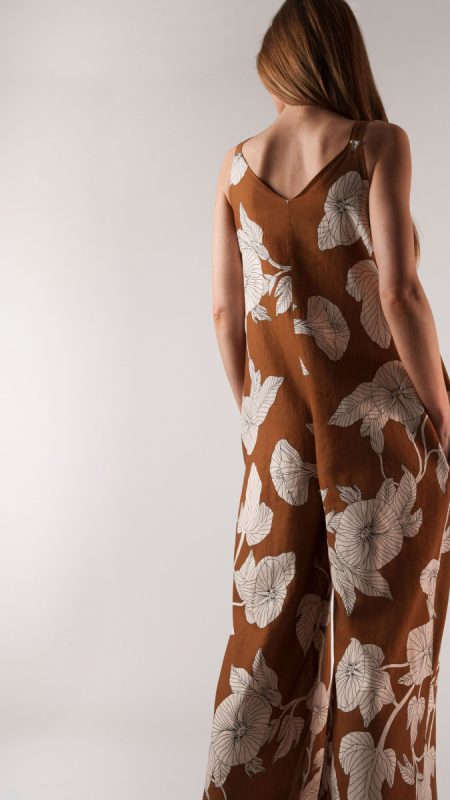
Pin both back pieces, right sides together, and sew 1/2″ seam allowance at center back.
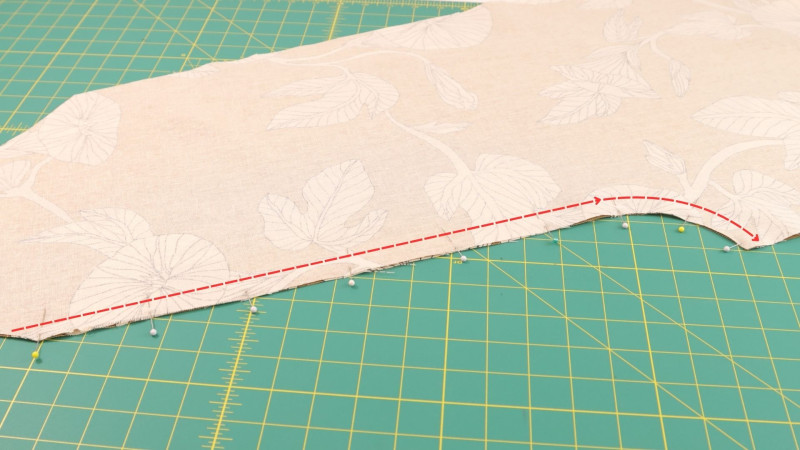
Step 3
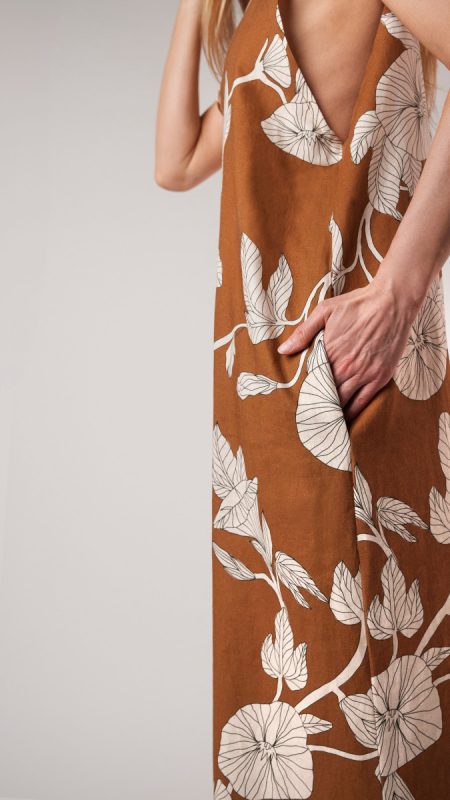
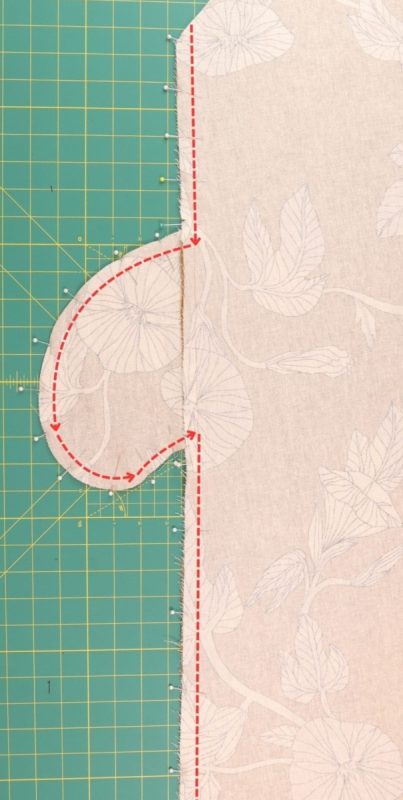
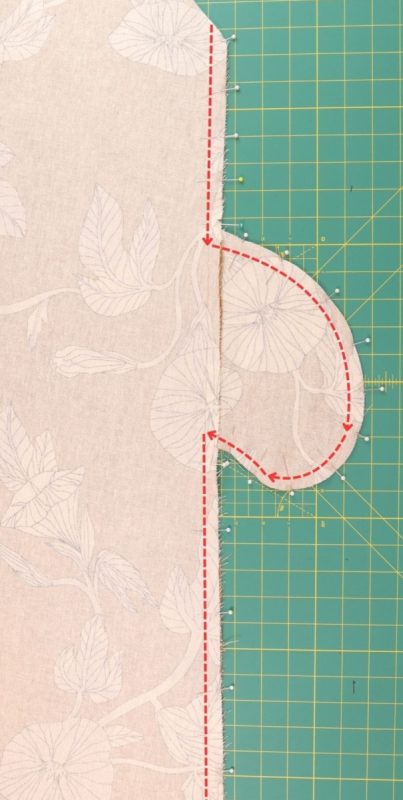
Pin the pockets to both sides of the front, right sides facing each other, and sew the pocket with 1/2″ SA.
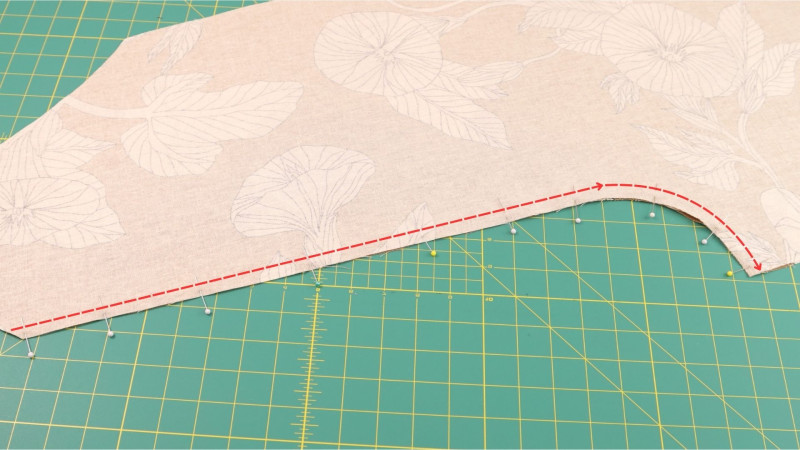
Step 4
Pin the pockets to both sides of the back, right sides facing each other, and sew the pocket with 1/2″ SA.
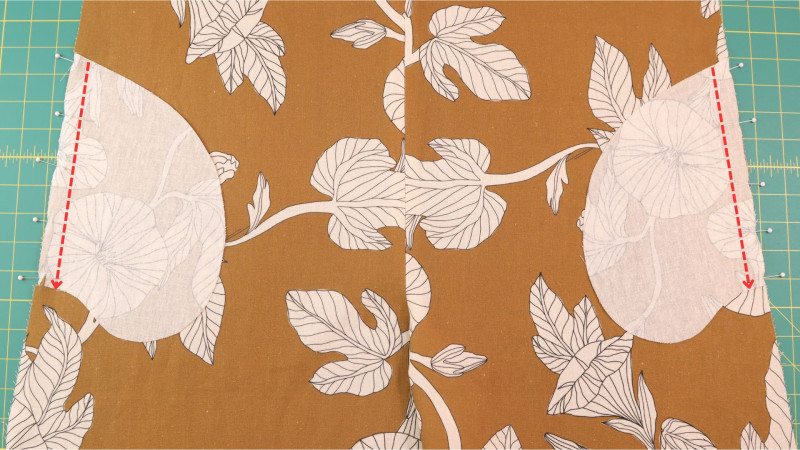
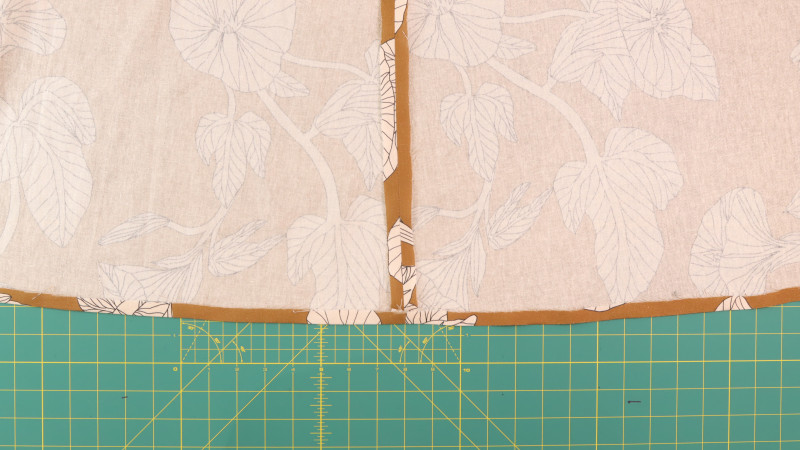
Step 5
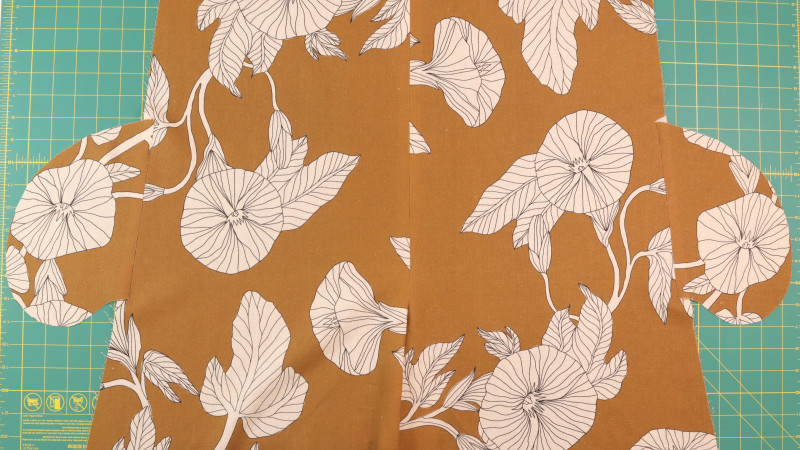
Press the front pockets outward.
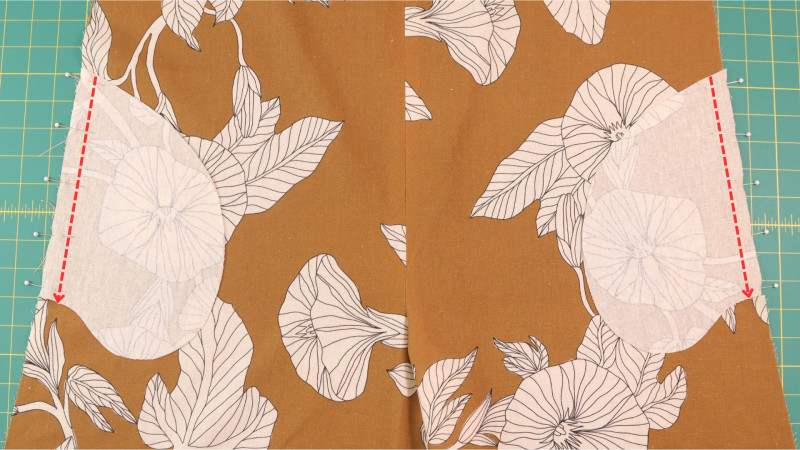
Step 6
Press the back pockets outward.
Step 9
Mark the seam allowance at the bottom of the pant legs.
Step 10
Sew the hem of the pant legs with 1/2″ SA.
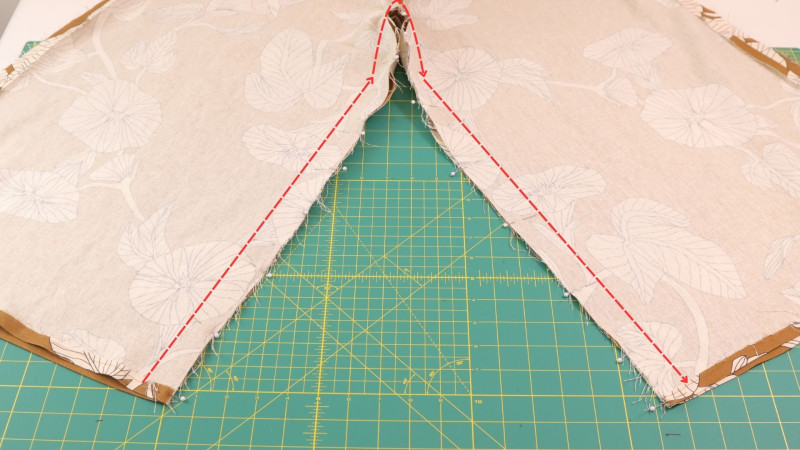
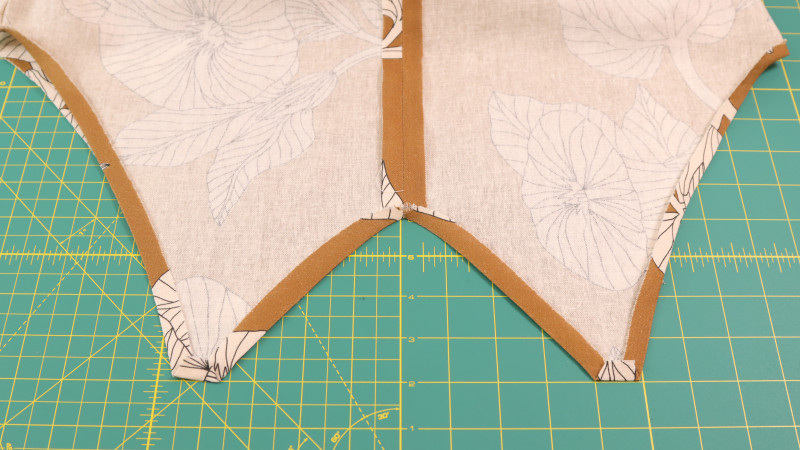
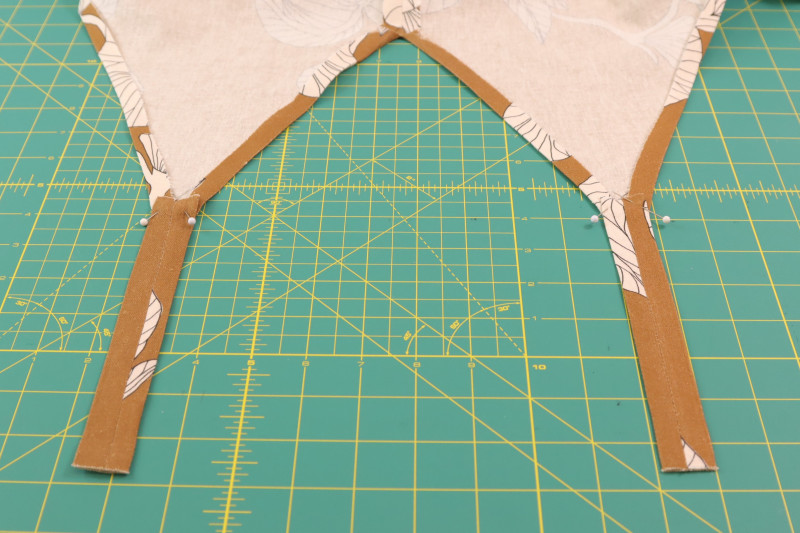
Step 11
Pin the front and back of the jumper at the inseam and sew right sides togther with 1/2″ seam allowance.
Step 12
Press 1/2″ SA around the neckline and armholes for front and back.
Step 13
Fold the shoulder straps with right sides inward. Pin and sew 1/2″ SA to the side with the raw edges.
Step 14
Turn the straps outward and pin onto the shoulders of the jumper.
Step 15
Sew the 1/2″ seam allowance all around front and back with the shoulder straps in place.
It’s been a pleasure guiding you through the Marisol Jumper Free Sewing Pattern, we hope these instructions are helpful and lead you to create an amazing final garment! Whether you choose to play with different fabrics or add your own unique touches, this pattern allows you to express your own personal style with every stitch. Now it’s time to grab your fabric and sewing machine to bring this stylish jumper to life!

Share this post with a friend (or two!), download The Marisol Jumper Free Sewing Pattern, and show us which fabrics and colors you choose, using the hashtags #MoodMarisolPattern & #MadeWithMood.
Could you make this using french terry fabric or would that be too heavy??
Hello, French terry should work well with this pattern.
How can you raise the nexline so it wont be so low?
Hello, you can raise the neckline by using pattern paper to to add a couple of inches to the front pattern before cutting out the fabric. You can also add a modesty panel made from another fabric such as lace for example.
Now to hack this to raise the neckline and arm openings to fit a normal curvy body.
I raised the neckline and sides by making the straps shorter.
Thank you. I was also considering making the straps wider in order to wear a bra.
Mike, I love your design style! Can you tell me the height of the model that this pattern was drafted? I’ll definitely make a toile, but it would be nice to have an idea of where to start. Thanks!
why wouldn’t I wait to hem these pants until I can try it on at the end? Loving the ease of this pattern just in time for the hot Memorial Day weekend!
Bonjour
Très belle combinaison
Je suis fan
Je l’ai télécharger pour la confectionner
Merci bcp
The sizing was right for me, but at 5’9”, the rise was a tiny bit short, so I lengthened the shoulder straps and made them ties to get a bit of extra room in the crotch. Otherwise the pattern was great, and super easy to do.
Love your pattern. I have sewn it up until the strap part. I am confused what to do with the 4 strap cut outs required. Please can you assist with instructions from step 15.
Many thanks
Hi Bridgette, I just checked and that part of the pattern is wrong. You only need 2 straps, not 4.
I beg to differ. I believe the pattern piece for the strap is correct – cut four – but the instructions are incorrect. In sewing this pattern, iit seemed to me that the intent was to cut four strap pieces, sew two together (wrong side to wrong side), then turn the straps out and press. Repeat for the other strap. That size fits better where the straps attach.
Signed up with email but never received link for Marisol jumper. Help!
Hello, Please email info@moodfabrics.com for any issues with pattern downloads.
Any advice on how to make it more fitter around the waist?
Hello, you can add elastic on the inside to cinch around the waist.
I have just made this, and also would like it more fitted around the waist, I’m planning to make a tie, and sew it in at the waist in the same step as #8 on the next go around! 🙂
I love this jumpsuit! I have so many ideas for colour blocking.
Question: Why cut four strap pieces of the pattern? I only see two being used in the instructions
Hey Tina, I just checked and it looks like that part of the pattern is incorrect. You only need 2 straps, not 4.
Loved your patterns
Super easy to sew. My daughter is 6 feet tall, so I added 3″ to the leg length and 3″ above the waist. The pattern was easy to adjust the lines and pocket placement,
How do I make a dress from this pattern?
To turn a jumpsuit pattern into a dress, start by using the bodice portion of the pattern as-is. Then, remove the leg sections and extend the side seams downward to your desired skirt length. Shape the skirt to your chosen style, such as A-line or straight, and adjust the hemline to create a smooth, even finish.
What height is the pattern drafted for? I’m 5’10 and wondering where the legs and crotch will fall to. Looking forward to making!
Hi Lucy! This pattern was drafted for our model’s height of 5’10”. Happy Sewing!
Love love your designs, simple lines yet elegant
Hello! Thanks for this gorgeous pattern that’s gonna be part of my summer!
I’m about to cut my fabric, ans was wondering whether seam allowances are included?
Have a nice day!
Yes, 1/2″ seam allowance is included in all of our patterns!
I feel a little new to this still, the pattern calls for 4 straps to be cut out. Does each piece get folded, sewn on the SA and then flipped outwards and attached to each part (2 for the front and 2 for the back)? OR am I pinning two, wrong sides together, sewing it down and making 2 straps total to be attached? Thank you for your clarification!
Hi Kristina, I just checked and that part of the pattern is wrong. You only need 2 straps, not 4.
Agree on this one! Wholeheartedly!
bonjour, comment faire pour téléchargé le patron. *j’ai mis mon adresse mail. Merci
Bonjour, Veuillez envoyer un e-mail à info@moodfabrics.com pour tout problème avec le téléchargement de modèles.
These looks great! Is there a way to buy this pattern already printed?
Hello,
In order to keep our free sewing patterns free, we are exclusively offering an A4-Letter size version that includes all sizes.
Thank you for visiting and downloading from Mood Sewciety!
hi
I need help putting the download pattern together, it’s very complicated. Nowhere is it explained
Hello, you can watch our youtube tutorial on “How To Assemble PDF Sewing Patterns“.
Love, ❤️ your pattern. Thank you so much
i really loved this actually but iwana ask if there a youtube tuto to follow i find it as a useful thing
Hello, unfortunately we do not have a video tutorial for this pattern at the moment, but you can check out all of our other tutorials here
Looks a bit hard to get in and out of it when nature calls.
Modèle ravissant. merci pour ce cadeau.
Merci beaucoup, profitez-en!
Love this pattern! I’m a newbie sewist and having trouble figuring out how to connect the straps on the front and back together to make the full arm hole. After pin the straps onto the jumpsuit, am I supposed to then pin the front and back straps together at the top and sew 1/2” around that so that the front and back are connected?
Yes, that is correct! Sew one end of the strap to the front and sew the other end to the back.
Hello. I am at the point where I need to make the straps but I am a bit confused. At the end I have 4 straps and I sew the front with the back strap at the top or I have 2 straps and i join the strap at the front and back?
Thank you
I think the pattern is mistaken, you only need two straps. Steps 13-15 show how to construct them and it’s only two straps that are folded in half hotdog style.
The pattern is not downloading for me. What am I doing wrong?
Please reach out to us at patterns@moodfabrics.com and we’ll make sure you get your free download. ✨
would this pattern work well with the double gauze fabric?
Yes, you can also use double gauze for the Marisol Jumper! 🙂
Okay– I absolutely *love* this pattern! I used some old black poly-cotton with a sheer lace design– there’s just enough opacity to get away without a bra. Speaking of bits, the drape around the chest is perfect– too often, on low, flowy garments, there’s a risk for nip slips, and like you’re always adjusting in fears of that one sinister breeze. However, this piece drapes slightly back… maybe giving me enough courage to bend down without grasping my chest (stilll to be tested), and offering adjustable coverage in the straps. While I often opt for the flowy bottom, I wanted something more functional– a jumper I could throw on to go out, run errands, get a pedicure, or just lounge at home, so I added a 1″ elastic, loosely around the ankles in a 1.25″ casing. This is my first *finished seams*, wearable, functional garment, so, I had a lot of fun playing around with seam finishes in this jumper, adding some lace seam hem along the seams in the body.
I cannot tell you how obsessed I am with this jumper; as someone who struggles with finding clothing that’s 100% cotton, fits, has functional pockets, AND is affordable, I think I’ve found what I’ll be living in for the rest of my life. So, my greatest appreciation to you!
(one small note, I noticed the pattern does not call for cutting the straps on the fold, as it shows in the instructions– obvs no biggie, and an easy extra stitch on them both– I just thought I was going crazy for a sec!)
That is so great to hear & thank you for your input and experienced advice! We truly appreciate thoughtful suggestions like yours—they help others get the best results from the pattern.
Hello! Will cotton work with this pattern too?
Yes, cotton works well with the Marisol Jumper!
Hello, would a charmeuse fabric work for this pattern?
Yes, you can also use charmeuse fabric for this pattern.
Thank you for this pattern ! I bought the Mood black background version of Floridian Nights . Pattern was so simple , great instructions . Perfect fabric for this pattern . A very satisfying quick project with great results .
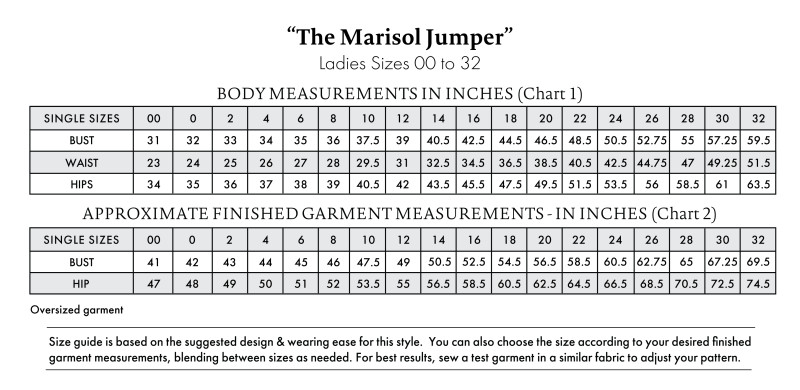
HI Mike. With this being an oversized garment and me being new to sewing, I am not sure which size I should use. I normally wear a 22 but the finished garment at that size is quite big. Would I be safe cutting the pattern for the size of the finished garment dimensions?
Yes! If the garment is oversized in fit but you want it to be a little more form fitting to your body, use the finished garment measurements instead of the size measurements.
Hi there! Would 135cm fabric width be okay?
Nope! You need at least 3 yards for this pattern, which comes out to about 275 centimeters.
I know this reply is late.
I realized that you are talking about”width” and the person that answered went straight to the length of material needed.
Your width of fabric is correct as long as you have the proper length needed.
Hello! I just wanted to say how much I adore this jumper pattern — it’s truly beautiful. Since I’m petite, I would love your guidance on how and where I could shorten the pattern to ensure the best fit. I’m very excited to make it, and your advice would mean so much to me. Thank you for creating such a lovely design
I think the best places to shorten it would be right above the markings for the side seam pockets and then obviously you’ll want to hem the pants to your desired inseam.
Thank you
Me encanta ❤️❤️
I love the pattern
How are the seams finished? Are they left raw?
I don’t think it suggested a certain way to finish them in the post, but there are a few ways you could do it. You could do flat felled seams, use a serger to finish the raw edges, or just use a zigzag stitch along the raw edges if you don’t have a serger.
how do you get in and out of this? step in through the neck? is it wide enough?
Hi Anne! Yes the neckline is super wide and you can just step into it because it’s pretty oversized.
This is so generous of you
Most beautiful designs
I like that it is such a straightforward garment but I fancy adding facing to the neck and sleeves. I am planning on pairing it with a handkerchief blouse in a complimentary colour. I could use that fabric and my question is, to make facings I guess that I just copy that part of the front and back and make it a couple of inches wide? Then stitch, clip and press.
Thanks for the pattern.
Hey Martin, you’re exactly right about the facings. You just have to cut out the same shape as the front and back necklines and make them about 2-3 inches wide.
Thank you
Like it
Love all yours free patterns. Thank you.
I just did a test sew on this and it was so easy to follow and complete. I had to shorten the legs quite a bit since I’m short, but it worked well. I experimented with elastic at the waist. While I love the shape it gives, I almost like the loose fit more for lounging or doing housework, and layering. Love this pattern, it can be hacked so many ways to fit a lot of styles. I am doing a Linen and Rayon woven next!
I’ve always wanted to learn how to sew.
Does this require, folding good side to good side? I did not see it.
Hey Beth! Yes, when cutting out mirrored pattern pieces, you want the fabric to be right sides together.
This is my first time with a mood pattern — do I cut fabric — good side to good side.?
Hey Beth! Yes, I would recommend folding the fabric right sides together when cutting out the pattern pieces.