
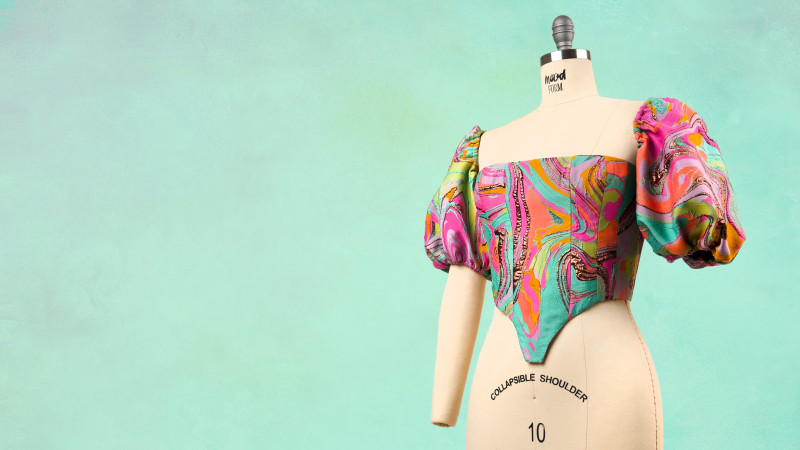
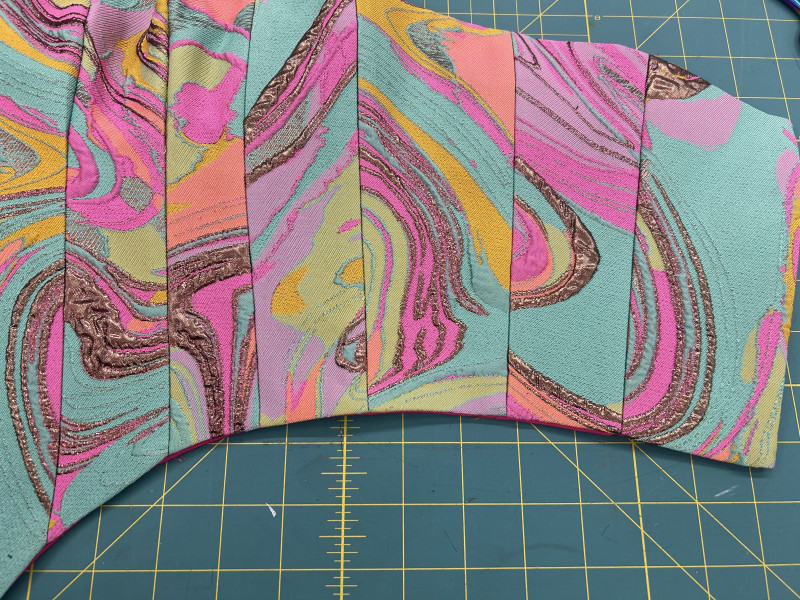
Brocade will always be a conversation starter, however, it can be an overwhelming fabric for some. Its richly decorative raised patterns, often woven with glimmering silver or gold threads, can be so show-stopping that a lot of us don’t know what to make with it. Brocade commonly gets categorized as special occasion fabric, and for good reason – it was worn by nobility throughout the centuries! But brocade can also be used to make separates that can go from day to night. I don’t know about you, but I don’t want minimal use items collecting dust in my closet, especially if I’m sewing them. I want to show off my creations as much as I can! For this project, we wanted to pull inspiration from the historical uses of brocade, but update it just enough to create a versatile garment for today. Using our Cerise Corset Free Sewing Pattern, I cropped and reshaped the bottom to loosely resemble a Robe L’Anglaise bodice from the 18th century. I quickly added puffed sleeves from our Valli Sleeve Pack, and that was it! I would love to make a matching mini skirt that puffs out at the waist for an exaggerated hourglass silhouette, but this would also look great with jeans, a bias silk skirt, or even over a cotton dress!
Purchase Materials Used Below:
- 2 yards of Rose Gold, Coral and Seafoam Marbled Metallic Luxury Brocade
- 4 yards of Black Rigilene – 12mm/0.5″
- 1 yard of White Cotton Buckram Stiffener
- 1 yard of Stratton Hibiscus Solid Organic Cotton Twill
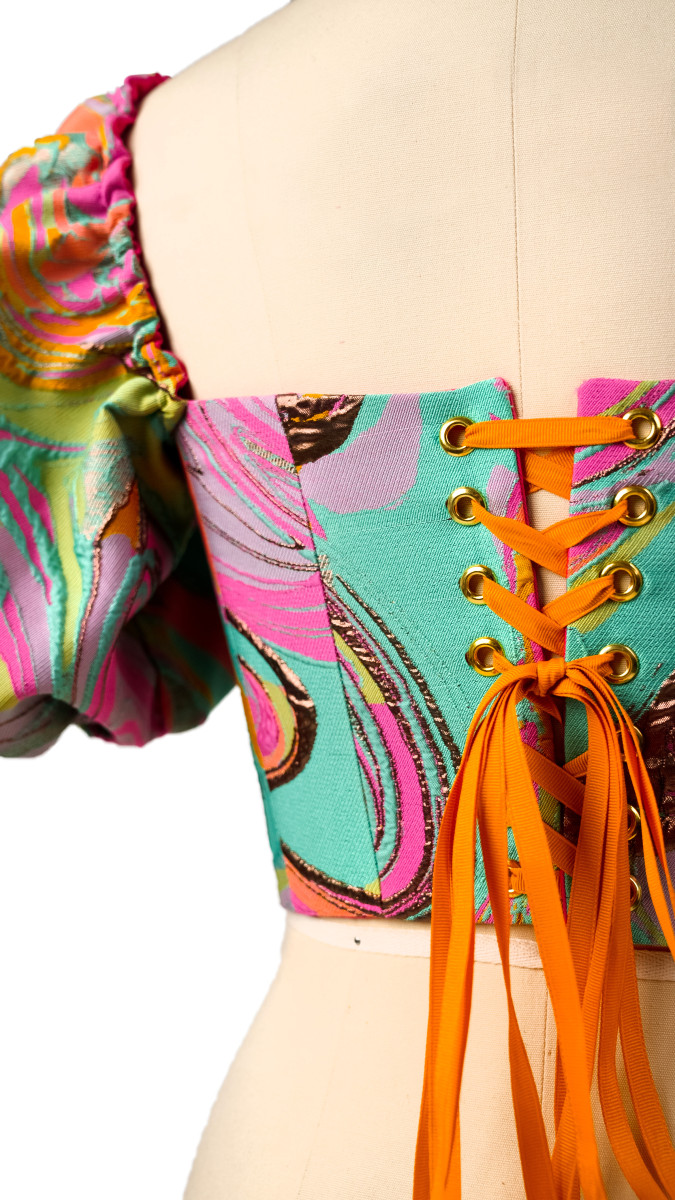
- 2 packs of Dritz Large Gold Eyelets Size 1/4″ – 15ct
- 5 yards of Gold Grosgrain Ribbon
- 1 spool of 700 Mint Green 250m Gutermann Sew All Thread
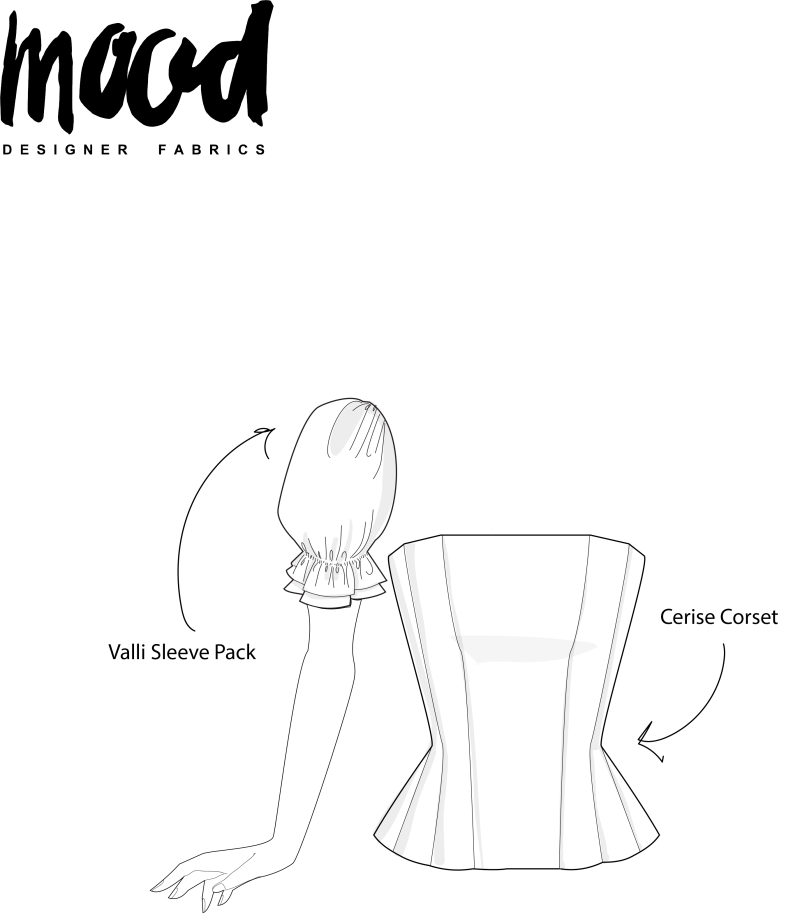
- MDF290 – The Cerise Corset Sewing Pattern (free download below!)
- MDF312 – The Valli Sleeve Pack Sewing Pattern (free download below!)
Alternative Recommended Fabrics:
Download the Cerise Corset Here
Download the Valli Sleeve Pack Here
All seam allowances are 1/2″ unless otherwise stated.
A note about the Cerise Corset pattern:
This is an advanced pattern, with 3 layers and lots of panels. If this is your first time sewing a corset, I recommend starting with our Spearmint Corset! Simply omit the shoulder straps, then redraw the lower edge.
How to adjust the lower edge:
1 – On piece 1, mark 1” from the CF at the bottom. Draw a curved line from that mark to the first notch.
2 – At this point, I recommend folding down the seam allowances on all vertical sides of each pattern piece. Tape the pattern together at the seam allowances. This will ensure that the curved line matches up properly once the pieces are sewn together.
3 – Mark the waist on piece 4. This is where your bottom edge will start to level out.
4 – Draw a curved line, connecting the line from step 1 to the waist on piece 4.
Sew the corset as originally instructed.
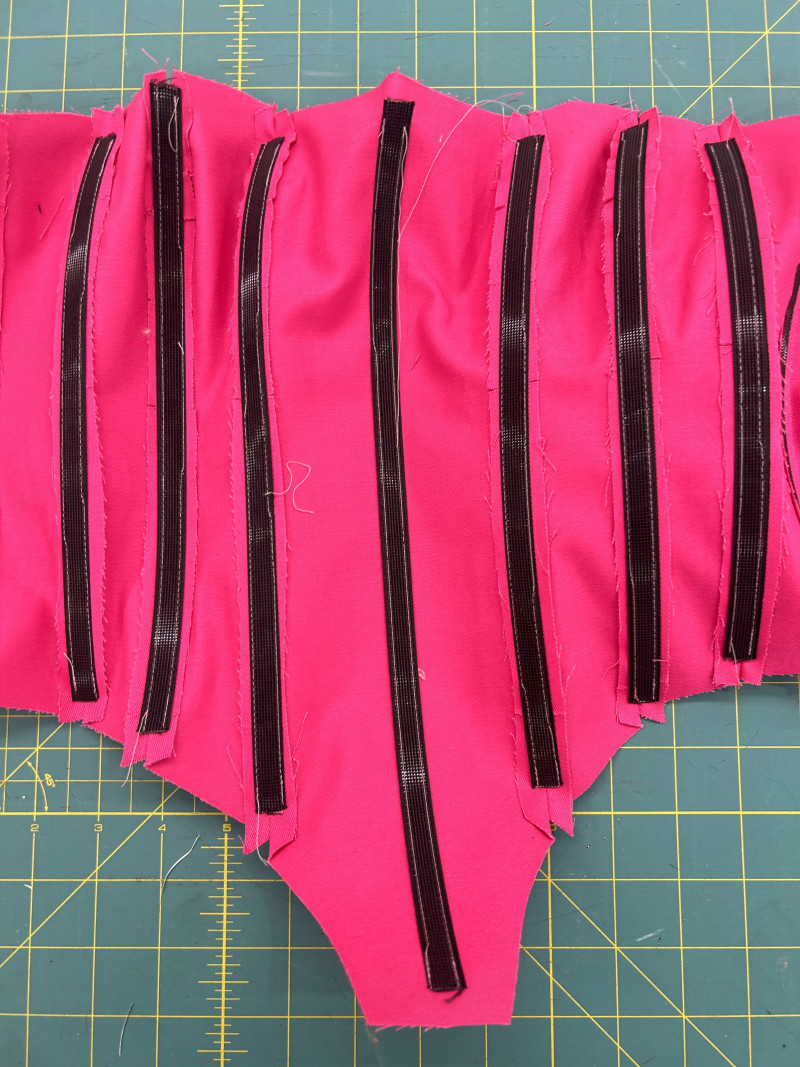
- I added an extra strip of boning to the center front lining (as pictured below), so the bottom edge lays flat at the center front.
- As suggested in the original instructions, I used buckram and it provided great structure.
- For a clean finish at the bottom edge, I hand-stitched the layers together using a slipstitch.
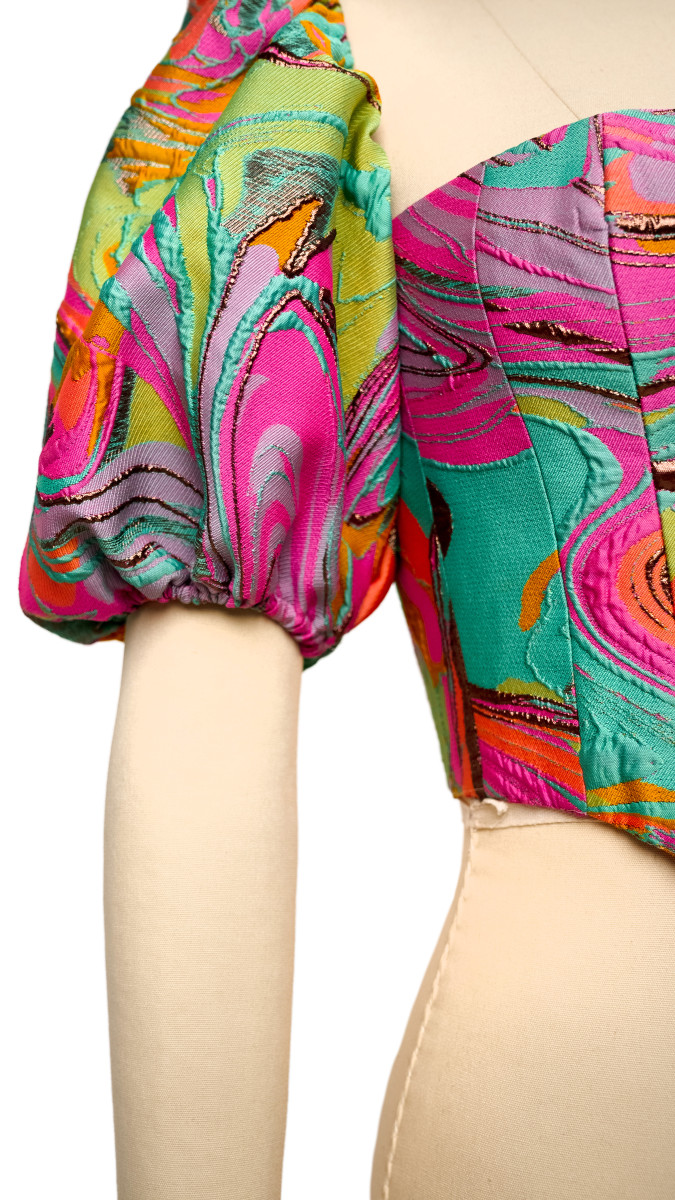
How to sew the sleeves:
1 – Cut piece C – Sleeve 2 Upper, and cut out the shorter length.

2 – As pictured above, redraw the underarm, so it’s flat instead of curved. This will just be a slight adjustment. Do this on both sides of the underarm.
3 – Make enough bias tape to go around the entire top edge of the sleeve. I made it out of the corset lining fabric.
4 – Sew the sleeves together at the inner arm. I used french seams for this.
5 – Double fold and hem the lower edge of the sleeves, leaving room to insert ¼” elastic.
6 – Use the bias tape to finish the top edge of the sleeves, leaving an opening to insert ¼” elastic.
7 – Cut your elastic for the upper and lower edges of the sleeves, to your desired length. Insert the elastic.
8 – Try on the corset and mark where you want the sleeves to be placed.
9 – Stretch the elasticated sleeve at the armpit, and pin onto the corset. Sew the sleeves to the corset, either by machine or hand.
Could you do a diagram of where to flatten the underarm curved or what the modified pattern would look like?
Hi Tess! I uploaded an illustration. Hopefully that helps! It’s a subtle adjustment, but since we’re adding as sleeve onto a garment that doesn’t have an armscye shape, we need to adjust the shape a bit. 🙂
What does it mean in step 2- “redraw the underarm so that it is flat instead of curved?” That is what I was looking for in the tutorial–how to use a standard arms eye and put it onto a garment without an arms eye.
Hi Jill! I’ve included a close-up illustration for clarity. 🙂
Jolies top manifique
thank you
Gracias
Gracias
On the cerise pattern it uses 3/8 seam allowance. Do we ignore that and use 1/2 instead?
Hey Cameryn, you can go ahead and follow the instructions for the Cerise corset. Ignore the 1/2 inch seam allowance in this blog post. Most of our posts have 1/2 inch seam allowance included but the Cerise corset was slightly different.
Thanks for this
i love iit thanks
Gracias
i LOVE your designs so much, i really hope you can make videos on how you sew all of them because that is much easier to follow for young designers like me.
Thank you! We are glad to hear and we will definitely be working on more video tutorials for you.
❤️