
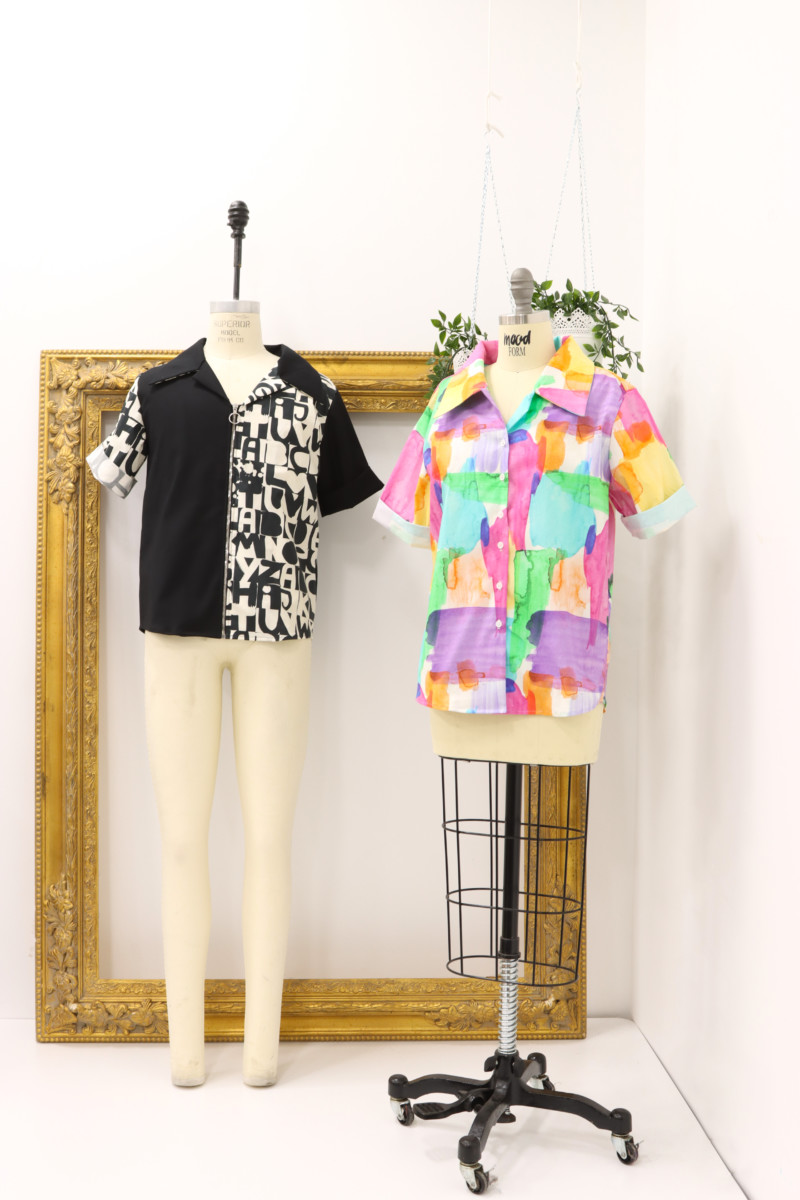
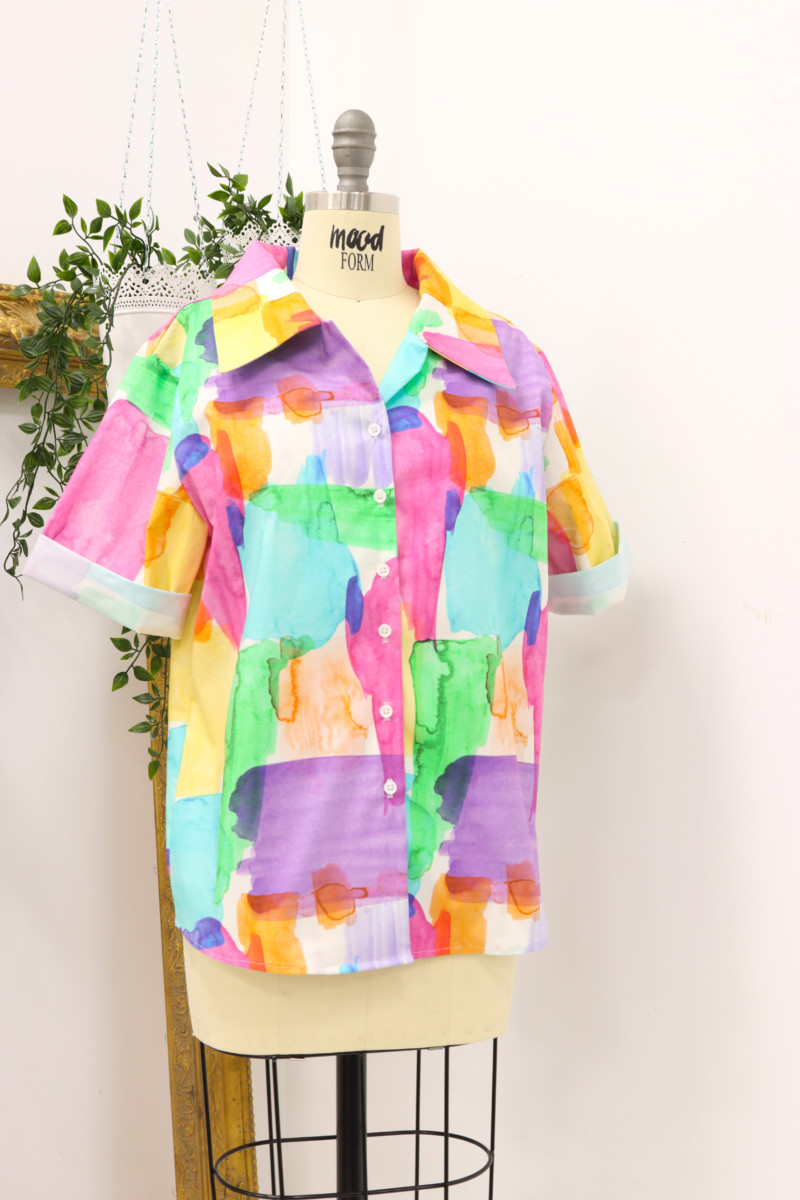
If you are anything like me, you’re always looking for that new top to help freshen up your existing fabulous wardrobe. Well, look no more; Mood has a brand new unisex sewing pattern, the Carya Shirt, that is simple and easy to make using any of Mood’s wide variety of vibrant cotton prints!
Purchase Materials Used Below
Single Print/Color:
- 2 yards Mood Exclusive Sugar Swizzle Color Fields Stretch Cotton Poplin
- 6 Milky White Tire Shaped Rim 4-Hole Plastic Button – 17L/10.5mm
- 1 yard Off-White Weft Fusible Interfacing
- MDF272 – The Carya Shirt Sewing Pattern (free download below!)
Two-Tone:
- 1.5 yards Mood Exclusive Amorous Alphabet Stretch Cotton Poplin
- 1 Black Stretch Cotton Poplin
- 1 Mood Exclusive Italian Black and Silver T5 Open End Metal Zipper – 27.5″
- 1 Mood Exclusive Italian Large Silver Round Metal Zipper Pull
- 1 yard Off-White Weft Fusible Interfacing
- MDF272 – The Carya Shirt Sewing Pattern (free download below!)

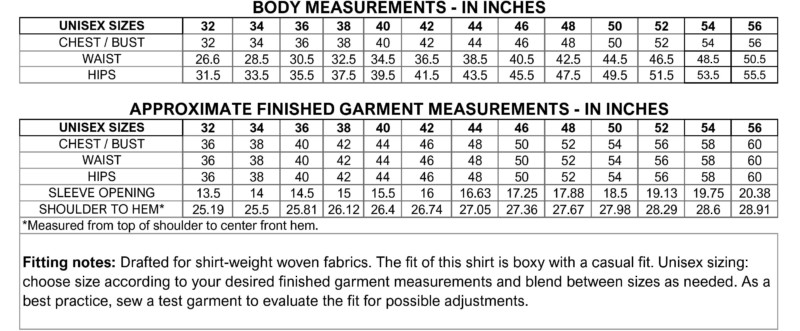
Alternative Recommended Fabrics:
Step 1
Print and tape pieces.
Step 2
Pin, cut out of fabric, and mark your notches.
Step 3
Cut out interfacing for facing and collar. Iron the interfacing to the corresponding pieces.
Step 4
Hem the edge of the facings and machine stitch.
Step 5
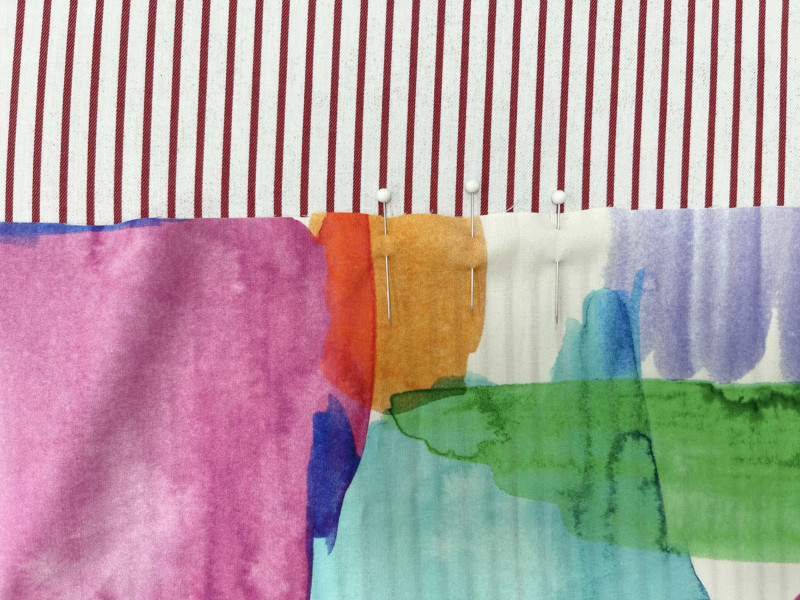
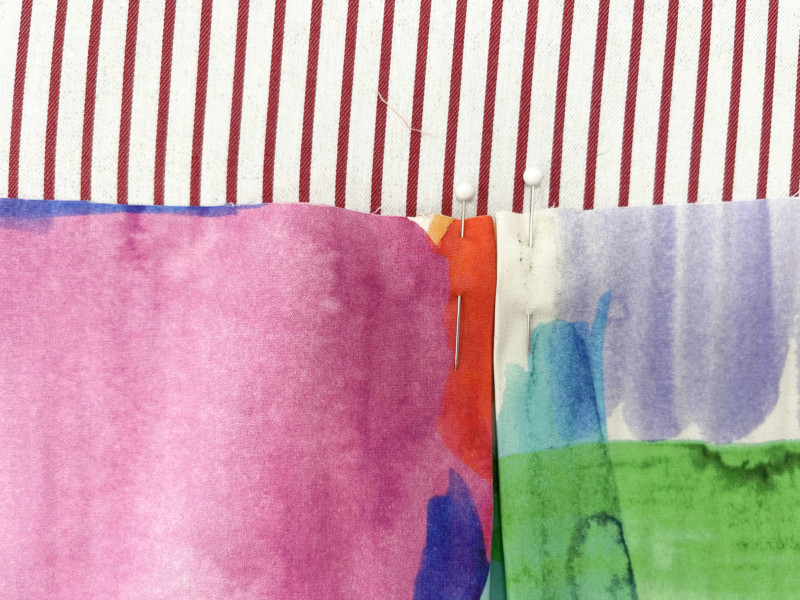
With your back piece, mark your pleats and fold inward placing two pins to secure it in place.
Step 6
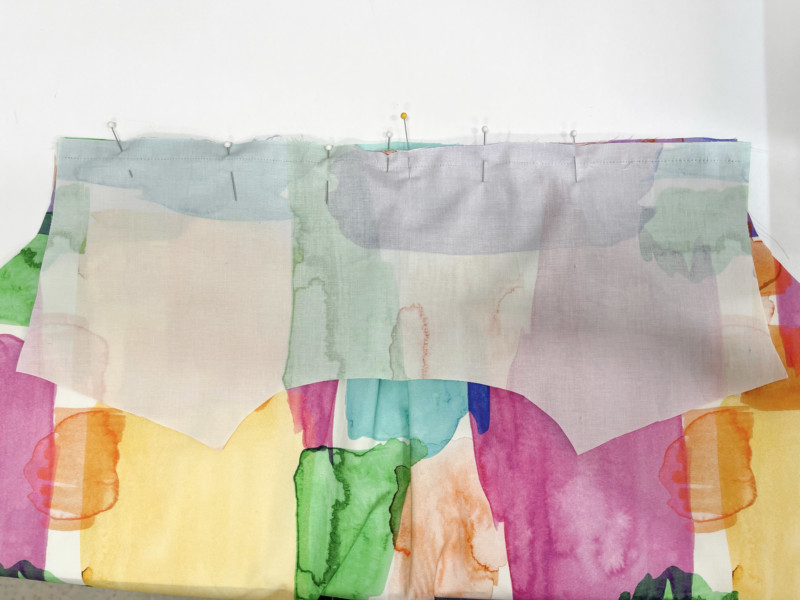
With the right sides together, sandwich the yokes around the back piece. Once sewn, press nicely and stay stitch the neckline.
Step 7
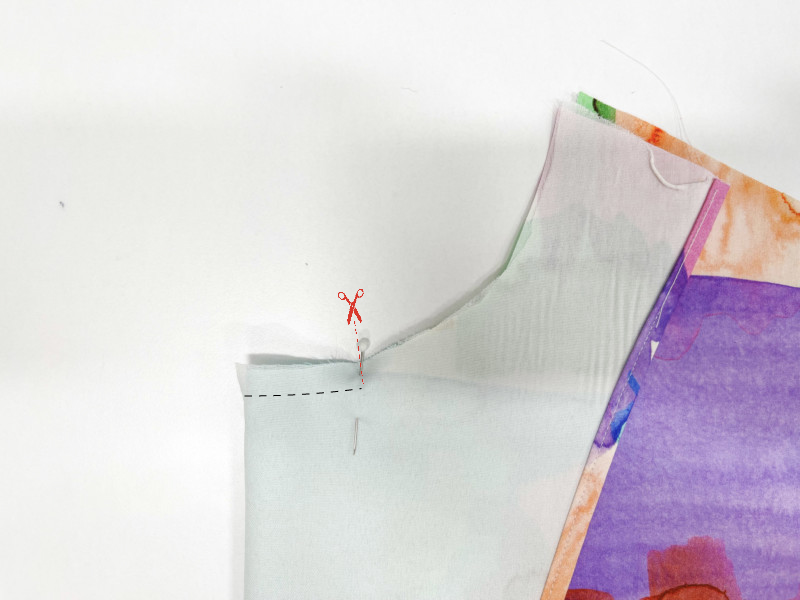
Take your front shirt piece, and fold right sides together along the indicated “fold line” on the pattern, as pictured below. Use a 3/8″ seam allowance and sew from the folded edge to the notch. At that notch, clip into the seam allowance, not beyond it. Doing so will ensure that the seam allowance on the neck will sit flat once the facing is turned right side out.
Clip the corner at the fold, and turn the facing right side out. Press.
Step 8
Using a french seam, stitch the shoulders together.
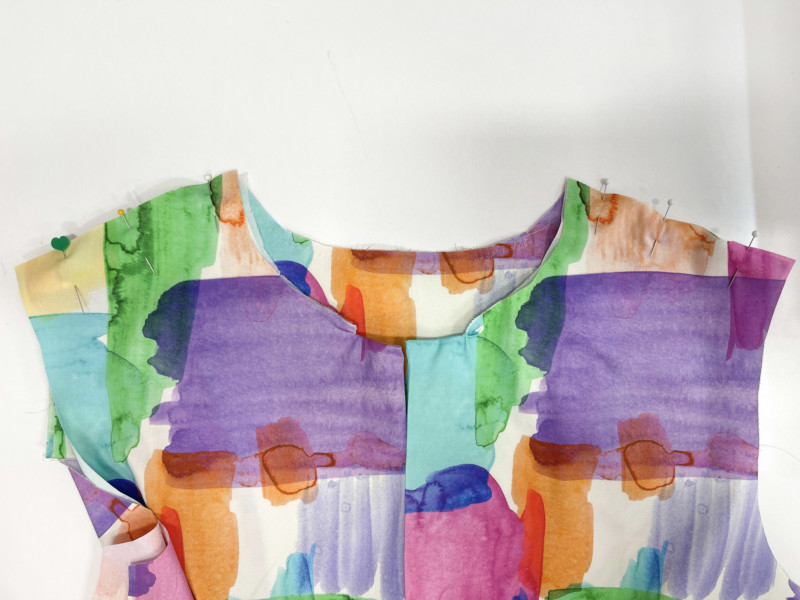
Step 9
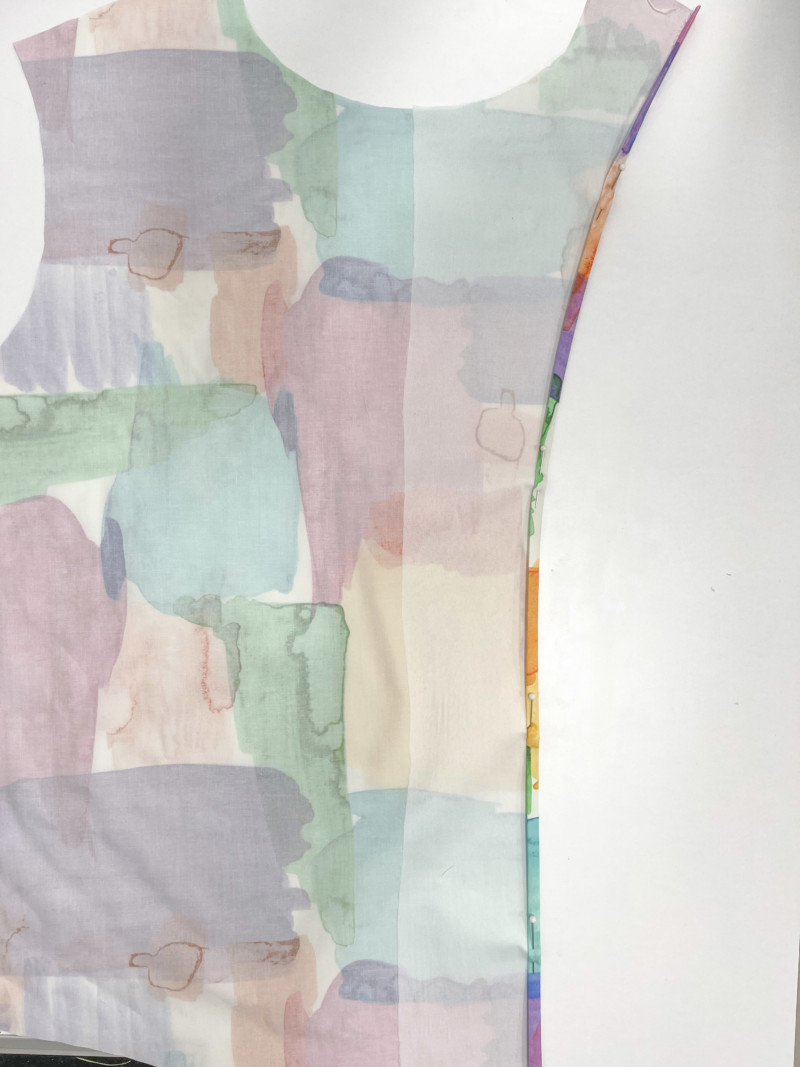
Using the French seam again, attach the fronts and back of your shirt at the side seams.
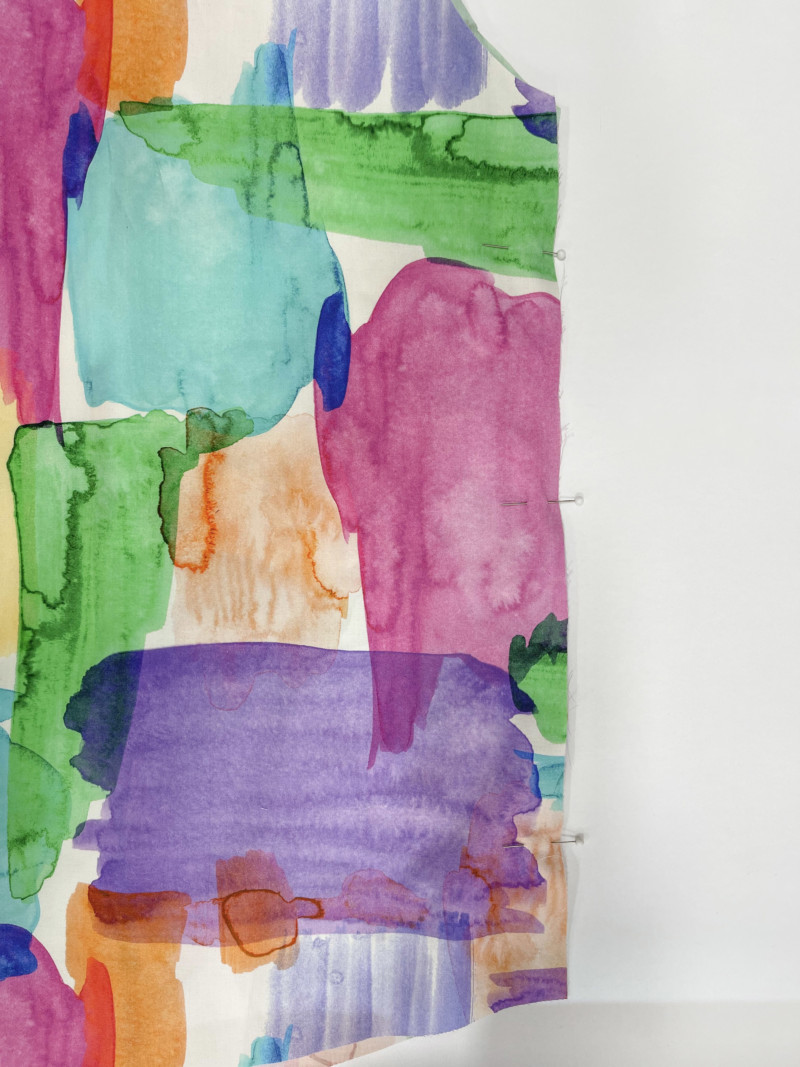
Step 10
With the right sides together, sew the top three edges of the collar at 3/8″ seam allowance. Trim and press.
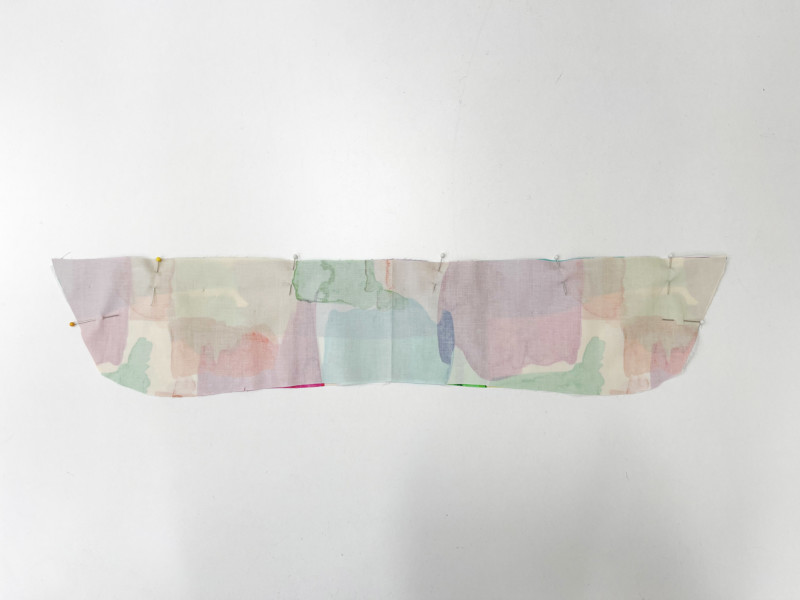
Step 11
Pin the interfaced side of the collar to the right side of the fabric, matching notches and leaving the other side of the collar open.
Step 12
Press the collar so it lays nice and flat. Fold the exposed seam under and slip stitch.
Note: if you want to topstitch the collar, you can do that here.
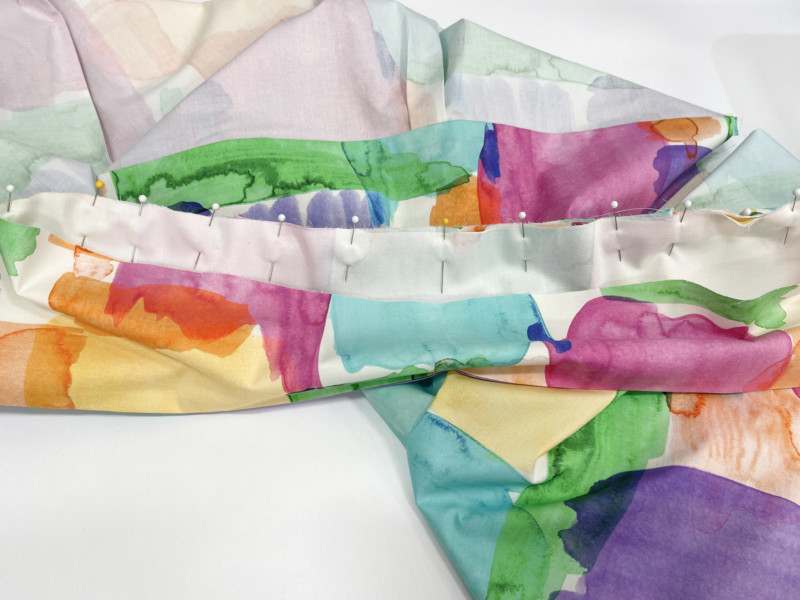
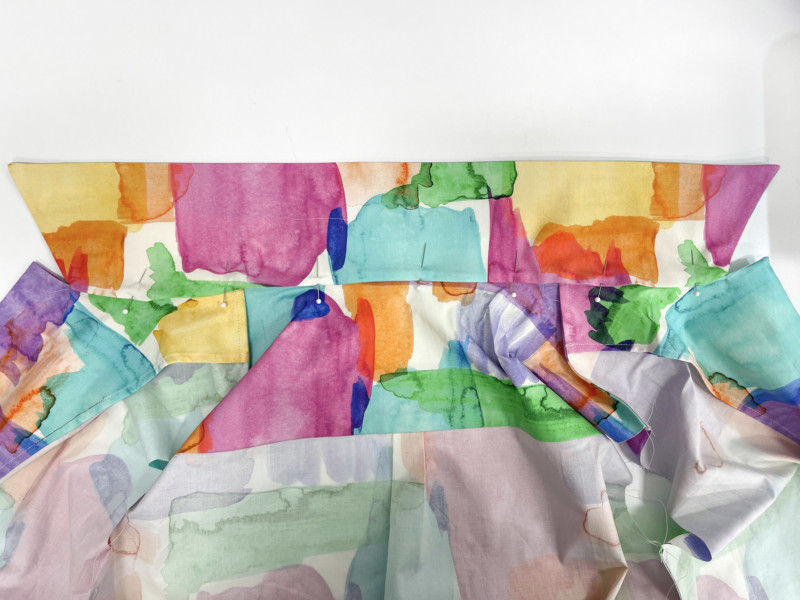
Step 13
If you want to add a patch pocket, add it here using the guideline from the pattern for placement.
Step 14
Using a French seam, sew the inseam of your sleeve.
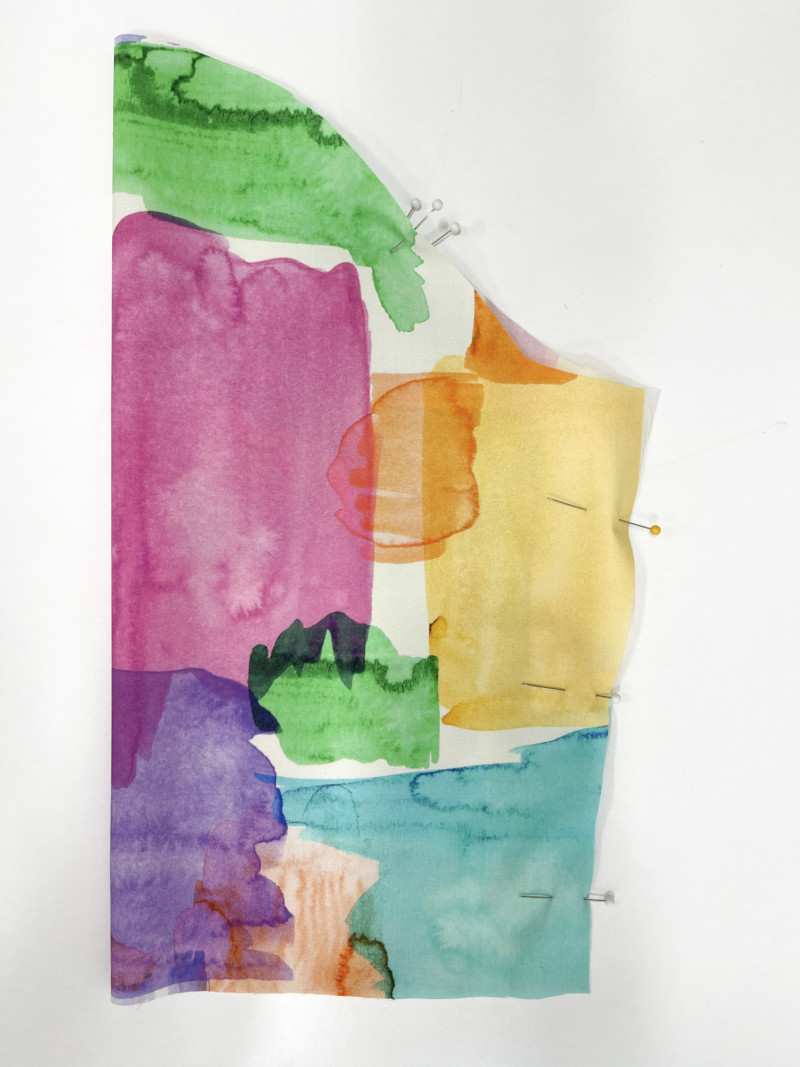
Step 15
Matching notches, set the sleeve in. Ease where it is necessary.
Note: you can do a French seam here or a regular seam. If you do a regular seam, finish the seam off with a zig-zag stitch, overlock stitch, or a serger.
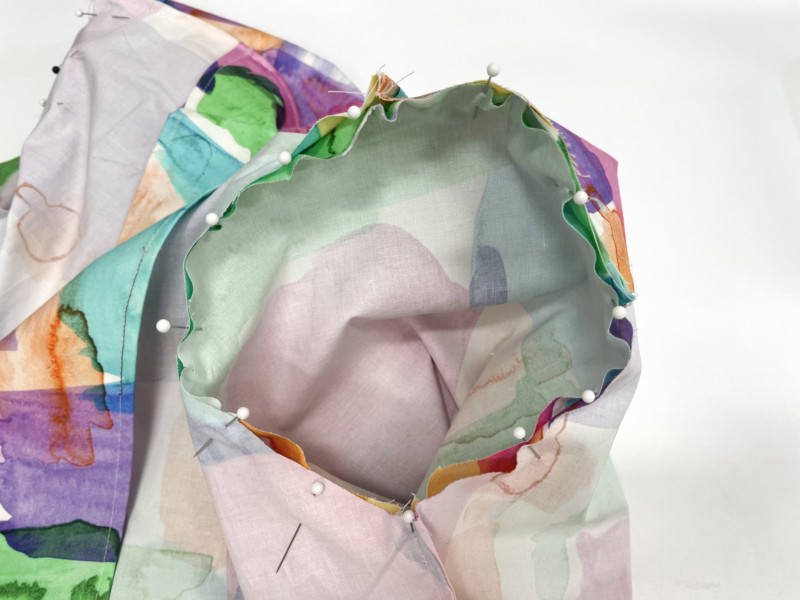
Step 16
Hem the sleeves using a rolled hem, press, and machine stitch. Fold up the sleeve 4″ and hand tack at the underarm seam. As an alternative option, you can shorten the sleeve and hem the same way.
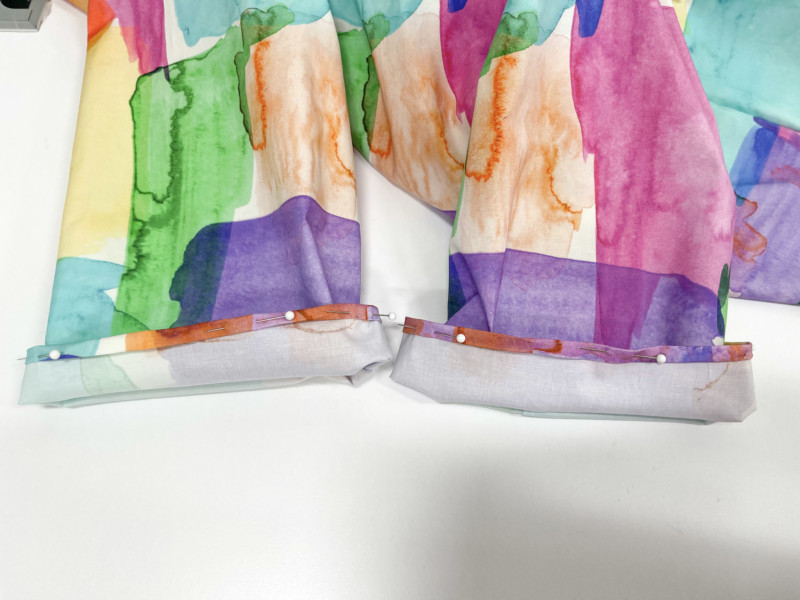
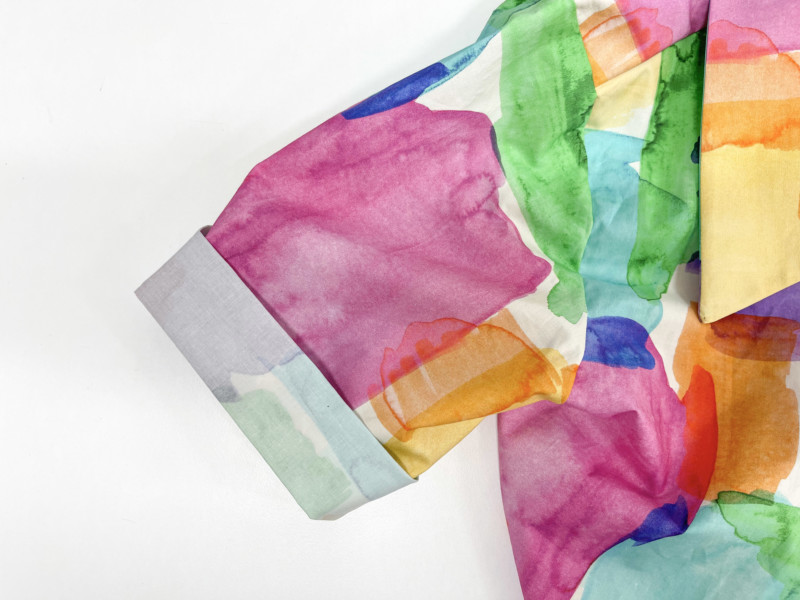
Step 17
Finish off the bottom of your shirt with a rolled hem. Press, pin, and topstitch!

Thank you so much for rthis pattern and detailed instructions – I have been avoiding sewing a woven, button down, collared shirt. I will definately be trying this 0ne
I can’t wait to try this pattern. It is just the style I love for summer. I can copy the instructions for the pattern from this page and save them, but it would be great if you could put a button on this page to print the pattern instructions. or a button with the server link for a .pdf that I could download. Just a suggestion.
Hello Adrienne! One thing you might find handy is that I put a QR code on the cover page of the pattern download. Just scan it with your phone or tablet and it will take you right to these instructions. The blog instructions would probably not be printer friendly and take up a lot ink due to the photographs. – Catina / PaTTernHack
Muchísimas gracias por sus tutoriales y patrones.
Thank you for this pattern! I was avoiding making myself a shirt because I knew the pattern I bought didn’t go up to my size but I feel much more comfortable using this one knowing it comes in my waist measurement. Thanks!!
For the french seams, is each stitch at a 1/2 seam allowance, so the total seam allowance is 1 inch, or are the two french stitches at 1/4? I hope this make sense
Hi, Michael! It’s two French seams at 1/4″ each. 🙂
Hey! Can someone tell me please if the pattern itself includes seam allowance or are we supposed to mark on the fabric ourselves? Thank you!
Hi Ridz, all of our patterns have a 1/2″ seam allowance unless otherwise stated 🙂
Wait, I’m confused – why does the two-tone call for a zipper that’s never mentioned again in the instructions?
Hi Lauryn, the instructions were for the standard button up, and the two-tone w/zipper was just shown as an option. Adding a zipper would be an easy adjustment! Head over to our Be a Zipper Expert guide, and take a look at the Exposed Zipper instructions.:)
This pattern is really nice. It would help if the instructions were just a little more specific & if the pictures better illustrated what was being instructed. I had to do a lot of brainstorming.
Is there a video tutorial for this pattern? I’m a fairly confident sewer but it would be really helpful for me if the instructions were a bit more detailed. I’ve managed to make a practice version but struggled a bit with the collar – how far down the side edges do you sew when putting the two sides of collar together? The curve baffled me a bit.
I do love the fit though and am stoked that me and my husband can wear the same pattern (matchy family outfits)
This was a cool pattern. The collar attachment was a bit tricky for me (youtube had great collar tutorials), and looking at the end product I just made, the collar was proportionally too large for my preference. May modify for next time! Thanks!
I agree with you on the collar. The sizing and proportion is awful.
Thank you so much for this pattern. I’ve been looking for a larger camp shirt pattern for quite some time. The fact that you’ve given it to us free is amazing. You are awesome.
Holy collar. This thing is huge. The pattern being free is nice but if you are a beginner, understand these instructions suck.
Hello!
Thank you for your feedback. Most of the instructions on our 350+ patterns, especially these older ones, do reflect their no-cost nature.
Unfortunately we can’t update all of the instructions on every pattern in our archive, however, if there are common areas of struggle on patterns 2 years or newer, we are working on correcting them.
We have revised step 7 for more clarity.
We encourage you to take a look at the improved in newer patterns, offering more thorough guidance! We appreciate your engagement and invite you to explore these updated options for a better sewing experience!
I really love this pattern! It’s really beautiful and versatile. I just struggle with the collar – the attachment itself is not the problem, but the collar is about 5cm too long when I want to attach it! I double checked if I had cut everything out correctly, but can seem to find the mistake.. can anybody help me?
Does anyone know if it is possible to print this pattern in layers so you’re only printing the size you want? I opened it Adobe Acrobat but layers didn’t seem to be an option. I love that the pattern is size-inclusive, but that also means that cutting out the pattern is a lot trickier if I can’t narrow down the field.
Hi, James! Unfortunately, this pattern isn’t layered. 🙁 Sorry!
Bonjour ,
Tout d’abord merci pour ce patron gratuit, c’est super!!!! Juste une question,les marges de coutures sont déjà comprise ou faut il les rajouter, encore merci
I’ve been wishing for the same thing. Printing out the patterns for my wedding suit and my fiance’s wedding dress took so much paper, but I’m not particularly large and they’re pretty thin so we could have saved a lot of money and waste if we had printed out just the sizes we needed. I’m also very glad that a lot of these patterns go up to large sizes, but it’s pretty wasteful when sewing even the smallest of sizes requires printing for a size 30 (or in this case, a size 56)
Hi Raphael! We totally understand your frustration. In order to keep our patterns free though, we can’t offer separate size files at this time. But we know this is a popular request, and we hear you! 🙂
I just got tracing pattern paper and traced the size or adjusted size to my liking. Then I just store the pattern and traced pattern together. Then you can make whatever size you need in the future. It’s a little more work but worth when you consider how much patterns cost IF you can even find any.
I would have liked to know how to sew the buttonholes or how to put the pocket on. I too struggled with the collar and did a lot of you tubing but the shirt turned out well and the fit was quite good.
I am an experienced sewer and wanted a quick camp shirt. I just made this shirt and the collar is very oversized, looks like the photo with the pointy tips almost to the shoulders, and definitely does not look like the line drawing. The neckline opening is also too large. I took it apart and cut down the collar but there was nothing I could do about the neckline. It shows a lot of lot of chest. I would not recommend this pattern.
nada…no me deja bajarme ningún patrón…no sé porqué, porque hace tiempo si pude. pero ahora quiero este y otra camisa y no me llega nada al email. provando en varios emails y dispositivos..¿como puedo conseguirlo porfavor? gracias
Hola Rocio, ¡Pedimos disculpas por la demora en la respuesta! Si todavía tienes problemas para descargar este patrón, envía un correo electrónico a info@moodfabrics.com y te enviarán el patrón directamente.
this is NOT an accurate pattern at all— I can’t even cut out enough fabric. I’m doing the biggest size and I can’t even fit the front on 2 yards of fabric. how do you make a pattern and not test it on the biggest size? ridiculous
Hi Hannah, our 2 yd recommendation was for the size we made, which I believe was a 38. Did you try a few pattern placement options before you started cutting? Sometimes it’s necessary to cut the pieces out individually instead of layered. Are you trying to pattern match? The largest pattern piece requires an area of approximately 33×28 inches. If we double that, there should still be ample space for other pieces. You shouldn’t need more than 2.5 – 3 yards for this shirt, unless you’re pattern matching, or there’s an obvious direction to the print.
I understand that these patterns are free, but there shouldn’t be a guessing game as to how much fabric we need to buy. I came to the comments looking for fabric questions because it didn’t seem right that the size I’d need to make would fit on two yards of fabric. I’m worried about trying to make any patterns from this site because of the question marks around how much fabric any of them need.
Hello!
Thank you for visiting and downloading from Mood Sewciety!
We aim to offer you the best guidance possible, although there may be some approximations in our free sewing patterns to maintain their accessibility. We recommend printing out the pattern and assembling it to fit your size. By aligning the pattern pieces according to the grain lines, you can estimate the required yardage for your specific size with greater accuracy. A list of products and yardage amount used can be found in this post next to the technical drawings.
Happy Sewing!
The MoodSewciety Team
Nice pattern. Just a question, the seam allowances are already included or should they be added ? thank you again.
Hi Manuela, all of our patterns include a 1/2″ seam allowance, unless otherwise stated! 🙂
Hello, I don’t understand the 7th step, could someone explain ?
Hi Naomie, step 7 has been revised for more clarity! 🙂
I hate to say it but I’m super disappointed with this shirt pattern. The armhole shaping is rough, and the drop isn’t deep enough. The collar is absolutely massive, even on the size 36, and the shape of the neckline keeps the collar far away from my neck. I’m just glad I tested it in muslin first and didn’t ruin my actual fabric.
Hi Tyler, we’re sorry you weren’t happy with the pattern! But thank you for your feedback 🙂
It was so helpfull. even though it was my first sewing project I have finished it. Thanks for that pretty pattern <3
What do you mean by ‘pin the interfaced side of the collar to the right side of the fabric’? The pattern says to cut two collar interfacing pieces on the fold, so both collar pieces should have interfacing, or am I misunderstanding?
Hi Alice, depending on the fabric and interfacing used, oftentimes both collar pieces aren’t interfaced. In that case, the interfaced piece is placed on the underside, so the non interfaced piece is visible when worn.
I hate to be the one who is not fawning over this pattern, but your directions are vague, the pictures are awful, and I am not inside your head, so a more detailed version of what you are doing would be appreciated. I’m tired of trying to guess what you are telling me to do and the photos do not help as you cannot tell what you are doing in the pictures. I can’t be the only one who thinks your instructions are skipping some very major steps because you expect others to know what you are referring to. Please be more detailed in your assembly instructions, more like a pattern you would purchase. That is one reason I have not purchased any fabric from this establishment in a couple of years. I simply do not have the money to waste when I guess wrong and compromise my fabric, basically, ruining the garment, and throwing money away. The last time I voiced my opinion on the inadequate instructions, no one even bother to contact me to ask where I was having a problem or apologize for the fact that I was having a problem.,. If your attitude is that it’s free so I shouldn’t complain and you can’t be bothered to explain your process that sends the message that you wouldn’t care if I were unhappy with a purchase of your over-priced fabric. Not a good message for a business to send if that business expects to be successful;
Hi Carolynn, we’re sorry that you’re feeling so frustrated. In order to keep our 350+ sewing patterns free, we unfortunately cannot rewrite every single older pattern for more detailed instructions. That’s quite a task for a 3 person team! We are directing our focus to more in-depth tutorials for our current free sewing patterns, as well as providing technical support for patterns that are up to 2 years old. We get dozens of comments and in-depth technical questions every single day, in addition to direct emails, and I apologize if you feel like you’ve been ignored. We have over 700 comments on the blog awaiting to be answered, and again, we’re a small team and we’re trying our best. I can assure you, we haven’t been ignoring you. Thank you for your understanding. 🙂
Agreed — as a confident beginner I was able to figure out everything except for the collar. 🙁 I have no idea what the pictures are trying to show me. The fabric used is far too busy for the instructions to be clear.
Loved that that pattern pieces themselves were free, but I need to go and seek out actual instructions.
I wish I had read the comments before I started, the instructions are not great especially for the collar but muddled through with the help of youtube videos. I made the size 50 for my partner and the collar is ridiculously large and the overall length of the shirt was too short. Sadly, I wasted my cute Santa fabric on it ☹
Hello Nerish,
We’re sorry you’re unhappy with the fit of this pattern. It’s important to remember that every individual’s body is unique, and a pattern will fit differently on different people. When creating these free patterns, we aim for a standard fit that works for a wide range of body types, but we understand it might not be perfect for everyone.
We always recommend making a muslin (or toile) first. It will allow you to assess fit and make necessary adjustments before cutting into your expensive fashion fabric.
Just made this pattern for my son for a holiday shirt. Shirt came out super cute. As everyone said previously collar instructions were kinda vague but it was relatively easy to figure out. Basically you sew the right side of thcollar or to the right side of the back. Only sew through 1 layer of the collar, I pinned the other side up so I wouldn’t accidentally catch it. Then you fold the bottom up a smidgen and either hand sew or machine sew it to the inside. If you are not talented at the straight line stitching I suggest hand sewing, don’t be like me. Also I kinda depending on the fabric you are using suggest maybe even sizing up 1 or 2 sizes. It could have been my fabric choice or my son grew within 12 hours both are possible but even though I went up one size from his measurements it still was a little tight in the midsection again could have been my mediocre skills. I also used 1/4 in seams throughout just because that’s what I’m used to. I’m definitely going to be remaking the shirt in a more suitable fabric. Thanks mood.
Hi Monica,
We’re so glad you enjoyed our pattern, and thank you for your feedback 🙂
I think there should be a video instead of reading directions, I get that there are pictures but i need more visual detail to better understand things but that’s just my opinion
Hello!
Thank you for your feedback. Most of the instructions on our 350+ patterns, especially these older ones, do reflect their no-cost nature. But we understand your frustration!
Unfortunately we can’t update the instructions on every pattern in our archive, especially if they are over 2 years old, however, if there are errors we will correct them! In order to keep our patterns free, we do not offer video tutorials. We encourage you to take a look at the improved in newer patterns, offering more thorough guidance! We appreciate your engagement and invite you to explore these updated options for a better sewing experience!
Is this easy to make by yourself as a child cuz is wanna do this for a school fashion project and don’t wanna put a lot of effort into makeing it. But I want a good grade so should I make this or no?
Hi Anita, here is a great list of beginner-friendly sewing patterns! Best of luck on your project, and happy sewing!
I’m a beginner working on this and it’s not a terrible amount of effort honestly, I think if you’ve sewn before you’ll be fine.
I’m still confused about the fusing area on the front. Is it the cut line between A3,B3,C3 and A4,B4,C4?
Hey LeeAnne! That’s correct. Do you see the part of the shirt front pattern pieces, there is a notch at the neckline that says “fold back”? You can draw a straight line coming down from that notch and that will be where you cut the fusible interfacing.
Thank you! I’m on my second shirt!
Hello! Could you please help identify “facing area” to cut fusing? I couldn’t find where it is on the front piece and don’t know how to cut the fusing. Thank you!
Hello, you will need to cut out fusible interlining with the pattern pieces A & B, collar and front, then stick and press it onto the wrong side of your fabric. This will give the fabric more structure in areas needed.
Does anyone else find that the width of the back piece does not allow for the pleat, thus making the back narrower than the yokes? Or am I missing something?
Hi there, first-time sewer here. I don’t know why you guys are complaining, These instructions are pretty simple, The pictures could be better but I feel like a lot of it is just understanding how a shirt is built. I’m still working on this and it’s going great, however my only complaint is that the sleeves seem to be way smaller than in the pictures?? Might be my fault for that, but they’re pretty tight on my arms and I’m a scrawny little guy so I recommend going up a bit for the sleeve sizing.
Just FYI, the biggest size takes 4 yards of fabric.
That depends on the width of the fabric–the one used here is 59″/150cm–if you use a narrower fabric of course you will need more for the layout.
I bless God for this website, thank you for this❤️
Thank you so much! Best of luck and happy Sewing 🙂
I was scared of doing the collar but its not too bad once you get there and you can actually SEE it, and I’m a very inexperienced sewist. I think the instructions are wrong though.
1. The pattern doesn’t actually say to cut interfacing, so you need one of those, then you press that to the side you want showing (the right side).
2. Then once you’ve gone around the straight sides and flipped and pressed you can topsitch the collar here if you’re naughty like me.
3. You want the RIGHT SIDE of the collar, upsidedown, facing the WRONG SIDE of the back piece with the interfacing showing up like in the picture. (Think of it like sandwiching the brand/size label in.) I folded back the ‘wrong side’ of the collar to expose the interfacing and pinned it down so it wouldn’t get in the way when sewing. The reason for this is the way the shirt is constructed there is one ‘neat’ seam and one slightly dodgy hand sewn slip stich seam. You might logically think you want the dodgy seam on the inside against the neck but that is NOT the case, because that seam goes all the way around to the front so it’s fully exposed. You want the dodgy seam to be hidden underneath the collar on the outside at the back where it will be nicely hidden away by the collar flopping down over it.
4. I marked my center point on the collar and matched that with the centre point of the pleat in the back of the shirt. Once you’ve pinned that it’s easy to pin the outer edges and then the notches which are at the shoulder points.
5. I slightly wish I’d given myself more seam allowance when clipping in the folded notch in step 7, just to give myself mor room to nestle the collar in. that’s the tricky bit I think. But you have TONS of seam allowance on the actual collar because this collar is HUGE so go deep and wild. ( I actually also trimmed 1 cm off the flat edge of the collar to reduce the size a bit and I think that’s perfect).
6. Once you’ve stitched this ‘neat stitch’ the inside and front of your shirt will look lovely. Then you fold in and press the remaining flap which you then hand slip stitch, it hides underneath the collar so no big deal if it’s not perfect (But I think it still looks pretty great actually!
Step 6 makes more sense when you actually get to that stage. Other amendments I made were lots of cute top stiching (the button bar, the top of the pocket, all of the external seams.) and double folding the sleeve so you don’t see the back of the fabric when you fold it up.
Best of luck to everyone doing this! I think it’s fab 🙂
Note: if you want to topstitch the collar, you can do that here.
Thank you for your input and experienced advice! We truly appreciate useful suggestions like yours that can help others get the best results!
This shirt is still my absolute favorite pattern. It is easy to fit and the collar is just the right width so it’s not too stuffy. Sometimes I’ll add an extra cm or so for a pop of drama.
Thank you! We are very happy to hear and we hope you continue to enjoy all the free sewing patterns that Mood has to offer.
Hello may I ask for Step 4 – hem the edge of the facings, does it mean fold twice at 3/8 inch or just once of 3/8 inch?
Hello! You will fold twice to get a double-folded hem, this way the raw edges are tucked and hidden.
hi i am really really new to this, Is there any way you can help me understand how to stick the pattern together?
I don’t think we have a video anywhere but let me try and explain it. When you print out the pattern, you’ll see that the corners of each sheet of paper has a square printed on it. You want the squares of each page to be overlapping the squares on the page next to it, so that there is about a 1 inch overlap between each sheet. I recommend taping rows together first, then taping each row to the next.
I’ve sewed a few items before but this was my first article of clothing. I was worried about the lack of explicit instructions but it ended up being not too hard. I also thought it would be super oversized so I sized down, but now it’s actually almost too small. So if you’re worried about sizing or on the cusp, I’d size up. The collar is definitely big but I used a 70s style fabric so I think it looks good. Overall this was fun and pretty easy, thank you for providing a free pattern!
The pattern is good, but the sizing is off. I made this shirt for my partner, made size 46, which should have 4 inches of ease. The first just barely closed around her bust with no ease. If you’re making this pattern, size UP.
Iam so excited
Very useful
Thank you
I agree that the instructions weren’t the best, so I probably wouldn’t do it as a first project if you’re completely new to sewing and aren’t able to use past knowledge for how the garment should be constructed. But I will say that at least the pattern itself seems to be properly shaped and size. It doesn’t mention all of the steps, and there were some parts where the wording/photo was a bit confusing, but if you look at a button-down shirt that you already own, or just look up a youtube video for how to sew a button-down, that can help you figure out what the finished project is supposed to look like. But for a free pattern, it definitely has a better construction than any other free pattern you’ll find, and honestly there are a lot of etsy patterns that have equivalently-vague instructions. I don’t really understand people saying the collar was too big—this seems to me to be a Hawaiian shirt type of pattern, rather than a formal dress shirt, and I thought the collar was exactly as pictured, and came together quite nicely. Turned out well in my opinion, although I would recommend doing a mock-up so you can mark down any places where the instructions were vague and you may have missed something before going on to using your final fabric