
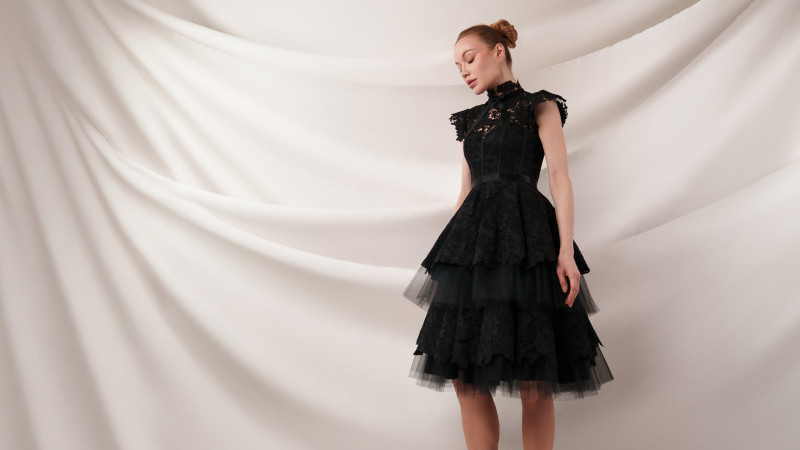
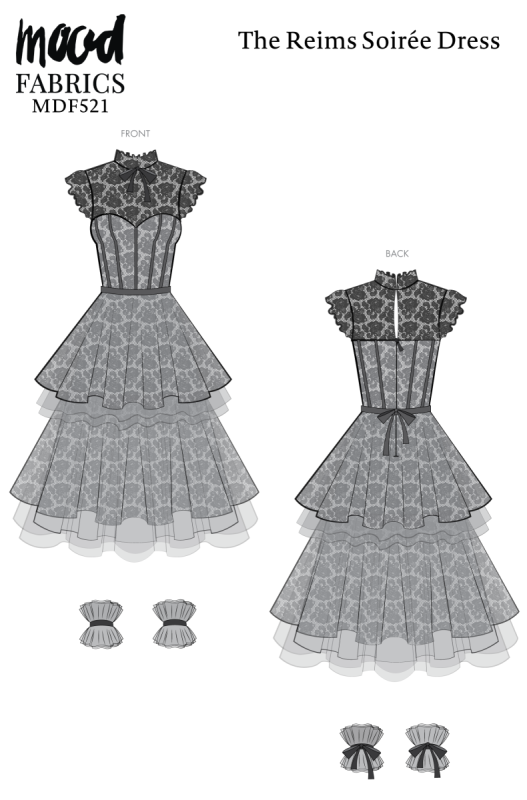
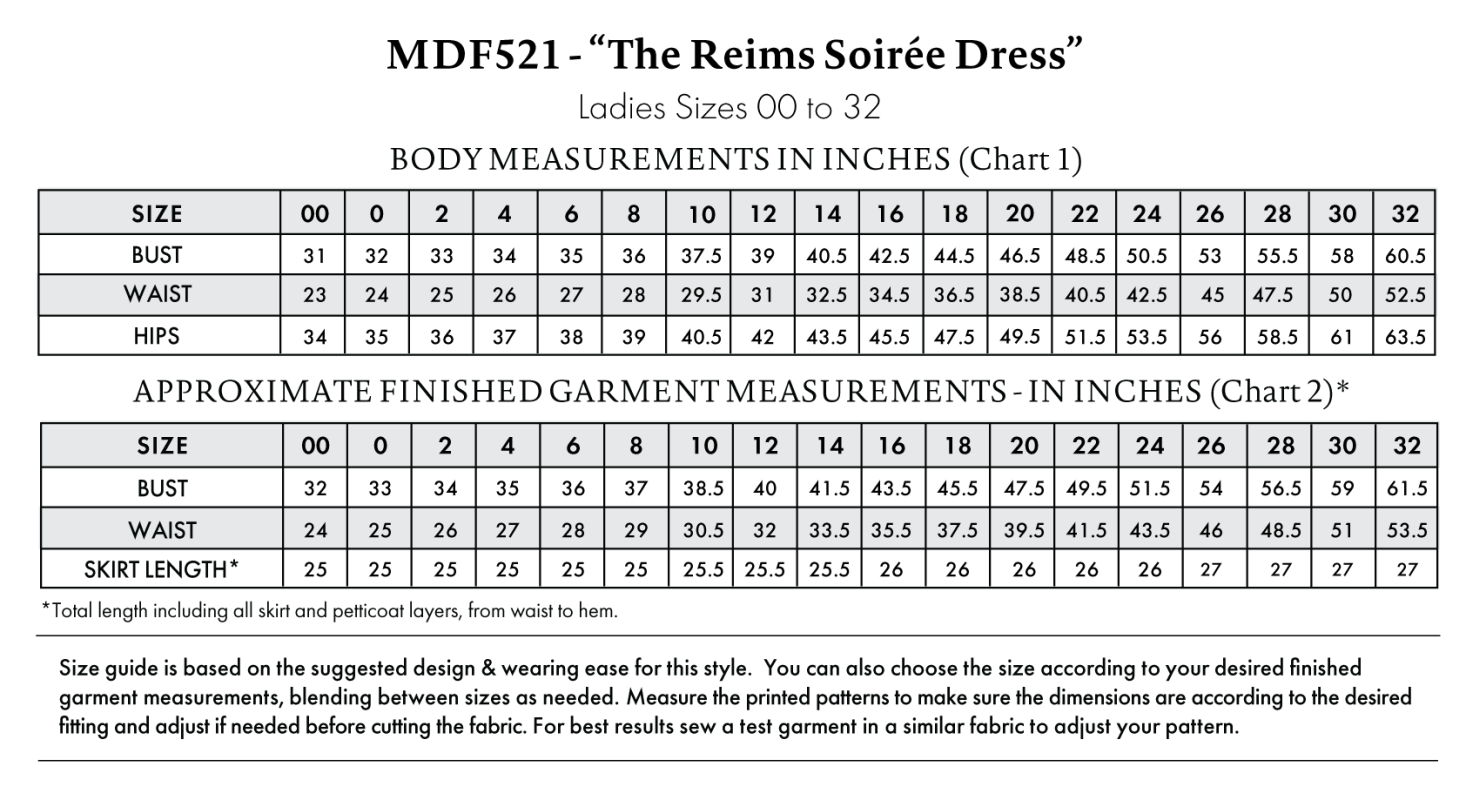
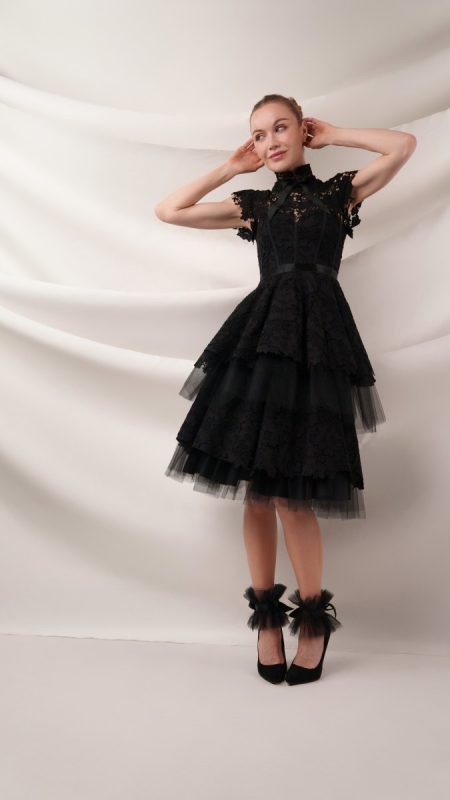
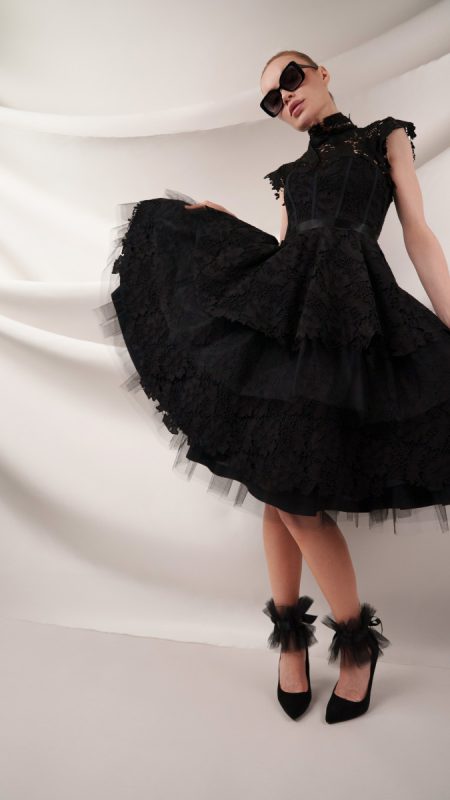
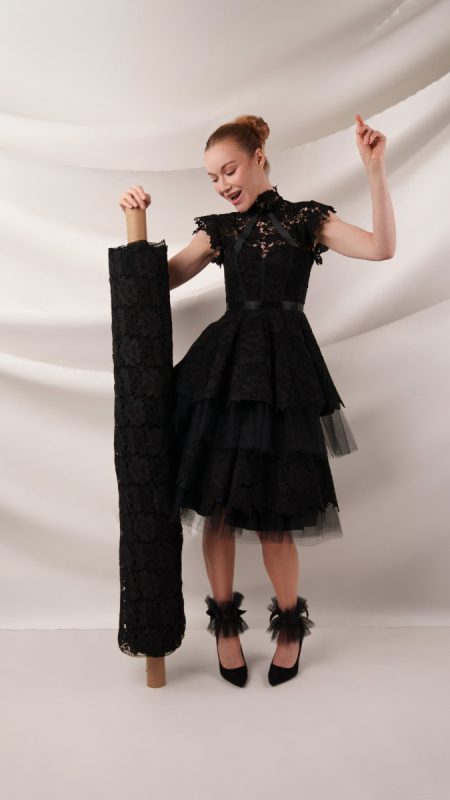
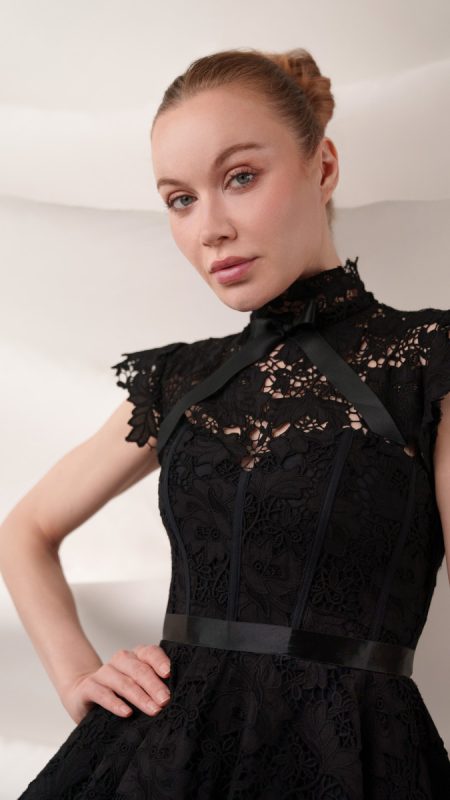
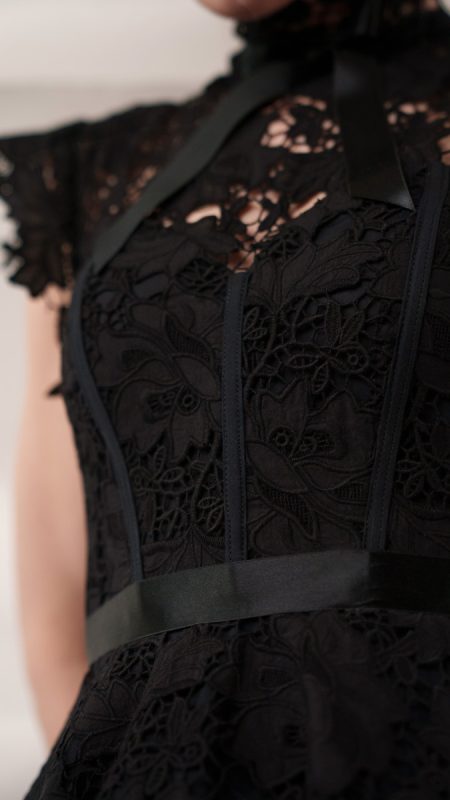
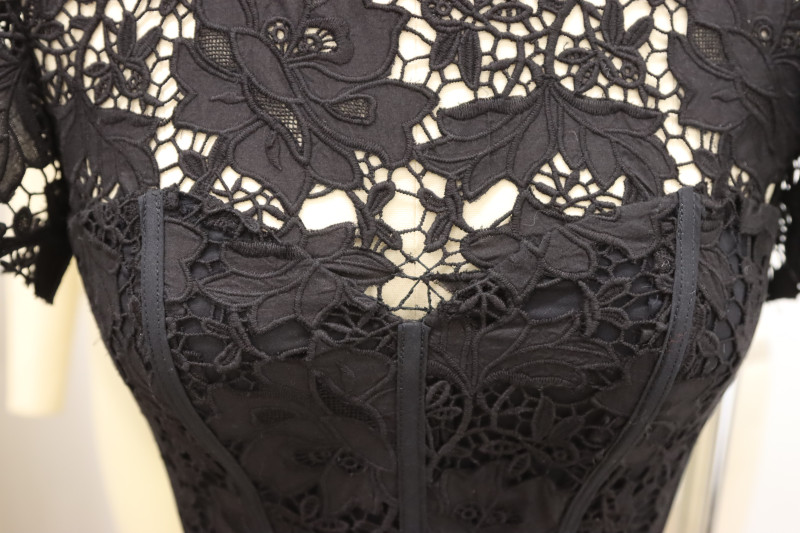
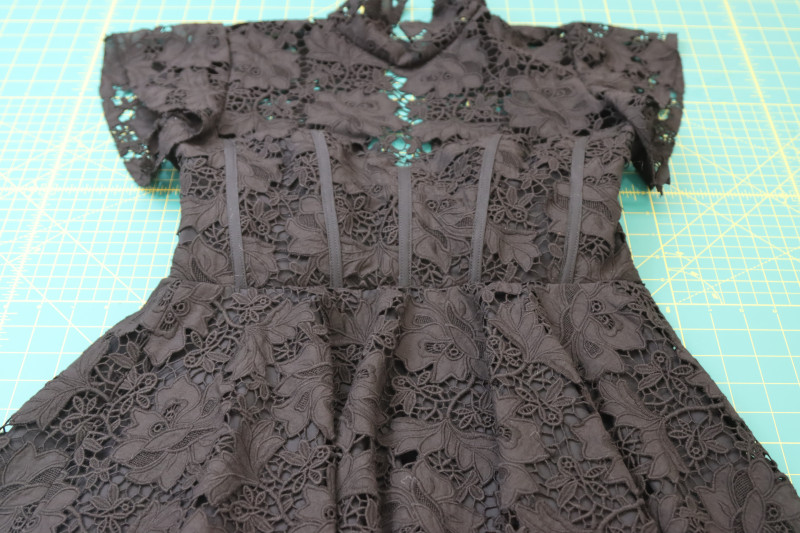
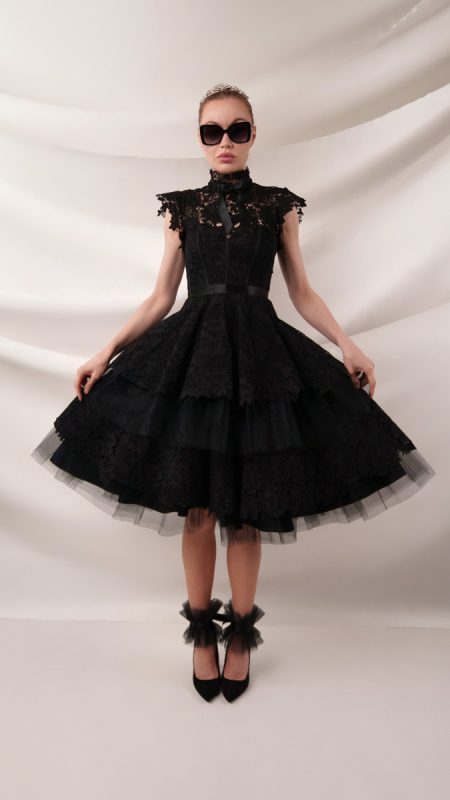
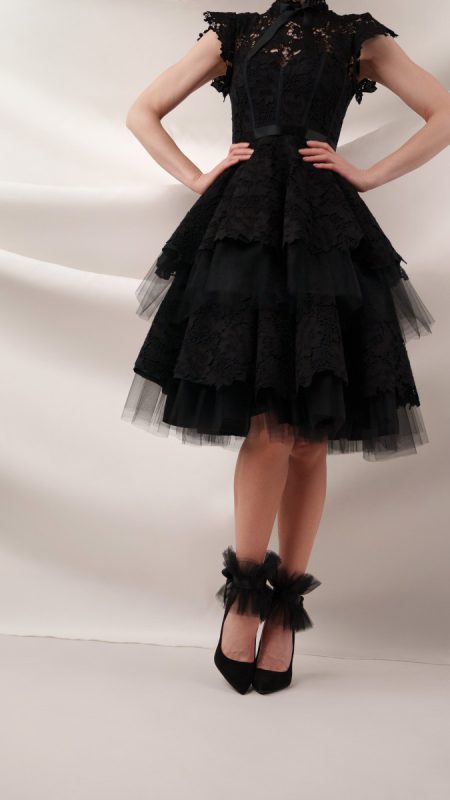
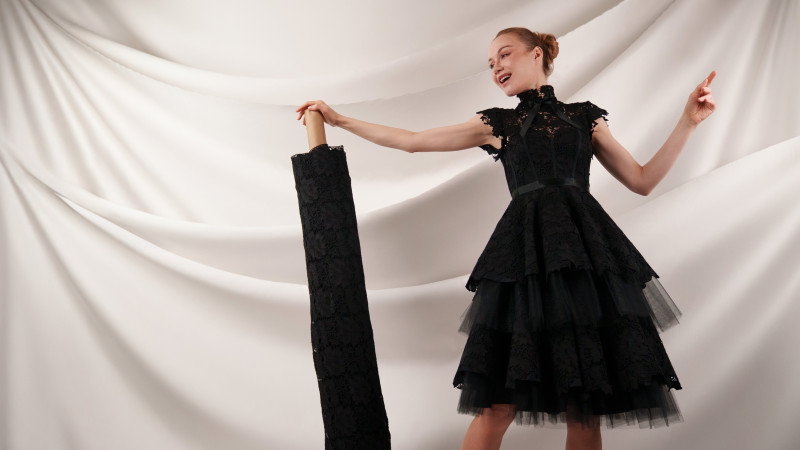
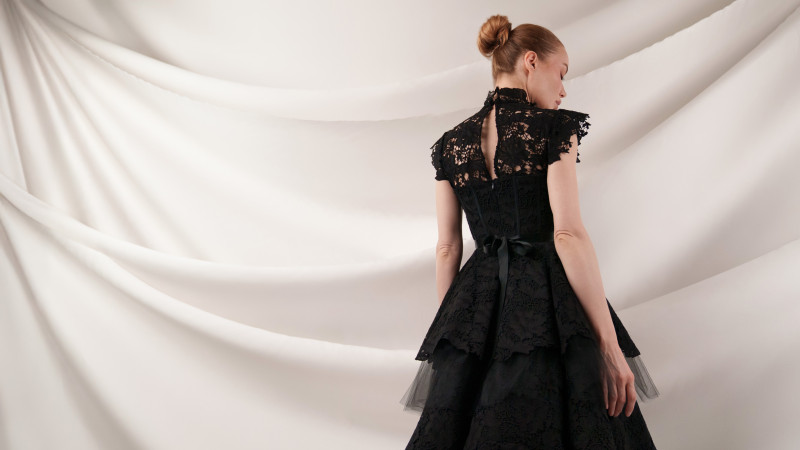
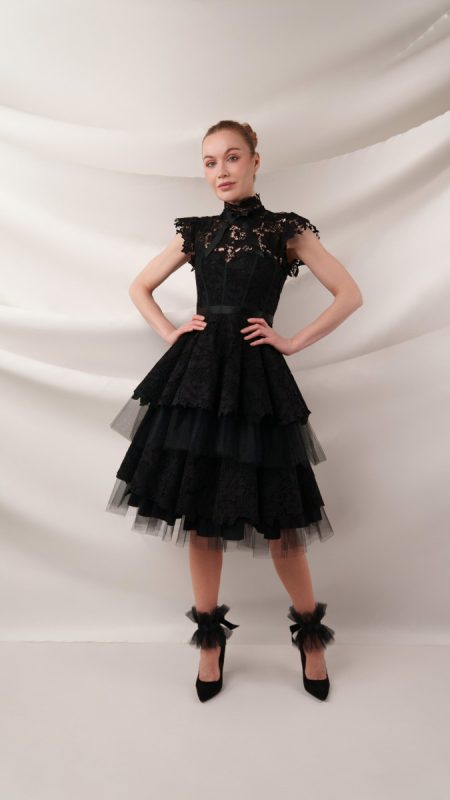
The Reims Soirée Dress is made for the moments that deserve a little extra magic. Designed with layers of guipure lace and softly gathered nylon tulle, this silhouette brings playful volume and movement to every step, creating that unmistakable feeling of celebration from the moment you put it on. The fitted bodice features a corset-inspired shape with visible boning channels stitched to the exterior for a couture finish, while the sheer neckline and delicate cap sleeves add an elegant softness that beautifully balances the structure.
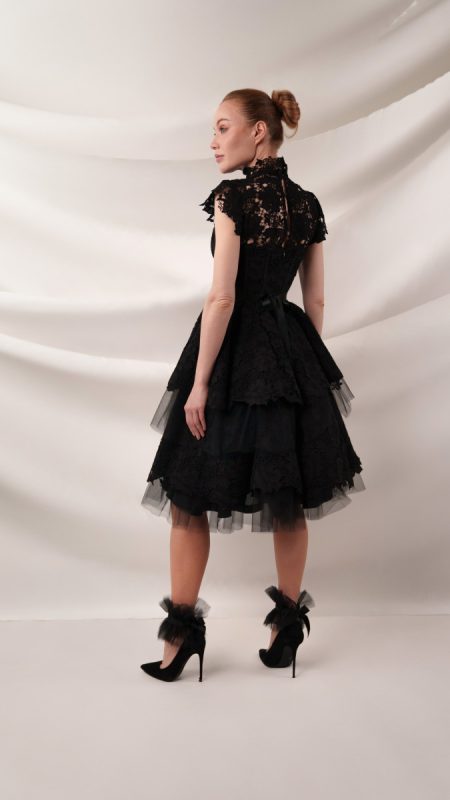
One of the most special details is the way the guipure lace has been carefully cut around the floral motifs, allowing the edges of the lace to shape the neckline, sleeves, and skirt with an organic finish that feels incredibly romantic. The tiered skirt layers add fullness without overwhelming the silhouette, and the contrast of sheer tulle beneath the lace gives the dress its dreamy, dimensional look.
What makes the Reims Soirée Dress especially versatile is its removable lower skirt layers. Because the longer tiers are attached to a separate petticoat rather than the bodice itself, the dress can instantly transform into a chic peplum top. Pair it with tailored trousers or your favorite jeans for a striking look that feels just as special as the full gown, making this pattern perfect for sewists who love pieces that can be styled more than one way. Finally, follow along until the very end of the pattern to learn how to make the adorably ruffled matching anklets to wear with your soirée dress.
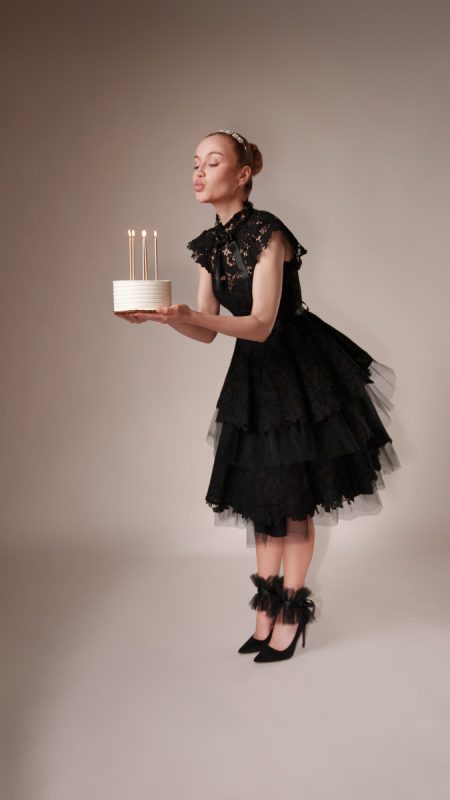
Whether you’re sewing for a milestone birthday, an anniversary dinner, a gala, or any event where you want to feel unforgettable, this dress is designed to help you be the star of the evening. In rich lace, soft tulle, or even unexpected fabric pairings, the Reims Soirée Dress is a statement piece that turns every entrance into a moment.


Essential Materials & Sizing Guide for the Reims Soirée Dress
Continue reading for a breakdown of what knowledge and materials you need for creating your very own soirée dress! We’ve got you covered with the recommended materials we used—if you want to follow along exactly—as well as a curated list of alternative fabric type recommendations if you want to customize your own version. The Reims Soirée Dress free sewing pattern download includes technical drawings for seam and silhouette visibility, plus a size chart to help you find your perfect fit!
Purchase Products Used Below:
Quantities indicated are for sewing a size small dress. Toggle the ‘SHOP THIS LOOK’ box to find quantity estimates for other sizes.
- 5 yards of Famous Australian Designer Black Floral Guipure Lace with Scalloped Edges
- 6.5 yards of Nylon Tulle 108″ – Black – Pavlova Wide Collection
- 5.5 yards of Cotton Voile – Black – Mood Exclusive Farley Collection
- 6 yards of Black Single Face Silk Satin Ribbon – 1″
- 2 yards of Black Rigilene – 6mm/0.25″
- 1 each of Invisible Zipper 24″ by YKK – 391 Midnight
- 1 each of Gutermann Sew All Thread 1000m – 10 Black
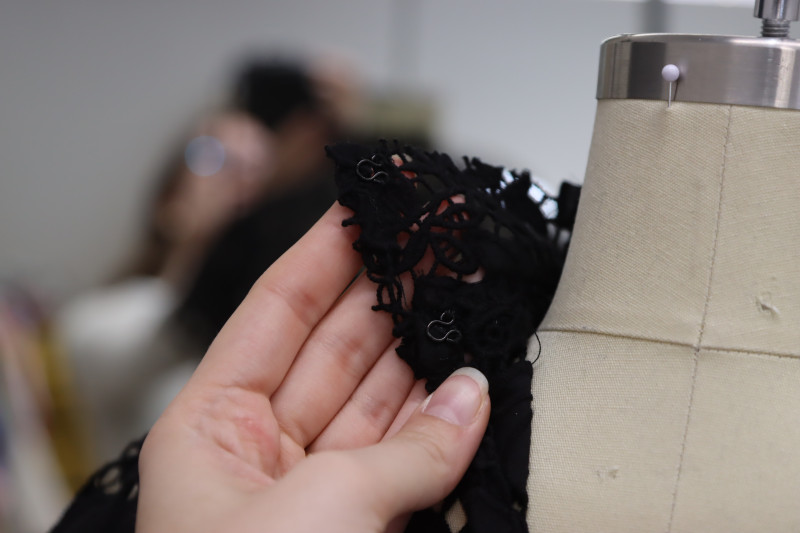
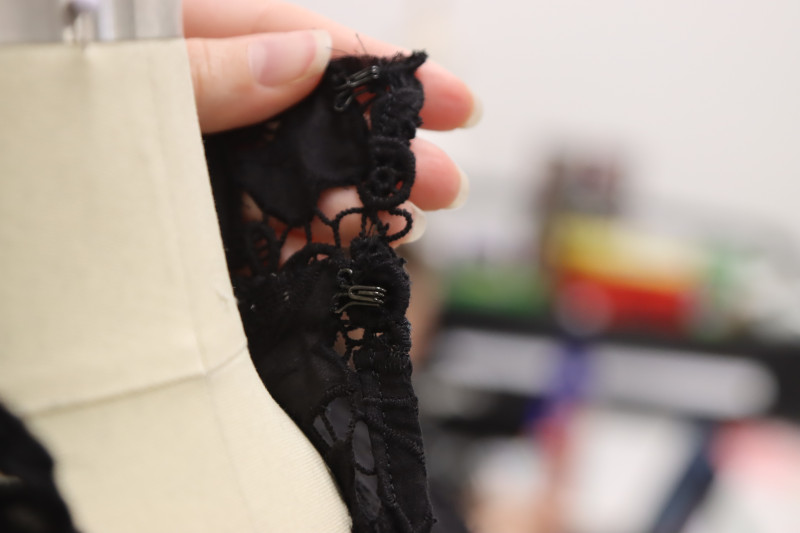
- 1 each of Dritz Black Hooks & Eyes Size 2 – 14ct
- MDF521 – Reims Soirée Dress Sewing Pattern (Free download below!)
*Quick Tip! The ‘SHOP THIS LOOK’ box defaults to full-yard quantities. To order an exact half-yard quantity for any fabric, simply use the decrease quantity button (-) to subtract by the half yard. Then click “ADD TO CART” to add all materials to your cart. (Our system can only display full-yard quantities initially.)
Alternative Fabric Type Recommendations:
The Reims Soirée Dress sewing pattern is best suited for a variety of fabric weights—given the style; from feather-weight to lightweight, and medium weight fashion fabrics. Explore other fabric types or colors from our featured collections for your dress with the links below.
Download Your Free Sewing Pattern
Submit your name and email in the form below to receive the download link for the Reims Soirée Dress free sewing pattern directly in your inbox. Mood Sewciety Patterns will send your free download link via email with the subject line: ‘Your Free Download from Mood Sewciety – The Reims Soirée Dress’ (in PDF format for A4 and letter-size printing).
© MoodFabrics.com / MoodSewciety.com – Mass production, resale, or distribution of this pattern in any form is strictly prohibited.
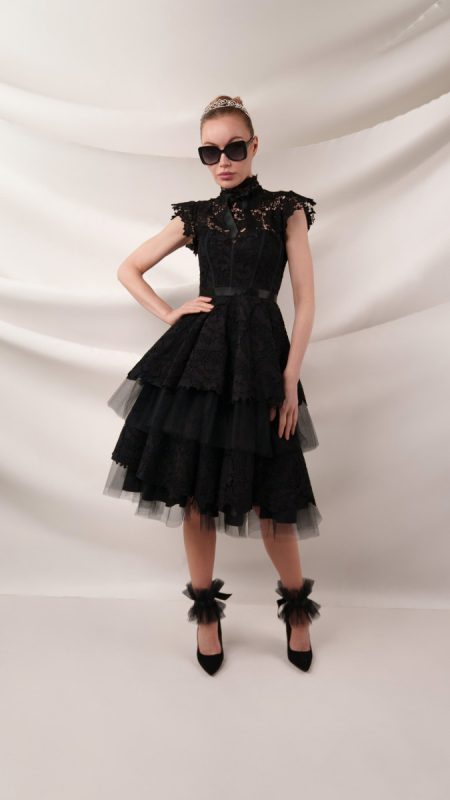
Find Your Perfect Fit
The Reims Soirée Dress Sizing Guide is based on the suggested design & wearing ease for this style. You can also choose the size according to your desired finished garment measurements, blending between sizes as needed. Measure the printed patterns to make sure the dimensions are according to the desired fitting and adjust if needed before cutting the fabric. For best results, sew a test garment in a similar fabric to adjust your pattern.
Note: Always read all the instructions before cutting the fabric!
How to Sew The Reims Soirée Dress
The instructions provided below are designed to guide you through sewing the Reims Soirée Dress from start to finish.

3 Tips for Sewing with Guipure Lace
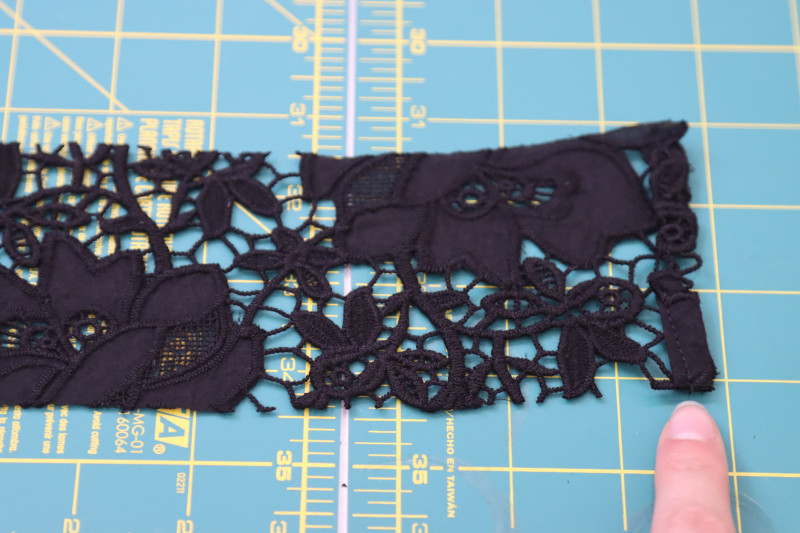
⇒ Don’t skip top stitching, stay stitching, or hand stitching in this project. The guipure lace has lots of holes in it, so it really needs to be secured in place to avoid ripping it and getting it caught on things when you wear it.
⇒ You can trim the seam allowances on the lace to ¼ inch after sewing if you want your seams to be super neat and clean without multiple bulky layers of lace showing through.
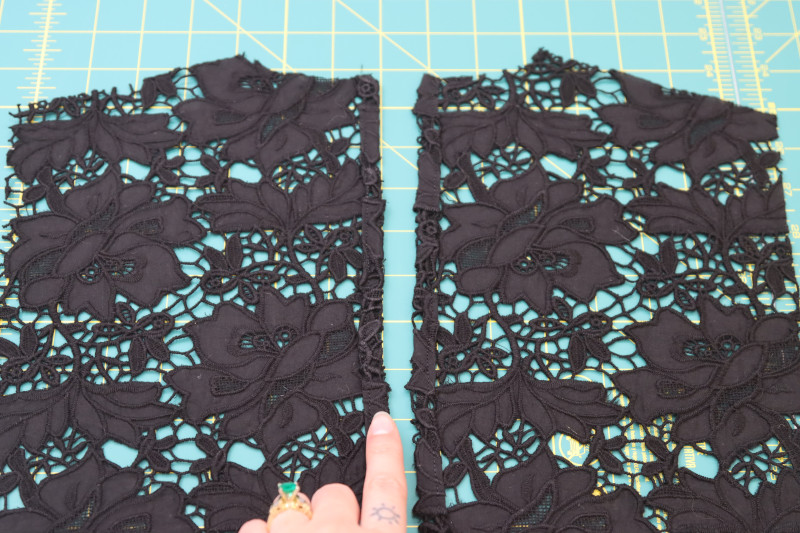
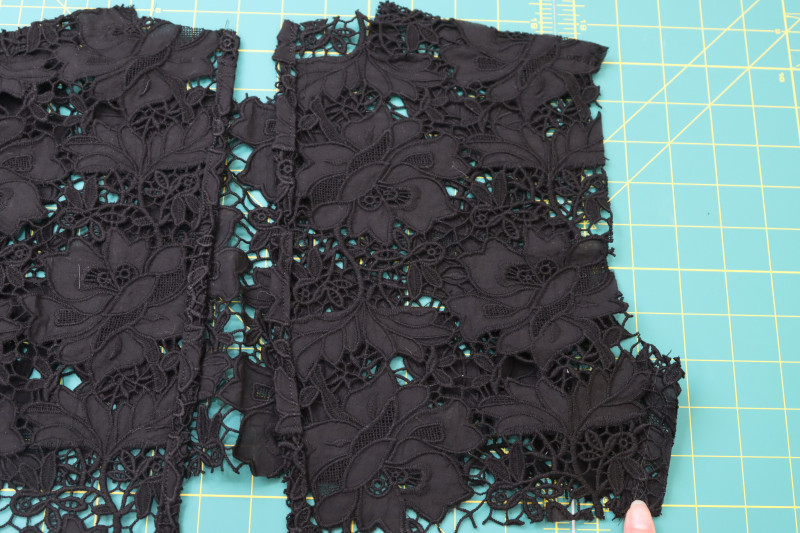
⇒ Go slowly when cutting around the flower motifs so that you don’t accidentally cut off too much of a piece of a flower and leave yourself with a bald spot on your dress.
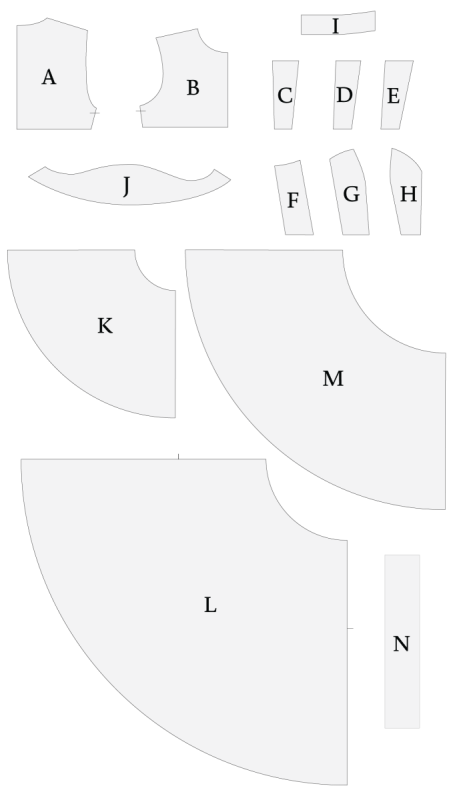
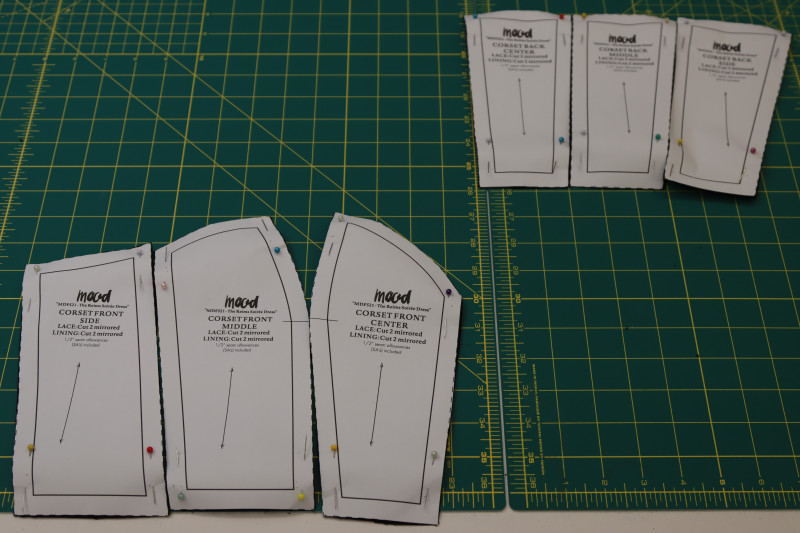
Pattern Pieces & Fabric Cuts Needed
- (A) TOP BACK
- Fabric – Cut 2 Mirrored
- (B) TOP FRONT
- Fabric – Cut 1 on Fold
- (C) CORSET BACK CENTER
- Fabric – Cut 2 Mirrored
- Lining – Cut 2 Mirrored
- (D) CORSET BACK MIDDLE
- Fabric – Cut 2 Mirrored
- Lining – Cut 2 Mirrored
- (E) CORSET BACK SIDE
- Fabric – Cut 2 Mirrored
- Lining – Cut 2 Mirrored
- (F) CORSET FRONT SIDE
- Fabric – Cut 2 Mirrored
- Lining – Cut 2 Mirrored
- (G) CORSET FRONT MIDDLE
- Fabric – Cut 2 Mirrored
- Lining – Cut 2 Mirrored
- (H) CORSET FRONT CENTER
- Fabric – Cut 2 Mirrored
- Lining – Cut 2 Mirrored
- (I) COLLAR
- Fabric – Cut 1 on Fold
- (J) SLEEVES
- Fabric – Cut 2 Mirrored
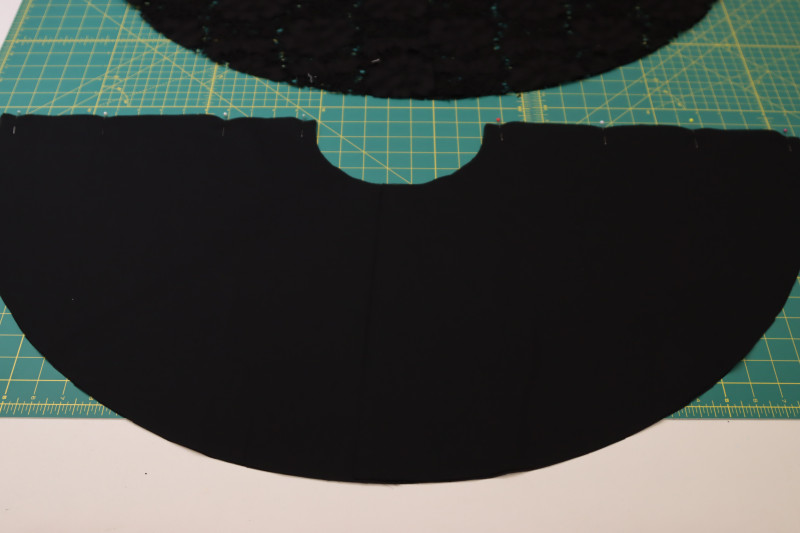
- (J) TOP SKIRT
- FRONT:
- Fabric – Cut 1 on Fold
- Lining – Cut 1 on Fold
- BACK:
- Fabric – Cut 2 Mirrored
- Lining – Cut 2 Mirrored
- FRONT:
- (L) PETTICOAT LINING
- FRONT:
- Lining – Cut 1 on Fold
- BACK:
- Lining – Cut 2 Mirrored
- FRONT:
- (M) LOWER SKIRT
- Fabric – Cut 2 on Fold
- Lining – Cut 2 on Fold
- (N) ANKLE CUFFS
- Tulle – Cut 6
Sew with a 1/2″ seam allowance for all seams unless otherwise specified.
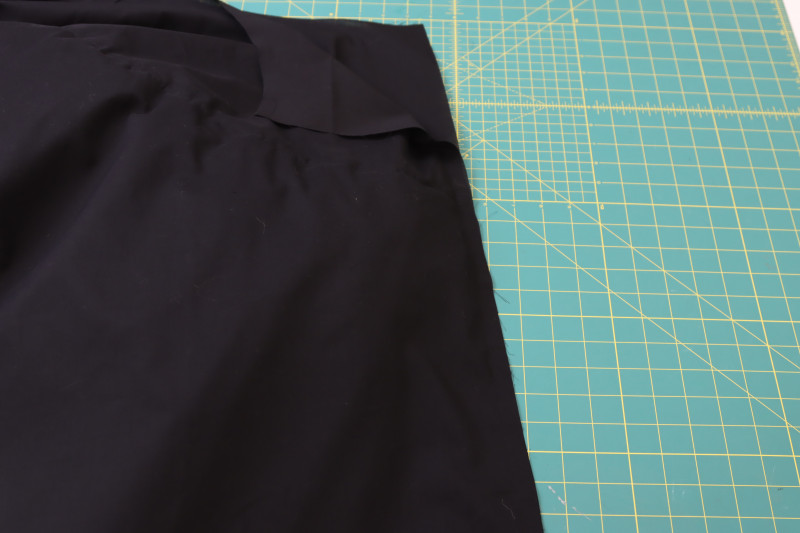
HOW TO SEW THE PEPLUM CORSET
Step 1
LACE CORSET
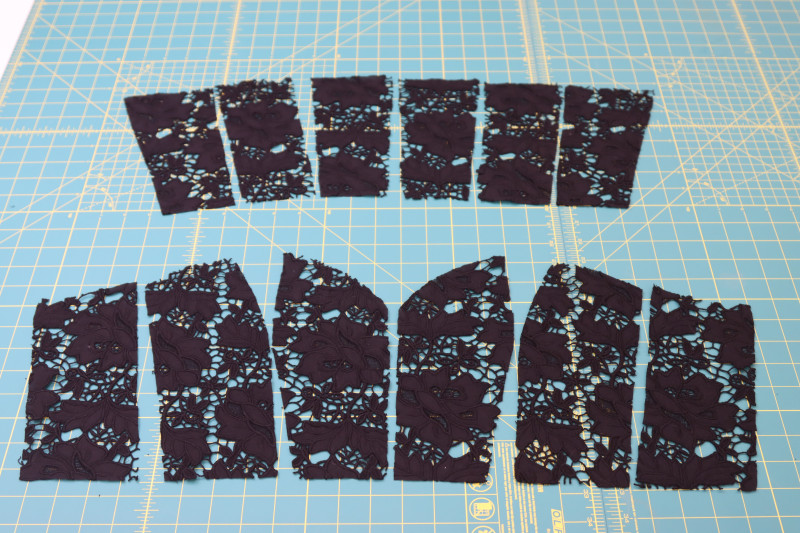
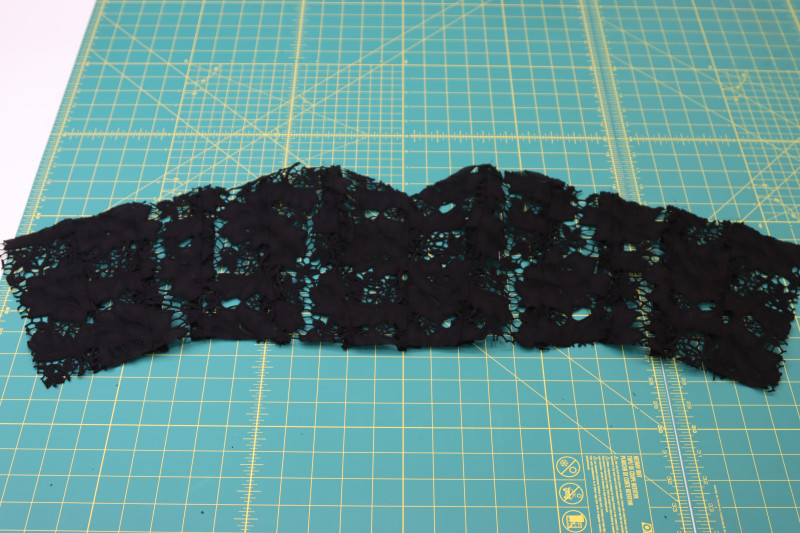
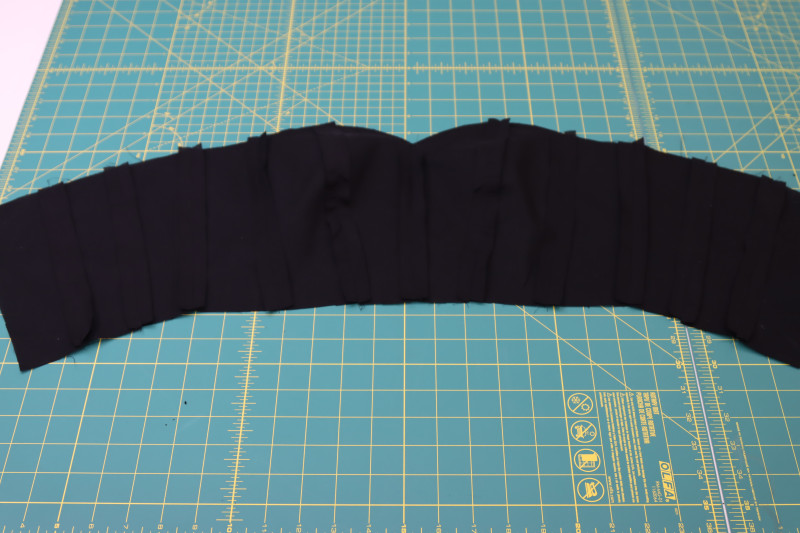
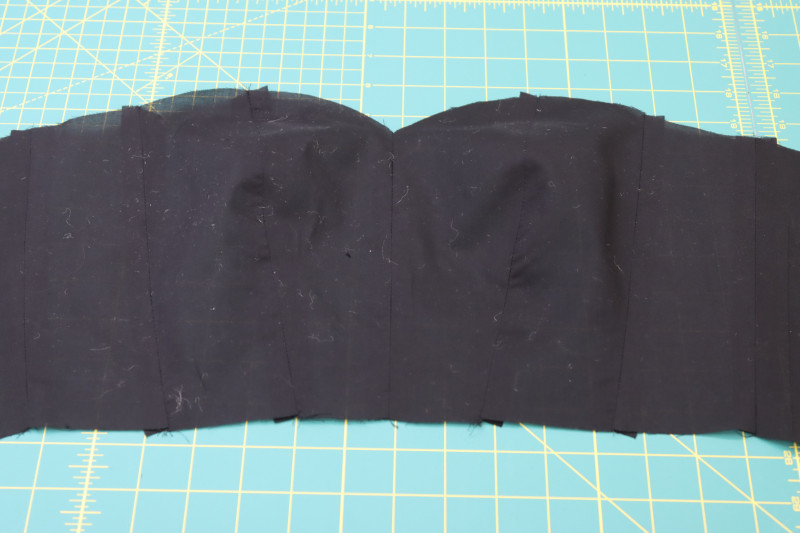
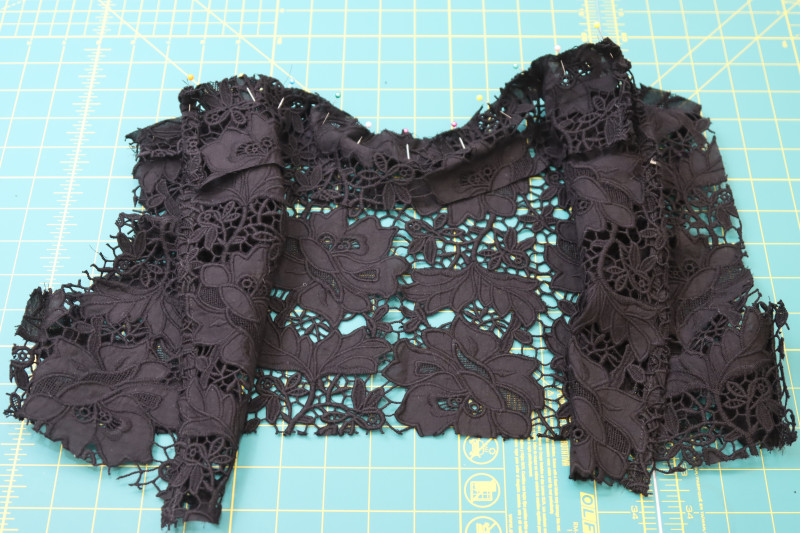
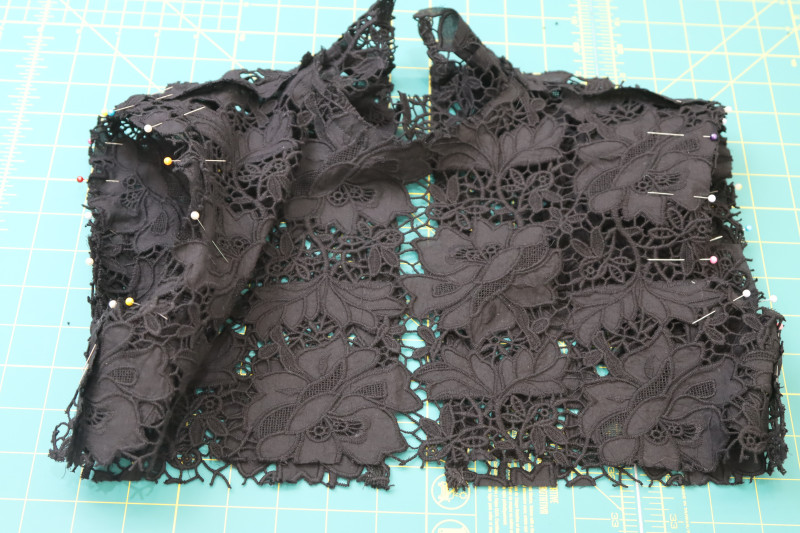
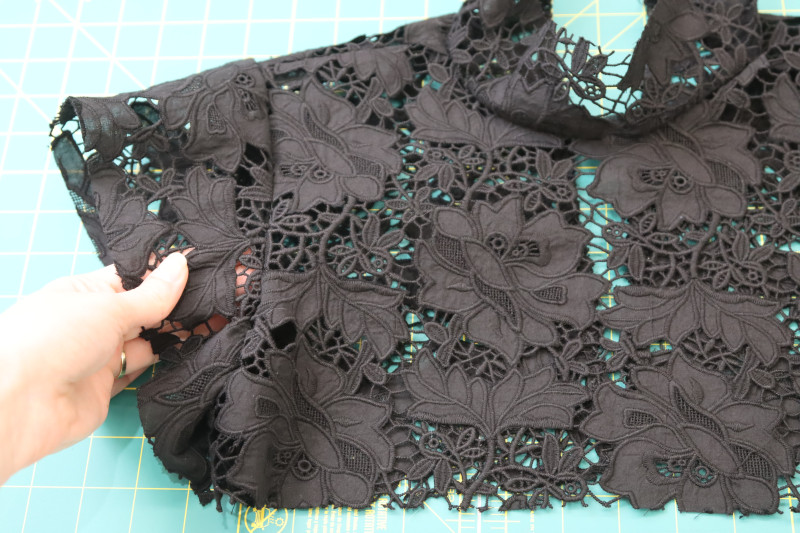
- Layout all the corset pieces as shown in the first photo below. Make sure to cut the notches on the corset front middle and corset front center pieces.
- Pin and sew each corset seam in the order shown below.
- Press all the corset seams open and flat.
Step 2
LINING CORSET
- Repeat the same process from step 1 with the corset lining pieces.
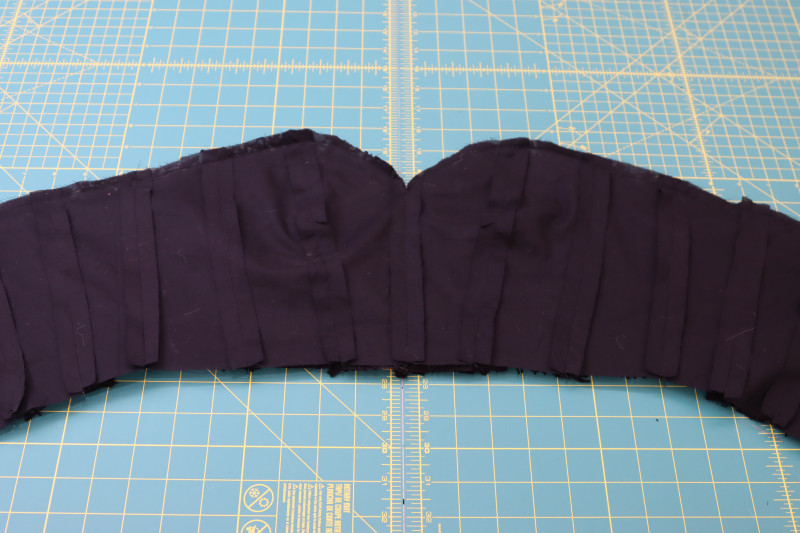
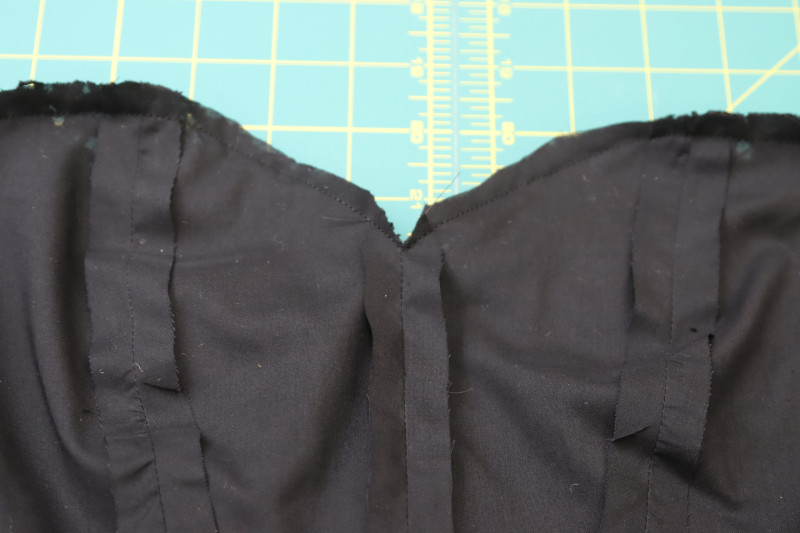
Step 3
KEYHOLE OPENING
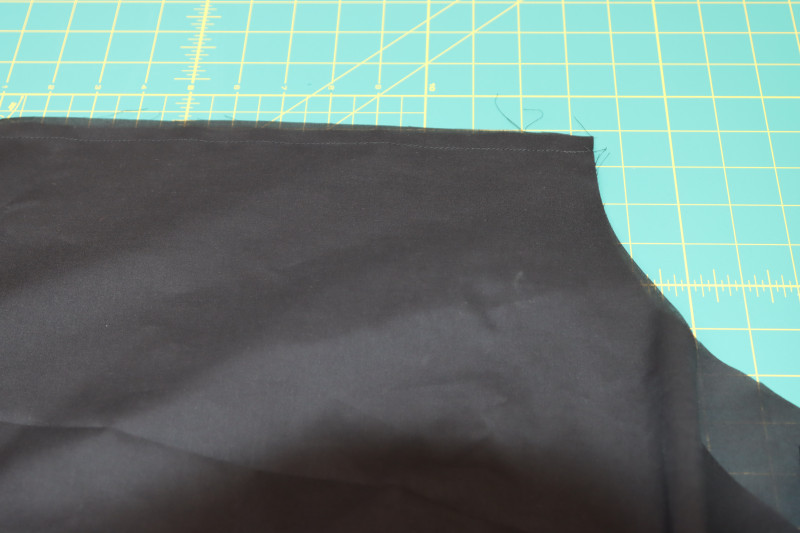
- Sew a double folded ¼ inch hem at the center back of the top back pieces.
- Press the rolled hem flat.
Step 4
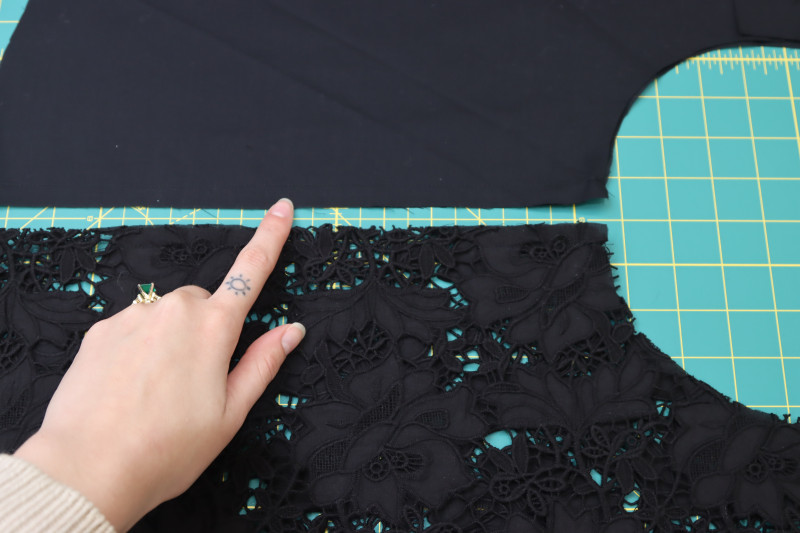
BODICE SEAMS
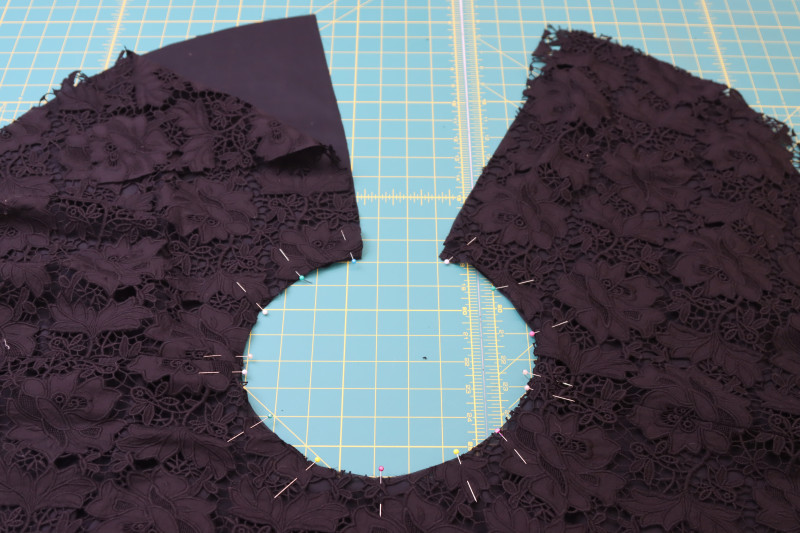
- Place the top back pieces right sides together with the top front piece with the shoulders and sides lined up.
- Pin and sew the top front and top back pieces together at the shoulder and side seams.
- Press the seams open and flat.
Step 5
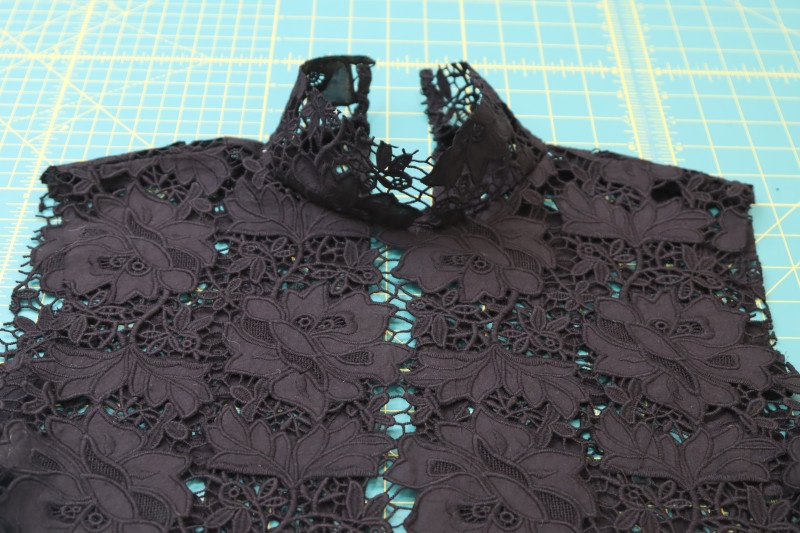
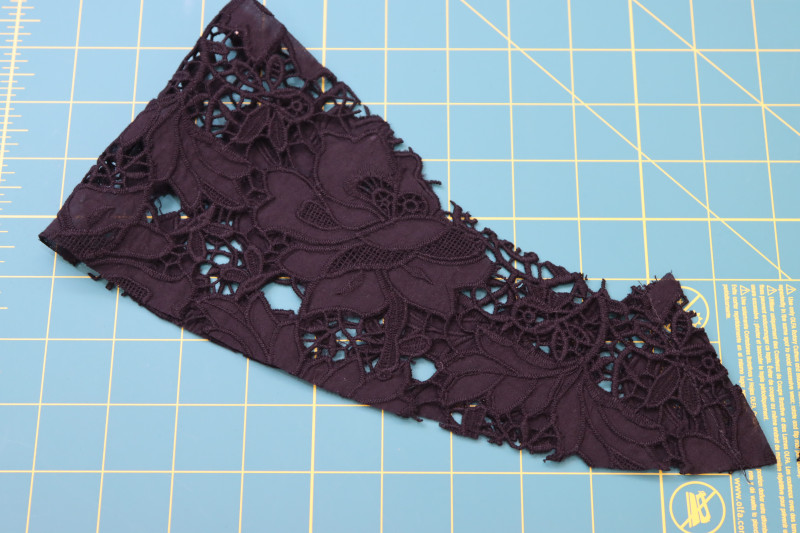
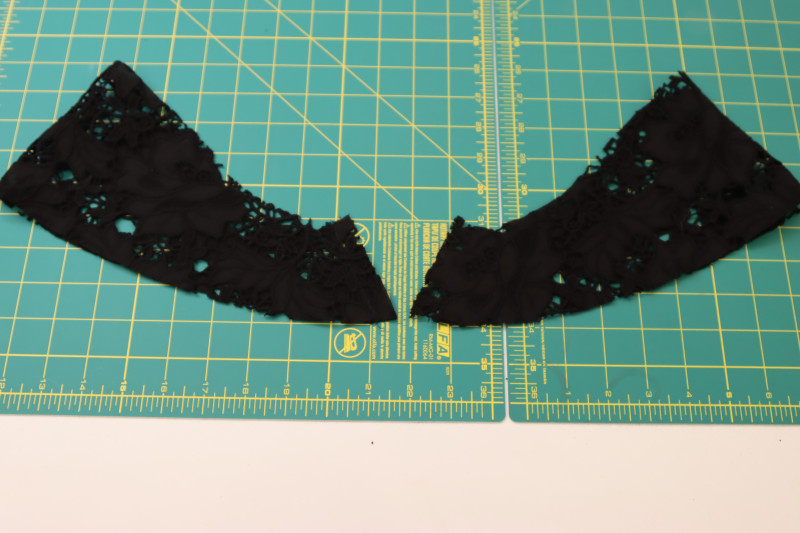
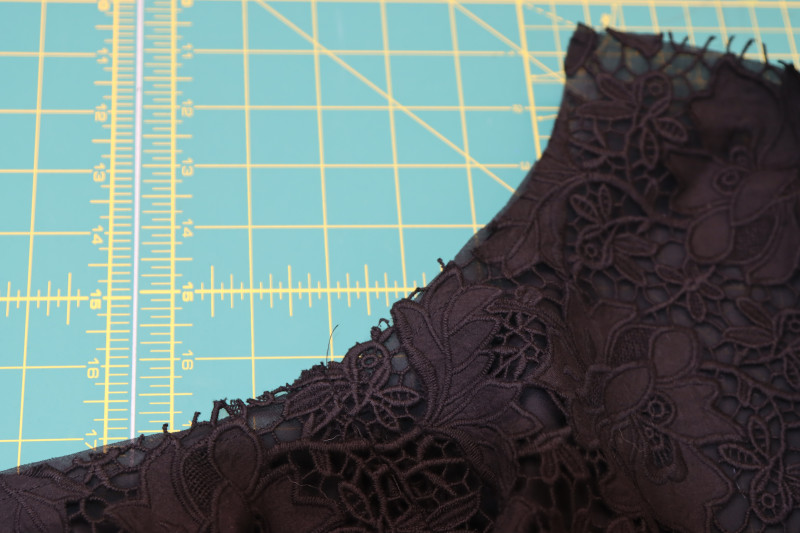
COLLAR
- Repeat the same process from step 4 onto the center back of the collar so that the raw edge of the lace is finished.
- Pin the bottom edge of the collar right sides together with the neckline of the top.
- Sew the collar to the neckline of the top.
- Press the collar seam flat.
Step 6
SLEEVES
- Fold the sleeves in half right sides together with the sleeve inseams touching.
- Pin and sew the sleeve inseams.
- Press the sleeve inseams open and flat.
- Pin the sleeves right sides together into the armscyes of the top, making sure that the fronts of the sleeves are aligned with the front of the top.
- Sew the sleeves into the armscyes.
Step 7
NECKLINE
- Place the lining corset and the lace corset right sides together.
- Pin and sew the necklines of the corset together, making sure all the seams are lined up.
- Clip the center front corner of the neckline to allow it to lay flat once the corset is flipped right sides out.
- Flip the corset right sides out.
- Understitch the corset lining to the seam allowance of the neckline to keep it from being visible from the outside of the dress.

Step 8
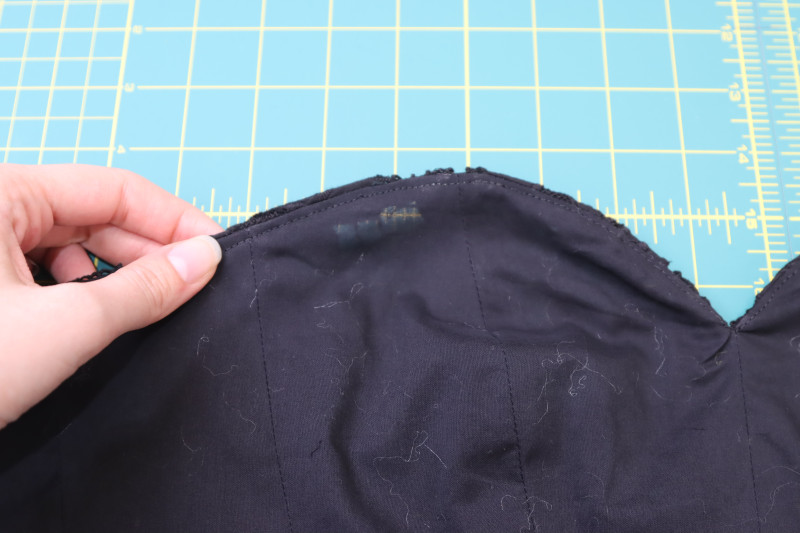
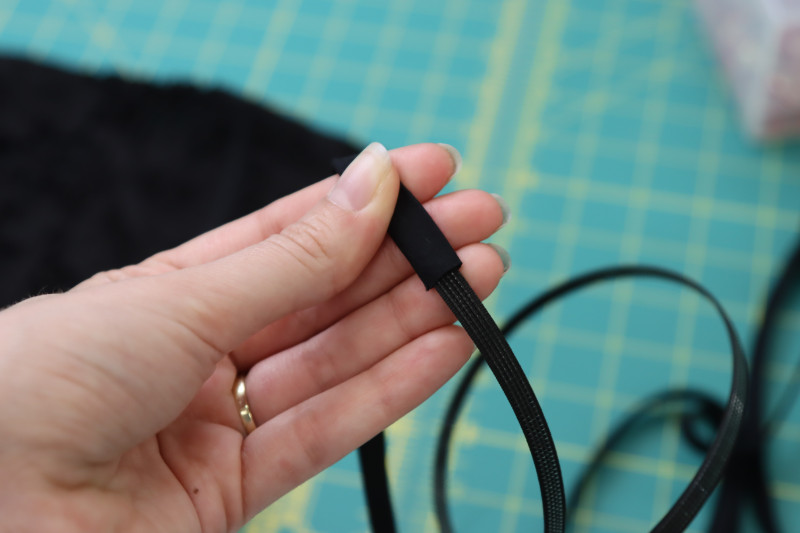
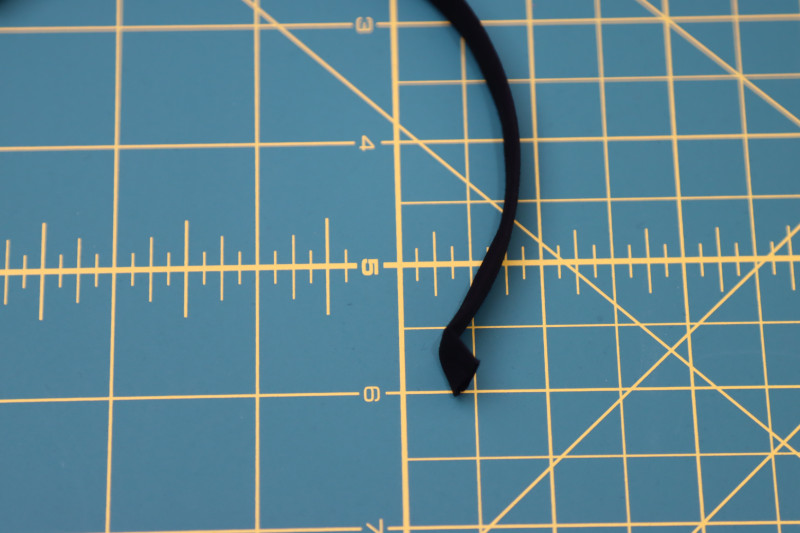
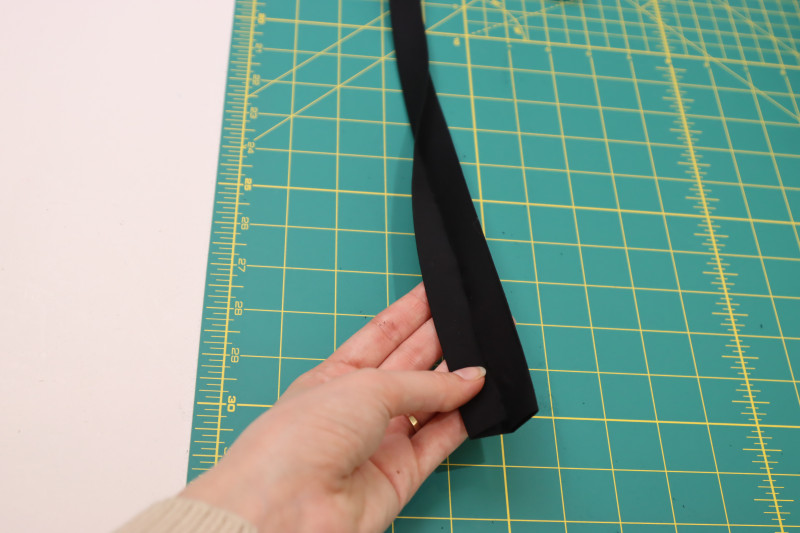
BONING CHANNELS
- Cut strips of fabric on the bias of the lining fabric that are 1.5 inches wide and at least 2 yards long.
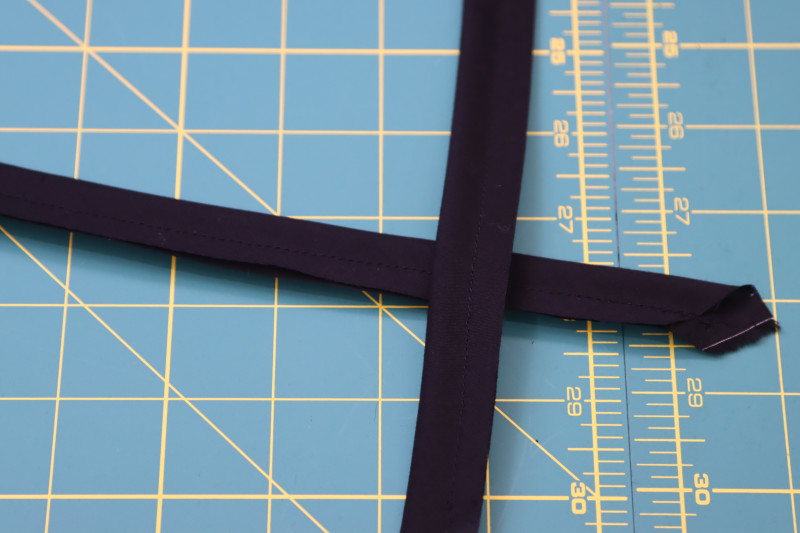
- Fold the strip of bias cut fabric longways and sew with a ½ inch seam allowance.
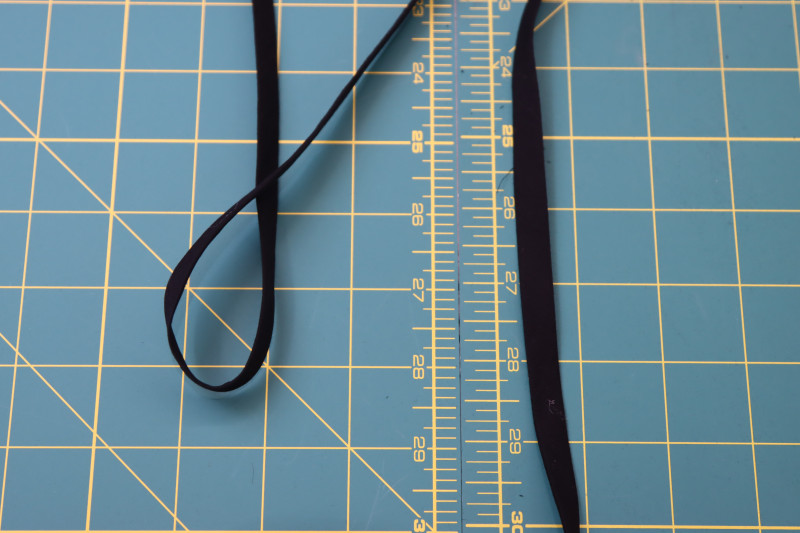
- Flip the bias strip right sides out with a loop turner.
- Press the bias tube flat.
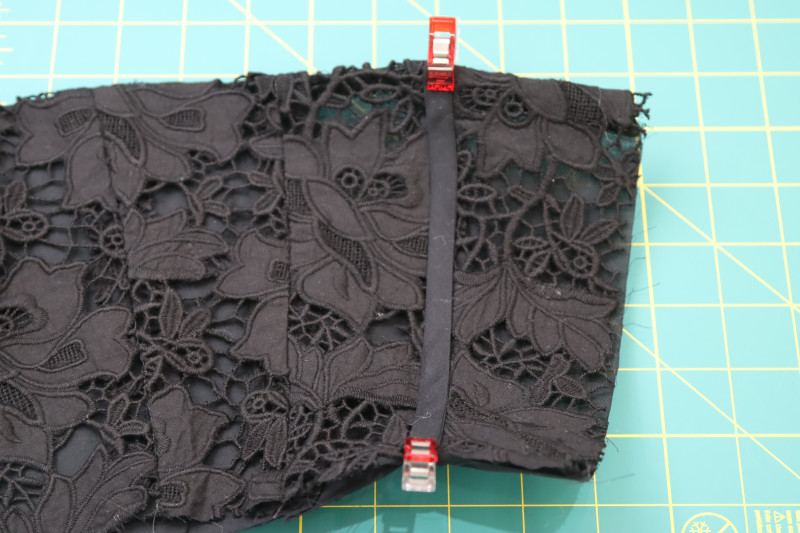
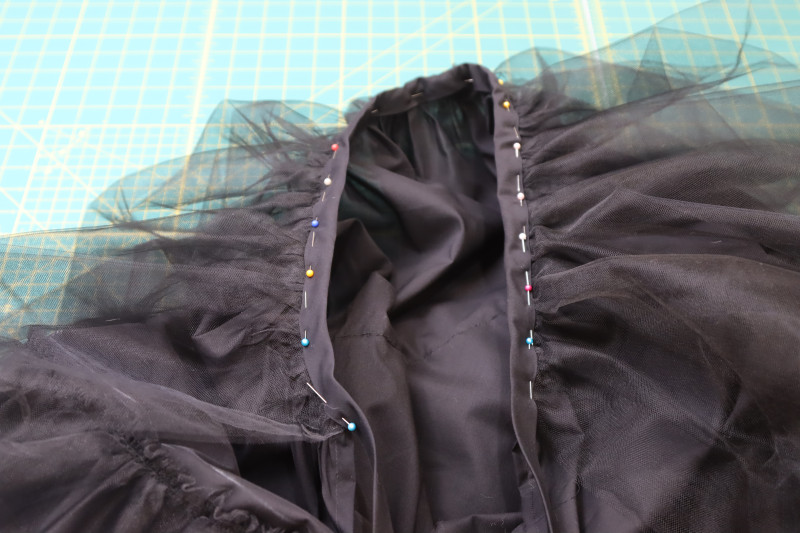
Step 9
ATTACH BONING CHANNELS
- Cut the bias cut tube into multiple pieces so that the tubes are 1 inch longer than the length of the seam that they will be covering on the corset.
- Insert pieces of rigilene boning into the tubes that are the exact height of each corset seam.
- Fold the top edge of the bias cut casing so that it covers the cut edge of the rigilene at the top of the corset.
- Pin and sew the casing with the boning in it on top of the corset seams.
Step 10
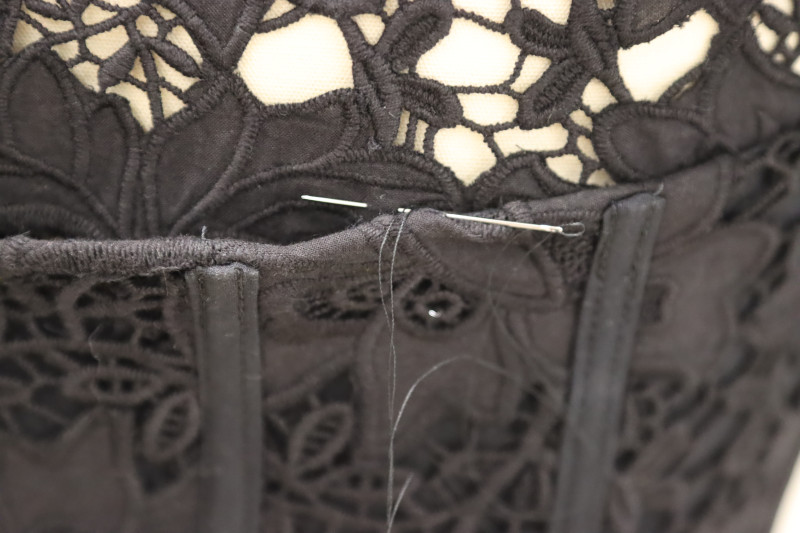
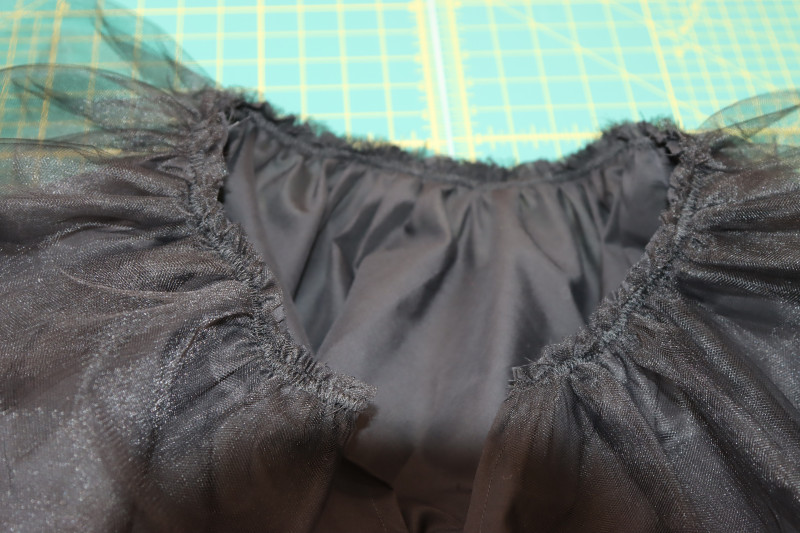
HAND STITCH NECKLINE
- Place the lace top of the dress (the part with the collar and the sleeves) onto a mannequin.
- Place the corset on top of the lace top and pin both pieces in place.
- Hand stitch the lace top to the neckline of the corset, but only to the lining so that the hand stitching is invisible from the outside of the dress.
- Trim the extra lace fabric of the lace top from the inside of the corset.
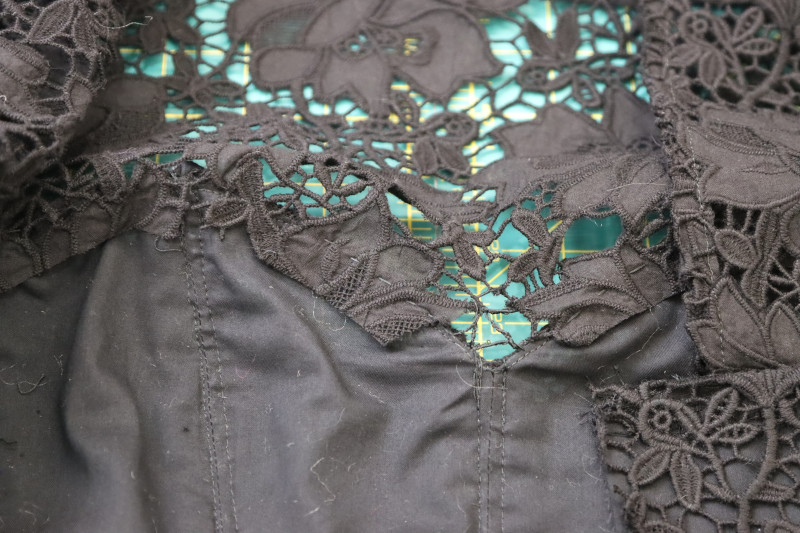
Step 11
SKIRT TOP LAYERS
- Place the back skirt pieces right sides together on top of the front skirt piece with the side seam lined up (do this for both the lining skirt and the lace skirt).
- Pin and sew the side seams of both the lining skirt and the lace skirt.
- Press the side seams open and flat.
- Line of the waistlines of the two skirt pieces with the wrong side of the lace skirt touching the right side of the lining skirt.
- Pin and sew the waistlines of the skirts together.
- Pin the waistline of the skirts to the waistline of the corset.
- Sew the skirts to the bottom of the corset.

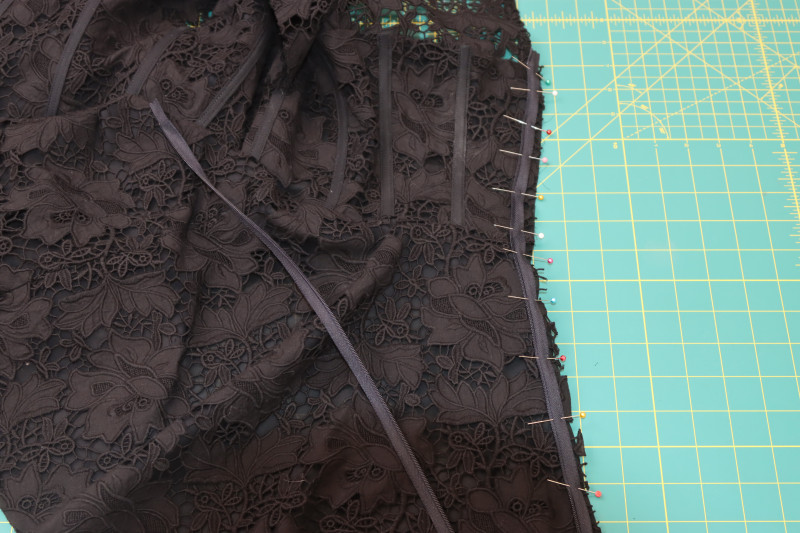
Step 12
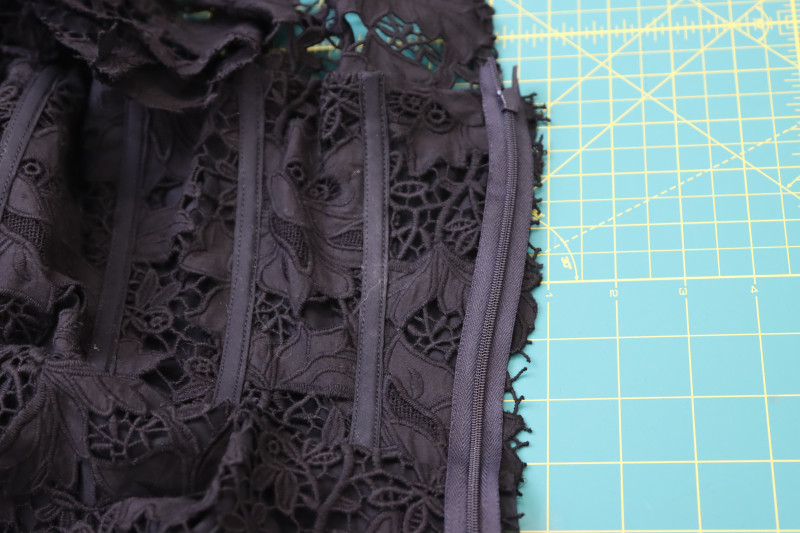
INVISIBLE ZIPPER
- Pin the zipper right sides together with one of the sides of the center back of the dress.
- Sew the zipper tape closest to the raw edges of the center back seam.
- Close the zipper.
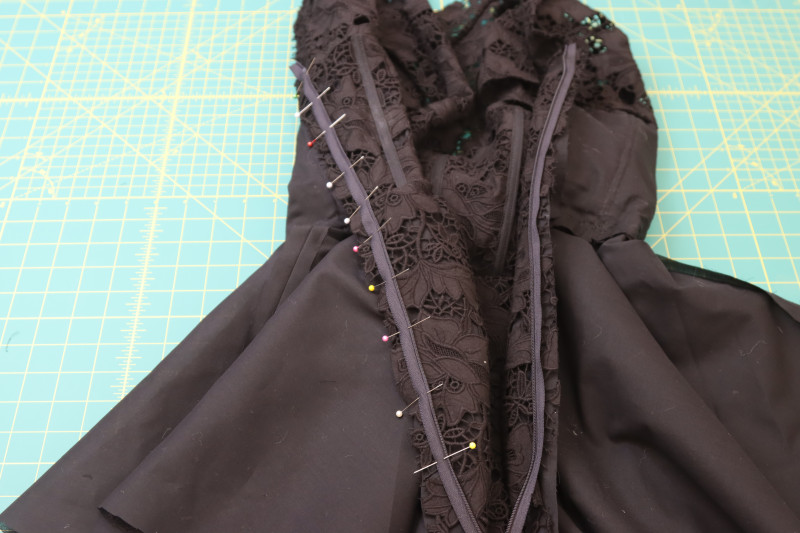
- Flip the dress inside out to access the opposite side of the center back seam.
- Pin the other side of the zipper to the other side of the center back seam, making sure the waist seams and neckline seams match on either side of the zipper.
- Sew the other side of the zipper to the other side of the center back seam.
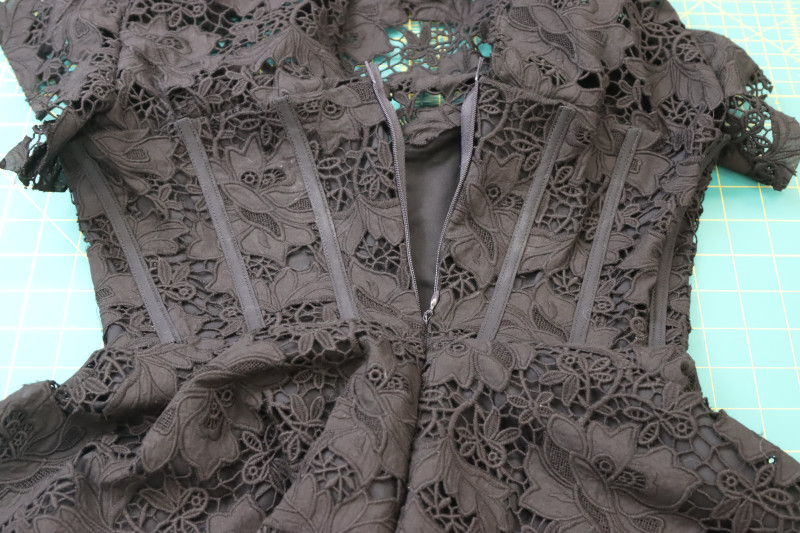
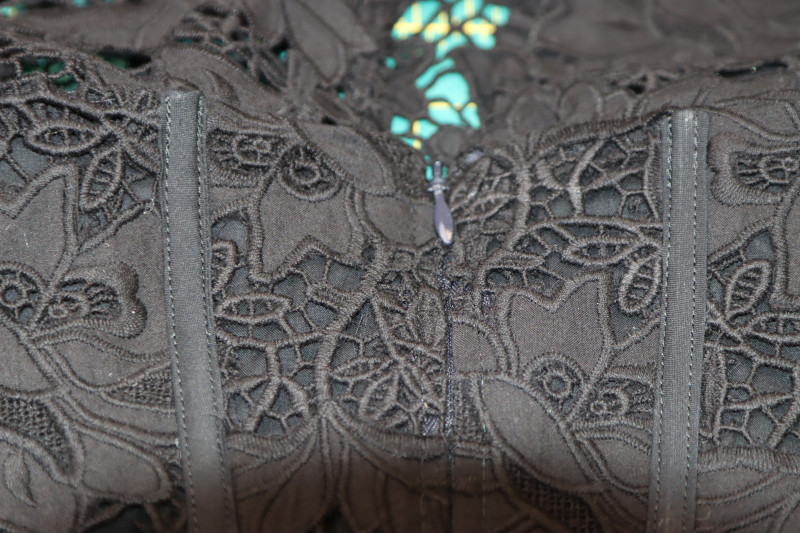
- Close the zipper.
- Topstitch over the zipper from the right side of the dress to keep the lace from getting caught in the zipper.
- (Not pictured) Sew the lining right sides together at the center back seam under the zipper.
- Sew the lace right slides together at the center back seam under the zipper.
HOW TO SEW THE RUFFLED PETTICOAT


Step 13
PETTICOAT LINING
- Sew the petticoat lining skirt side seams the same way that the top skirt side seams were sewn in step 11.
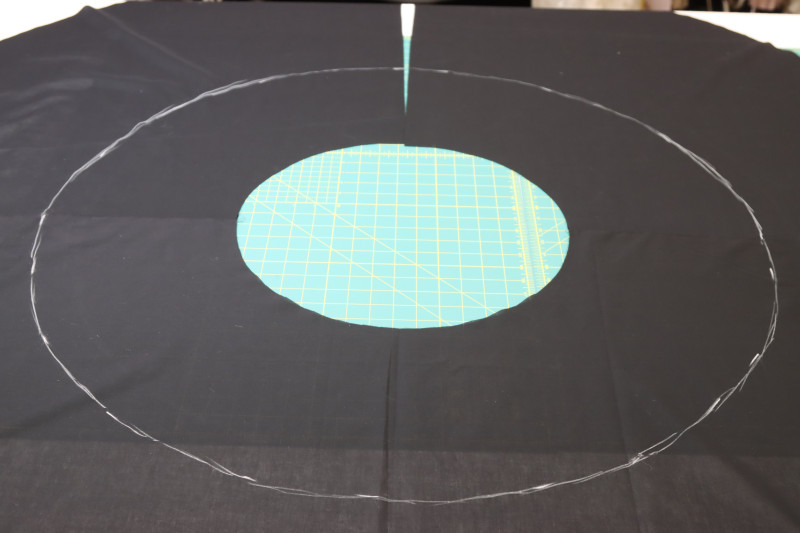
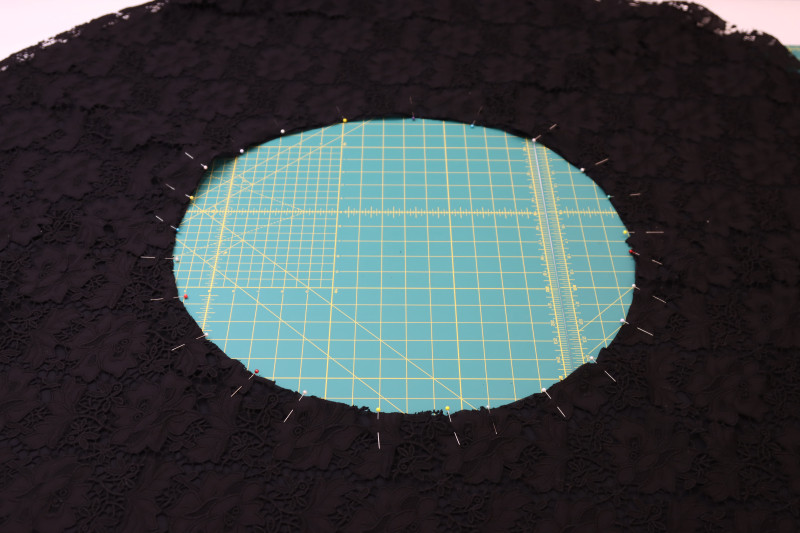
- Mark the location where the petticoat ruffles are supposed to be sewn using tailor’s chalk.
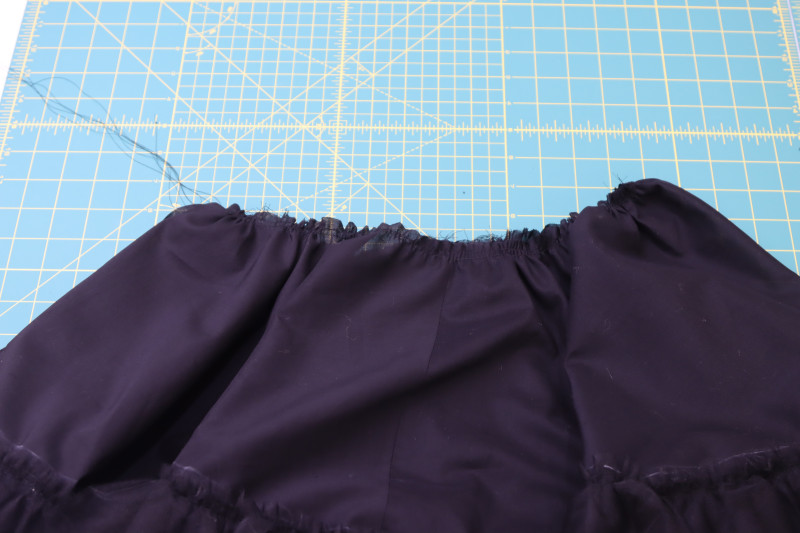
Step 14
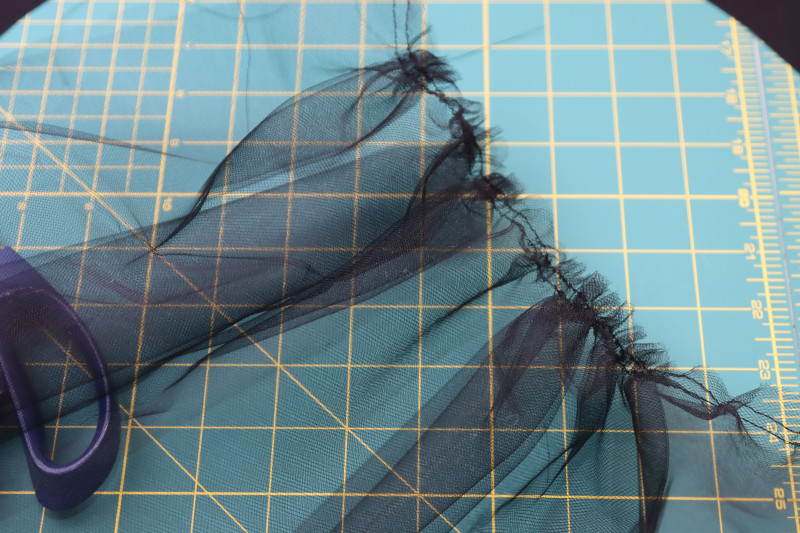
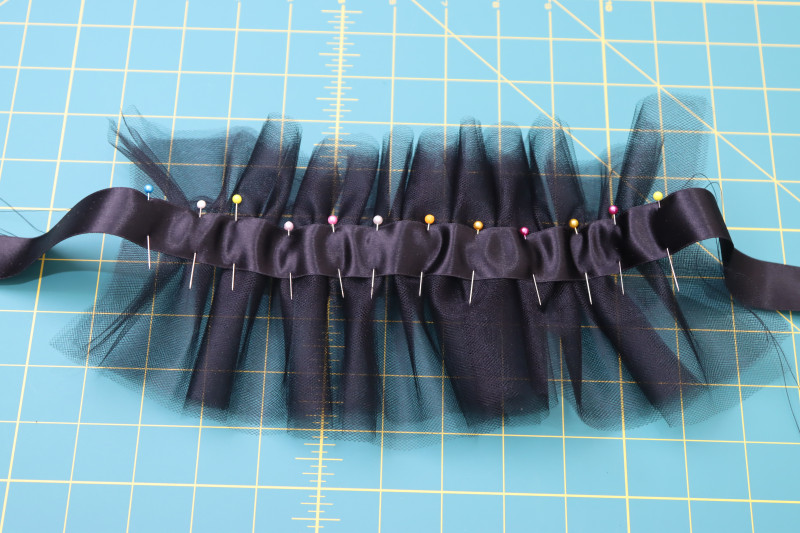
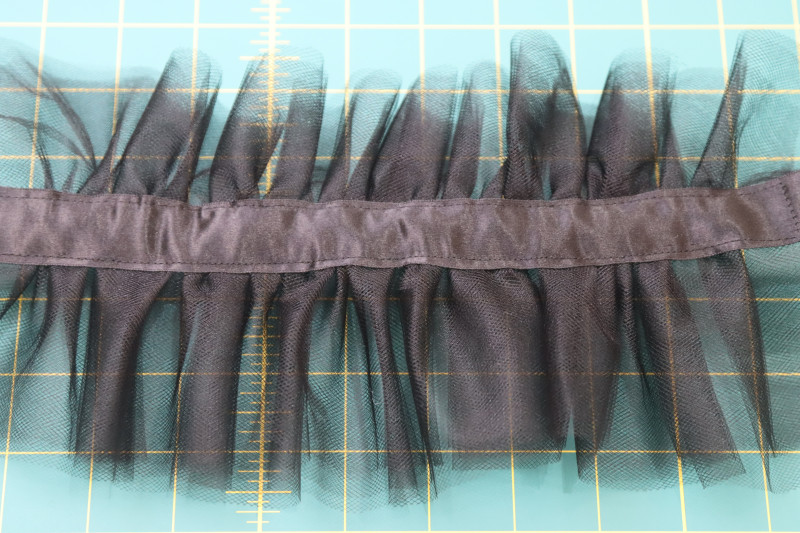
GATHER TULLE
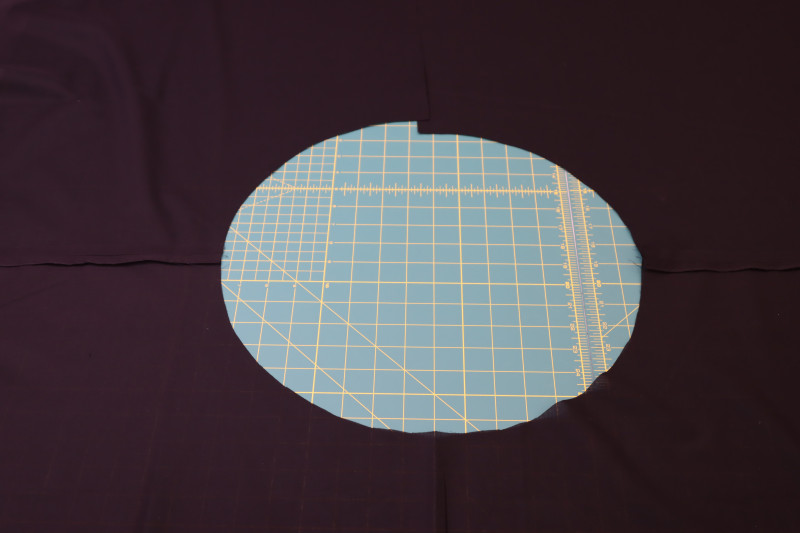
- Cut 2 strips of tulle that are 16 inches long and at least 4 yards wide.
- Sew two parallel straight stitches with a stitch length of 4 millimeters along the top edge of the tulle pieces.
- Pull on the top threads of the straight stitches to begin gathering the tulle.
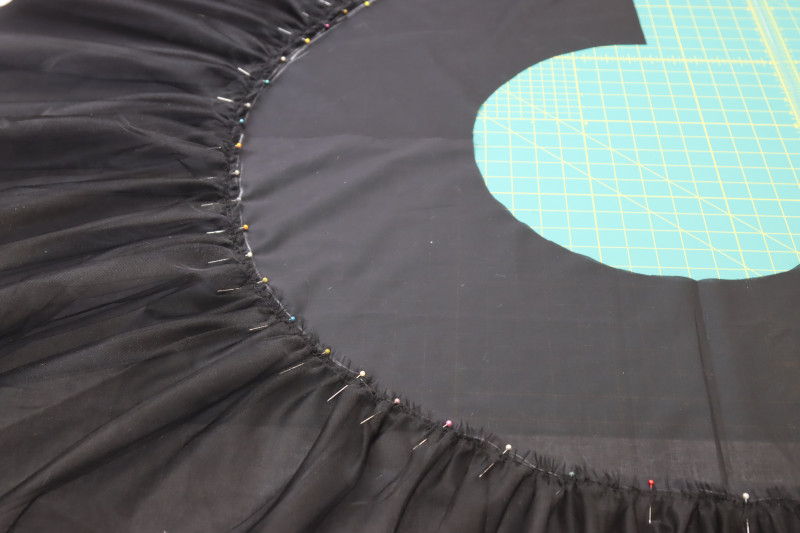
- Gather one of the pieces of the tulle until it is the same length and the circumference of the chalk line on your skirt.
- Pin the gathered tulle to the chalk line on the petticoat lining.
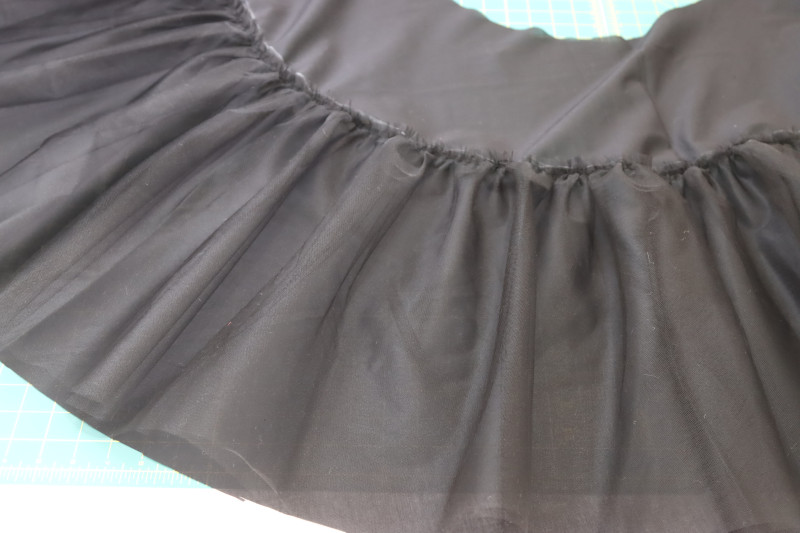
- Sew the tulle to the petticoat lining.

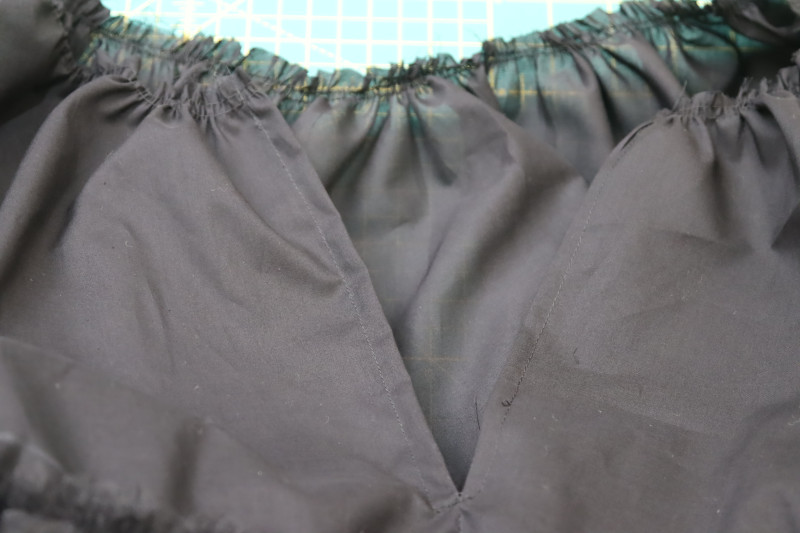
Step 15
PETTICOAT BACK SEAM
- Before sewing the center back seam of the petticoat shut, first you have to sew the tulle to itself at the back of the petticoat.
- Fold the petticoat in half right sides together with the center back seams lined up.
- Place the ends of the tulle right sides together.
- Pin and sew the tulle right sides together at the center back of the skirt.
- Pin and sew the center back seam of the petticoat right sides together without sewing over the tulle. NOTE: Make sure to leave a 6 inch gap at the top of the center back seam of the petticoat so that it can be pulled on over the hips.
Step 16
PETTICOAT WAISTLINE
- Sew two parallel straight stitches with a stitch length of 4 millimeters along the waistline of the petticoat lining skirt.
- Begin gathering the waistline of the petticoat lining skirt. Make sure the final measurement of the gathered waistline is the same width as your own waist measurement.
- After gathering the waistline of the petticoat lining skirt, finish the slit at the center back seam of the petticoat lining by topstitching over the seam allowance.

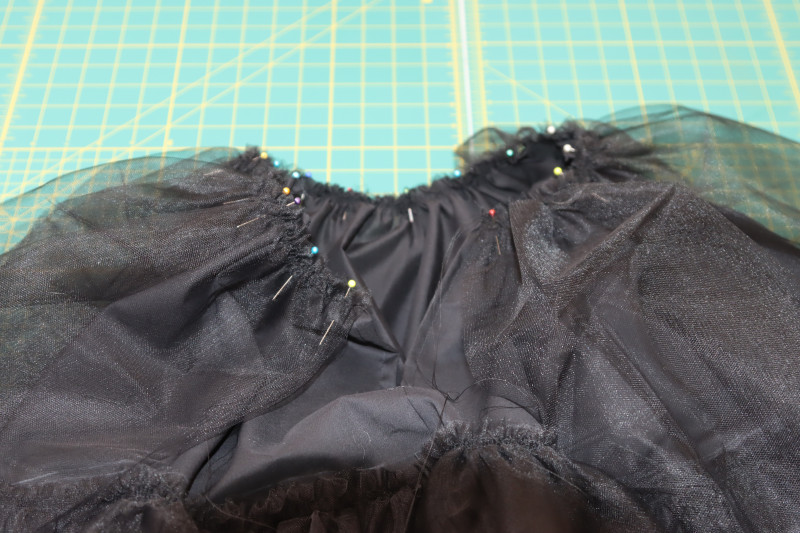
Step 17
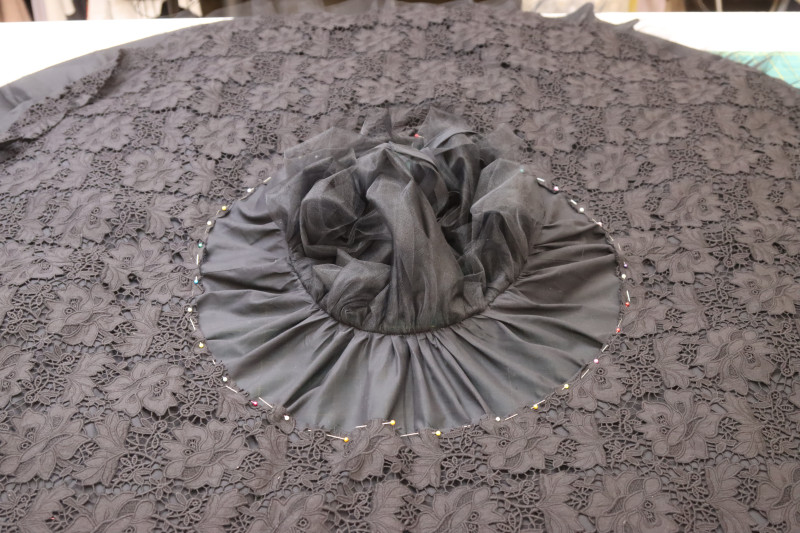
UPPER TULLE LAYER
- Gather your other piece of tulle to be the same length at the gathered waistline of the petticoat lining skirt.
- Pin and sew the upper tulle layer to the gathered waistline of the petticoat lining.
Step 18
PETTICOAT WAISTBAND
- Cut a strip of fabric that is 3 inches wide and at least twice the length of your waist measurement.
- Fold the strip of fabric in half long ways and press the fold.
- Fold the raw edges of the strip of fabric into the fold you just pressed, then press again.
- Pin the gathered waistline of the petticoat lining skirt into the waistband.
- Sew the waistband to the petticoat waistline.
Step 19
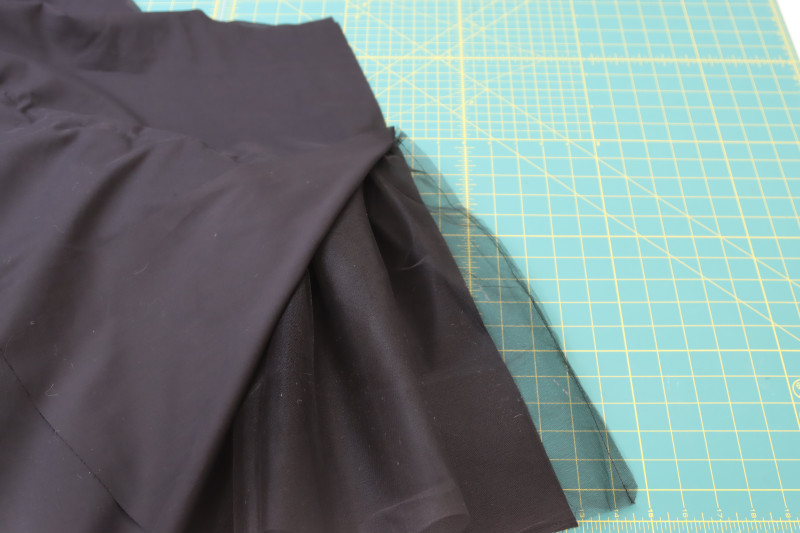
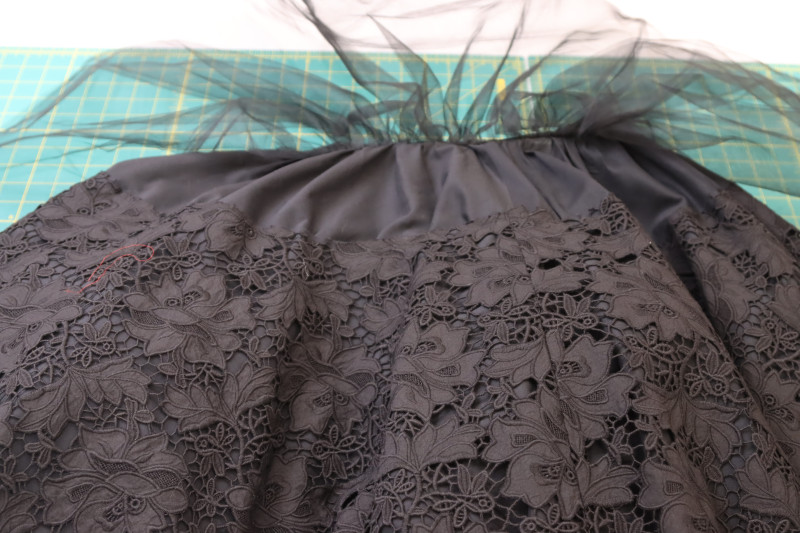
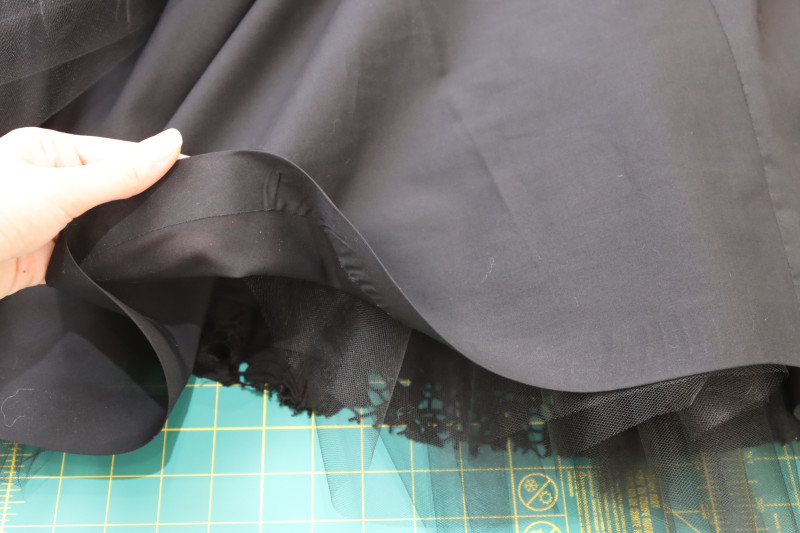
PETTICOAT BOTTOM LAYERS
- Sew the side seams of the bottom layers of the lace and lining skirt the same way you sewed the petticoat lining (these skirt pieces are going to go right over the bottom tulle layer).
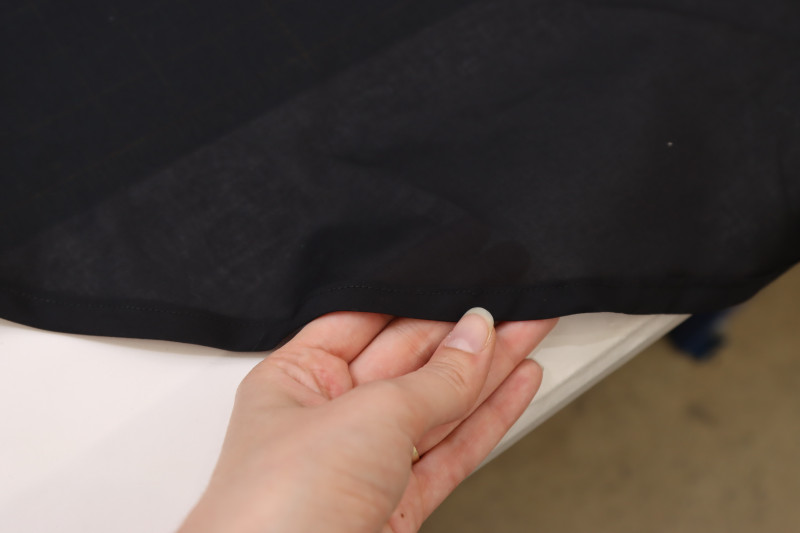
- While we’re here, take this time to hem EVERY LAYER of lining fabric (this goes for the lining layer attached to the corset, the lower lining skirt, AND the petticoat lining).
- Pin the waistlines of the lower lining skirt and lower lace skirt together the same way you did in step 11.
- Layout the petticoat lining skirt so that it is laying in a relatively flat circle shape.
- Layout the lower skirt layers on top of the petticoat lining above the lower layer of tulle.
- Pin and sew the lower skirt layers directly above the lower tulle layer.

Step 20
TRIM LACE
- Carefully trim around the raw edges of the lace sleeves, the collar, and the hems of the lace skirt pieces to reveal the floral motifs in the lace.

Step 21
COLLAR CLOSURE
- Hand sew hook and eye closures at the center back seam of the dress where the collar is sewn to the neckline.
Step 22
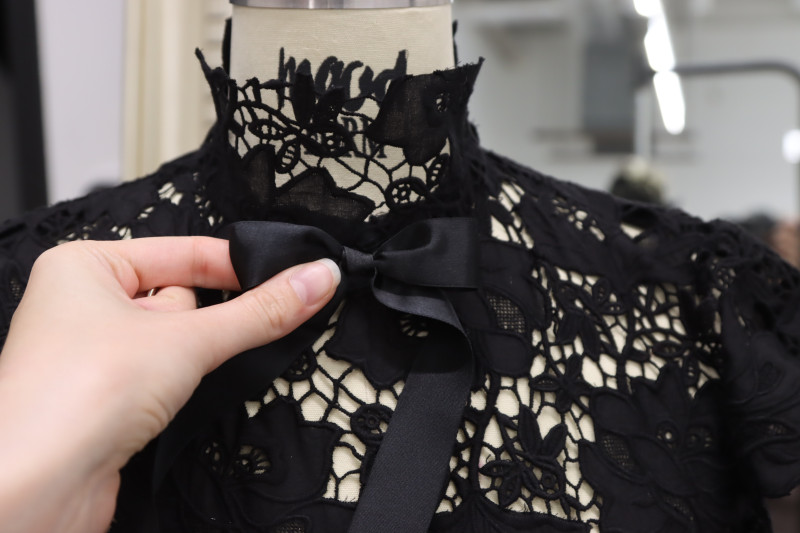
SATIN RIBBON BOWS
- Cut a piece of satin ribbon to make a bow at the center front neckline of the dress.
- Hand sew the bow to the neckline.
- Cut a longer piece of ribbon and tie it around the waistline of the dress. This ribbon does not need to be stitched in place necessarily, but you can if you want to secure it.
HOW TO SEW THE RUFFLED ANKLETS
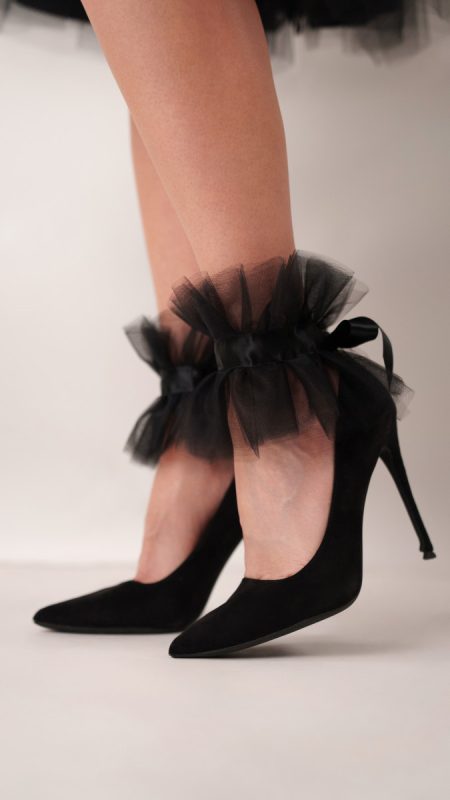

Step 23
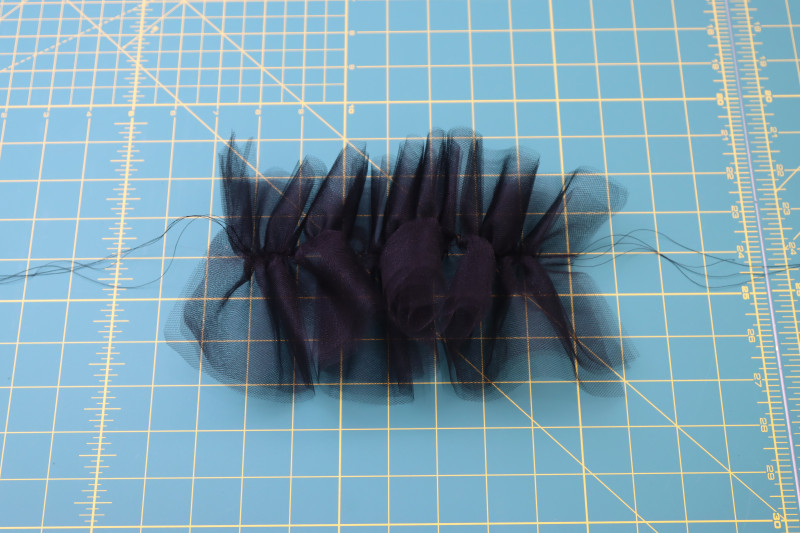
ANKLE CUFFS
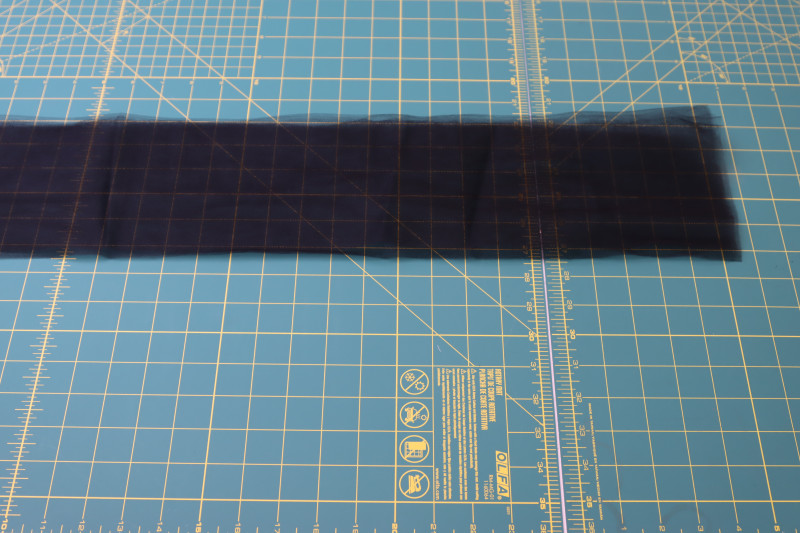
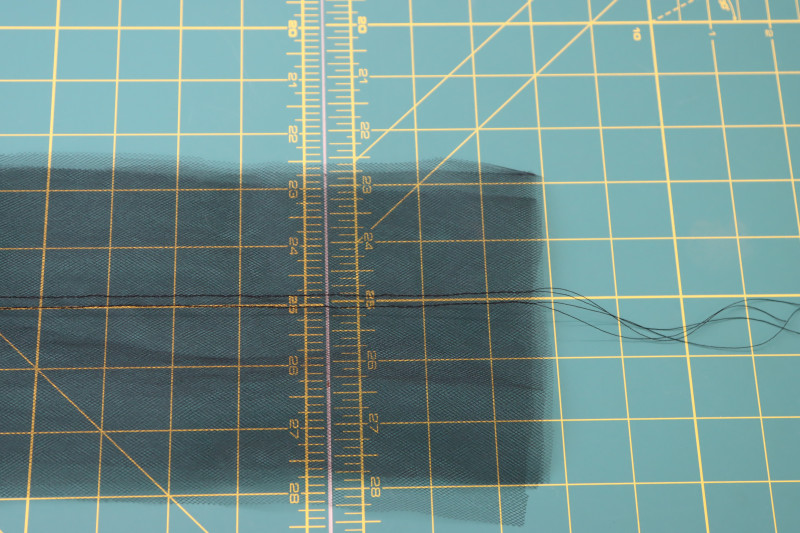
- Cut pieces of tulle that are 6 inches long and at least twice the width of the circumference of your ankle.
- Gather the tulle by sewing two parallel gather stitches down the middle of the tulle, lengthwise.
- Pull the tulle until it is the width of your ankle.
- Cut two pieces of satin ribbon that are at least twice the length as the circumference of your ankle.
- Pin the gathered tulle to the wrong side of the satin ribbon.
- Topstitch the ribbon over the tulle.

Sewing Success: The Completed Reims Soirée Dress
Share this post with a friend (or two!), download the Reims Soirée Dress free sewing pattern, and show us which fabrics and colors you choose, using the hashtags #MoodReimsPattern & #MadeWithMood—and don’t forget to tag us @MoodFabrics, too.


Free Sewing Pattern Inspiration for Your Next Project
With 500+ free sewing patterns and counting, your opportunities for sewing with Mood are endless!
We hope you had as much fun sewing this reims soirée dress pattern as we did! As always, we want to hear from you—share your thoughts and comments below and let us know where you’ll be wearing the Reims Soirée Dress free sewing pattern!
Can’t get enough sewing with Mood? Browse your next make with our latest free sewing patterns.
I would sew the boning on the inside, it would look prettier
That’s a great idea Julia!
Does the petticoat tie at the waist using the waistband? I don’t see a mention of any other type of closure so I am supposing that is the case. Beautiful pattern!
That’s correct Maria, the petticoat ties at the waist under the peplum that’s attached to the corset.
Thank you for this free pattern
Thank you
Es hermoso este vestido ❤️
So beautiful
Gorgeous
Yay
How would I make the skirt a small bit shorter, or would that ruin the shape?
Hi
You can reduce proportionally the length of all the skirt pieces, but be careful not to shorten the upper layers too much. For exdample, if you reduce 3 inches of the lower layers, only reduce 1.5″ for the upper layers.