

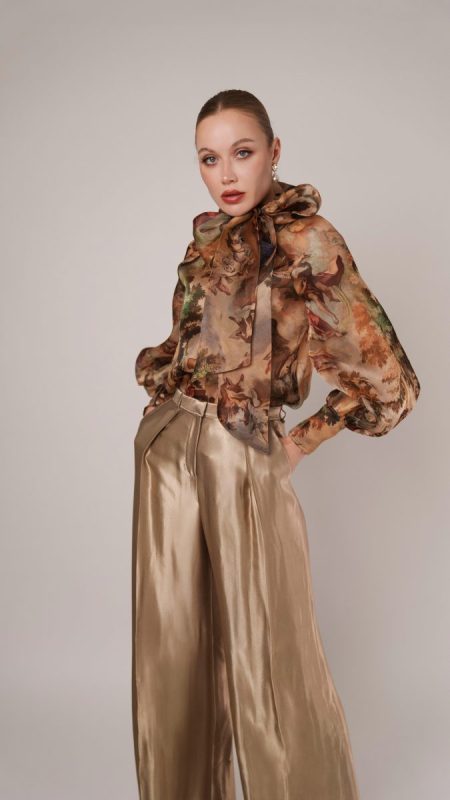
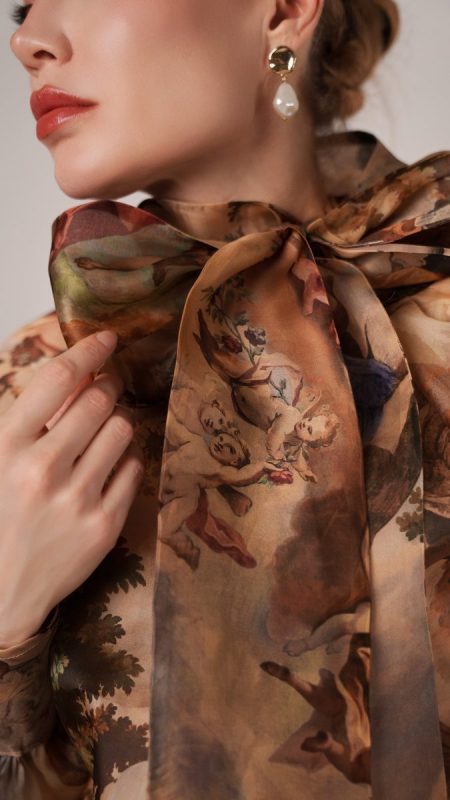
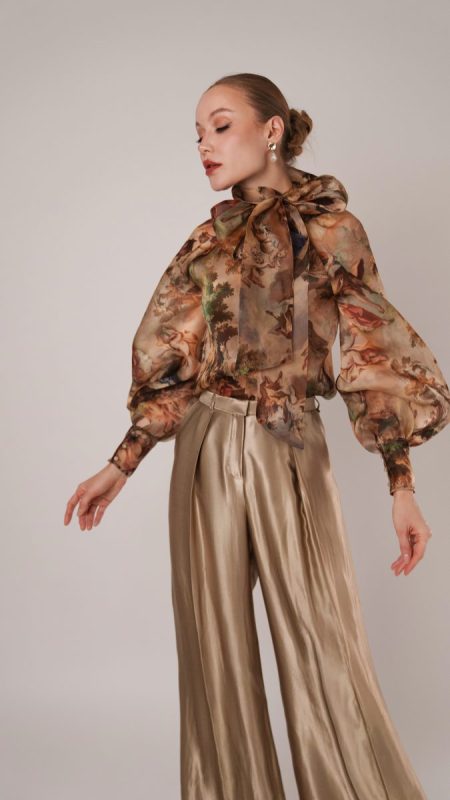
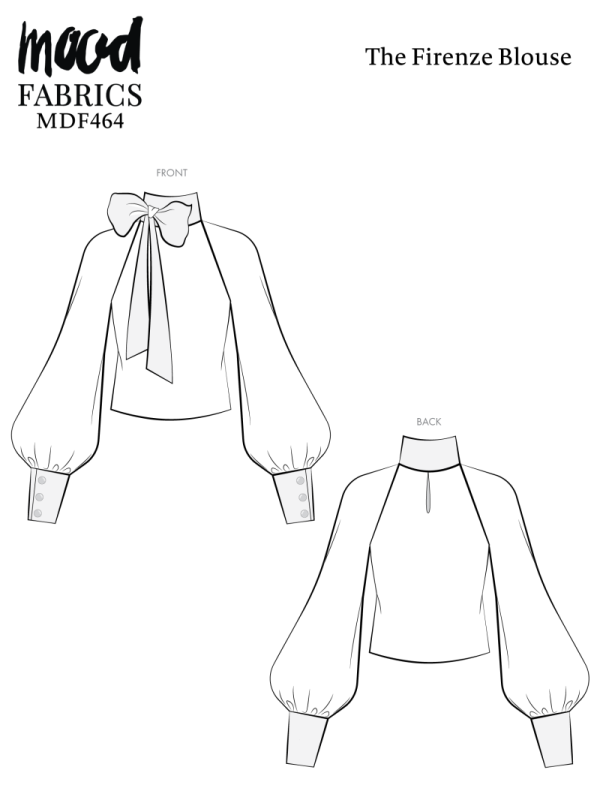
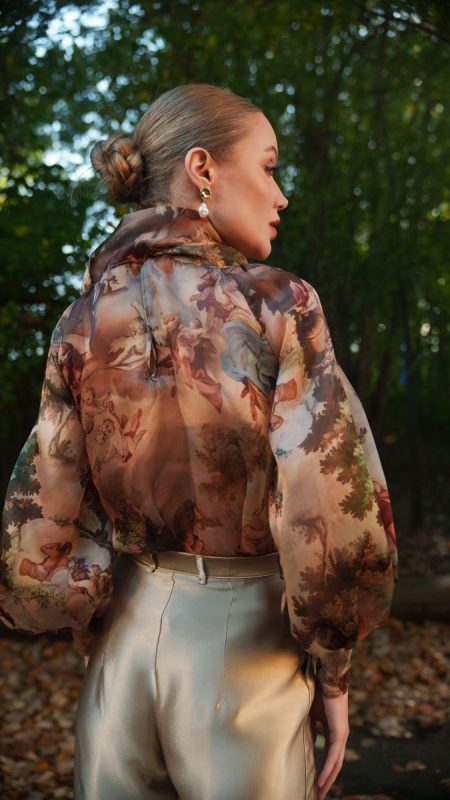
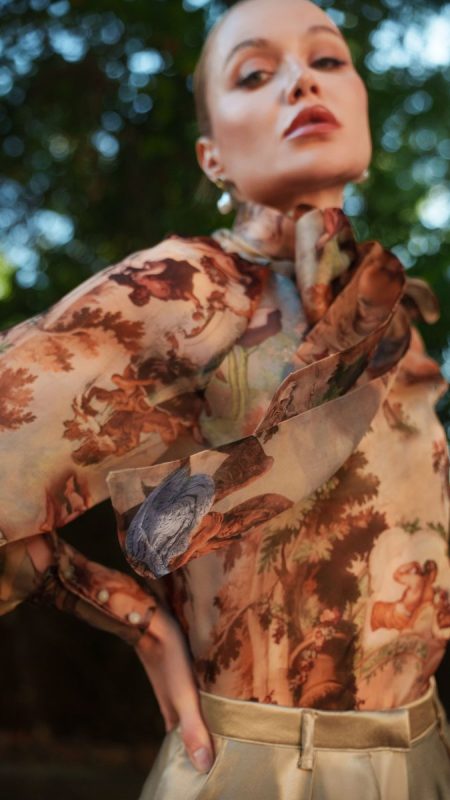
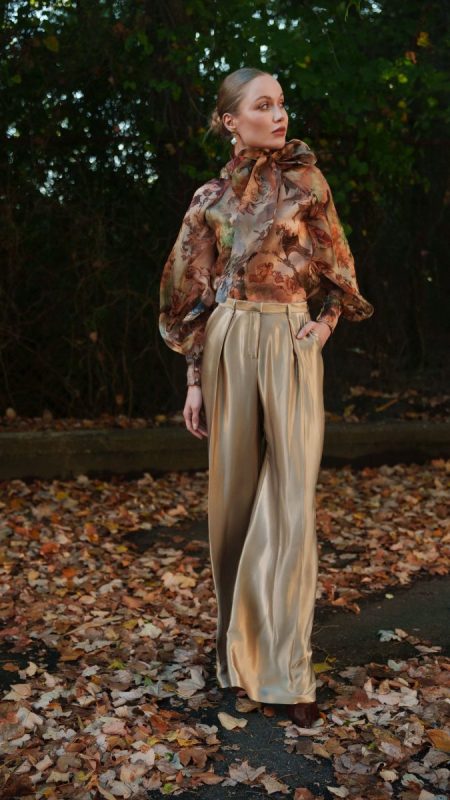
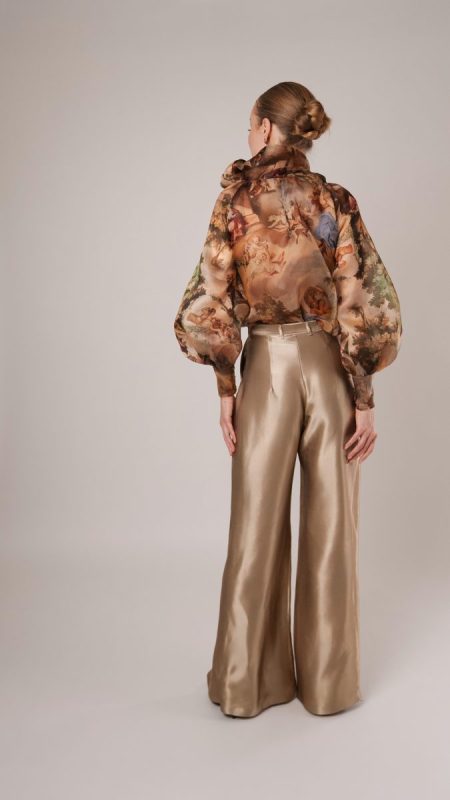
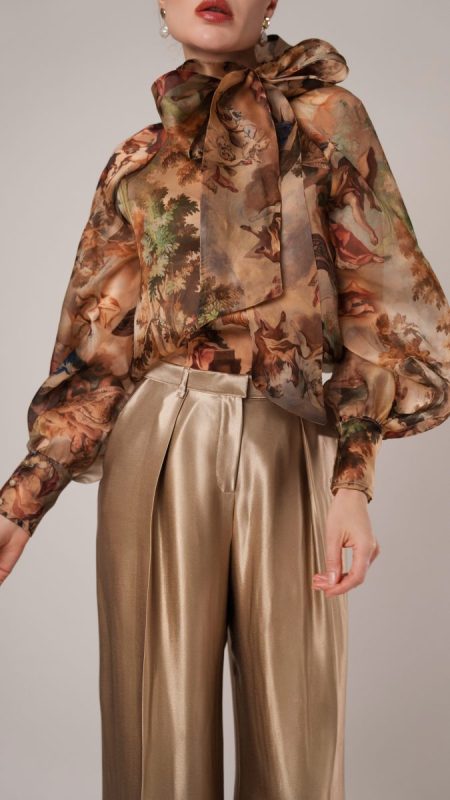
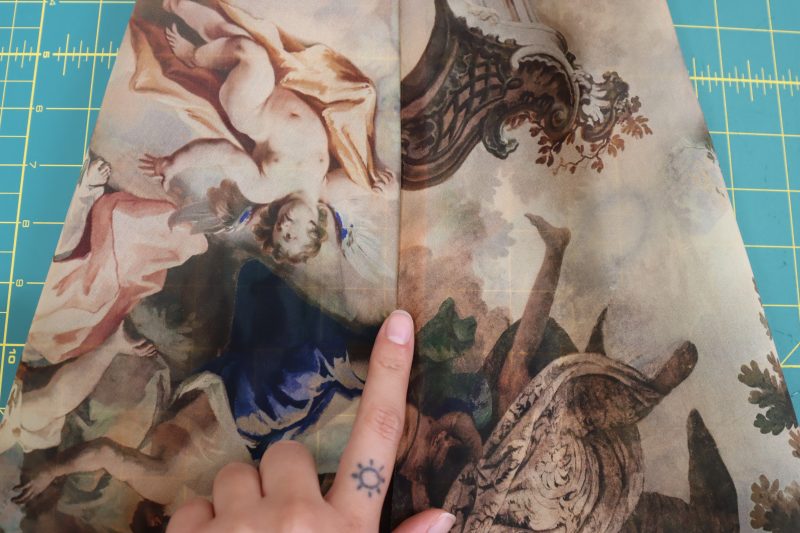
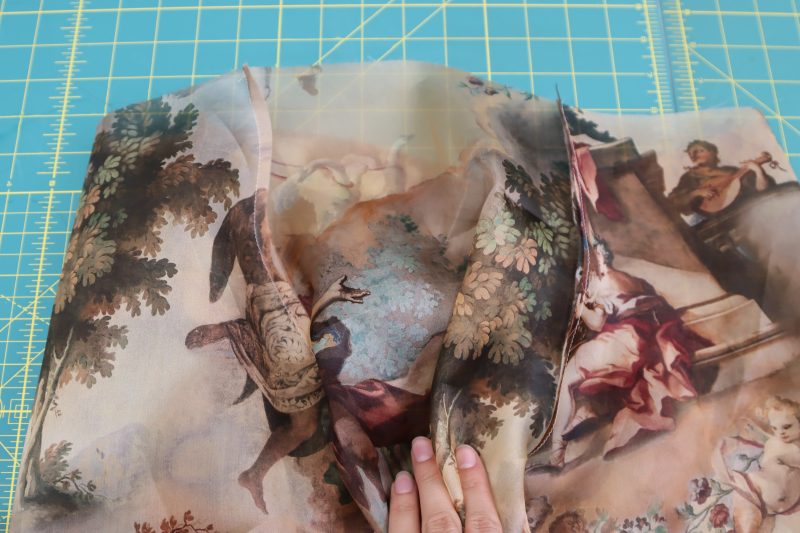
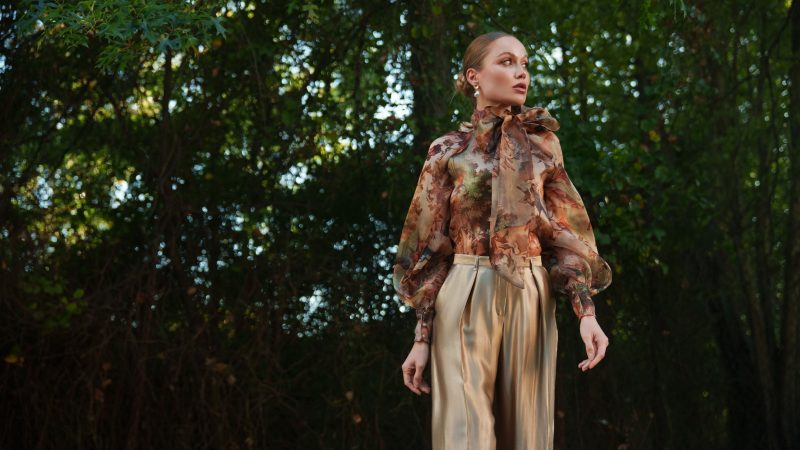
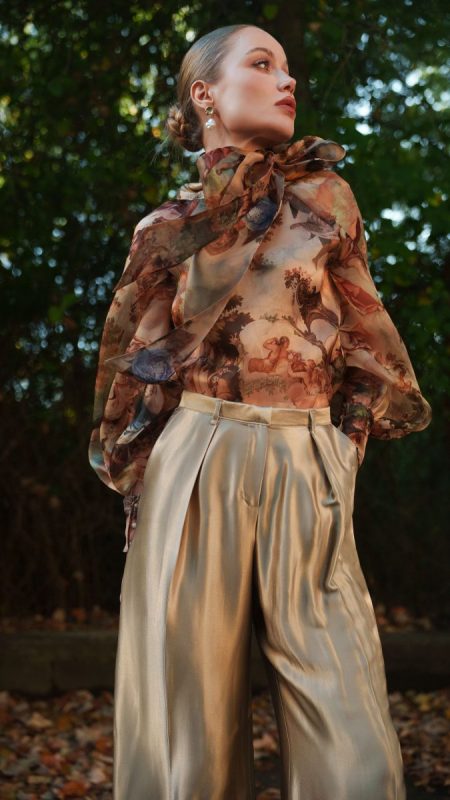
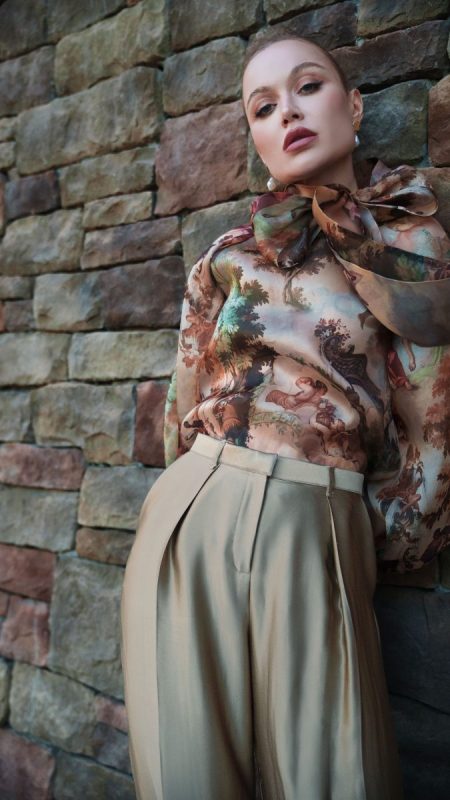
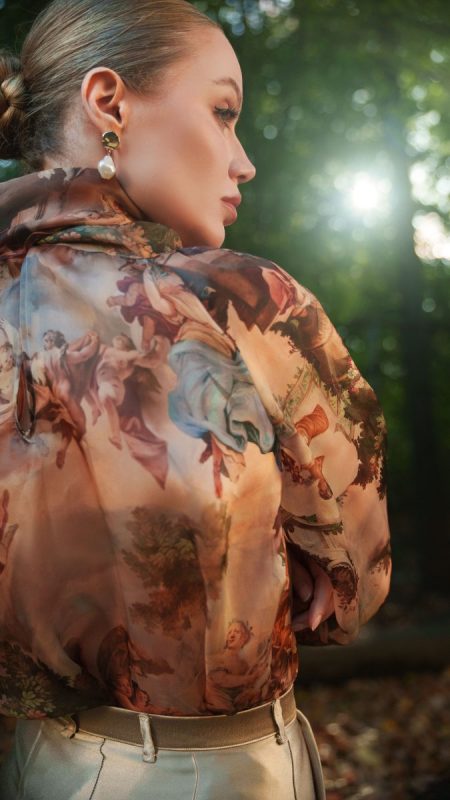
Step into the understated elegance of the Firenze Blouse and Trousers, designed for those who savor the art of slow, stylish living. The blouse, crafted from a luxurious Italian silk organza printed with soft browns, beiges, and muted greens, evokes the quiet romance of classical landscapes and the warm patina of old-world charm. Its billowing sleeves and delicate drape lend a sense of airy, scholarly grace, reminiscent of a stroll through a sunlit library or a tucked-away courtyard lined with ivy.
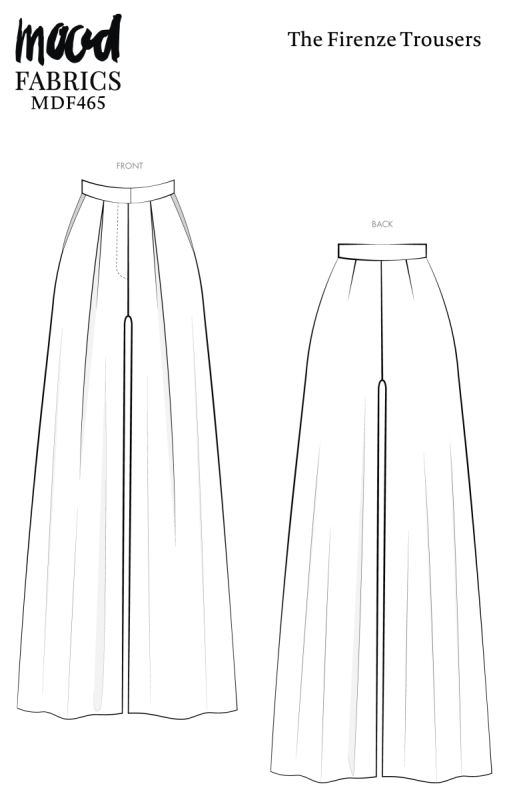
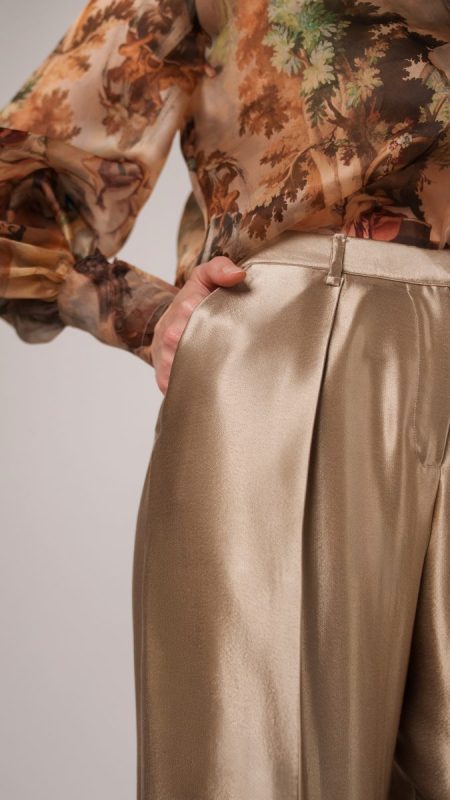
Paired with high-waisted, flowing trousers in a soft viscose satin, the ensemble balances structure and fluidity, offering the kind of sophisticated ease that invites both movement and leisure. The subtle sheen of the satin catches the light just so, hinting at refinement without ever feeling fussy or overdone.
Imagine wandering through an art museum, pausing to admire a centuries-old painting, or lingering over an espresso at a romantic bistro terrace. Both the blouse and the trouser feel as though they were made for moments of quiet elegance. Whether layered with a classic coat for crisp mornings or styled with delicate jewelry for a cultured evening, this outfit allows you to inhabit a world that is at once vintage, intellectual, and utterly wearable. Every detail has been thoughtfully designed to let your creativity shine, giving you the freedom to bring this European countryside-inspired aesthetic to life in your own wardrobe.

Essential Materials & Sizing Guide for the Firenze Blouse and Trousers
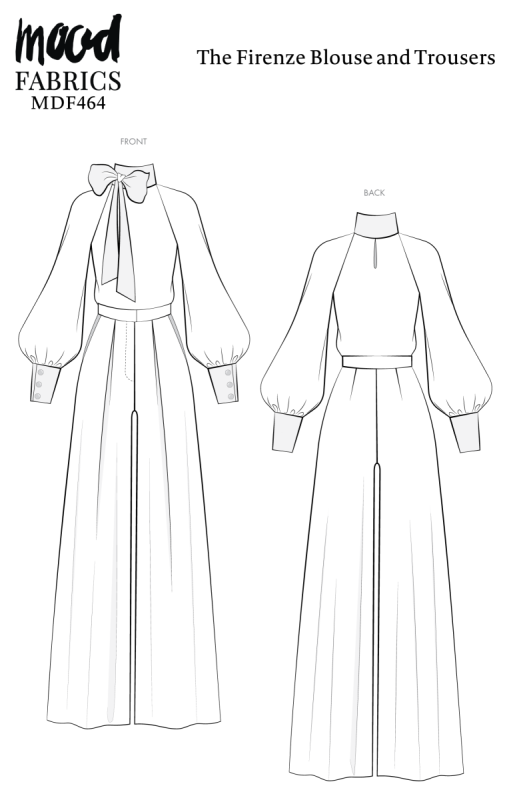
Continue reading for a breakdown of what knowledge and materials you need for creating your very own blouse and trousers! We’ve got you covered with the recommended materials we used—if you want to follow along exactly—as well as a curated list of alternative fabric type recommendations if you want to customize your own version. The Firenze Blouse and Trousers free sewing pattern download includes technical drawings for seam and silhouette visibility, plus a size chart to help you find your perfect fit!
Purchase Products Used Below:
Quantities indicated are for sewing a size small blouse and trousers. Toggle the ‘SHOP THIS LOOK’ box to find quantity estimates for other sizes.
- 3 yards of Silk Organza Print Made in Italy – Brown, Beige and Green Classical Scenes
- 3 yards of Sustainable Viscose Fluid Satin – Natural – Mood Exclusive Elliana Collection
- 1 yard of White Non Woven Single Side Fusible Interfacing
- 1 each of Regular Zipper 9″ by YKK – 573 Bright Khaki
- 1 each of Dritz Black and Nickel Sew-On Skirt Hook & Eye Closures
- 1 each of Gutermann Sew All Thread 100m – 524 Brown Grey
- 1 each of Gutermann Sew All Thread 250m – 30 Bone
- 6 each of Dune Quartz Abstract Swirl Glass and Metal Shank Back Button – 14L/9mm
- MDF464 + MDF465 – Firenze Blouse and Trousers Sewing Patterns (Free downloads below!)
Alternative Fabric Type Recommendations:
The Firenze Blouse and Trousers sewing pattern is best suited for feather weight fashion fabrics for the top and lightweight fashion fabrics for the bottoms. Explore other fabric types or colors from our featured collections for your blouse and trousers with the links below.
Fabric Collections Used in this Post:
Download Your Free Sewing Patterns
Submit your name and email in the forms below to receive the download links for the Firenze Blouse and Trousers free sewing patterns directly in your inbox. Mood Sewciety Patterns will send your free download link via email with the subject line: ‘Your Free Download from Mood Sewciety – The Firenze Blouse’ or ‘Your Free Download from Mood Sewciety – The Firenze Trousers’, respectively, (in PDF format for A4 and letter-size printing).
Find Your Perfect Fit
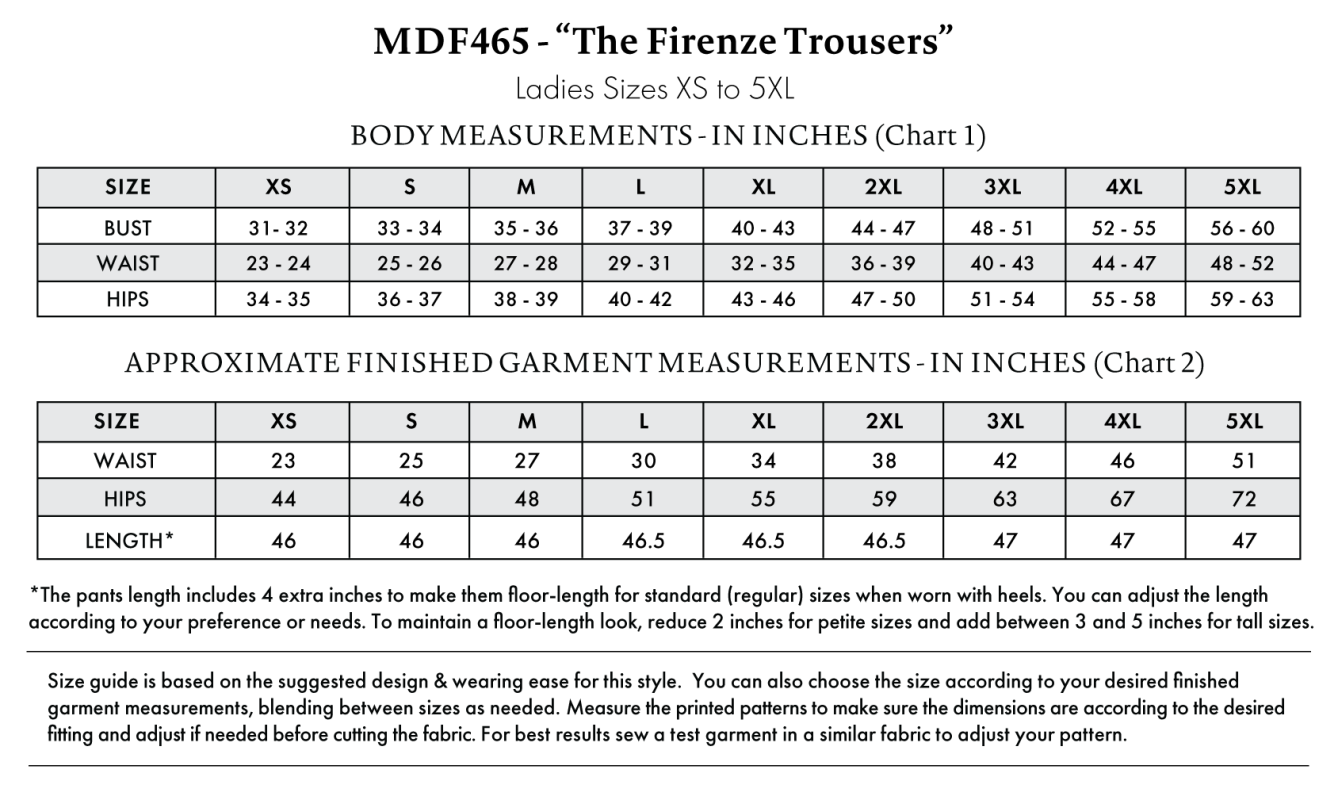
The Firenze Blouse and Trousers Sizing Guide is based on the suggested design & wearing ease for this style. You can also choose the size according to your desired finished garment measurements, blending between sizes as needed. Measure the printed patterns to make sure the dimensions are according to the desired fitting and adjust if needed before cutting the fabric. For best results, sew a test garment in a similar fabric to adjust your pattern.
*The pants length includes 4 extra inches to make them floor length for standard )regular) sizes when worn with heels. You can adjust the length according to your preference or needs. To maintain a floor length look, reduce 2 inches for petite sizes and add between 3 and 5 inches for tall sizes.
Note: Always read all the instructions before cutting the fabric!

How to Sew The Firenze Blouse and Trousers
The instructions provided below are designed to guide you through sewing the Firenze Blouse and Trousers from start to finish.

3 Tips for Sewing with Organza
⇒ Silk organza can be really difficult to seam rip without making holes in the fabric. If you’re not confident in sewing this pattern correctly the first time without seam ripping, it is recommended to make it in muslin first for practice.
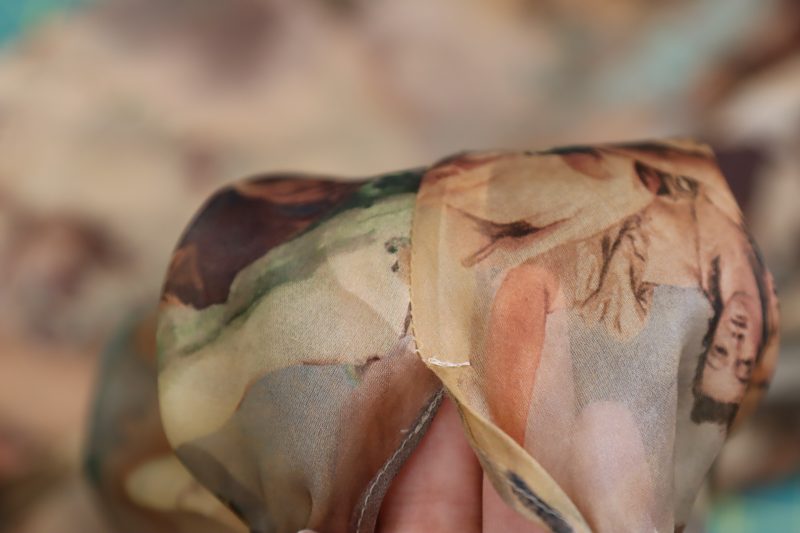
⇒ Wherever possible, either use french seams or a serger to secure the raw edges of your fabric. Organza frays a lot and your garments will last longer if you finish them this way.
⇒ Switch to a fresh needle before starting this project. Even if you haven’t sewn anything in a while, using a brand new needle will ensure that there aren’t any tiny nicks or scratches in the needle that could cause it to make the fabric run.
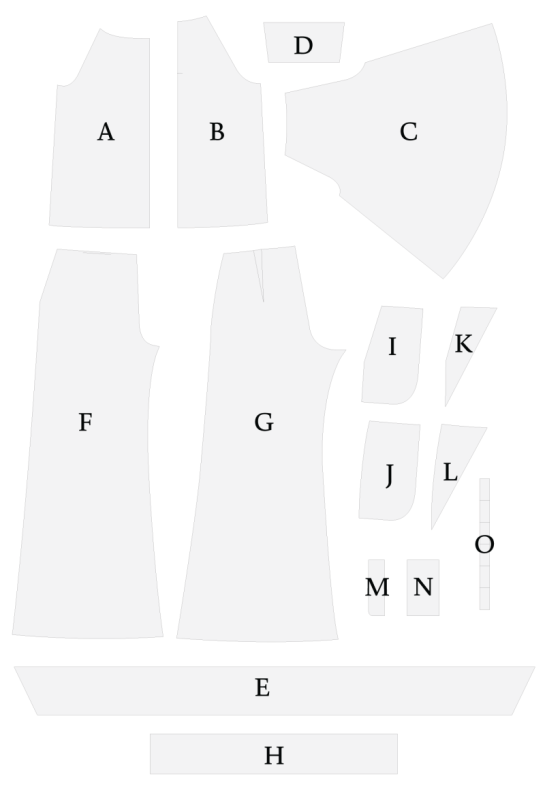
Pattern Pieces & Fabric Cuts Needed
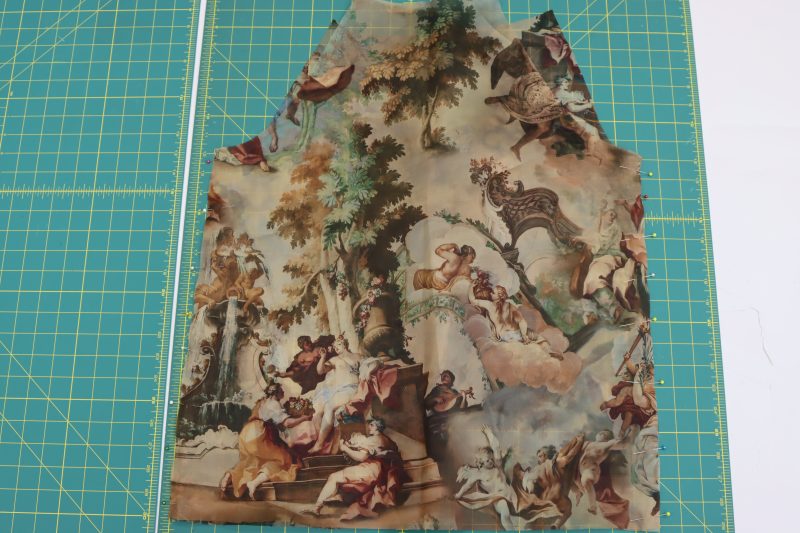
- (A) BLOUSE FRONT
- FABRIC – CUT 1 ON FOLD
- (B) BLOUSE BACK
- FABRIC – CUT 1 ON FOLD
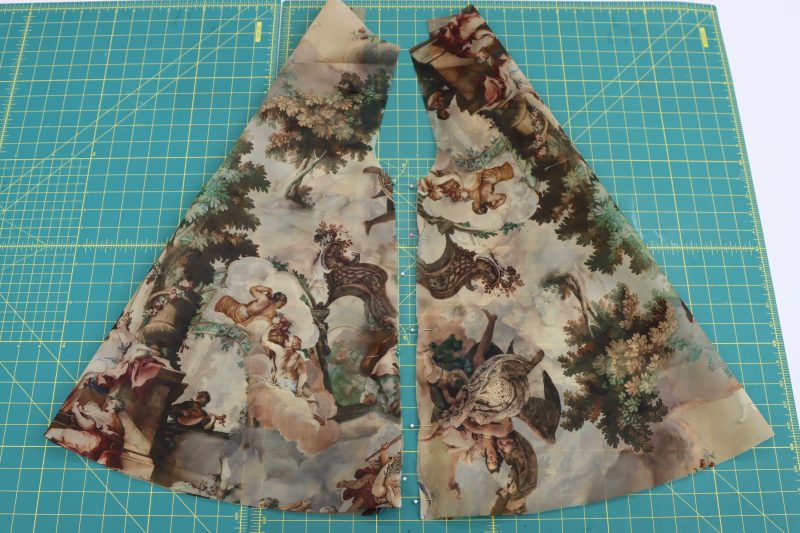
- (C) SLEEVE
- FABRIC – CUT 2 MIRRORED
- (D) CUFFS
- FABRIC – CUT 4
- (E) COLLAR/BOW TIE
- FABRIC – CUT 2
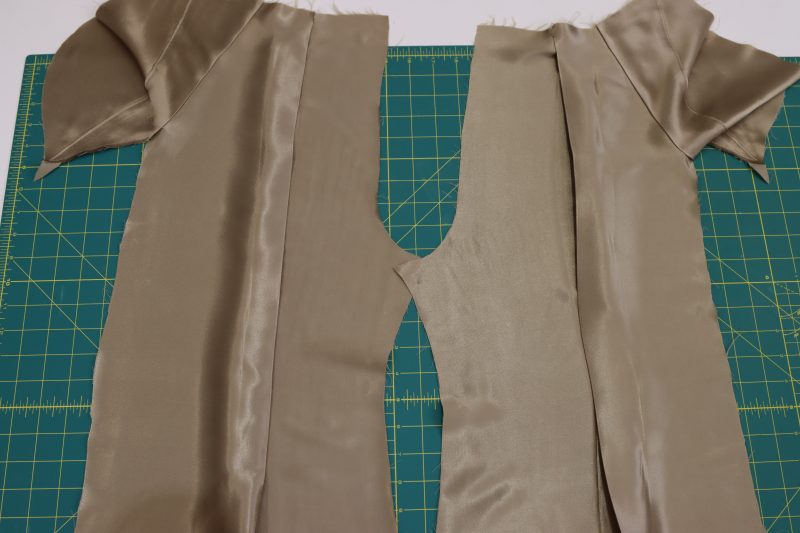
- (F) PANTS FRONT
- FABRIC – CUT 2 MIRRORED
- (G) PANTS BACK
- FABRIC – CUT 2 MIRRORED
- (H) PANTS WAISTBAND
- FABRIC – CUT 1
- (I) PANTS SIDE POCKETS A
- FABRIC – CUT 2 MIRRORED
- (J) PANTS SIDE POCKETS B
- FABRIC – CUT 2 MIRRORED
- (K) PANTS SIDE POCKETS A FACING
- FABRIC – CUT 2 MIRRORED
- (L) PANTS SIDE POCKETS B FACING
- FABRIC – CUT 2 MIRRORED
- (M) FLY
- FABRIC – CUT 2 MIRRORED
- (N) FLY SHIELD
- FABRIC – CUT 1
- (O) BELT LOOPS
- FABRIC – CUT 1 (THEN DIVIDE INTO 6)
Sew with a 1/2″ seam allowance for all seams unless otherwise specified.
HOW TO SEW THE FIRENZE PLEATED TROUSERS
Step 1
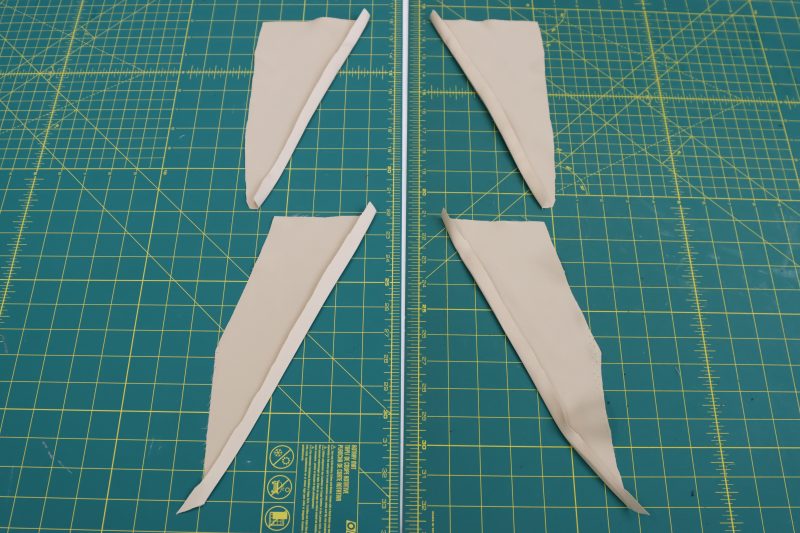
POCKET FACINGS
- Fold the long diagonal edge of each pocket facing piece inward by ½ inch and iron in place.
- Pin the pocket facings to their respective pocket pieces (for reference, the pocket facings line up with the pocket bags at the side seams).
- Sew the pocket facings down on all sides with a ¼ inch seam allowance to secure them to the pocket bags.
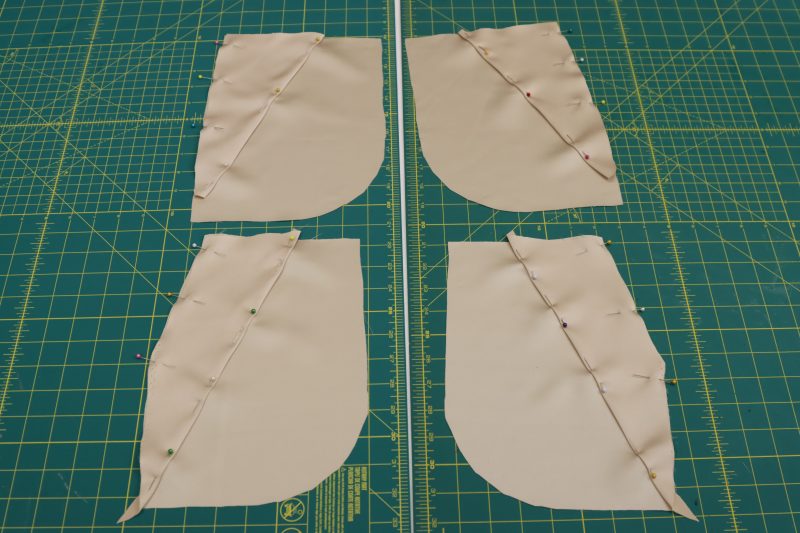
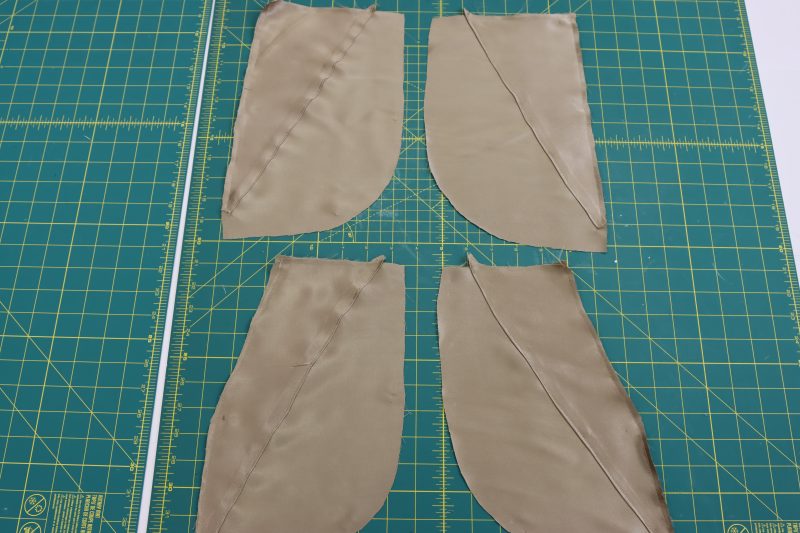
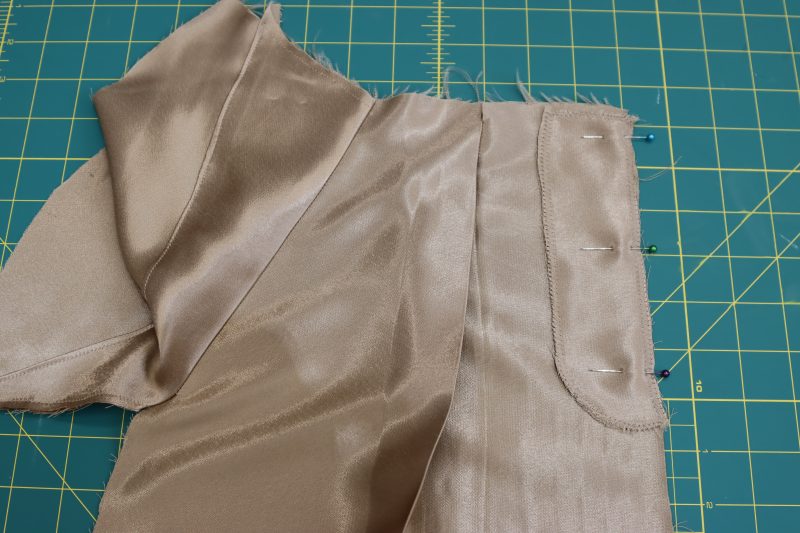
Step 2
ATTACH POCKETS
- Pin and sew the front pocket bag to the front side seams of the pants, right sides together. Only pin down the angled corner of the pocket so that the bottom of the pocket bag is still loose.
- Pin and sew the back pocket bag to the back side seams of the pants, right sides together. Only pin down the first 6 inches of the pocket so that the bottom of the pocket bag is still loose.

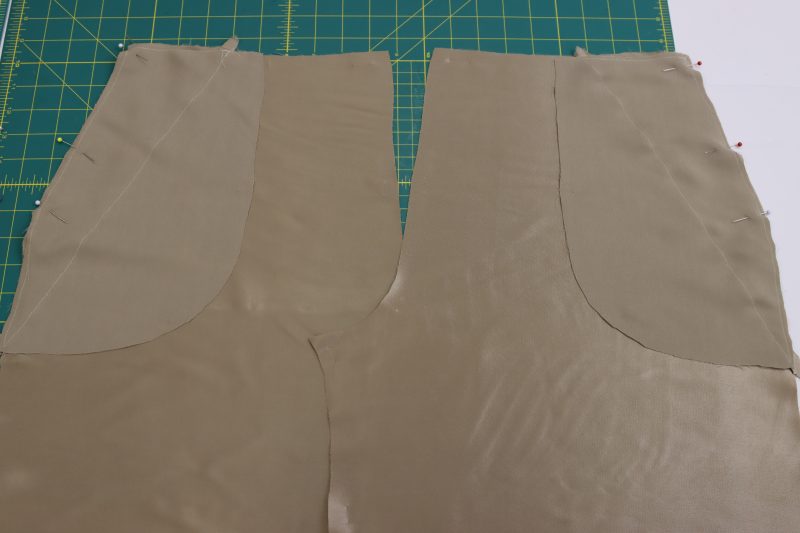
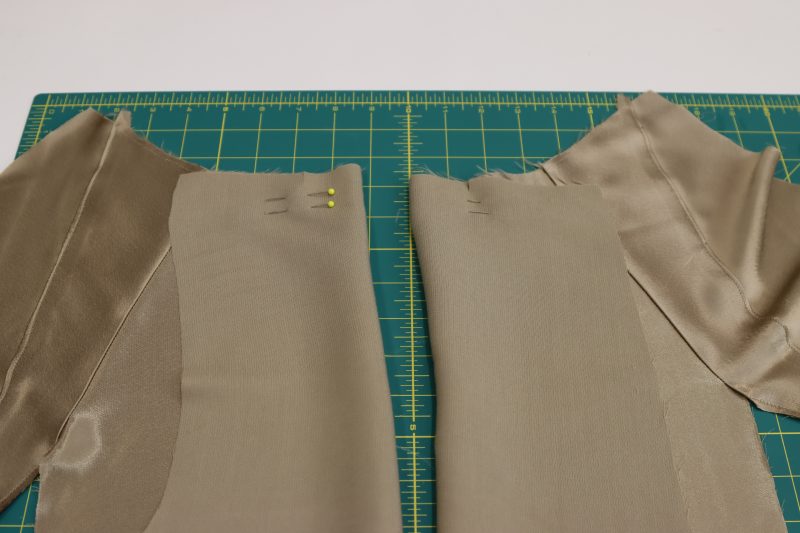
Step 3
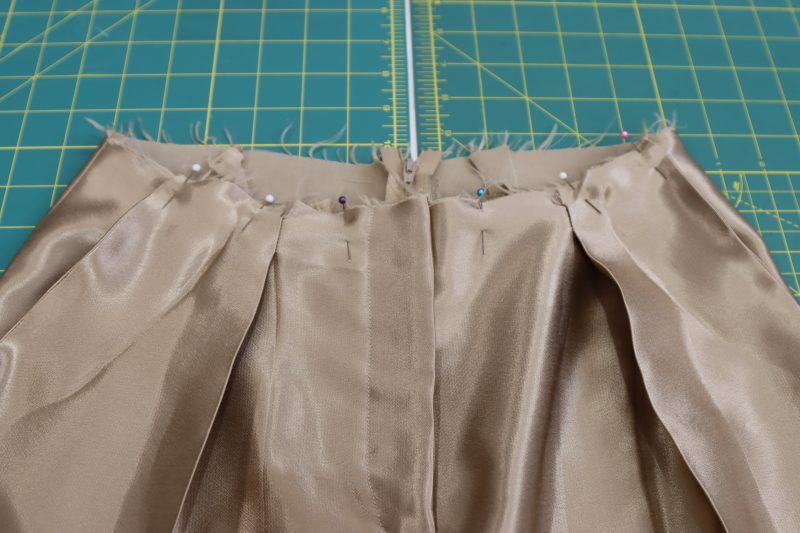
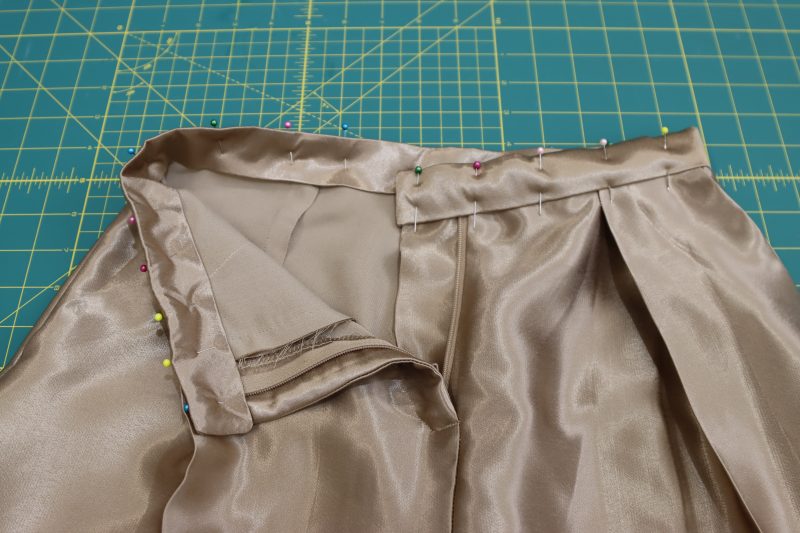
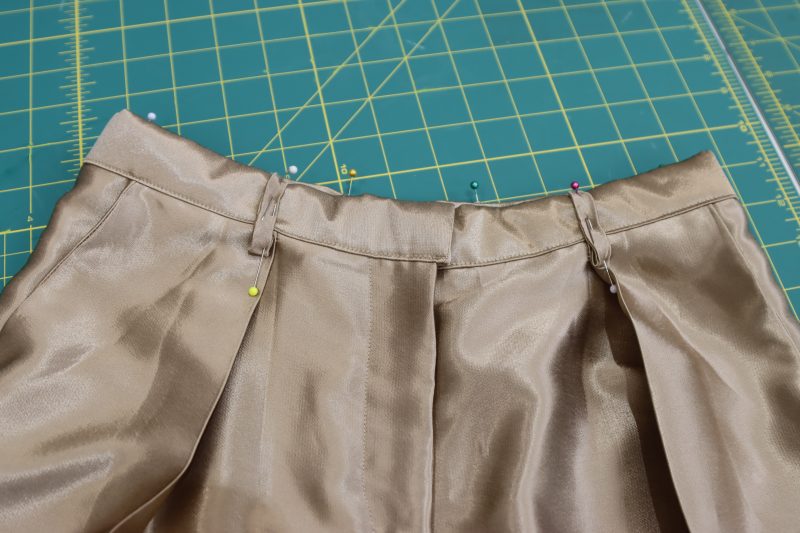
DARTS & PLEATS
- Mark the darts and pleats on the back and front waistlines of the pants using the notches on the pattern.
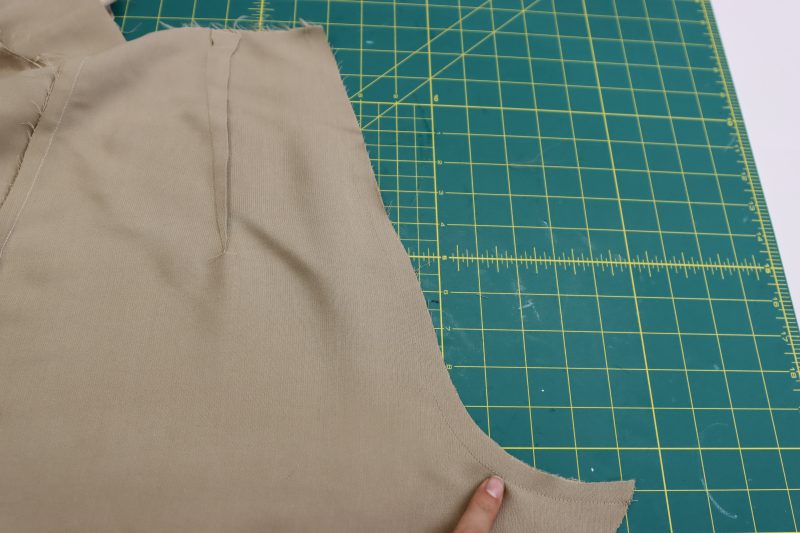
- Fold the back pant pieces right sides together to make the notches on the waistline touch. Mark the bottom of the dart on the back pants pieces according to the pattern.
- Pin and sew the darts onto the backs of the pants pieces.
- Fold the front pant pieces right sides together to make the notches at the waistline touch.
- Pin and sew a vertical seam that is 1 inch in length directly under the notches on the fronts of the pants to secure the pleat.
- Open the darts and pleats and iron them all towards the back of the pants.
- For the pleats in the front, iron a crease that starts from the pleat at the waistline and gradually ends slightly below where the pants will hit your knee.
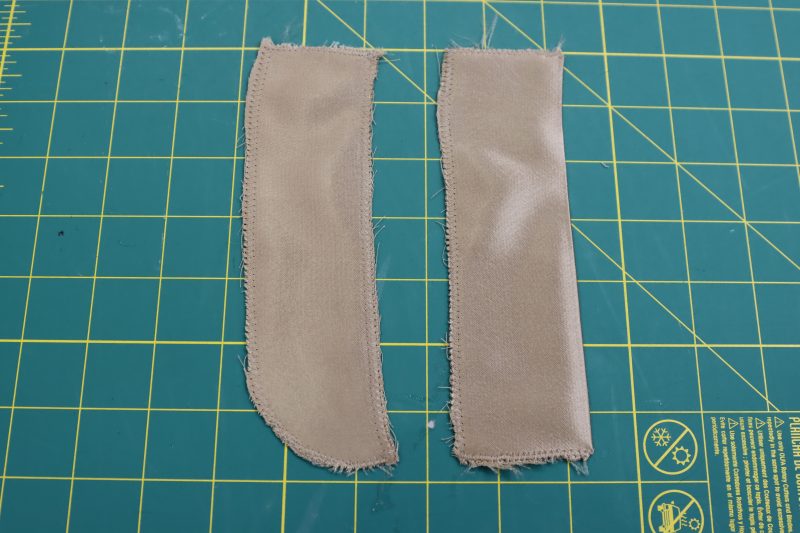
Step 4
PREPARE FLY PIECES
- Sew the fly facing pieces wrong sides together with a zig zag stitch around every edge. Press it flat.
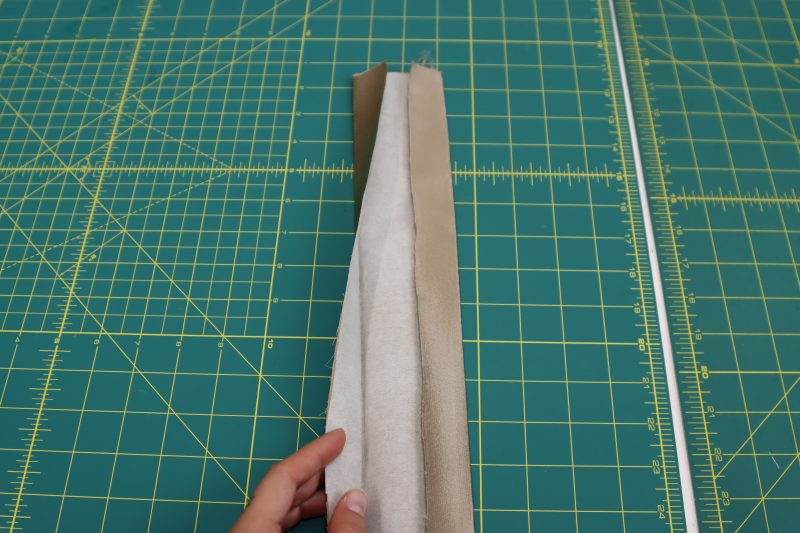
- Fold the fly shield piece in half long ways, wrong sides together.
- Sew the fly shield piece around the three raw edges with a zigzag stitch. Press it flat.
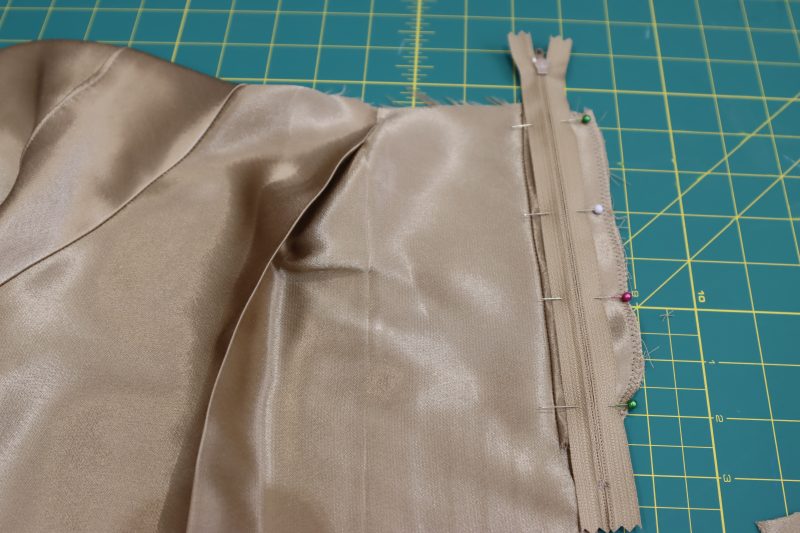
Step 5
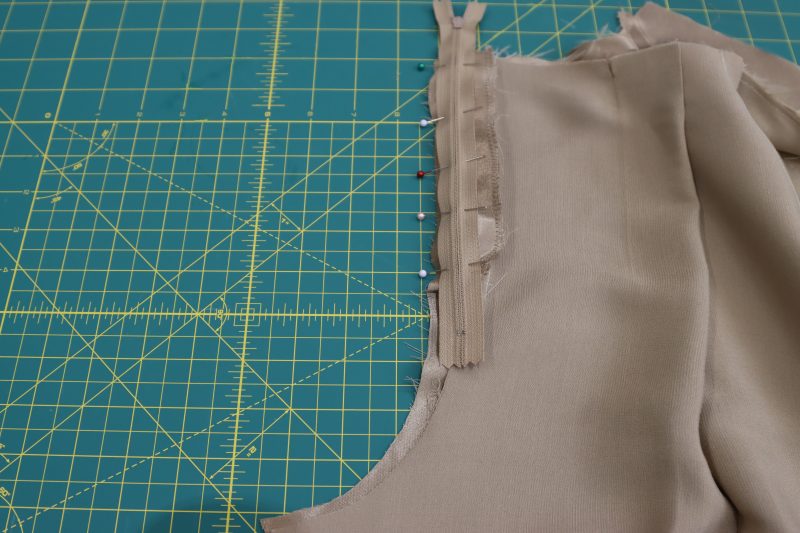
INSERT FLY
- Pin and sew the long flat side of the fly facing to the crotch seam of the wearer’s front right side of the pants.
- Press the seam between the fly facing and the crotch seam open and flat.
- Pin and sew the zipper right sides together with the fly facing , being sure so only sew along the side of the zipper tape furthest from the seam between the fly facing and the crotch seam.
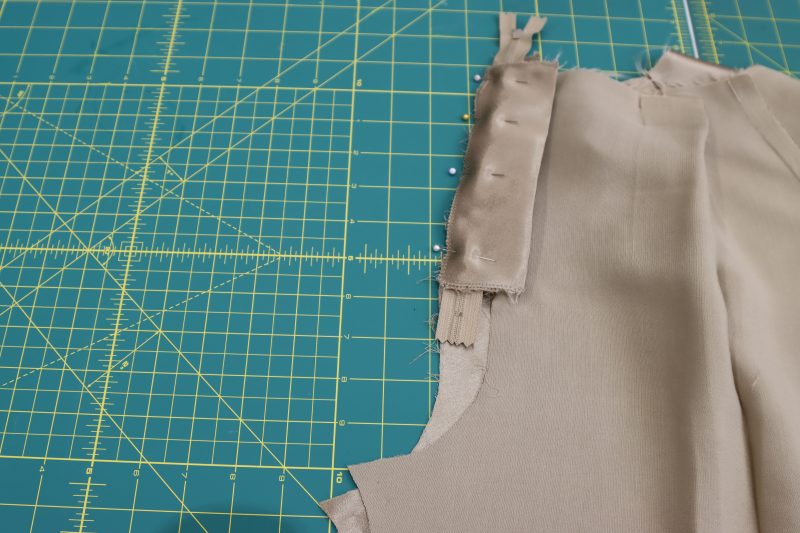
- Unfold the seam that attaches the zipper to the fly facing and place the other side of the zipper right sides together with the crotch seam at the wearer’s front left side of the pants.
- Pin and sew the other side of the zipper to the crotch seam of the wearer’s front left side of the pants.
- Layer the fly shield on top of the zipper and the wearer’s front left side of the pants. Pin and sew all three layers.
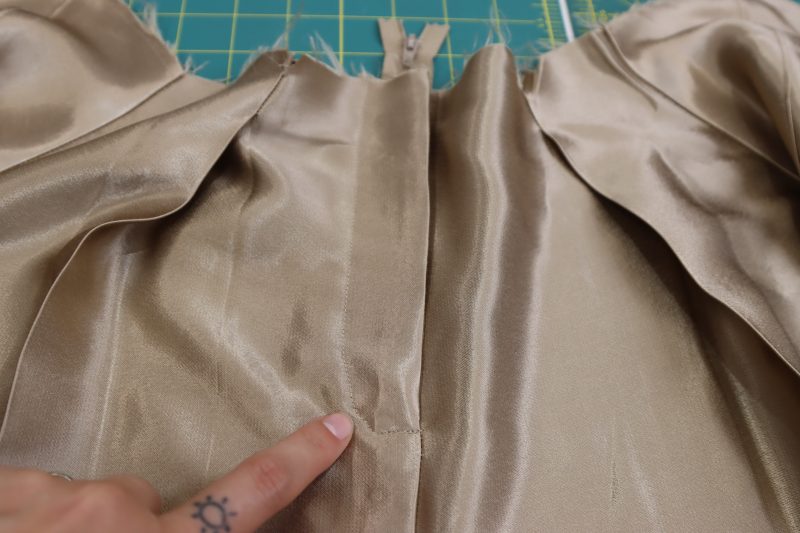
- Unfold all the pieces of the front fly to lay them flat. Top stitch the fly facing to the wearer’s front right side of the pants.
Step 6
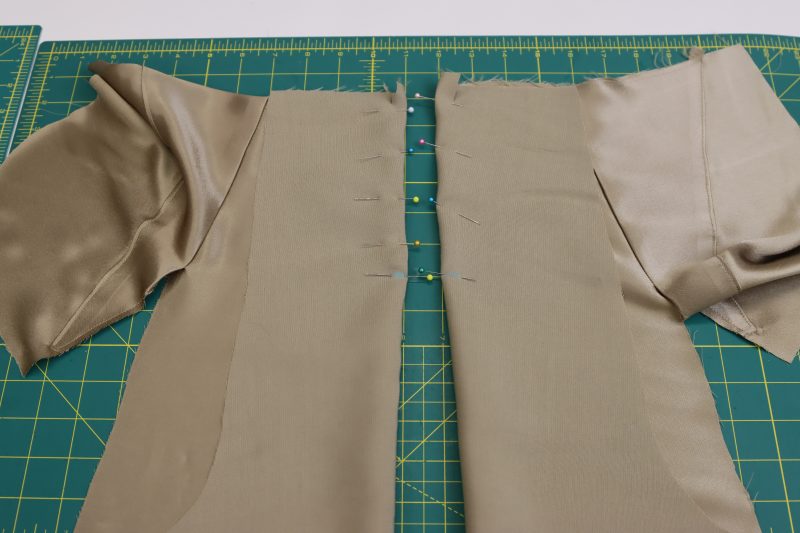
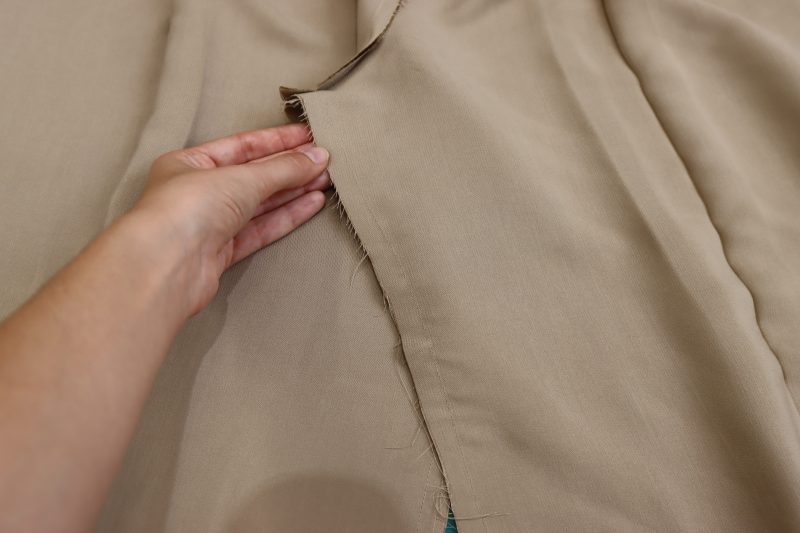
CROTCH SEAMS
- Pin and sew the crotch seam of the two back pants pieces, right sides together.
- Pin and sew the crotch seam of the two front pattern pieces, right sides together up to the bottom of the fly shield and fly facing, making sure that there are no gaps in the front crotch closure.
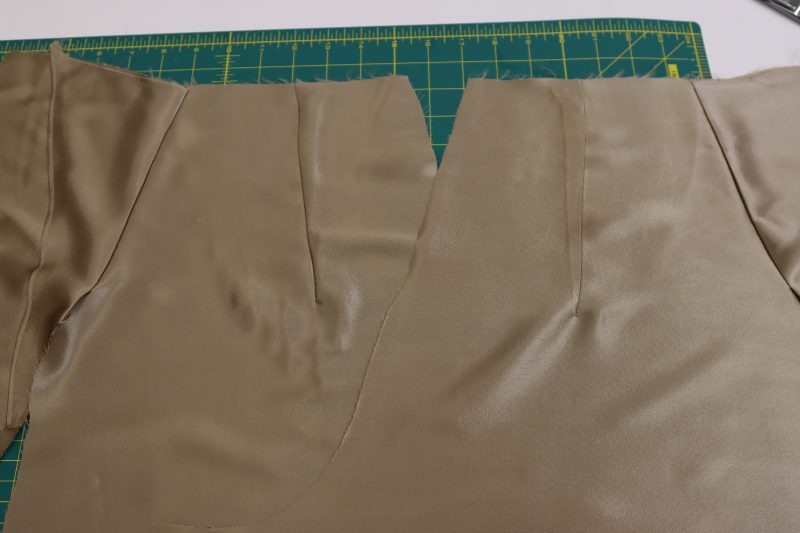
Step 7
SIDE SEAMS
- Lay the back pants piece on top of the front pants piece, right sides together.
- Line up the pockets and side seams so that the outer corners of the pocket bags are perfectly overlapping.
- Pin from the top outer corner of the pocket bags, all the way around the perimeter of the pocket bags, connecting them at the corner where the pocket bag meets the side seam.
- Sew both the left and right side seams together, making sure not to sew the pocket opening shut.
Step 8
INSEAM
- Pin and sew the pants inseam together, right sides together, starting by lining up the front and back crotch seams.
Step 9
WAISTBAND
- Pin and sew the tops of the pocket backs to the top of the waistline of the pants to secure them in place while attaching the waistband.
- Iron the fusible interfacing to the wrong side of the waistband.
- Fold and iron both long sides of the waistband by 1 inch toward the center of the waistband. Then, fold and iron the entire waistband in half longways.
- Sew the ends of the waistband shut, right sides together. Poke the corners of the waistband out with a chopstick or other skinny but dull tool.
- Sandwich the waistline of the pants into the open edge of the waistband piece.
- Pin and sew the waistband to the waistline of the pants with a ⅛ inch seam allowance.
Step 10
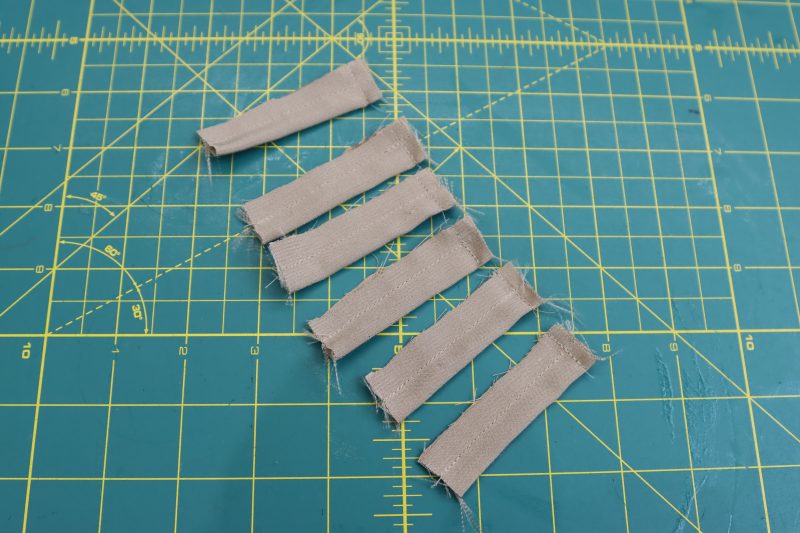
BELT LOOPS
- Fold the belt loop pieces in half long ways, right sides together.
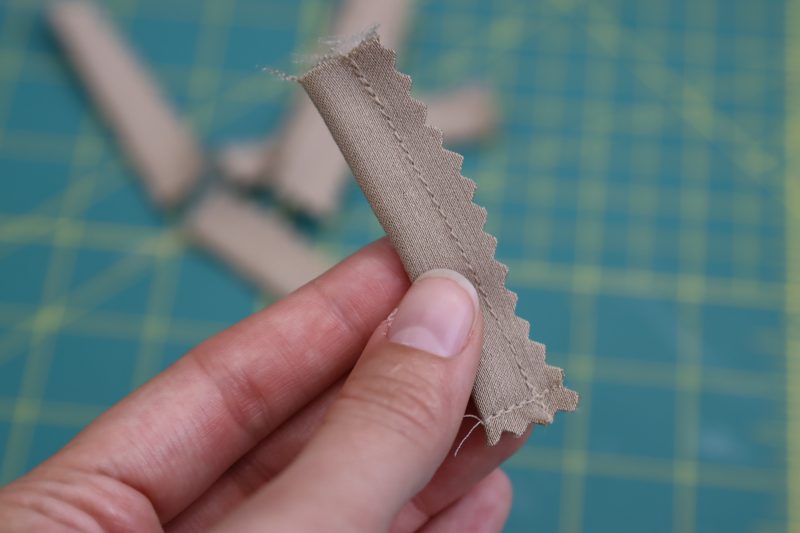
- Sew the belt loops pieces into a tube with one end open using a ⅜ inch seam allowance.
- Trim the seam allowance on the belt loops with pinking shears.
- Flip the belt loops right sides out using a tube turner tool.
- Pin and sew the belt loops evenly spaced around the waistband of the pants, with the tops of the belt loops even with the top of the waistband and the bottoms of the belt loops folded up and sewn to the waistline of the pants, just under the waistband.
Step 11
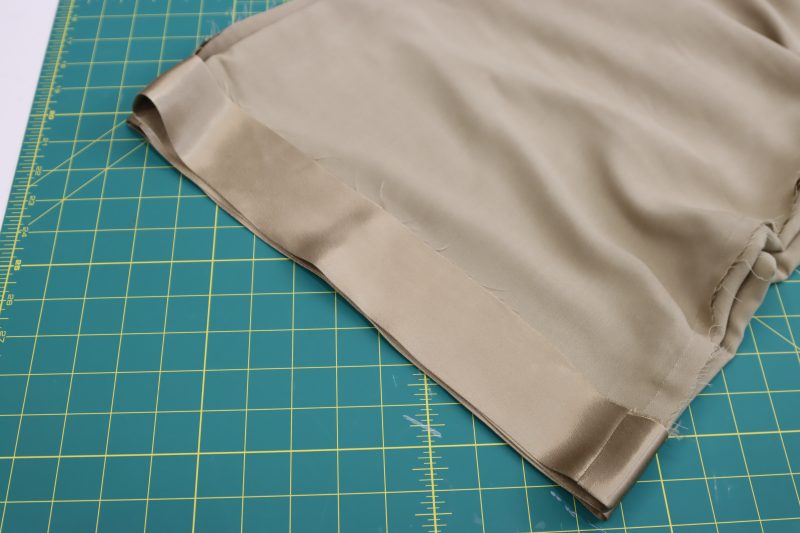
HEM
- Fold and iron a wide hem into the bottom of the pants (note: the pants should be hemmed enough so that they fit your particular inseam measurement, but the hem should be wide so that the bottoms of the pants have the same drape as the rest of the pants).
- Either iron hem tape into the hem to keep it in place OR sew the bottom hem with a 2-3 inch seam allowance. Again, the seam allowance on the hem should be wide, not a baby hem.
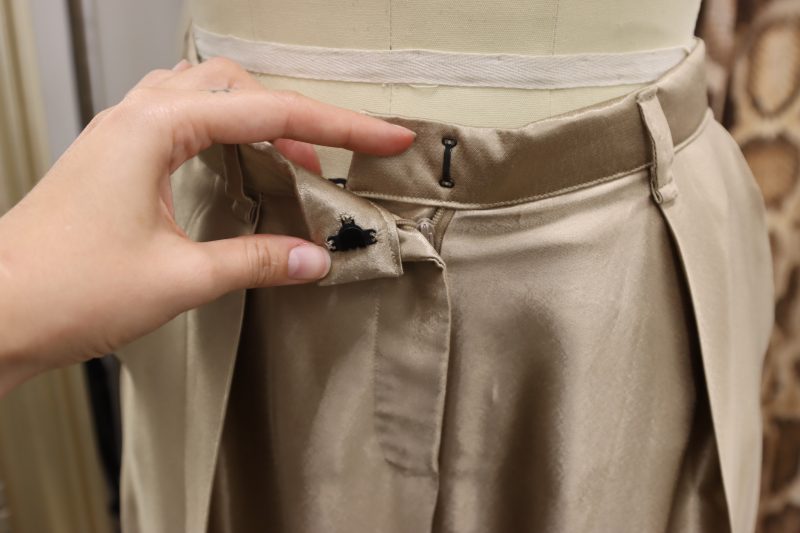
Step 12
HOOK & EYE
- Hand sew the hook and eye closure to the waistband above the zipper fly using a needle and thread.
HOW TO SEW THE FIRENZE BLOUSE

Step 13
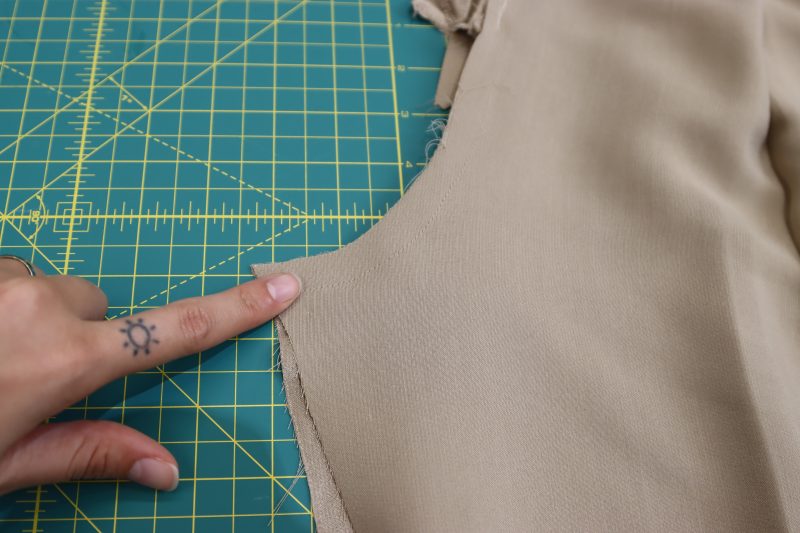
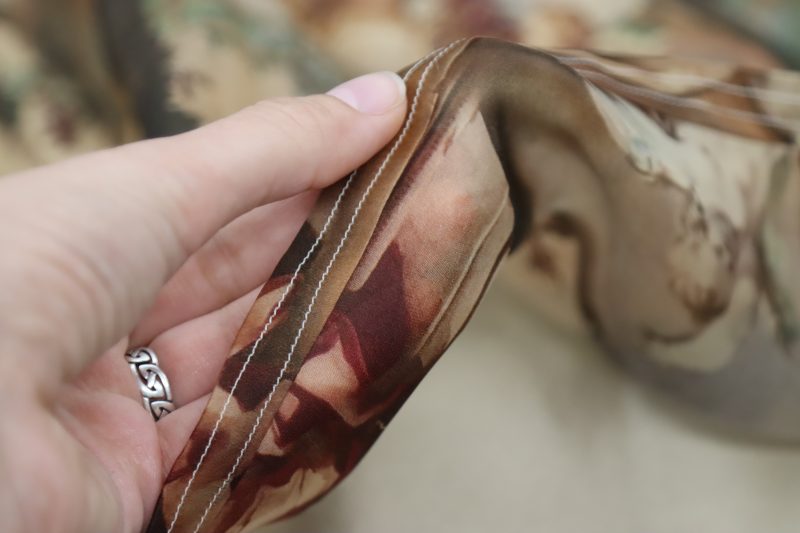
SIDE SEAMS
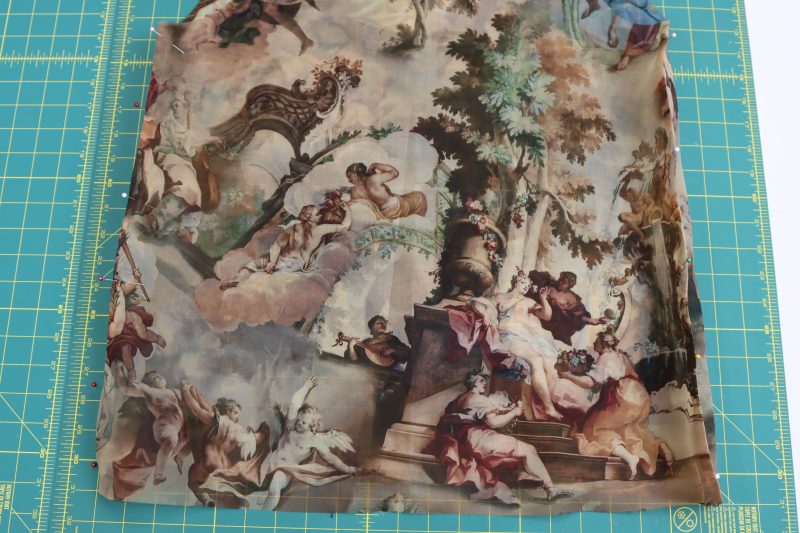
- Place the front and back blouse pieces wrong sides together.
- Pin and sew the side seams of the front and back pattern pieces with a ¼ inch seam allowance.
- Flip the blouse piece wrong sides out (at this point, the seam allowance you just sewed should be on the inside of the garment and the wrong side of the fabric should be facing the outside. We’re making a French seam here, so just trust the process).
- Iron the side seams open and flat.
- Pin and sew the side seams together again, but this time with a ⅜ inch seam allowance. This slightly larger seam allowance should fully encase the raw edge of the first seam you sewed earlier.
- Iron the French seams open and flat.
Step 14
SLEEVE SEAMS
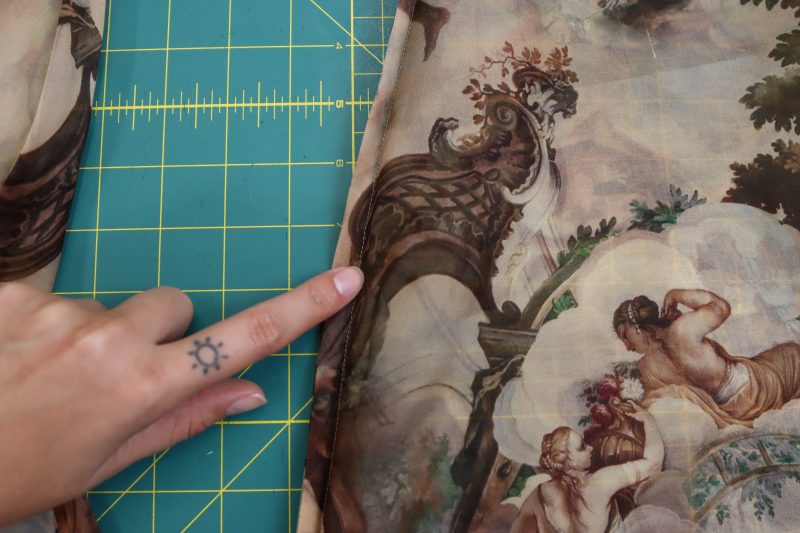
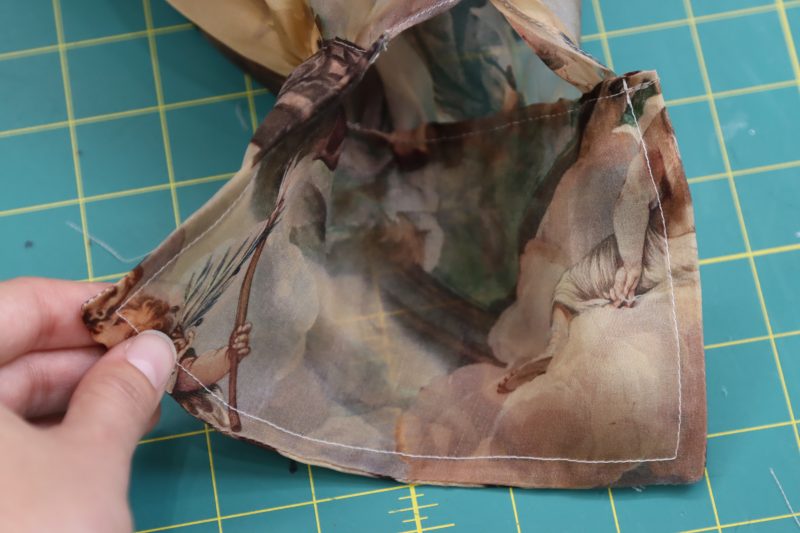
- Fold the sleeve pieces, wrong sides together, and pin the raw edges.
- Sew the raw edges together with a ¼ inch seam allowance, leaving a 4 inch gap at the bottom of the sleeve for the sleeve placket to be finished before attaching the cuff.
- Flip the sleeve pieces so that the raw edge seam allowance is on the inside and the wrong sides of the fabric are facing the outside.
- Using the same technique as in step 13, encase the raw edge seam allowance into a new seam with a ⅜ inch seam allowance to create the French seam on the inside of the sleeves. Again, make sure to leave the gap at the bottom of the sleeves.
- Iron the French seams open and flat.
Step 15
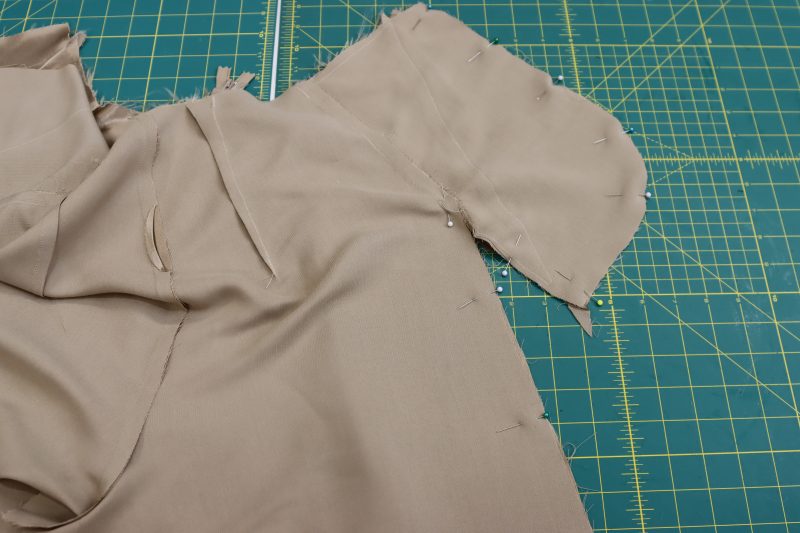
UNDERARM SEAMS
- Pin the curved underarms of the sleeves to the curved underarms of the blouse torso, wrong sides together.
- Sew the pinned seams with a ¼ inch seam allowance.
- Flip the whole blouse so that the raw edge seam allowance you just sewed is on the inside of the garment and the wrong sides of the fabric are on the outside.
- Pin and sew a seam with a ⅜ inch seam allowance to encase the raw edge seam allowance you just sewed.
- Iron the underarm French seams open and flat.
Step 16
CUFF OPENING
- Sew a tack stitch (by machine or by hand) at the bottom of the finished seam near the wrist of the sleeve to keep it from ripping open.
- Sew a straight stitch over both open sides of the sleeve placket to finish the raw edges.
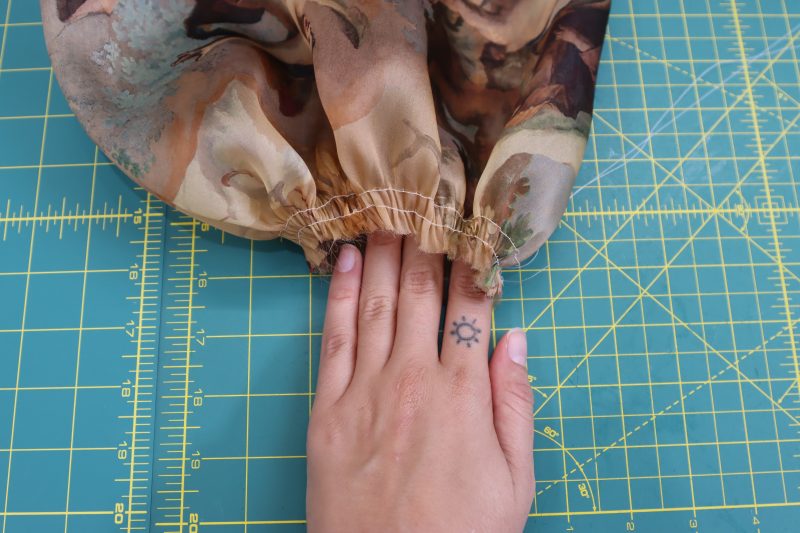
- Sew two parallel straight stitches with a long stitch length along the raw edge of each sleeve.
- Begin gathering the wrist of the sleeves using the two parallel straight stitches. We will gather them to the correct length later when we attach the cuff.
Step 17
ATTACH CUFFS
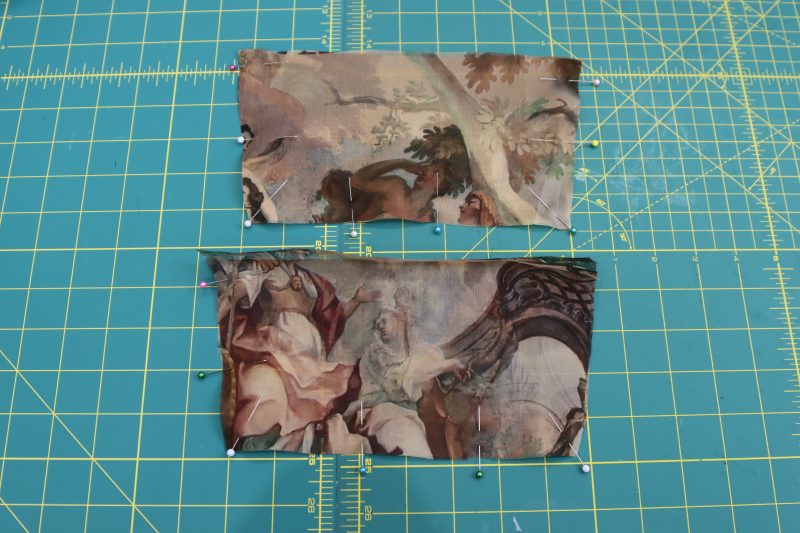
- Place the mirrored cuffs, right sides together.
- Pin and sew the two cuff pieces at the left, right, and bottom edges of the fabric.
- Turn the cuff pieces right sides out and press them flat.
- Fold and iron a ½ inch hem into the top opening of both cuff pieces.
- Sandwich the gathered edge of each sleeve into a cuff piece, spreading out the gathers so that they perfectly fit within the length of the cuff.
- Top stitch the open edge of the sleeve cuff around the gathered edge of the sleeve.
- Top stitch around the other three sides of the cuffs.
Step 18
NECKLINE OPENING
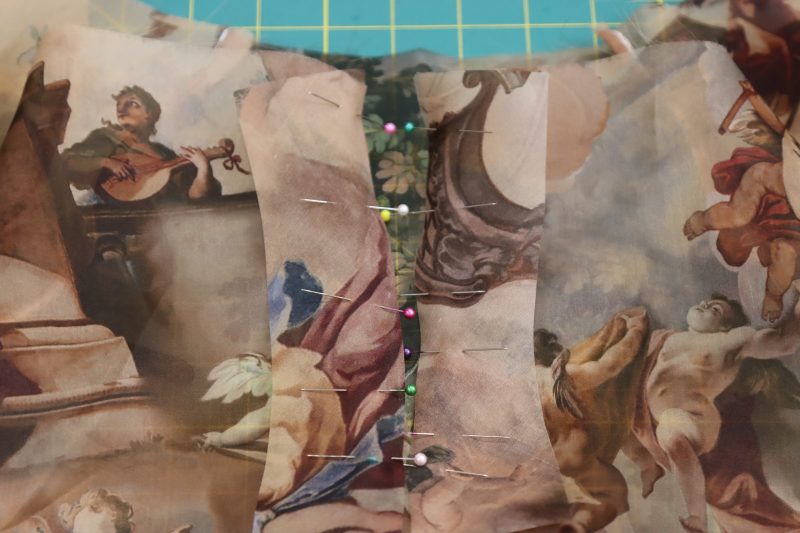
- Cut two strips of bias cut fabric that are 2 inches wide and as long as the back slit opening to use as facing.
- Pin and sew the facing strips right sides together on either side of the back slit opening with a ¼ inch seam allowance.
- Fold the pieces of facing fabric inward so that they are hidden on the inside of the garment behind the back slit opening. Iron the seam flat.
- Top stitch the facing strips to the back slit opening with a ¼ inch seam allowance.
- Optionally, you can serge the edges of the facing strips or even sew a tiny baby hem to finish the raw edges.

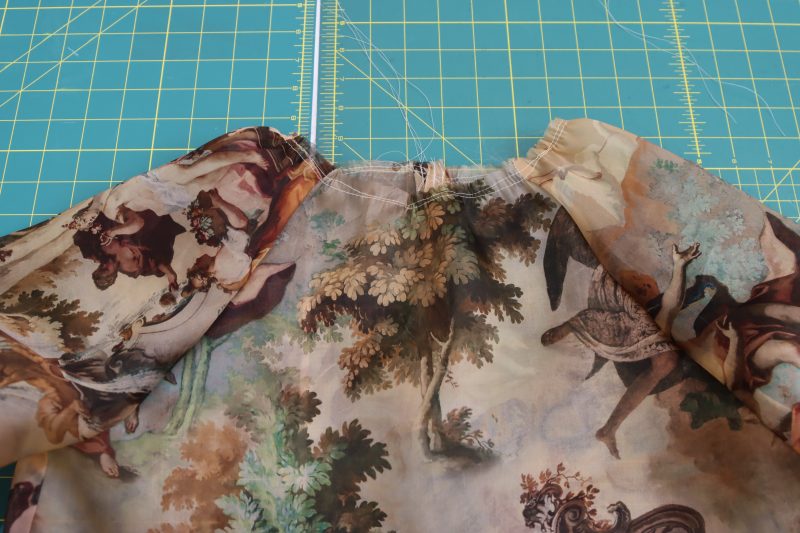
Step 19
NECKTIE
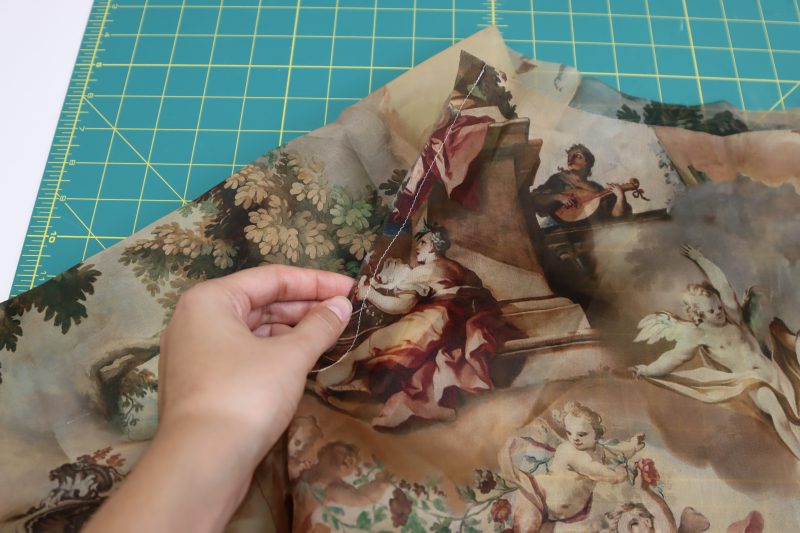
- Sew two parallel straight stitches with a long stitch length along the entire neckline of the blouse.
- Use the straight stitches to gather the neckline to ¾ of the original length of the neckline.
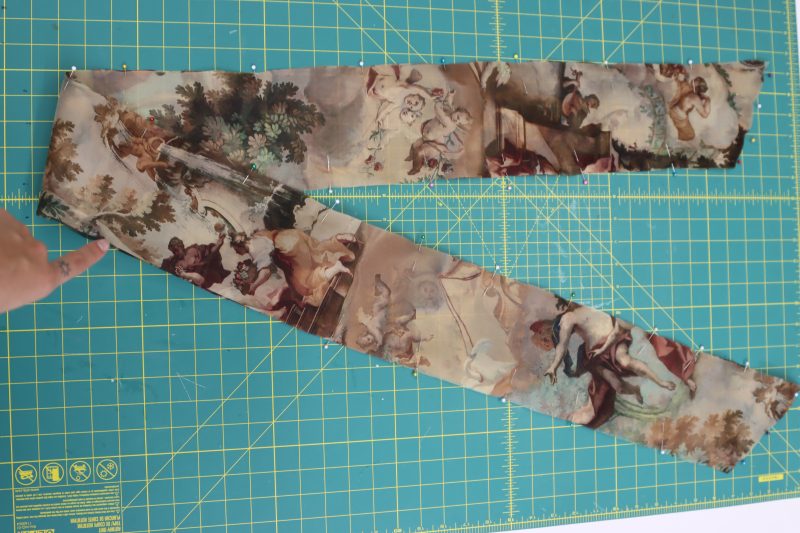
- Pin the two neck tie pieces together, right sides together, around all 4 raw edges. Make sure to leave an opening on one side of the neck tie that is the length of the neckline of the blouse so that the blouse can be sandwiched into the neck tie later.
- Sew around all 4 edges of the neck tie pieces except for the opening.
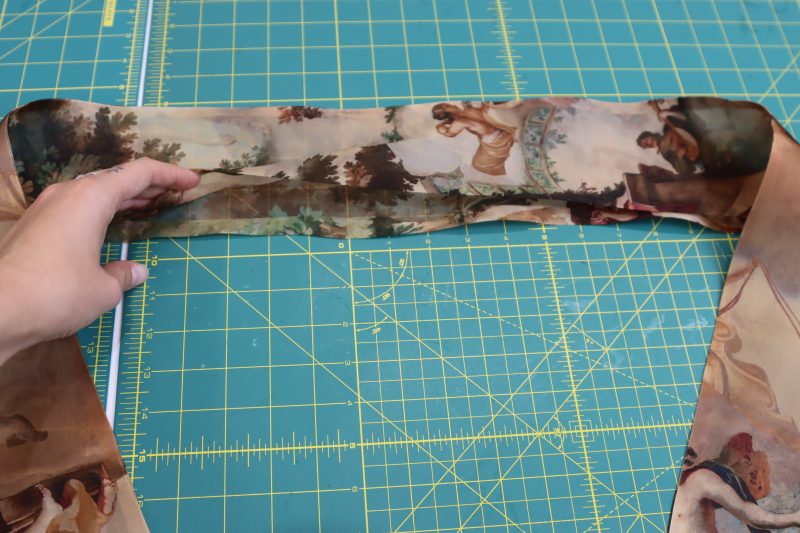
- Flip the neck tie right sides out, poke out the corners of the tie, and iron all the seams flat, including a ½ inch hem along the opening of the neck tie.
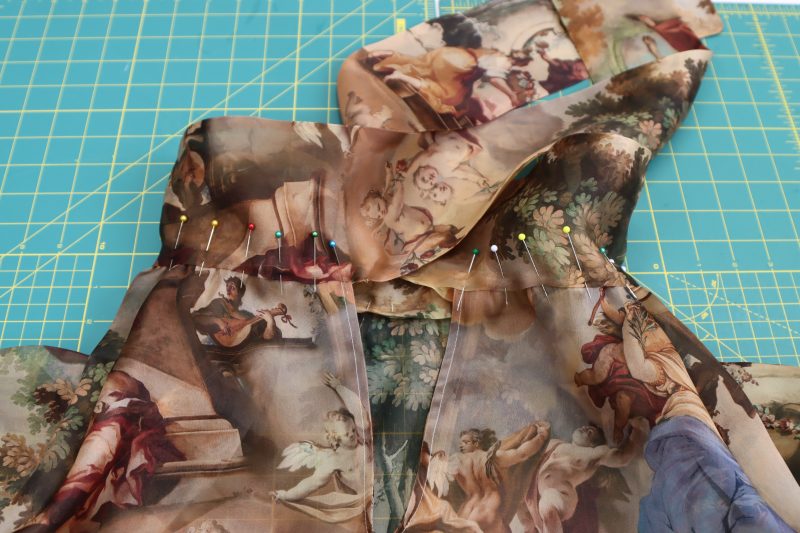
- Sandwich the neckline into the opening of the neck tie.
- Pin and sew the neckline into the opening of the neck tie with a top stitch.
Step 20
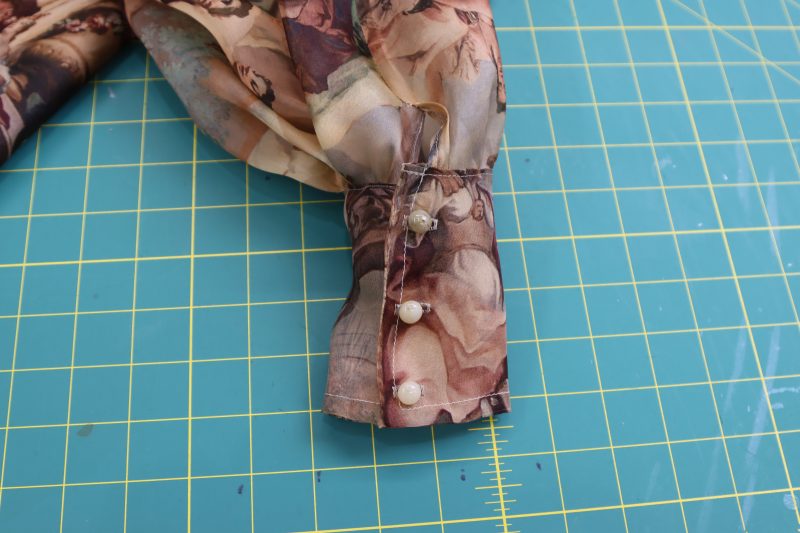
BUTTONS & BUTTONHOLES
- Mark 3-4 evenly spaced spots along both sides of the wrist cuffs for the buttons and buttonholes.
- Make buttonholes on one side of the cuff using the buttonhole foot attachment on your sewing machine.
- Hand sew buttons on the opposite end of the cuff that are aligned with the buttonholes you just sewed.
Step 21
HEM
- Sew a ½ inch folded hem into the bottom of the blouse.
- Fold the ½ hem up another ½ inch and sew again to encase the raw edge.
- Iron the hem flat.
Sewing Success: The Finished Firenze Blouse and Trousers
Share this post with a friend (or two!), download the Firenze Blouse and Trousers free sewing pattern, and show us which fabrics and colors you choose, using the hashtags #MoodFirenzePattern & #MadeWithMood—and don’t forget to tag us @MoodFabrics, too.

Free Sewing Pattern Inspiration for Your Next Project
With 450+ free sewing patterns and counting, your opportunities for sewing with Mood are endless!
We hope you had as much fun sewing this blouse and trousers pattern as we did! As always, we want to hear from you—share your thoughts and comments below and let us know where you’ll be wearing the Firenze Blouse and Trousers free sewing pattern!
I LOVE this pattern! I’ve been looking for an elegant looking trouser pattern that I wouldn’t need to scale up for my curvy best friend for ages. Thank you for making this size-inclisive!
Thank you so much for the positive feedback Christine! If you love our patterns, we would love if you could share this feedback in a google review. Happy sewing!
stunning!!!
The Firenze Blouse and Trousers pattern offers an elegant ensemble featuring a billowy-sleeve blouse in silk organza and high-waisted satin trousers. Ideal for advanced beginners, it combines classic style with modern comfort.
I would love to sew the pants. Is there a size A0 so I can send off to be printed on one piece of paper? The full pattern is 92 pages and costs $60 to print the smaller pages. Is there a copy shop size available?
Unfortunately we don’t offer A0 pattern files as of right now, but we will consider offering them in the future! I’ve read in the comments in the past that some people will manually put the A4 pages into an A0 format using various design programs, but I haven’t personally done it myself.
Dear Marisa and Mood,
I’ve sewn the Firenze blouse with a navy blue cotton satin and it looks incredibly beautiful. Thank you so much for providing this pattern for free!
Thank you
I wiil wear it at my birthday