
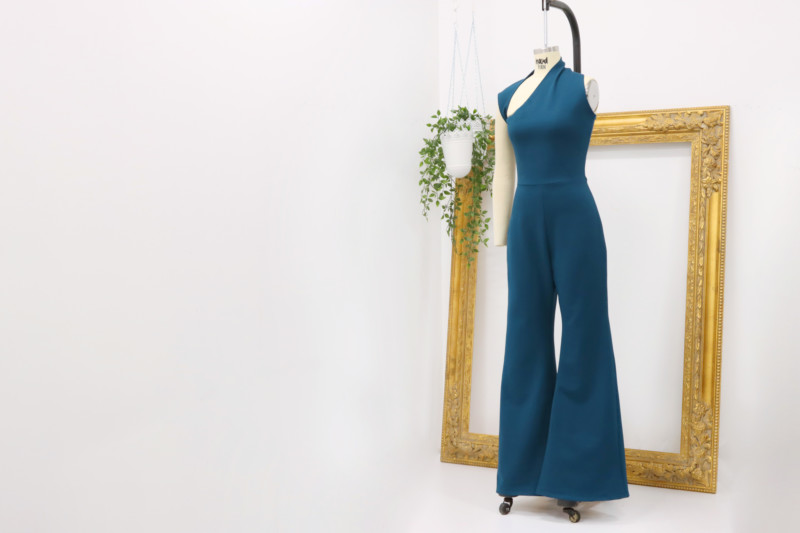
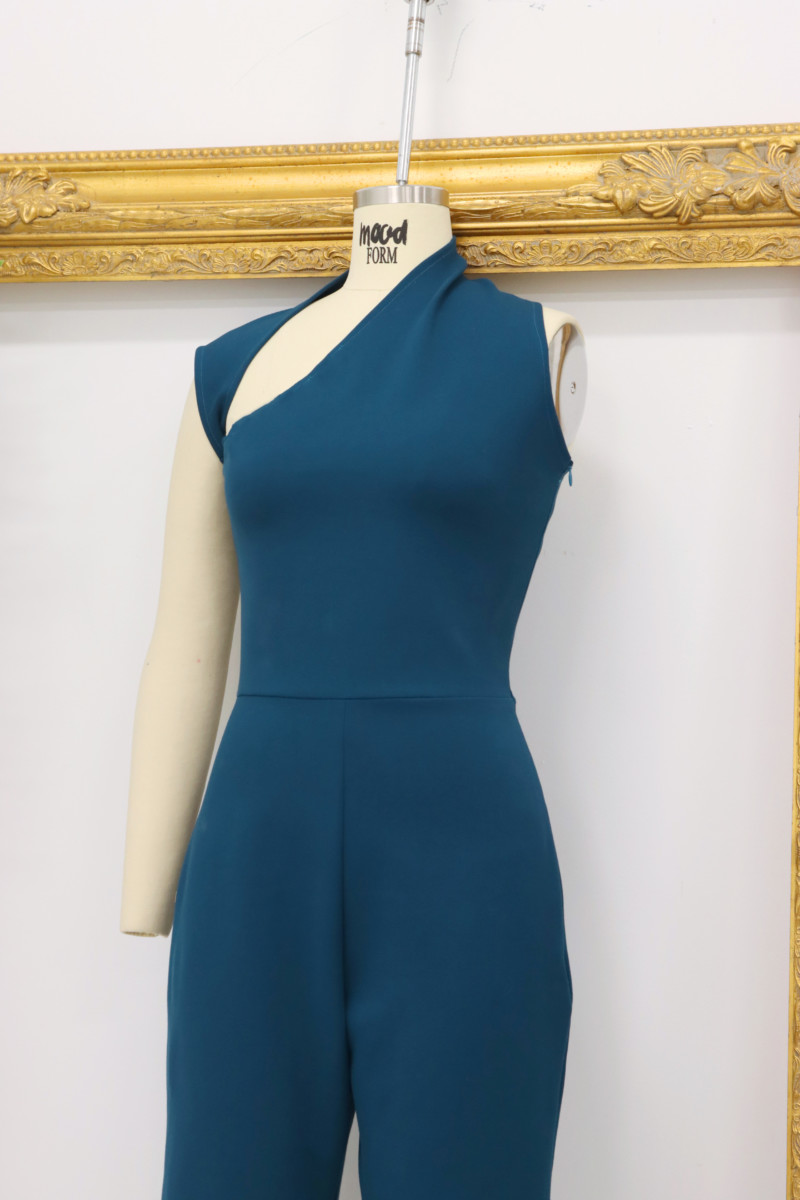
If, like us, you’re inspired by ABBA, Harry Styles, and everything 1970’s, then you’ll love The Pepper Jumpsuit. Our latest free sewing pattern features a single wrap-around shoulder with groovy flared trousers. If you’ve been on the fence about sewing a jumpsuit, this is the place to start! We chose to make it out of our featured collection of ponte knits, which are a great option if you’re dipping your toes into knits for the first time. It’s forgiving while sewing, doesn’t fray or wrinkle, and looks great on any body! Stitch up the Pepper Jumpsuit for a far out addition to your fall wardrobe.
Purchase Materials Used Below:
- 4 yards of Papilio Premium Teal Stretch Ponte Knit
- 1 907 Dark Aqua 24″ Invisible Zipper
- 1 spool of 630 Deep Turquoise 100m Gutermann Sew All Thread
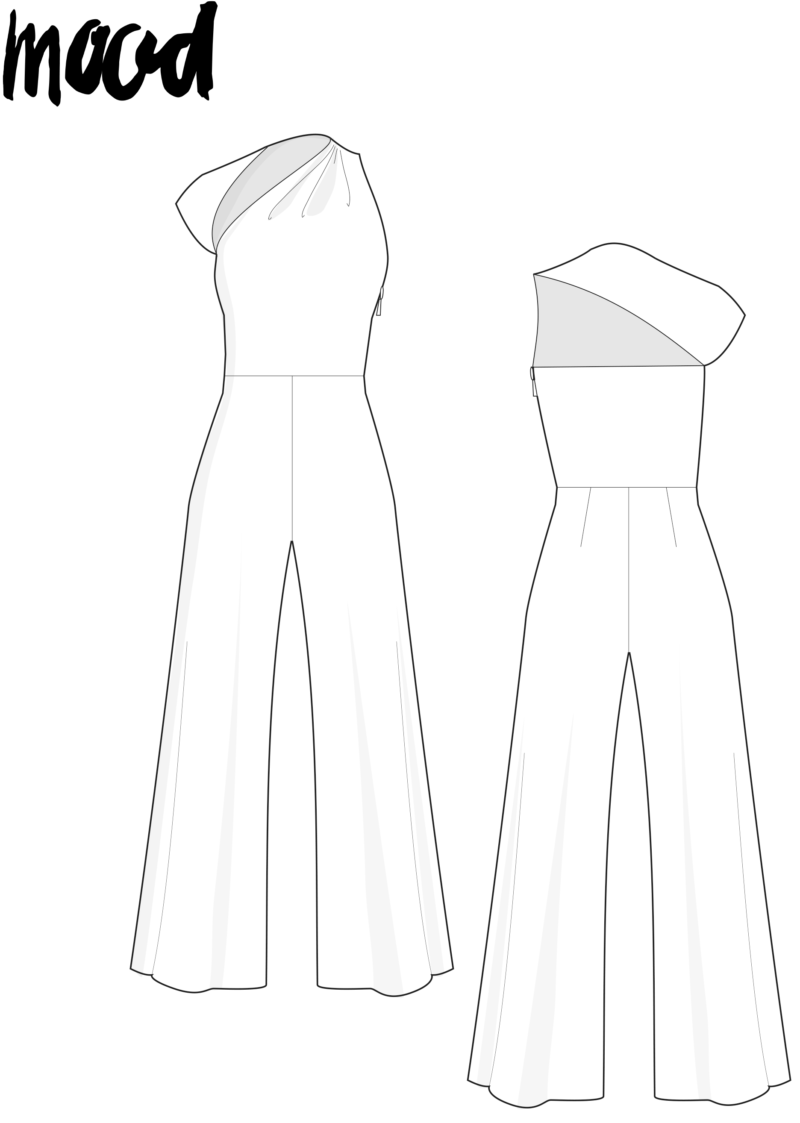
- MDF320 – The Pepper Jumpsuit Free Sewing Pattern (free download below!)
Alternative Recommended Fabrics:
How to sew the pants:
All seam allowances are 3/8″.
Step 1
Transfer dart markings on the back pant leg to the wrong side of your fabric. Right sides together, fold on the center line. Pin and stitch along the outer dart line. Press towards the outer seams. Repeat.
Step 2
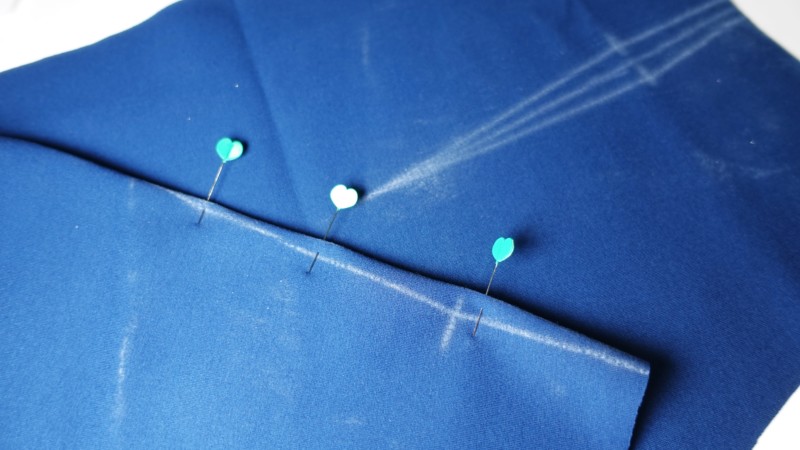
Place the front and back legs right sides together, matching notches, then pin and sew up the sides. If inserting a zipper, sew until the last notch on the wearer’s left side. Press seams open.
Step 3
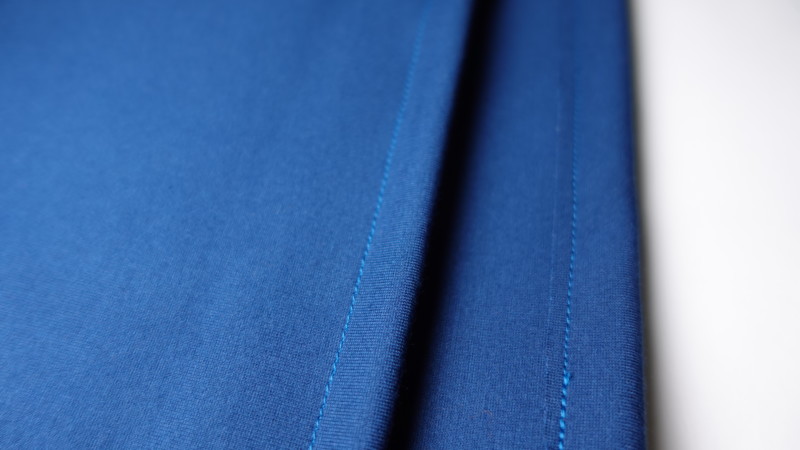
Press the pant leg bottoms in by ½”, then hem. Since ponte knit fabric doesn’t fray and I wanted to reduce bulk, I did a single fold hem.

Step 4
Place one pant leg into the other, right sides together. Pin and sew the rise.
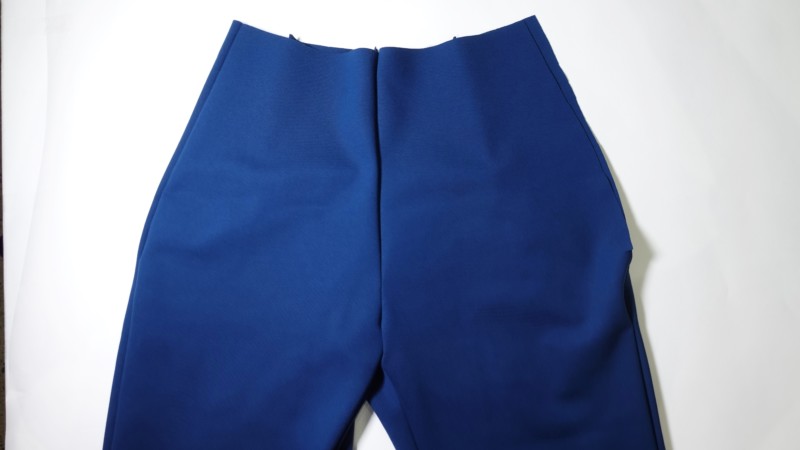
The pants are now complete!
How to sew the top:
Step 1
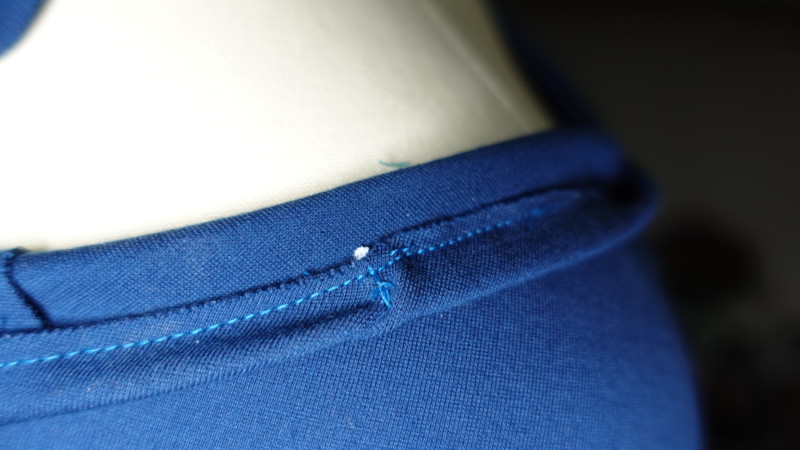
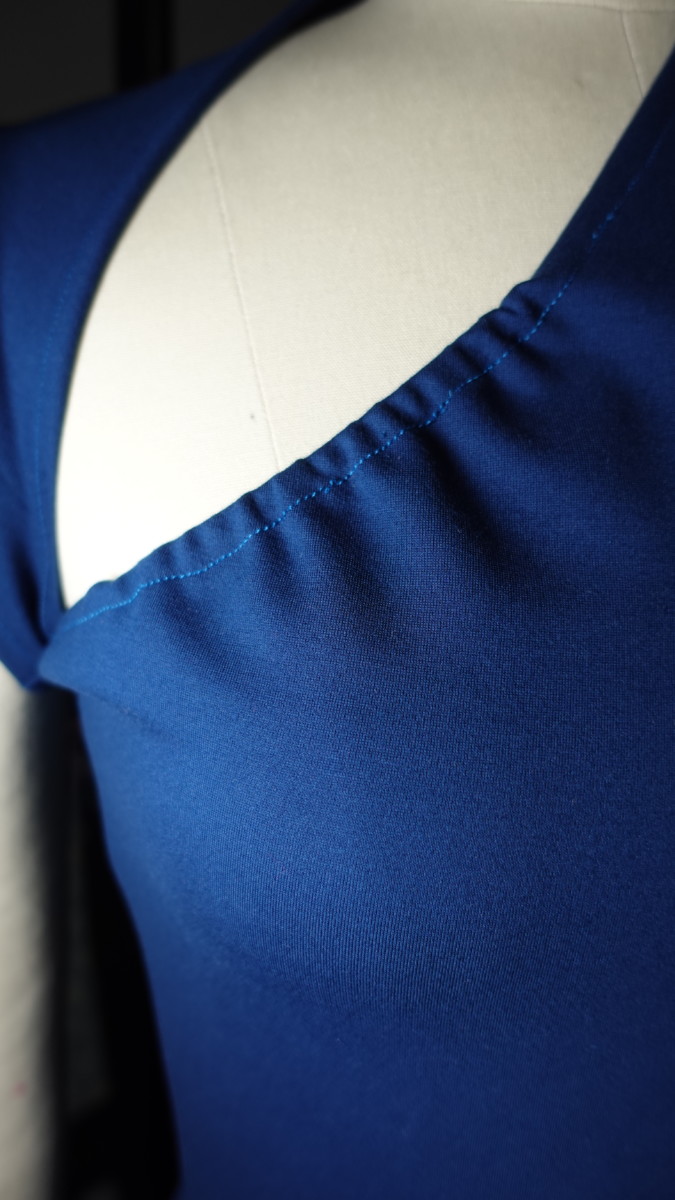
Transfer the two markings on the top front edge, and depending on your fabric, ease & staystich or insert elastic in the hem you’re about to sew in step 3. Given the weight of the fabric ponte, I inserted a 3 inch piece of elastic, which I secured on the inner/hemmed fold.
Step 2
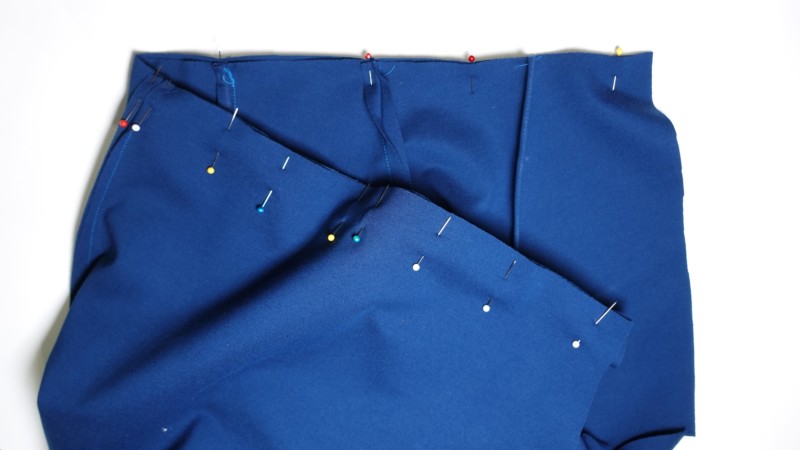
Right sides together (the single shoulder should be on the wearer’s right side), pin and sew the back bodice to the front bodice, up the sides. If inserting a zipper, don’t sew that left side yet.
Step 3
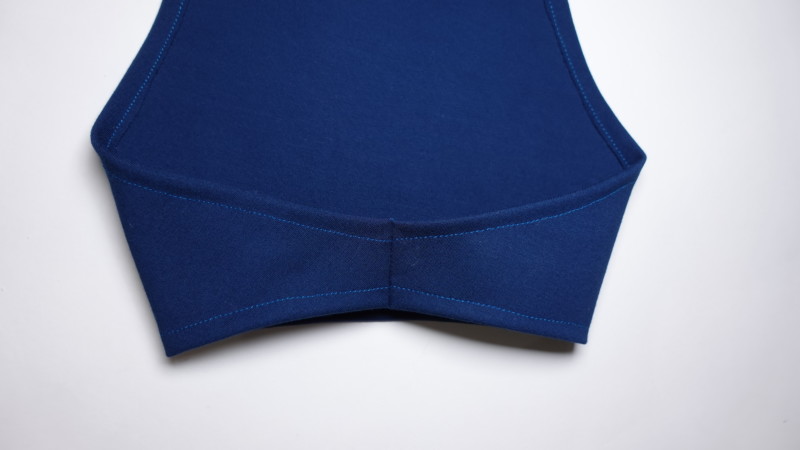
Hem edges. Again, because this fabric doesn’t fray I did a single fold hem, which you can see pictured below.
Step 4
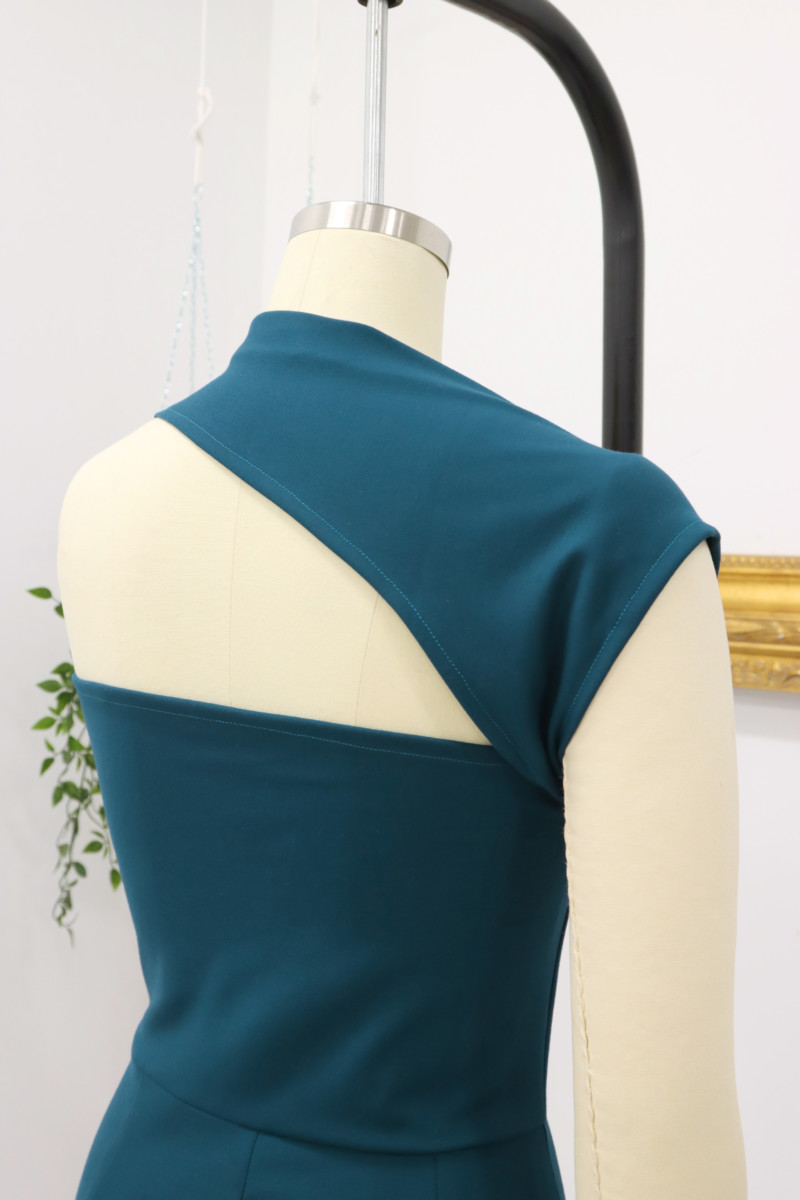
Sew the two short edges, right sides together, and press. You now have the one shoulder loop.
How to complete the jumpsuit:
Step 1
Pin the right sides of the bodice and pants, then sew around the waist. Press the seam.
Step 2
If you’re using a zipper, insert it now. I used an 18” invisible zipper.
I generally love your patterns but you outdid yourself on this 70s jumpsuit. Love love love it and cannot wait to sew
I love the bottoms! I cant wait to see all of the outfits people will make with this pattern 🙂
I used the top of the pattern and added a skirt for a Viking themed costume!
Thank you for the pattern, looks great and I can’t wait to sew it. Do I understand correctly that the front and back bodices are stiched together at the sides only and the fron bodice by the two short ends and that the front bodice stays in place by being tucked under the right arm? No further sewing? Many thanks!
Hi Kristina! Yes, if I’m understanding your question correctly – the bodice is stitched only at the side seams. The asymmetrical sleeve is then “loose” and tucked under the arm. 😀
What do you mean by “loose”? As in both ends are not attached to the bodice?
Hi Danielle! The two small ends are attached to each other, not to the bodice. That little enclosed circle that’s created by those two ends being sewn shut, is now the armhole. 🙂
What size of paper should I print this on?
Hello! This pattern can be printed on US and A4 size paper 🙂
Hola! Muchas gracias por el regalo!!! Un abrazo!!!
I’m excited to see how the pants fit actually the whole outfit
hi i wonder qhere can we see everything that people makes ,thank you
Hi Estela! You can join the Mood Sewciety Facebook group to see what everyone is making! Also, search the hashtag #MadeWithMood. 🙂
Gorgeous pattern, thanks!
Could you make this with a non-stretch material if you added a zip?
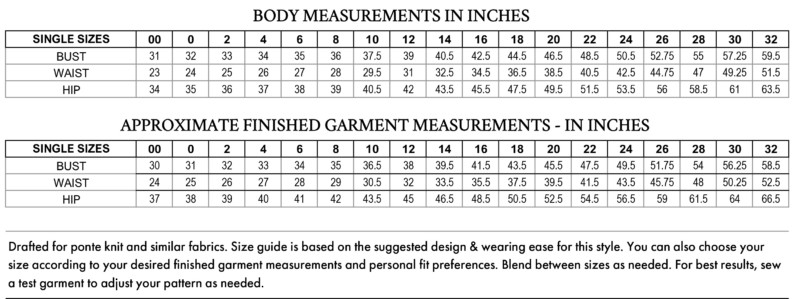
Hi Georgia, We’re sorry for the delay in responding to your question! We get dozens of comments and questions each day, and so many questions get buried and, unfortunately, unanswered. We are now focusing user support on patterns 2 years and newer. We hope this will prevent questions on our more current patterns from going unanswered. Although this is late, we wanted to respond in case anyone else has the same question: You’ll want to make sure that the pattern has enough ease, before deciding on the size. Compare your measurements to those on the pieces, subtracting the 1/2″ seam allowance. Luckily this already has a zipper, so there shouldn’t be too much pattern hacking. The shoulder piece might need to be adjusted though, so I strongly suggest making a muslin of this first!
Hi! Just wondering how i can adapt this pattern for a non stretchy fabric so that it fits perfectly whilst using the same pattern as ive already printed it… thank you!
Hi Camille! You’ll want to make sure that the pattern has enough ease, before deciding on the size. Compare your measurements to those on the pieces, subtracting the 1/2″ seam allowance. Luckily this already has a zipper, so there shouldn’t be too much pattern hacking. The shoulder piece might need to be adjusted though, so I strongly suggest making a muslin of this first!
Hi !
I am wondering what changes can I do to the pattern if i would like to realise it in crepe fabric and only the bodice of it as a top 🙂 thanks
Hi Sana, I would try to find a stretch crepe to use, since this pattern relies on stretch for the over the shoulder detail. If you want to attempt this with a non stretch fabric, I suggest measuring the pattern and choosing your size based on that. A test muslin is essential, as you may find you need to revise the pattern in order to get your arm through the loop, or add ease on the shoulder feature for movement.
Is it pissible for the sleeve to be longer?
Any tips?
Hi Gladys, we’re sorry for the delay in responding to your question! We get dozens of comments and questions each day, and so many questions get buried and, unfortunately, unanswered. We are now focusing user support on patterns 2 years and newer. We hope this will prevent questions on our more current patterns from going unanswered. Although this is late, we wanted to respond in case anyone else has the same question: Yes it’s possible to pattern hack it! Test it out with some stretch fabric first though.
Hi, is there an inseam measurement somewhere and one for the length of the torso? Thanks.
Hello, this size 4 sample has an inseam measurement of 33 (plus 1/2″ seam allowance), torso measurement of 15 1/2″, and front rise of 12 1/2″.
Thank you!
Très joli je le ferai la semaine prochaine
Hey just a quick question how do I get the full instructions I am unable to find it
Hello Alexis, the sewing instructions can be found along with process images when you scroll down the post.
Hello, just downloaded pattern. One quick question, can this be made using Nylon Spandex Knit fabric? As I do not currently have Ponte knits or Scuba Fabric in my stash.
Hello, yes this pattern can work with nylon spandex knit as well
hey amazing pattern 🙂
would I be able to make this as just a pair of pants and exclude the bodice of the jumpsuit ?
Hello! In order to make just the pants from this pattern, we recommend to add about 1-2 inches at the top of the waistline to create a casing, this way you can insert an elastic or a drawstring.
Used this pattern for my 4th sewing project and absolutely loved it! Instructions were a bit confusing, but the ending piece was beautiful, and I cannot wait to wear it! Thank you!
We are glad to hear! Happy sewing 🙂
Hi! Is there a way to buy this pattern instead of doing the free download? The printing and taping it together is killing my back. Thanks!
Unfortunately we only have the 8.5 x 11 printer paper option, but we’re considering having other print formats available some time in the future. Thank you for this feedback! It helps us prioritize what our community wants.
Hi,
I have a maths question! When I was printing the pattern, no matter how I tried printing I couldn’t get the test square to measure exactly 2 inches (it was in portrait, at actual size/100% scale etc- I also tried increasing the scale to no avail). It consistently measured up at 4.9cm or just over 1-7/8 inches and I eventually had to just print the pattern this way.
Now, I know that millimetres can add up- should I adjust my measurements and/or the size chart measurements accordingly? Would this be a case of working out what the ratio is between 4.9cm and 5.08cm and scaling the rest of the measurements down, or is there a more suitable way of doing it?
Thank you!
Honestly if it’s only off by 1/8 inch, it shouldn’t affect the pattern too much. If it printed slightly too small, I just recommend using a more narrow seam allowance (our patterns generally say to use 1/2 inch seam allowance, so you can always use 1/4 inch seam allowance in places where you’re worried about the fit).