
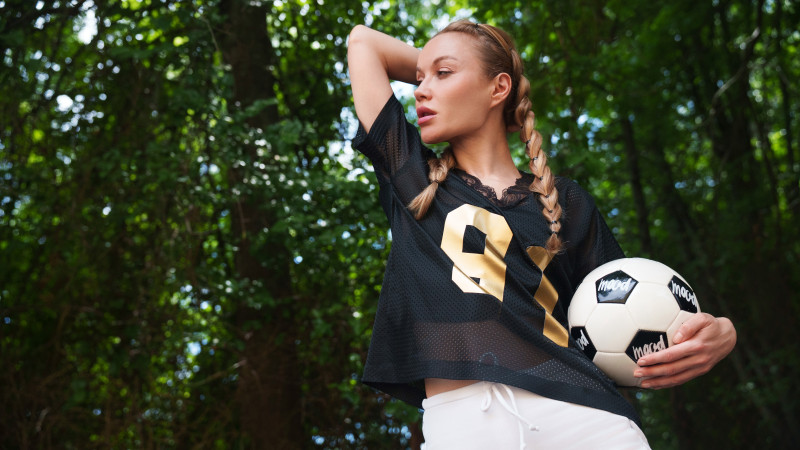
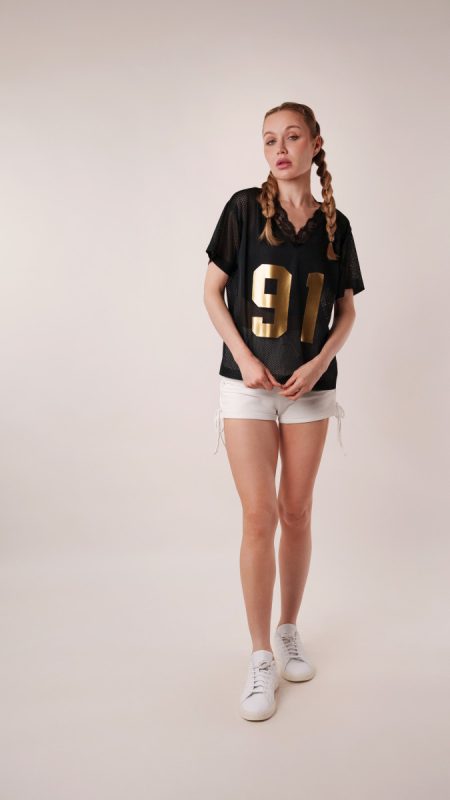
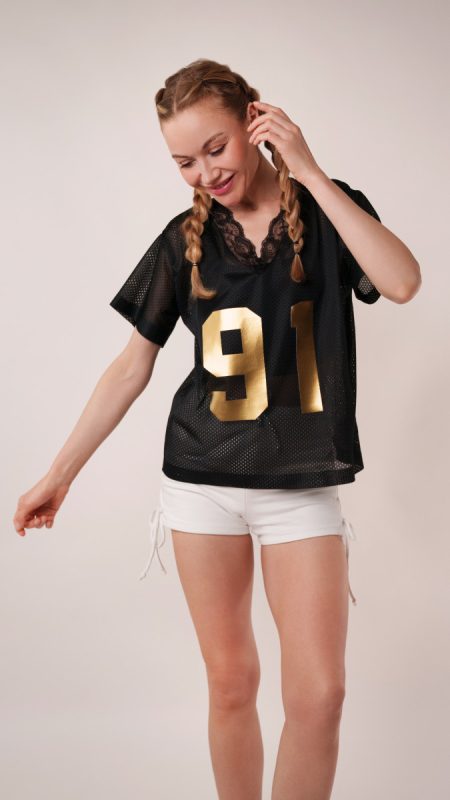
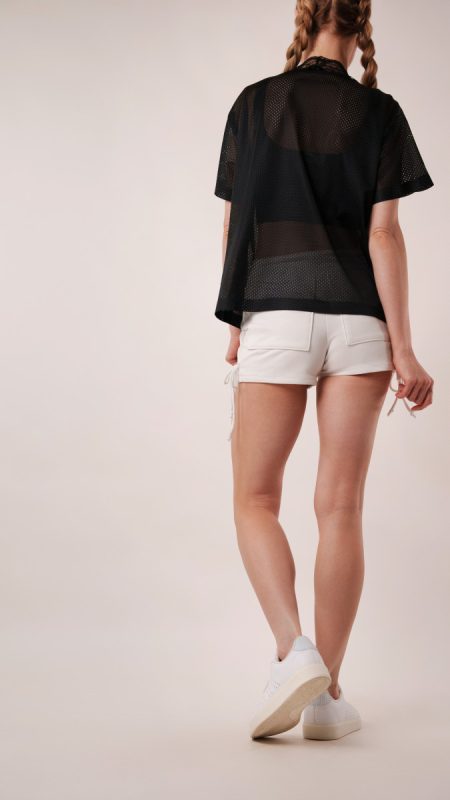
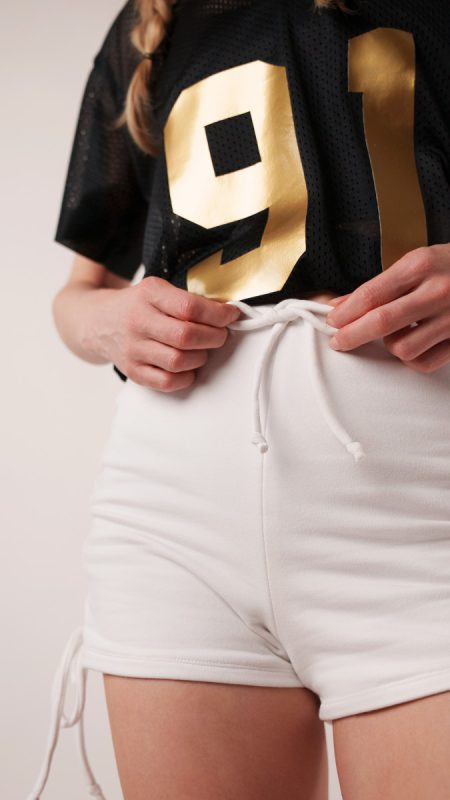
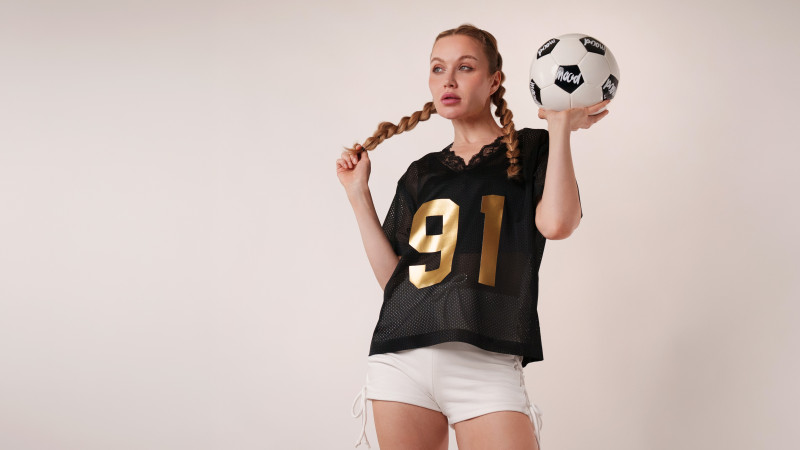
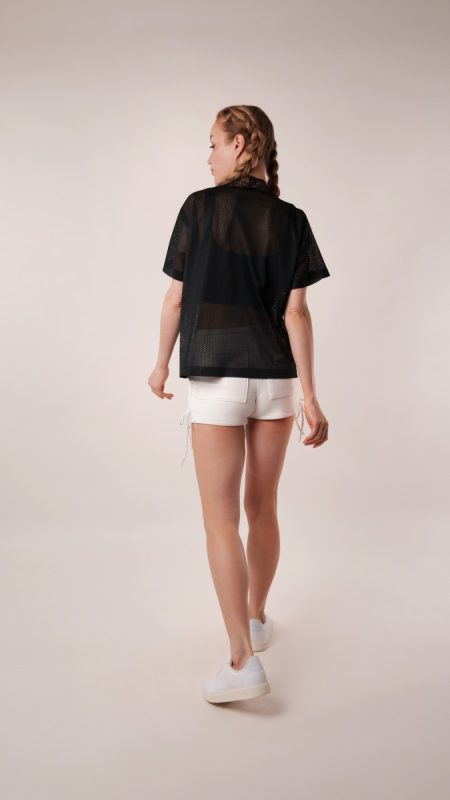
Whether you’re cheering from the sidelines, gathering with friends for match day, or heading out for a quick kickaround at the park, the Fiona Athletic Set is ready to score. Inspired by the excitement and camaraderie of the biggest soccer event of the year, this sporty two-piece set combines athletic functionality with a touch of feminine charm for a look that’s as cute as it is comfortable.
Made from breathable athletic mesh for the jersey and cozy cotton fleece knit for the shorts, the Fiona set is the perfect combination of sporty and soft. The relaxed-fit jersey keeps you cool whether you’re on the move or relaxing after the final whistle, while the fleece shorts offer just the right amount of comfort for everything from morning workouts to weekend lounging.
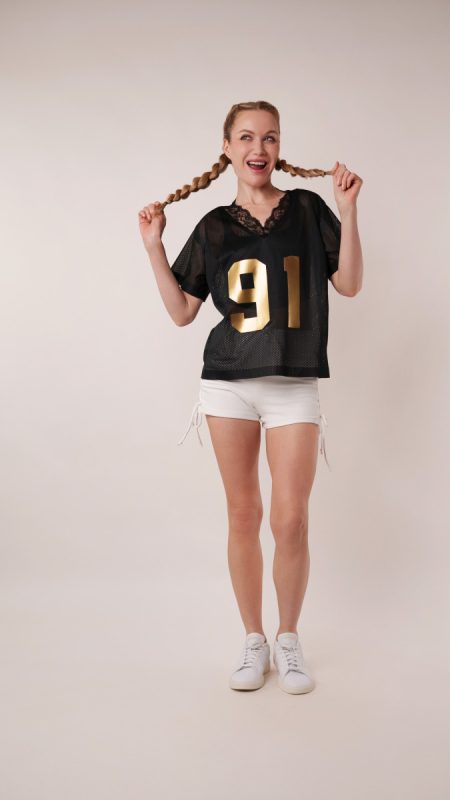
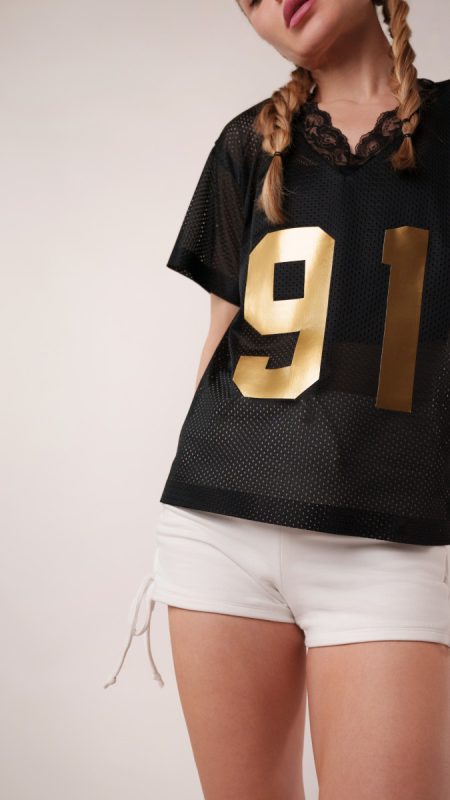
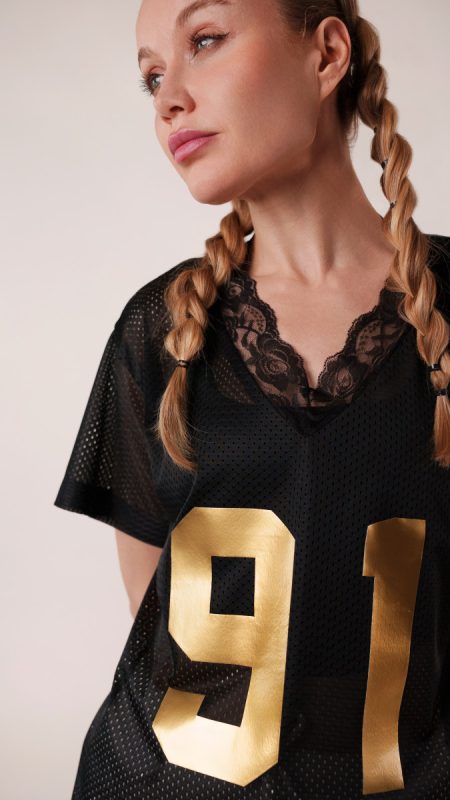
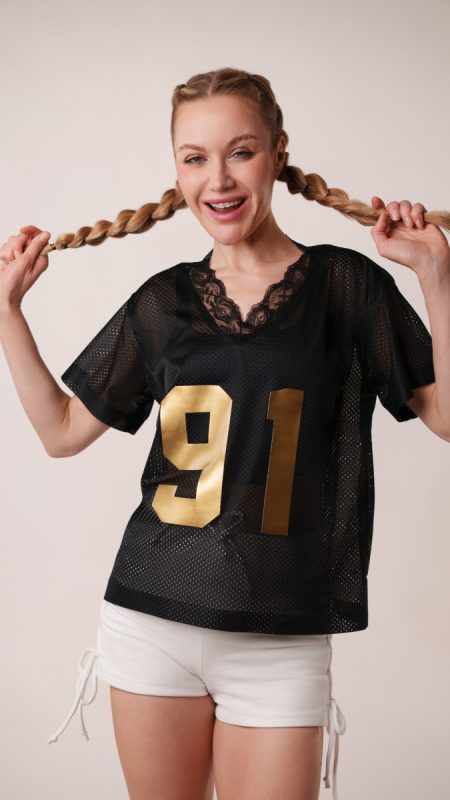
Best of all, both pieces are beginner-friendly and quick to sew. The jersey is constructed from only four pattern pieces, making it an approachable project for newer sewists looking to build confidence. Customize it in the colors of your favorite team with nearly 20 shades of athletic mesh to choose from, then make it uniquely yours by adding your favorite player’s number, your lucky number, or even your birth year. A delicate lace-trimmed collar adds an unexpected touch of sweetness that sets it apart from a typical athletic top.
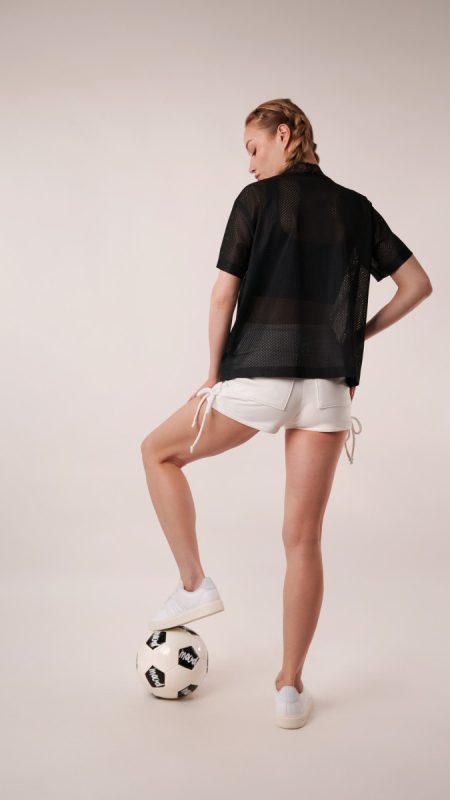
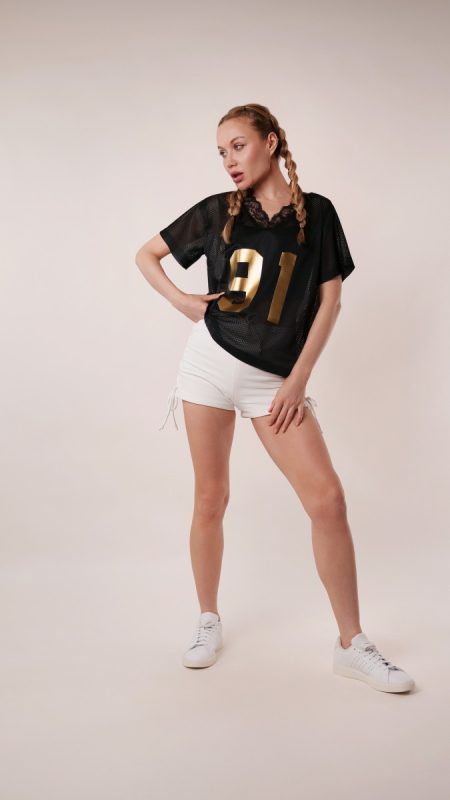
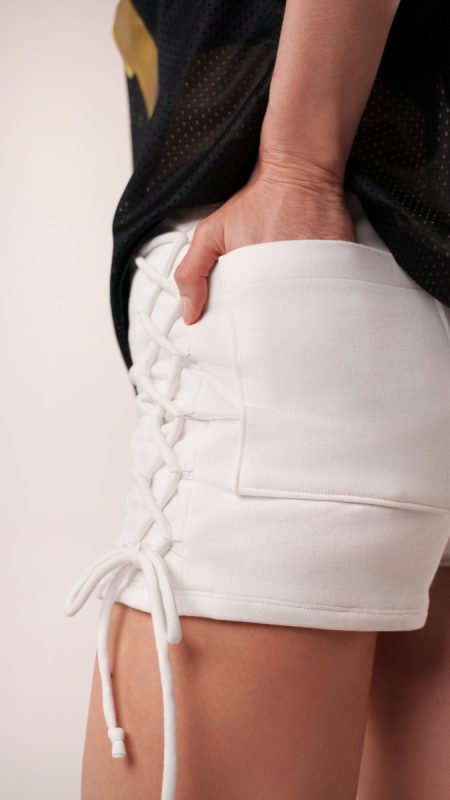
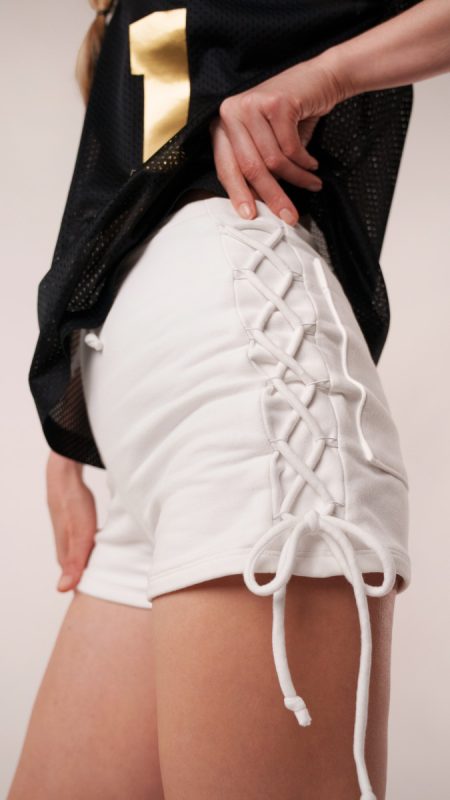
The coordinating shorts are equally simple to make and packed with personality. Their sporty silhouette features a short inseam that’s playful without sacrificing comfort, while adjustable drawstring lacing at the side seams allows you to customize the fit and length. The lace-up details echo the feminine feel of the jersey’s collar, tying the entire look together with thoughtful details that make this set stand out both on and off the field.
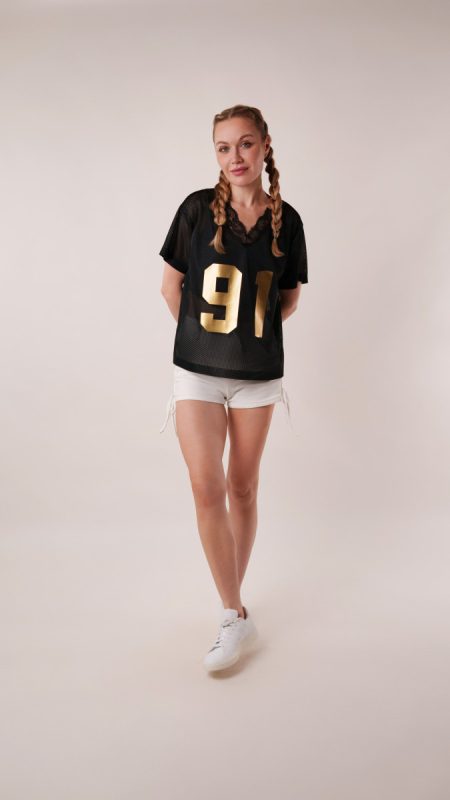
Cute enough for everyday wear and practical enough for an active lifestyle, the Fiona Athletic Set is ready for everything from pickup games and morning jogs to movie nights and snack-filled watch parties. It may just be the most adorable thing you’ve ever worked out in, and it’s more than ready for grass stains, victory dances, and every goal-worthy moment in between.
Essential Materials & Sizing Guide for the Fiona Athletic Set
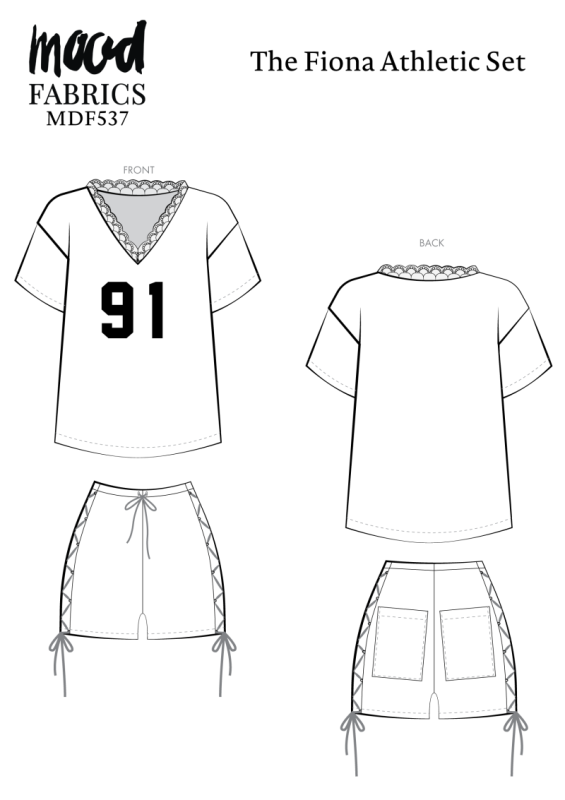
Continue reading for a breakdown of what knowledge and materials you need for creating your very own athletic set! We’ve got you covered with the recommended materials we used—if you want to follow along exactly—as well as a curated list of alternative fabric type recommendations if you want to customize your own version. The Fiona Athletic Set free sewing pattern download includes technical drawings for seam and athletic set visibility, plus a size chart to help you find your perfect fit!
Purchase Products Used Below:
Quantities indicated are for sewing a size small athletic set. Toggle the ‘SHOP THIS LOOK’ box to find quantity estimates for other sizes.
- 2 yards of Polyester Athletic Mesh – Black – Heracles Collection
- 0.5 yards of Flynn Gold Glossy Stretch Imitation Latex
- 1 yard of Fleece-Backed Stretch Cotton Knit – White – Cecil Collection
- 1.5 yards of Famous NYC Designer Black Delicate Roses Stretch Lace Trim with Scalloped Edge – 2.25″
- 1 each of Dritz White Beading Cord Elastic – 5 yd
- 1 each of Heat & Bond Lite Soft Stretch Web Adhesive – 17″ x 2 yards
- 1 each of Gutermann Sew All Thread 250m – 20 White
- 1 each of Gutermann Sew All Thread 250m – 10 Black
- MDF537 – Fiona Athletic Set Sewing Pattern (Free download below!)
Additional Products Used:
*Quick Tip! The ‘SHOP THIS LOOK’ box defaults to full-yard quantities. To order an exact half-yard quantity for any fabric, simply use the decrease quantity button (-) to subtract by the half yard. Then click “ADD TO CART” to add all materials to your cart. (Our system can only display full-yard quantities initially.)
Alternative Fabric Type Recommendations:
The Fiona Athletic Set sewing pattern is best suited for lightweight fashion fabrics. Explore other fabric types or colors from our featured collections for your athletic set with the links below.
TOP
SHORTS
Fabric Collections Used in this Post:
Download Your Free Sewing Pattern
Submit your name and email in the form below to receive the download link for the Fiona Athletic Set free sewing pattern directly in your inbox. Mood Sewciety Patterns will send your free download link via email with the subject line: ‘Your Free Download from Mood Sewciety – The Fiona Athletic Set’ (in PDF format for A4 and letter-size printing).
© MoodFabrics.com / MoodSewciety.com – Mass production, resale, or distribution of this pattern in any form is strictly prohibited.
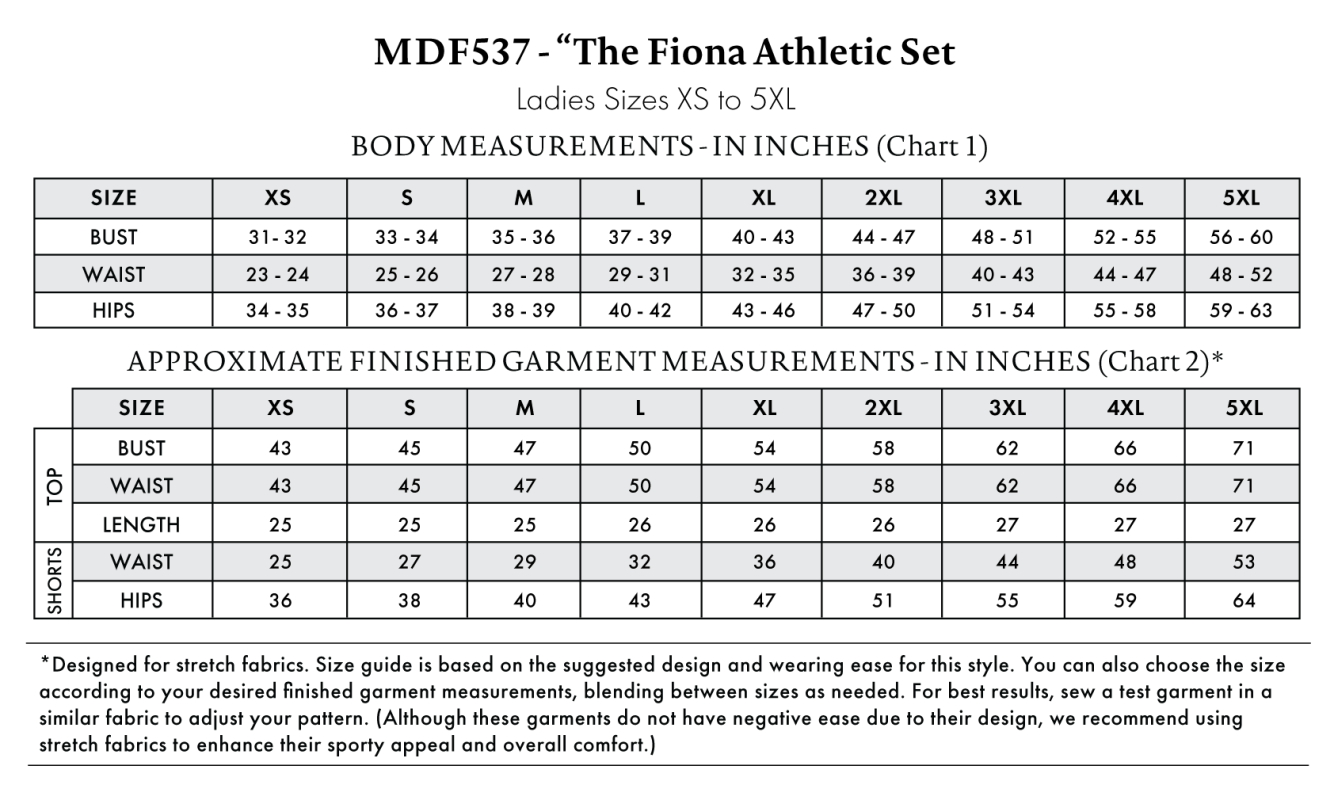
Find Your Perfect Fit
The Fiona Athletic Set Sizing Guide is based on the suggested design & wearing ease for this style. You can also choose the size according to your desired finished garment measurements, blending between sizes as needed. Measure the printed patterns to make sure the dimensions are according to the desired fitting and adjust if needed before cutting the fabric. For best results, sew a test garment in a similar fabric to adjust your pattern.
Note: Measurements may vary after adjustments. If using non-stretch fabrics, reference the approximate finished garment measurements chart to choose your size.
Note: Always read all the instructions before cutting the fabric!
How to Sew The Fiona Athletic Set
The instructions provided below are designed to guide you through sewing the Fiona Athletic Set from start to finish.
Tips for Sewing with Mesh Jersey and Fleece-Backed Cotton Knit
⇒ Sew both materials with a stretch needle or ball point needle to prevent skipped stitches and thread pulls in the fabric.
⇒ For the fleece-backed knit, make sure that your grainline is going perpendicular to the direction of stretch in the fabric.
⇒ Launder both fabrics before cutting out the pattern.
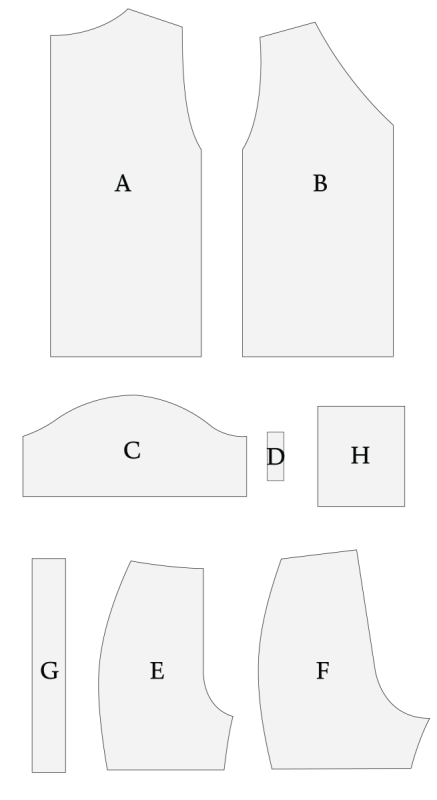
Pattern Pieces & Fabric Cuts Needed
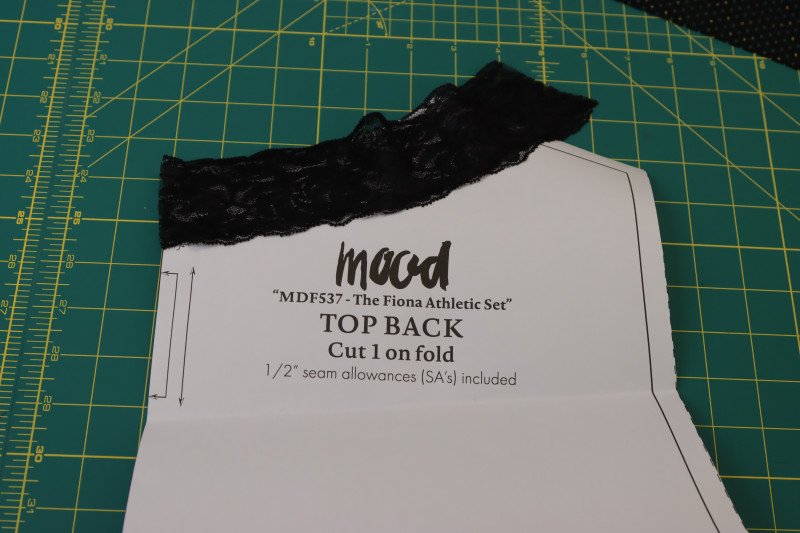
- (A) TOP BACK
- Fabric – Cut 1 on Fold
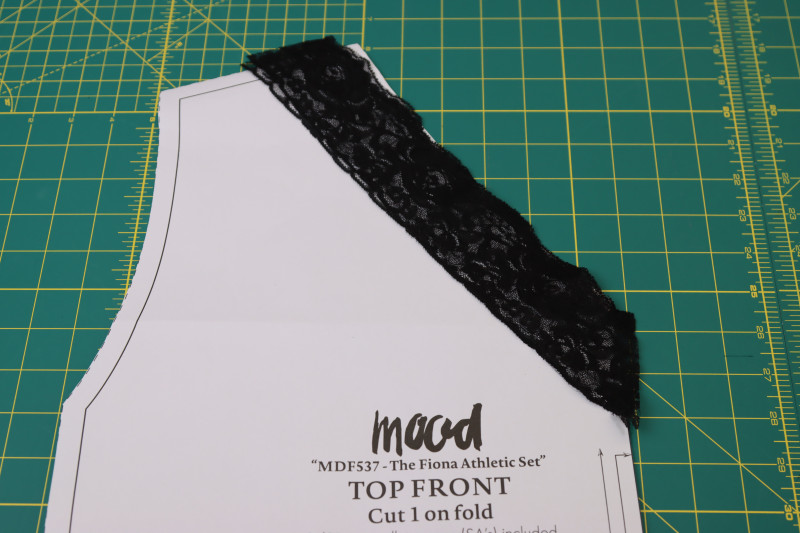
- (B) TOP FRONT
- Fabric – Cut 1 on Fold
- (C) SLEEVES
- Fabric – Cut 2 Mirrored
- (D) LOCKET LOOP
- Fabric – Cut 1
- (E) SHORTS FRONT
- Fabric – Cut 2 Mirrored
- (F) SHORTS BACK
- Fabric – Cut 2 Mirrored
- (G) SHORTS SIDE PANEL
- Fabric – Cut 2
- (H) SHORTS POCKETS
- Fabric – Cut 2

Sew with a 1/2″ seam allowance for all seams unless otherwise specified.
Step 1
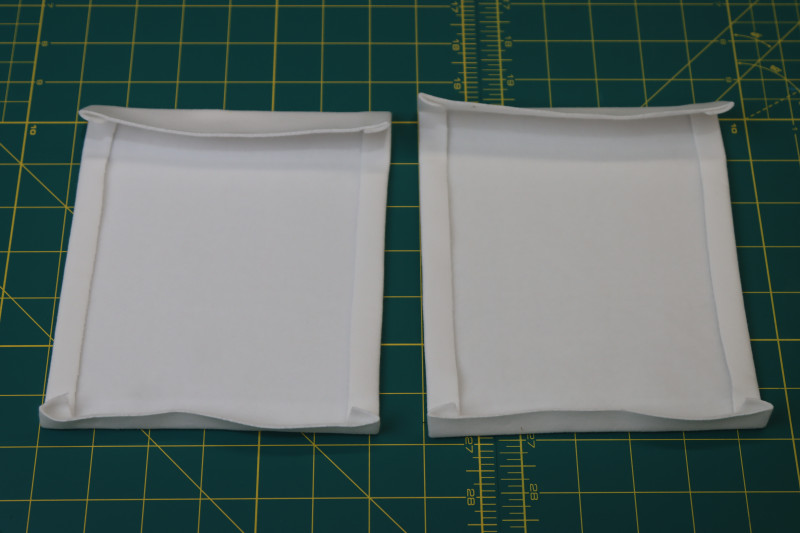
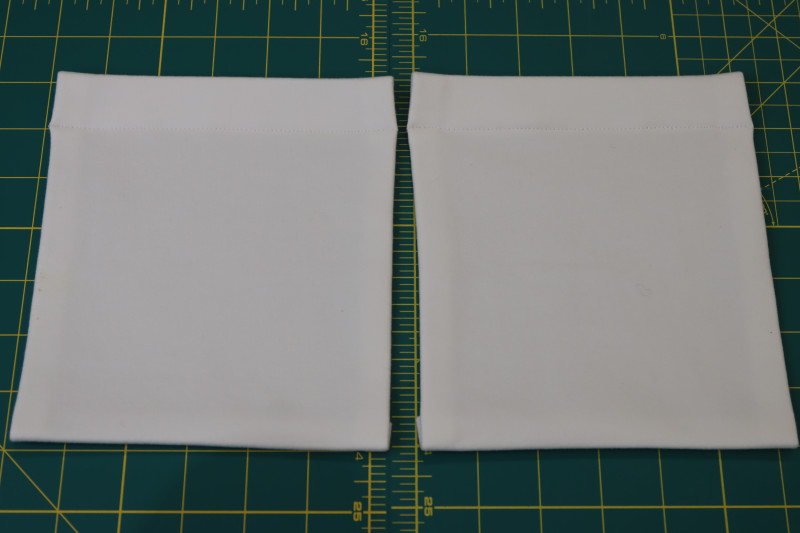
SHORTS POCKETS
- Fold and press a ½ inch fold the sides and bottoms of the back pockets toward the wrong side of the fabric.
- Fold and press a 1 inch fold into the tops of the back pockets toward the wrong side of the fabric.
- Topstitch over the 1 inch folded top of the pocket with a ⅞ inch seam allowance.
Step 2
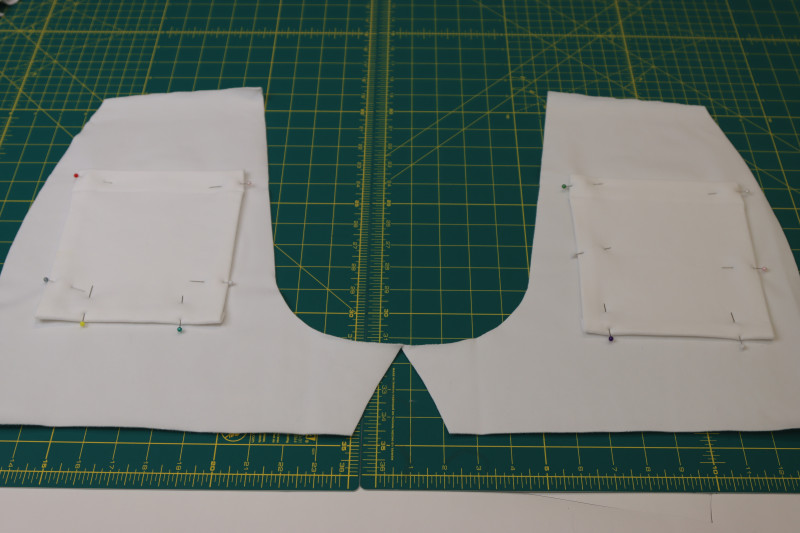
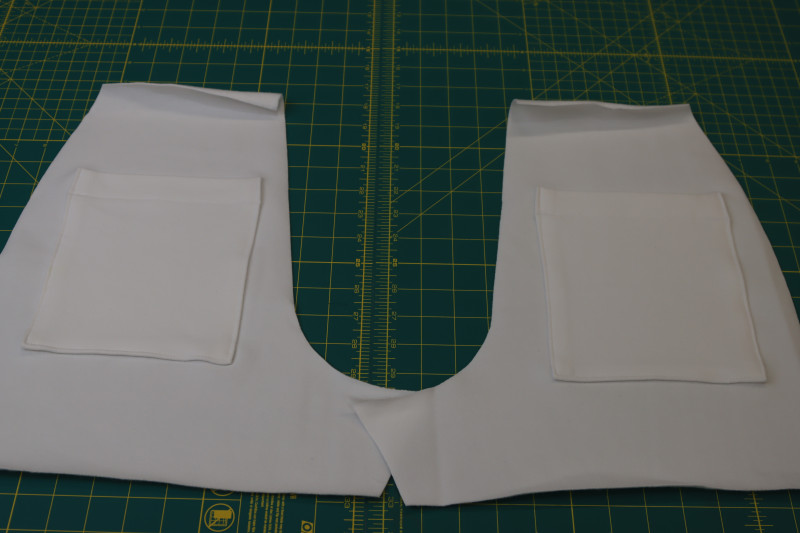
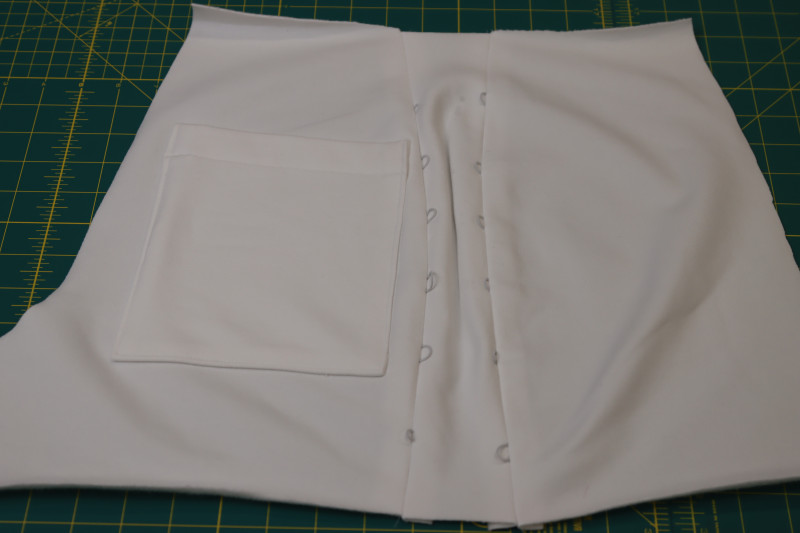
ATTACH SHORTS POCKETS
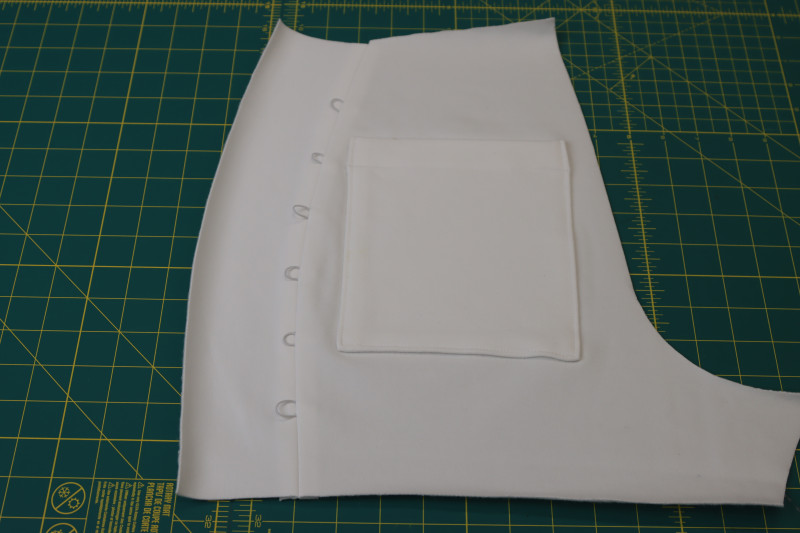
- Place the wrong side of the back pockets on the right side of the back shorts pieces with the bottom edge of the pockets laying parallel with the bottom hem of the shorts. I put my pockets so that they were evenly spaced between the side and crotch seam and the hem and waistline seam.
- Pin the sides and bottoms of the pockets to the backs of the shorts.
- Topstitch around the sides and bottoms of the pockets to attach them to the backs of the shorts.
Step 3
BACK LACING LOOPS
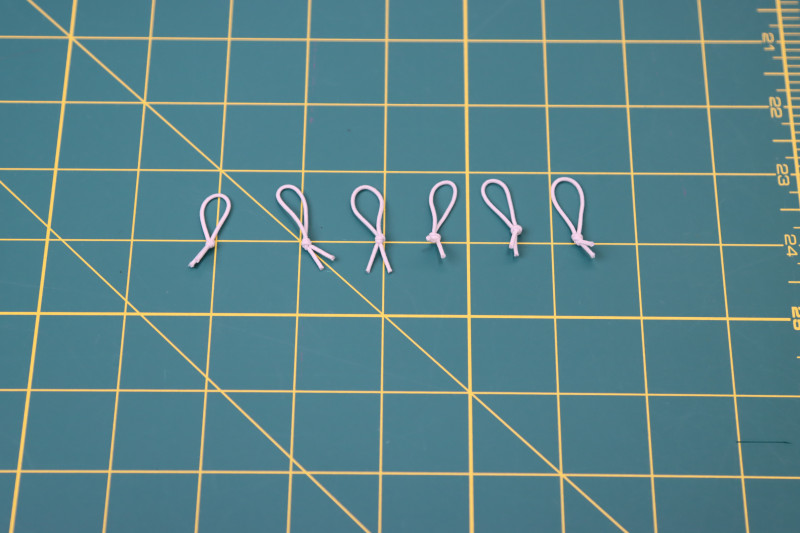
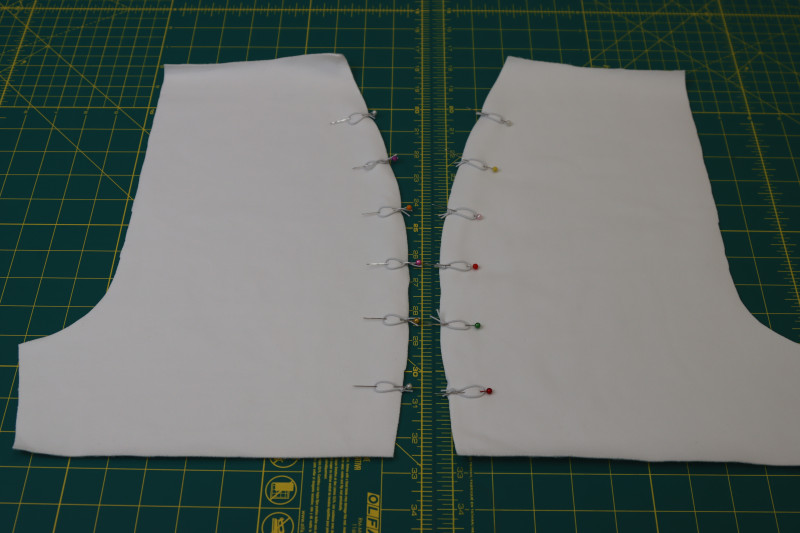
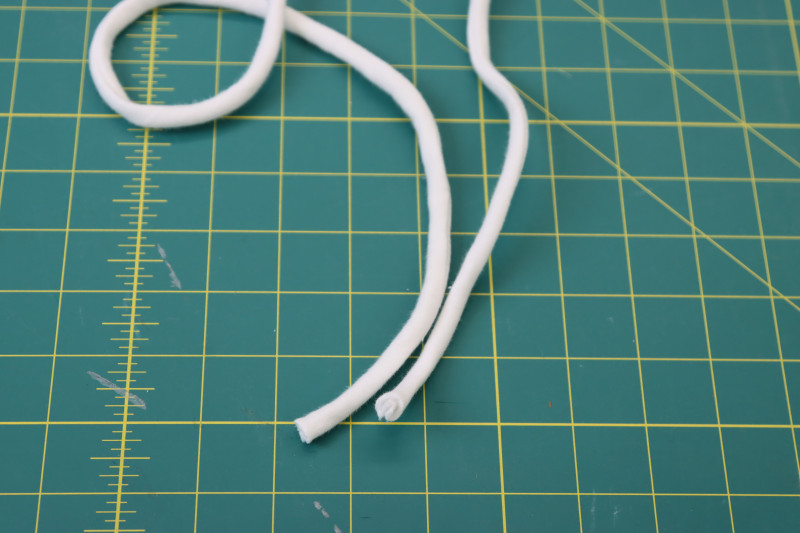
- Cut strips of beading cord that are around 2 inches long and wrap them into slipknots around your fingers as shown in the photo below. You’ll need 24 loops in total (12 for each leg).
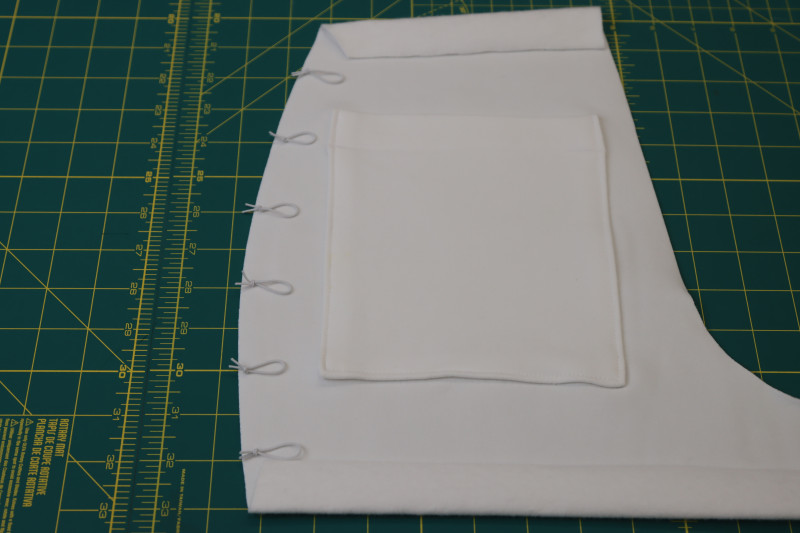
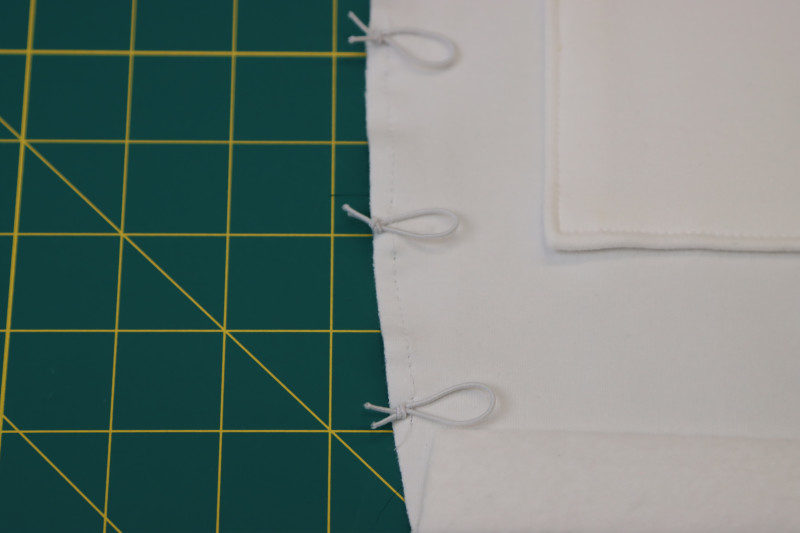
- Evenly space out the elastic loops along the right side of the side seam of the back of the shorts as shown in the photo below. Make sure to leave enough space on the top of the shorts for the waistband and the bottom of the shorts for the hem when placing the elastic loops.
- Staystitch over the elastic loops with ¼ inch seam allowance to attach them to the side seams of the backs of the shorts.
Step 4
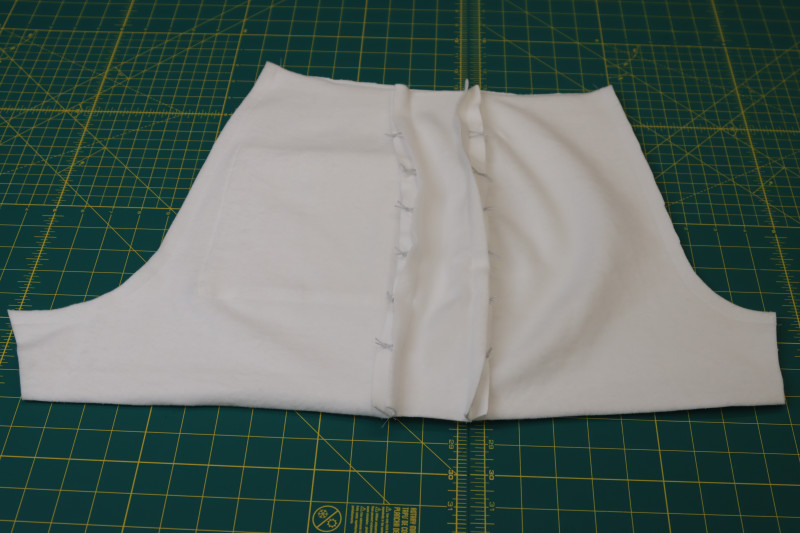
SIDE PANELS
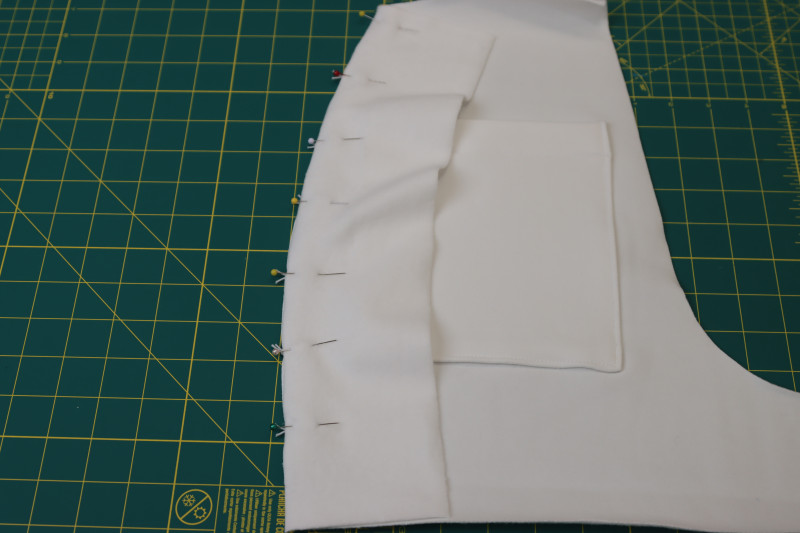
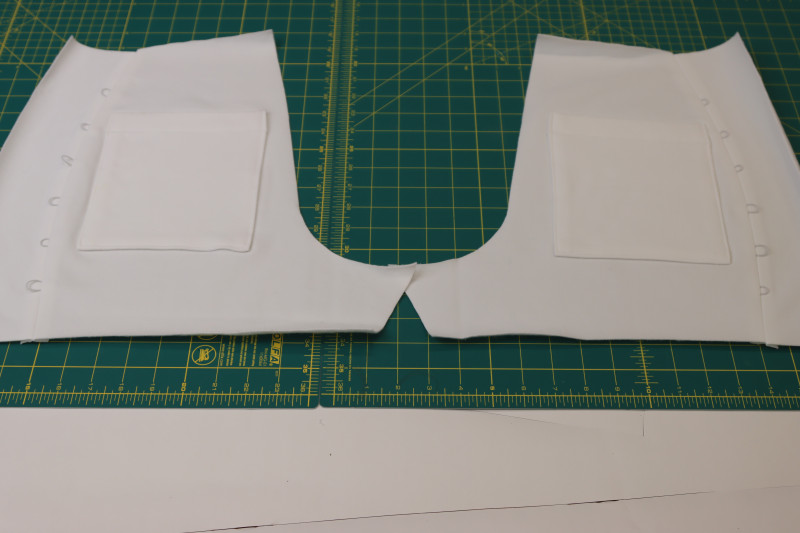
- Place the side panels right sides together with the side seams of the backs of the shorts.
- Pin and sew the side panels to the side seams of the backs of the shorts.
- Press the side seam allowances open and flat.
Step 5
FRONT LACING LOOPS
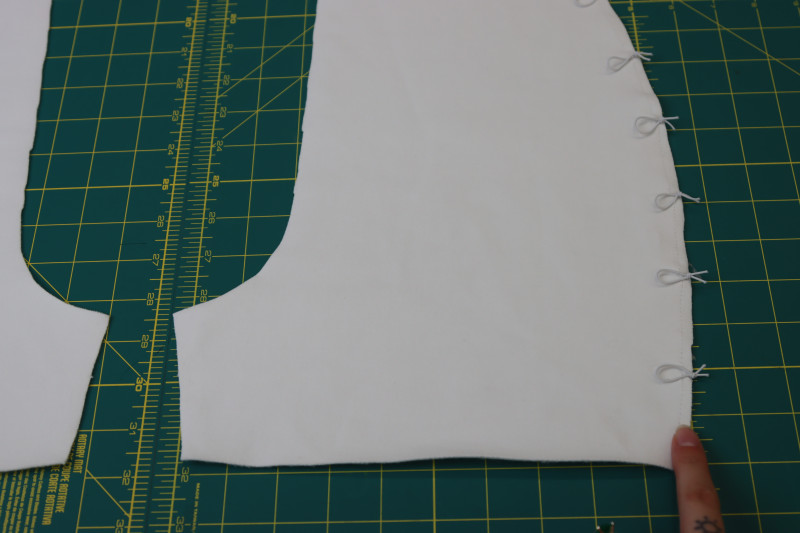
- Evenly space the elastic loops along the side seams of the fronts of the shorts in the same manner that you spaced them out on the backs of the shorts.
- Pin and sew the loops to the right side of the front side seams of the shorts.
- Place the opposite sides of the side panels right sides together with the front side seams of the shorts.
- Pin and sew the side panels to the front side seams of the shorts.
- Press the front side seam open and flat.
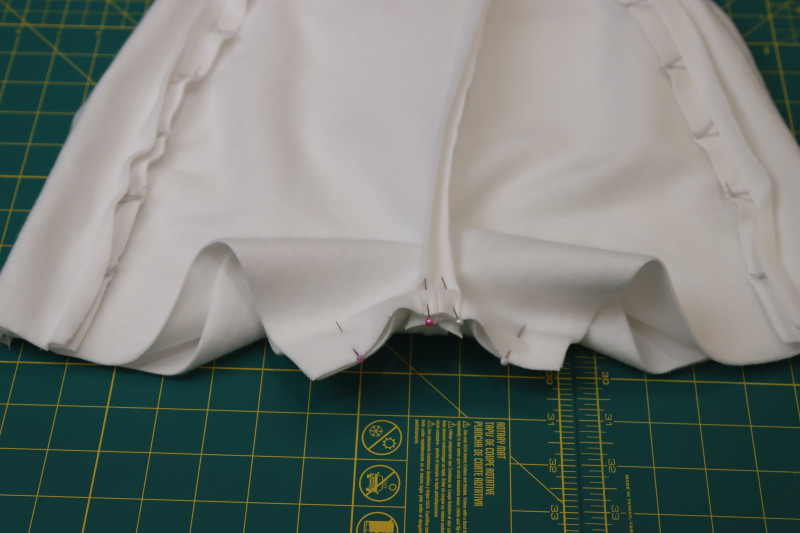
Step 6
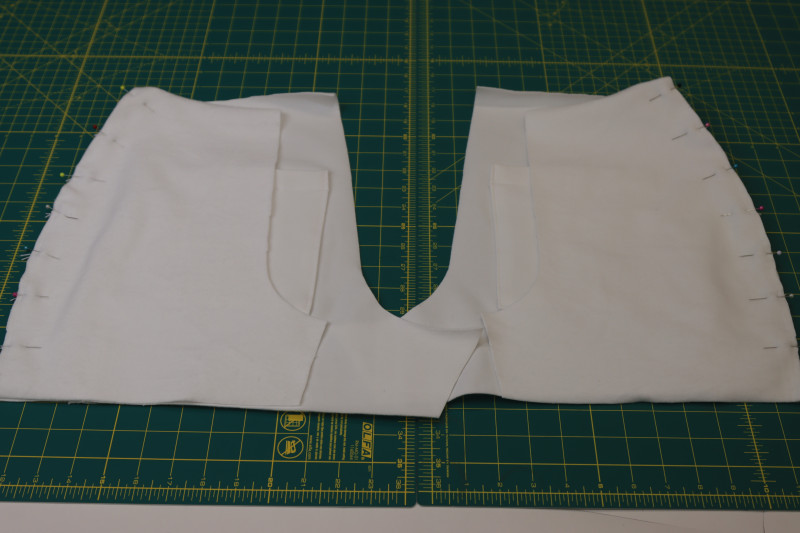
CROTCH SEAM & INSEAM
- Place the left shorts piece right sides together on top of the right shorts piece with the crotch seams lined up.
- Pin and sew the front and back crotch seams together.
Step 7
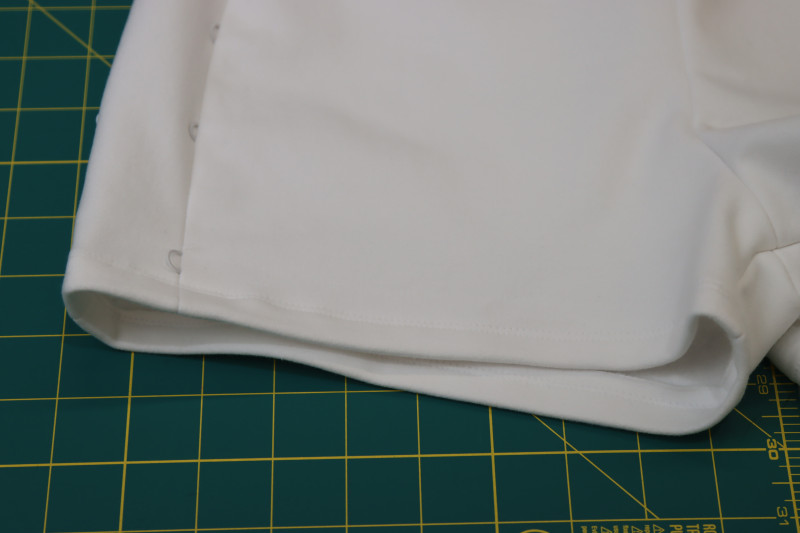
SHORTS HEM
- Fold the hem of the shorts up by ½ inch and press toward the wrong side of the fabric.
- Sew two parallel straight stitches along the folded hem.

Step 8
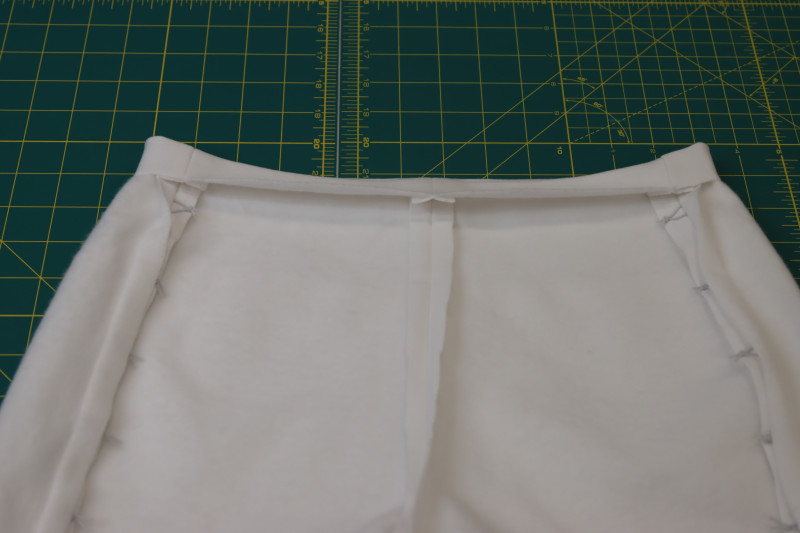
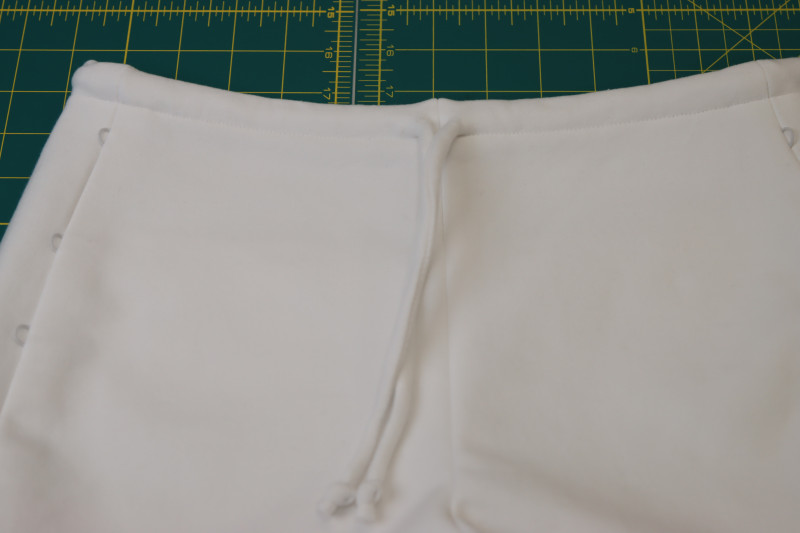
WAISTBAND
- Press a ½ inch fold into the waistline of the shorts toward the wrong side of the fabric.
- Poke two holes with an awl on either side of the center front of the shorts at the waistline for the drawstrings.
- Sew the folded waistband of the shorts with a ⅜ inch seam allowance to create a closed channel for the drawstring.
Step 9
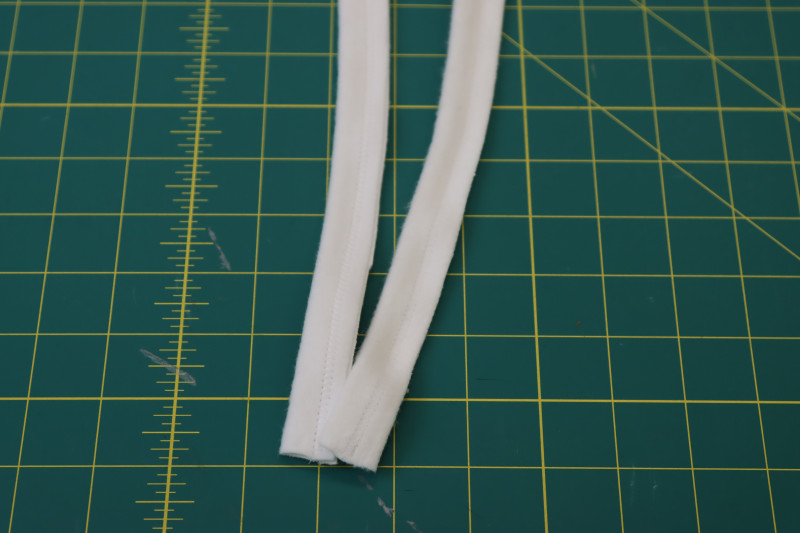
DRAWSTRINGS & LACES
- Cut two strips of fabric that are the length of your fabric front selvage to selvage and 1.5 inches wide.
- Fold the strips in half longways and sew them right sides together.
- Flip the tubes right sides out with a loop turner.
- Cut one of the strips in half so that it can be used on either side of the shorts side seams.
Step 10
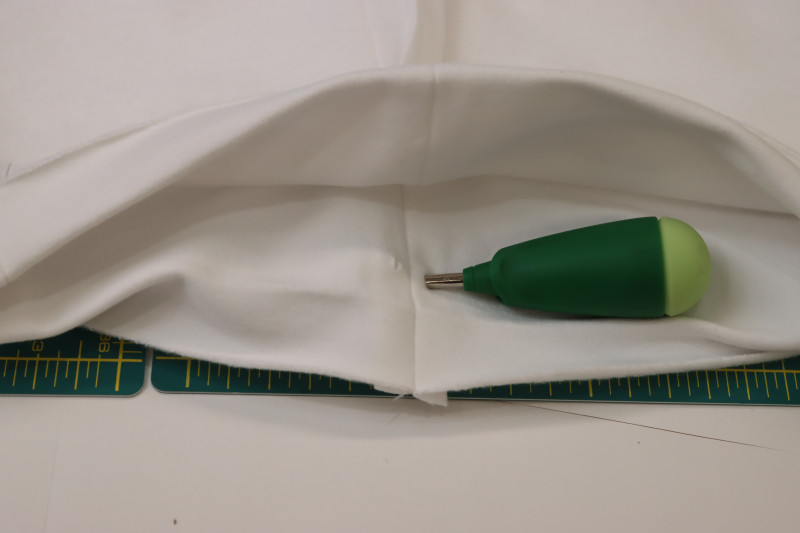
INSERT LACES
- Insert one of the drawstrings into the waistband channel using a safety pin to feed it through the opening of the tunnel that you made with the awl in step 8.
- Lace the drawstrings back and forth in a corseted pattern through the elastic loops at the side seams of the shorts.
- Tie knots at the ends of all the drawstrings.

Step 11
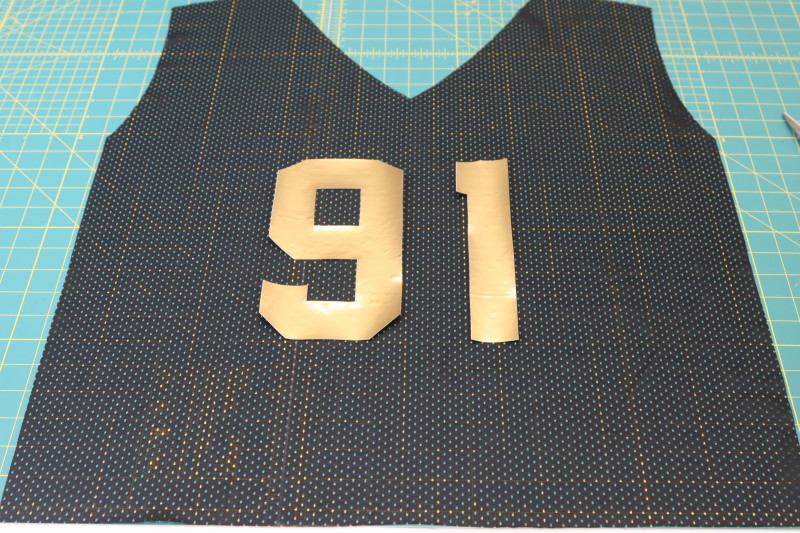
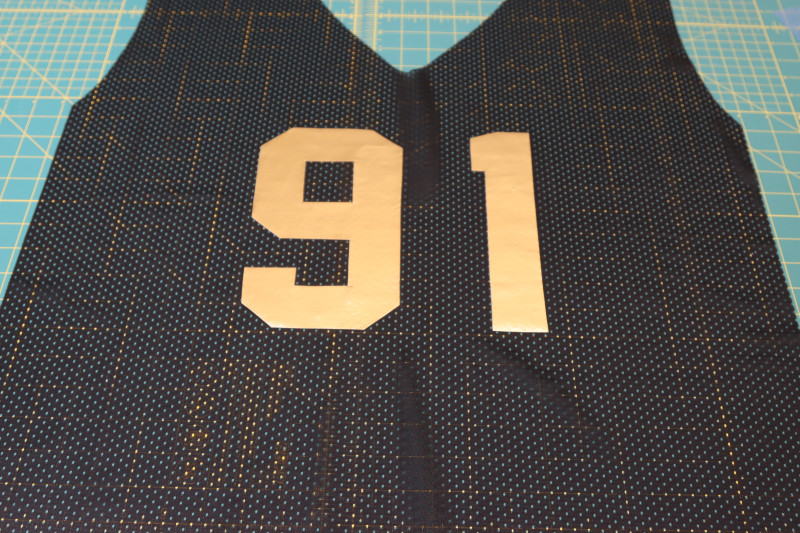
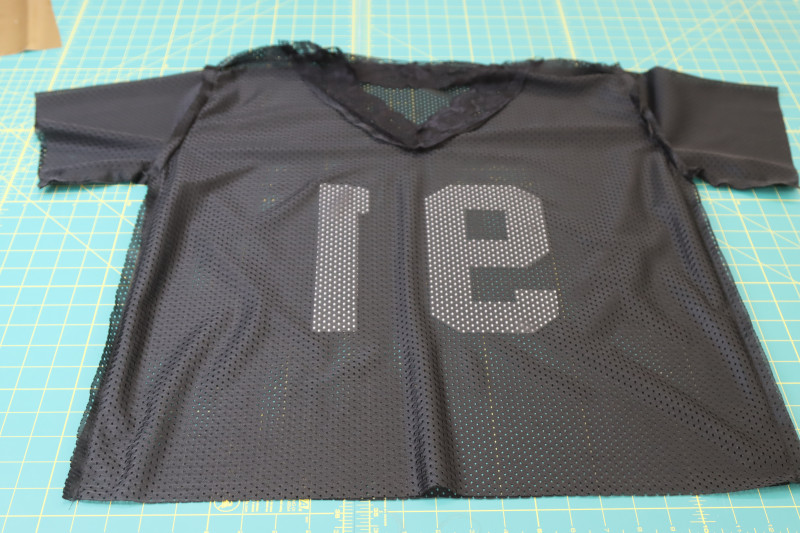
GOLD NUMBERS
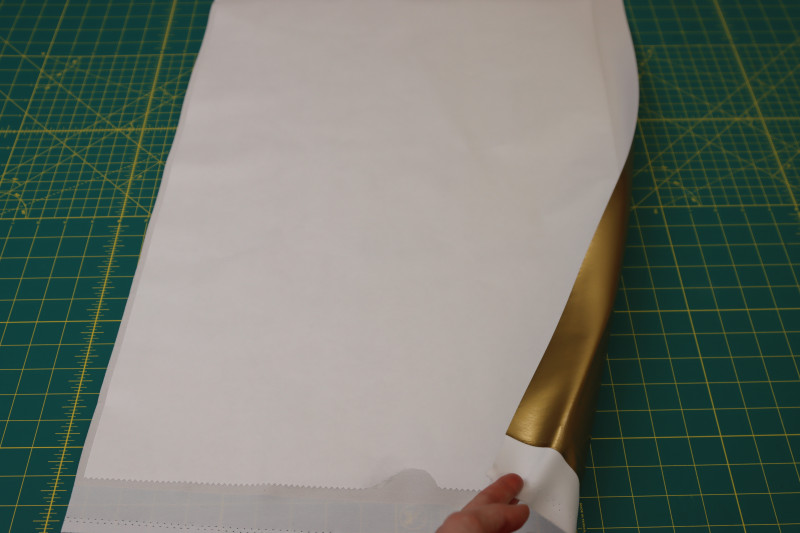
- Following the instructions on the Heat & Bond Web Adhesive, peel off the backing to reveal the sticky side of the web adhesive.
- Place the sticky side of the web adhesive to the wrong side of the imitation latex.
- Place a piece of muslin over the web adhesive and then press it to the imitation latex with high heat and no steam. Let it sit and cool for a second before removing it from the ironing board.
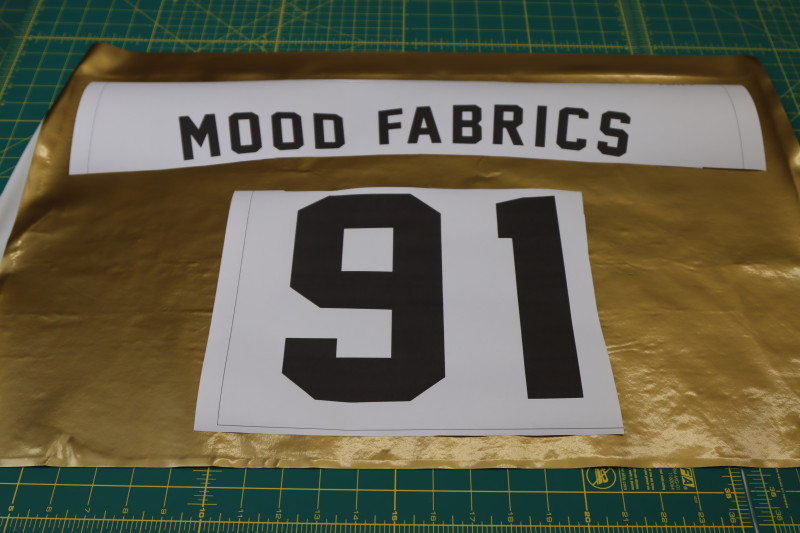
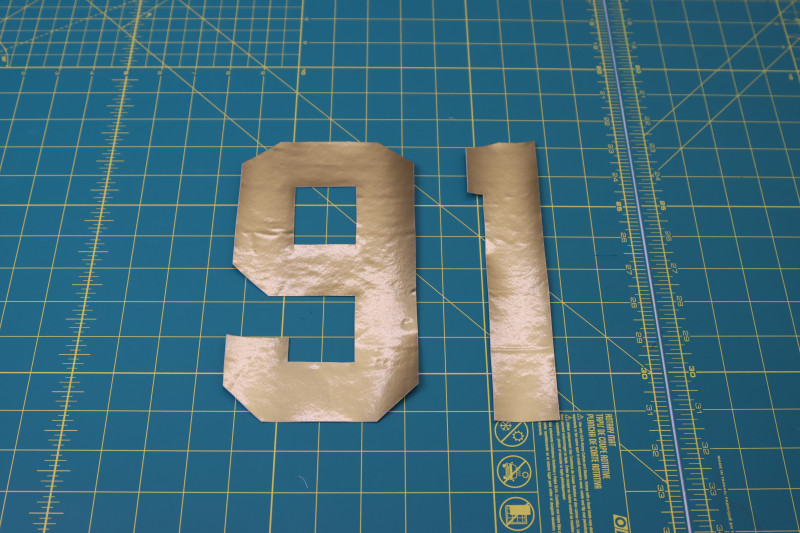
- Place the numbers (and letters, if you choose) on the right side of the imitation latex.
- Hold the number stencils in place with pattern weights and carefully cut around them with a rotary cutter or X-acto knife.
Step 12
ADHERE NUMBERS
- Place the paper side of the numbers on the front of the jersey and center them.
- Peel the paper off the back of the numbers and place them back onto the front of the jersey.
- Place muslin over the numbers then iron them to the jersey with the iron on high heat and no steam.
- Let the numbers cool before removing them from the ironing board.
Step 13
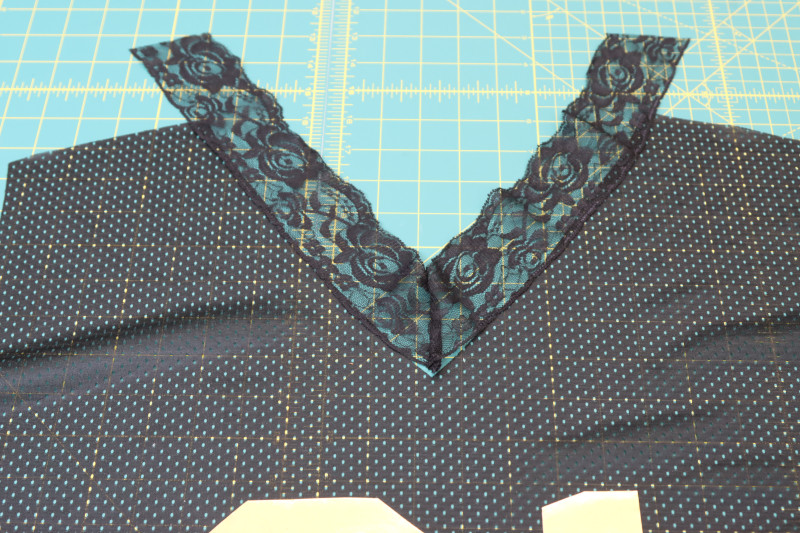
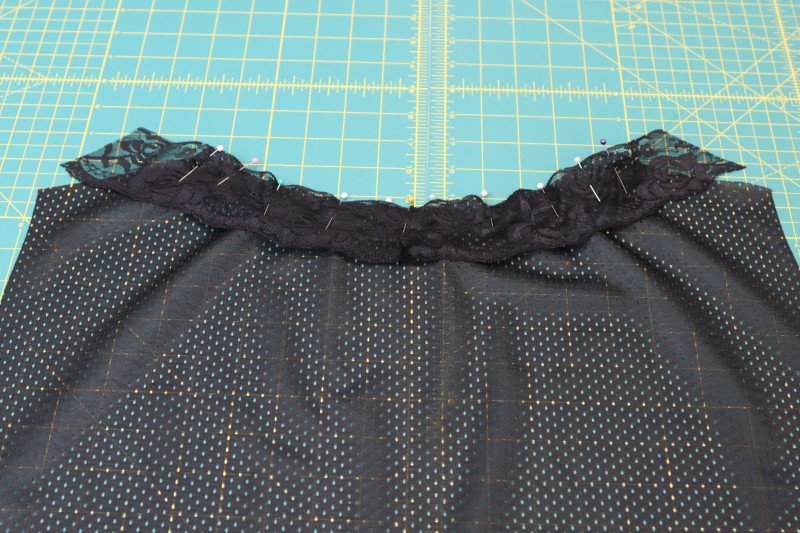
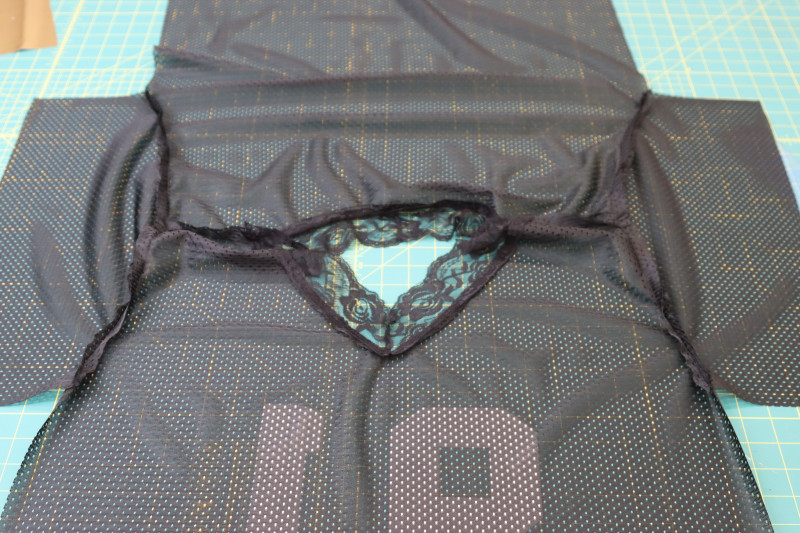
LACE COLLAR
- Cut strips of lace that are lined up parallel with the front and back necklines of the top pattern pieces. Make sure that there is ½ inch of seam allowance of lace trim at the shoulders and center of each top piece.
- Sew the lace right sides together at the center front and back of the collar.
- Unfold the front collar and line it up with the front neckline.
- Pin and sew the lace collar right sides together with the front neckline.
Step 14
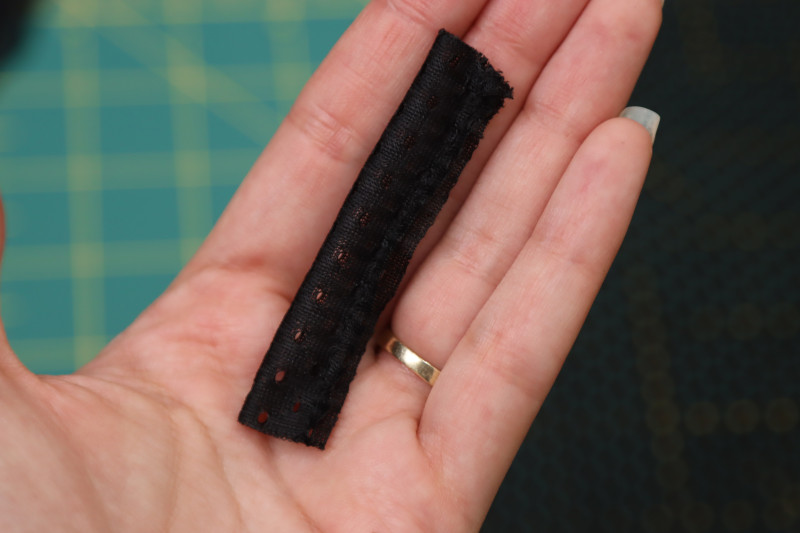
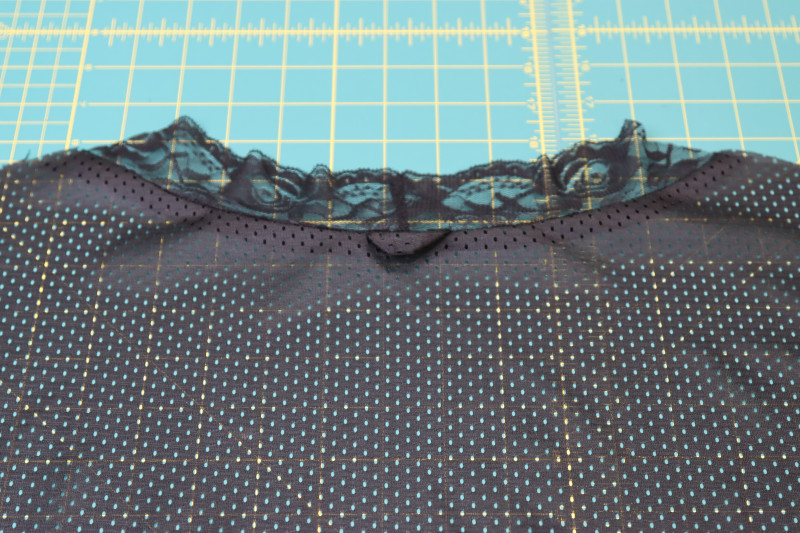
LOCKER LOOP
- Fold the locker longways right sides together.
- Sew the loop with a ⅛ inch seam allowance.
- Flip the loop right sides out with a loop turner.
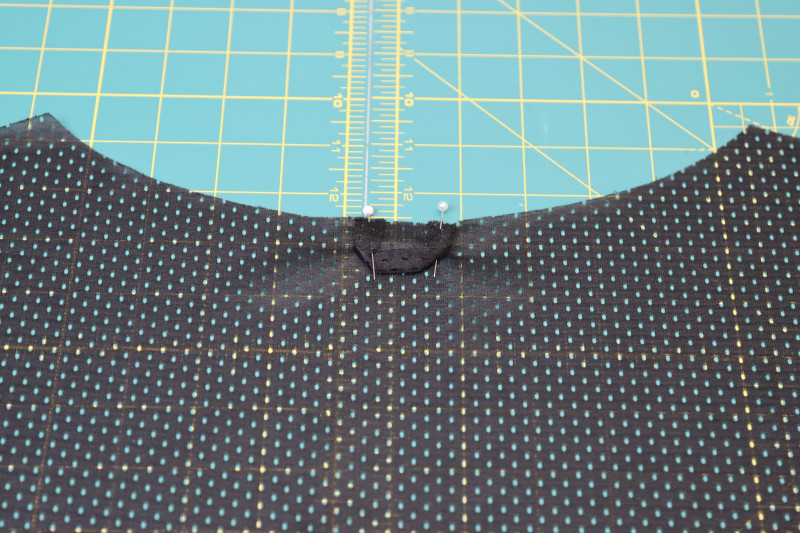
- Pin the locker loop to the center back neckline as shown in the photo below.
- Pin the back collar right sides together on top of the locker loop.
- Sew the back collar to the back neckline, securing the locker loop in place.
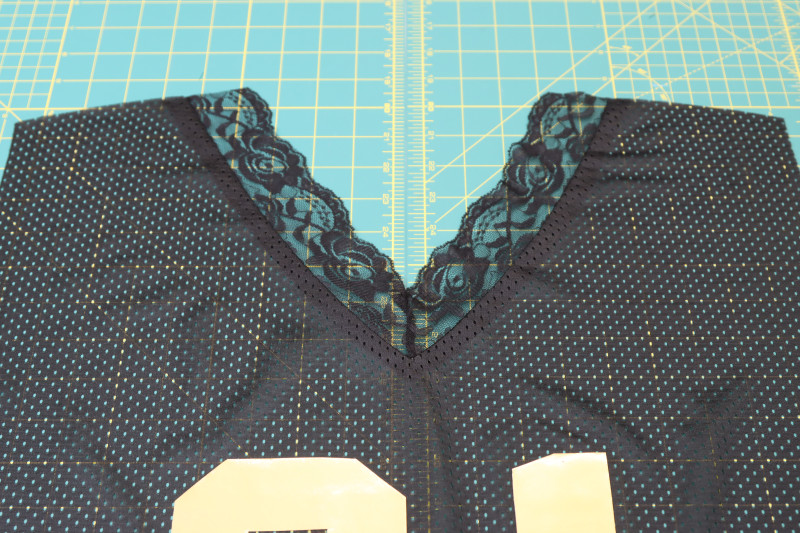
Step 15
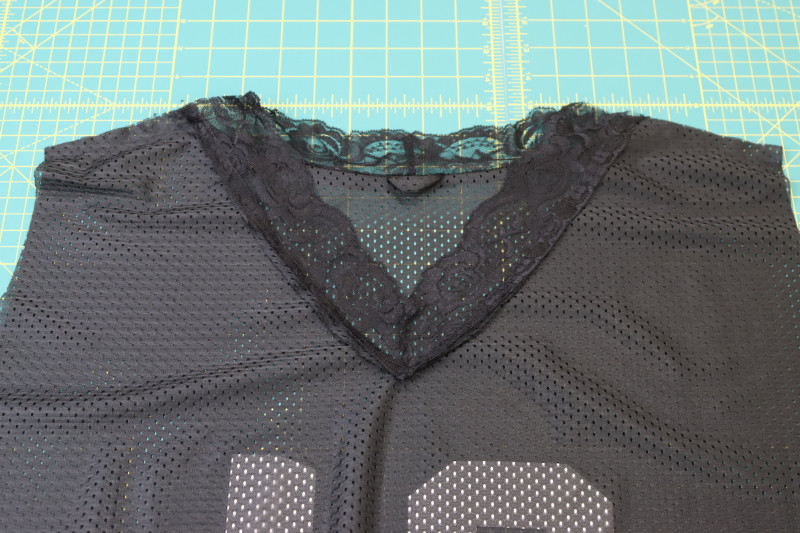
SHOULDER SEAMS
- Place the front jersey right sides together with the back jersey with the shoulders lined up.
- Pin and sew the front and back jersey pieces together at the shoulder seams, making sure to sew the lace collar as well as the jersey fabric.
- Press the shoulder seams open and flat.
Step 16
SLEEVES
- Separate the front and back top pieces and unfold at the shoulder seams.
- Line up the sleeve caps right sides together with the armscyes of the jersey, making sure the fronts of the sleeves line up with the front of the jersey.
- Pin and sew the sleeve caps right sides together with the armscyes.
- Fold the jersey at the shoulder seams with the side seams and sleeve inseams lined up.
- Pin and sew the jersey side seams and sleeve inseams.
Step 17
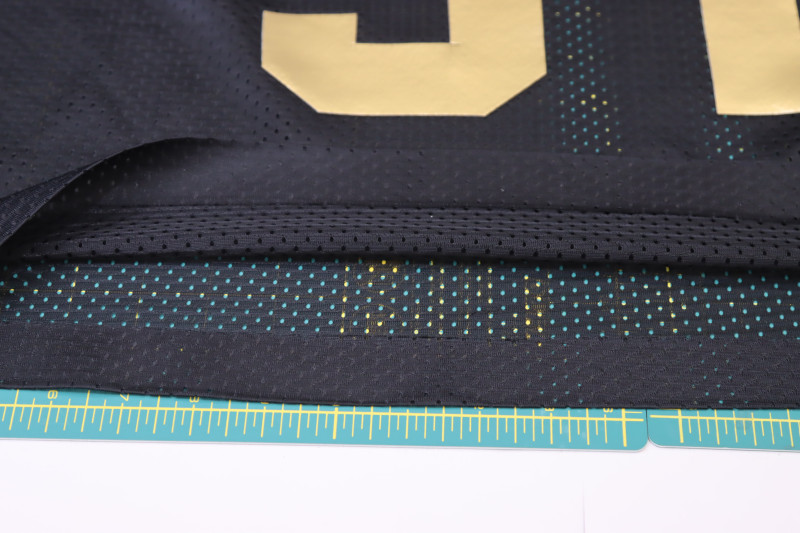
HEMS
- Press a 1 inch fold into the hem of the shirt and the hems of the sleeves.
- Press the stitch witchery hem tape into the 1 inch fold for a seamless hem on both the sleeves and the hem of the jersey.
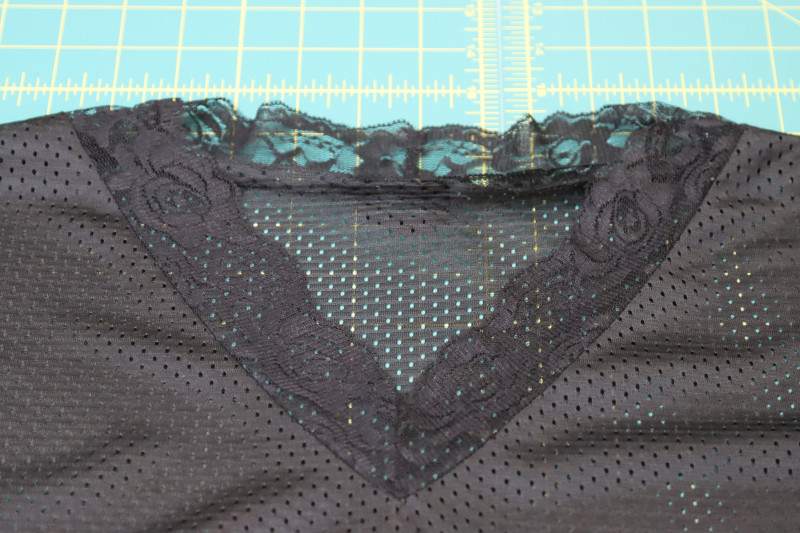
Sewing Success: The Finished Fiona Athletic Set
Share this post with a friend (or two!), download the Fiona Athletic Set free sewing pattern, and show us which fabrics and colors you choose, using the hashtags #MoodFionaPattern & #MadeWithMood—and don’t forget to tag us @MoodFabrics, too.


Free Sewing Pattern Inspiration for Your Next Project
With 525+ free sewing patterns and counting, your opportunities for sewing with Mood are endless!
We hope you had as much fun sewing this athletic set pattern as we did! As always, we want to hear from you—share your thoughts and comments below and let us know where you’ll be wearing the Fiona Athletic Set free sewing pattern!
Can’t get enough sewing with Mood? Browse your next make with our latest free sewing patterns.
Oh, this is SO CUTE!!! And so versatile too!!! It’s amazing as an athletic set, but if you change the materials to something softer (like Cotton) it could be used as sleepwear too! I’m definitely making one set for the world cup, and maybe one set as pajamas later
Love this set! Thank you so much!
I’m going to be making multiple jersey tops for summer concerts! Do you have any suggestions for alternate fabric to use in place of the lace for a less feminine look? I know that my kid would love this in a more gender neutral look.
Hey Maggie! Take a look at our Nylon Elastic Trims