

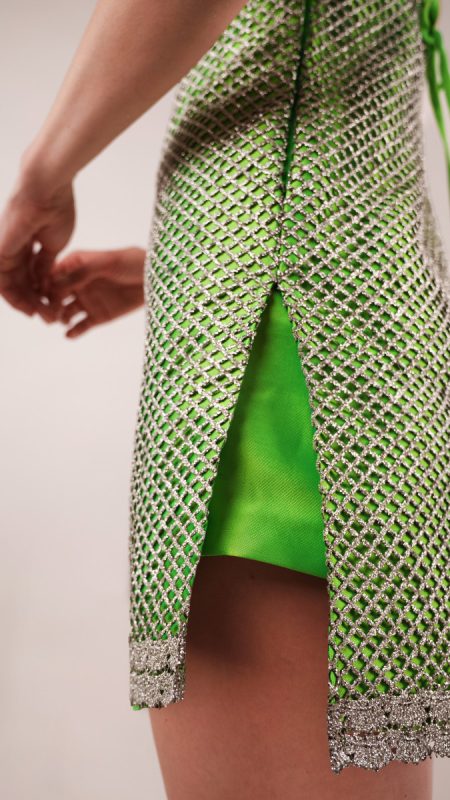
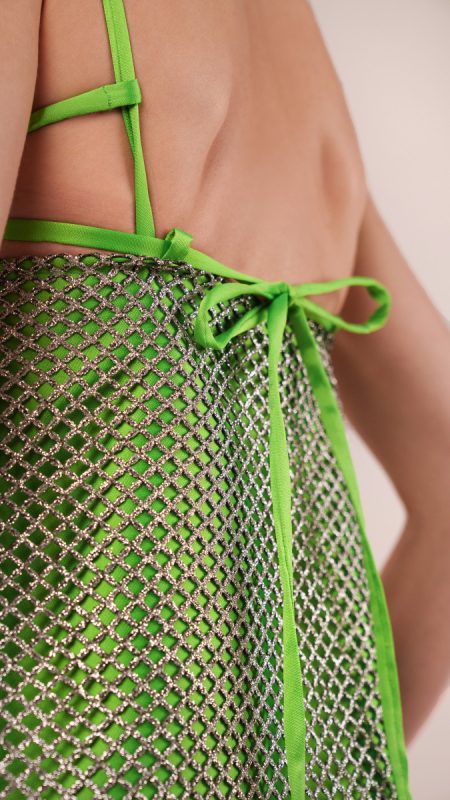
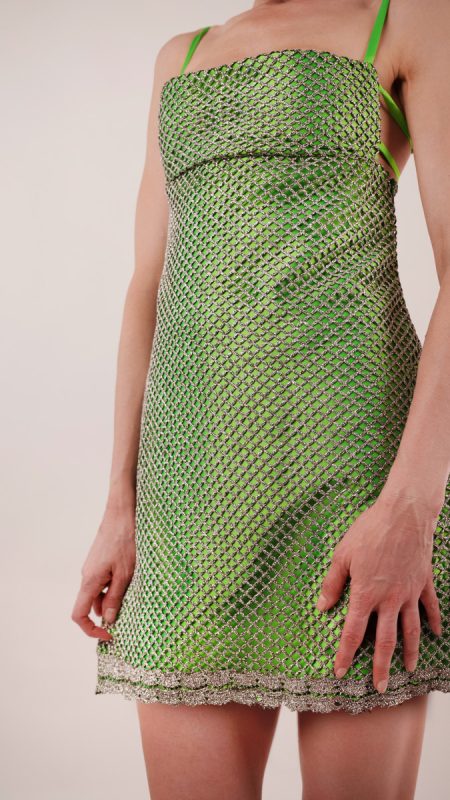
Meet the Lynx Mini Shift Dress, the ultimate flirty cocktail dress for all your warm-weather plans. Featuring a vibrant lime green polyester mikado underlayer topped with a sparkling, glittery guipure lace overlay, this eye-catching mini was made to stand out. Whether you’re headed to a rooftop party, summer wedding, vacation dinner, or a night out with friends, the Lynx Dress brings just the right amount of glamour without sacrificing comfort.
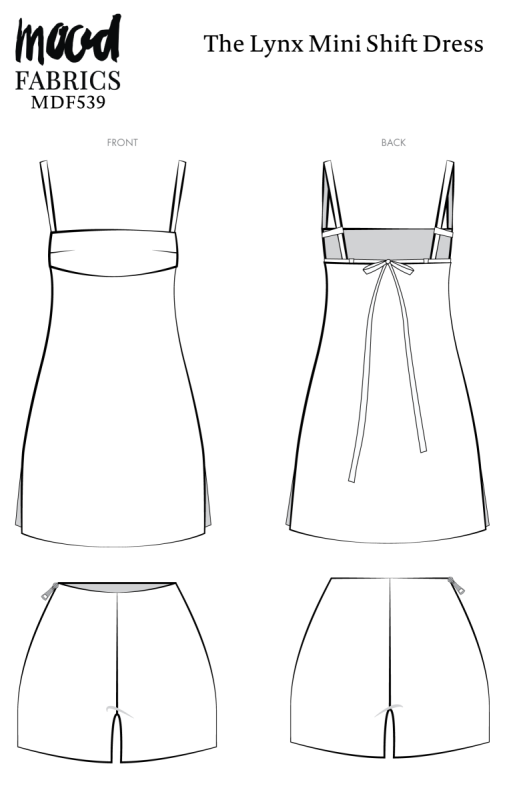
Despite its high-impact look, this pattern is surprisingly simple to sew. Constructed from only three unique pattern pieces, the Lynx Mini Shift Dress comes together quickly and easily. In fact, it can be completed in less than a day, making it a satisfying project for sewists looking for a fast and fashionable make. Thoughtful details like the high side seam slit, open back, and delicate overlapping criss-cross straps give this dress its playful summer personality, while bust darts provide just enough shaping for a flattering fit.
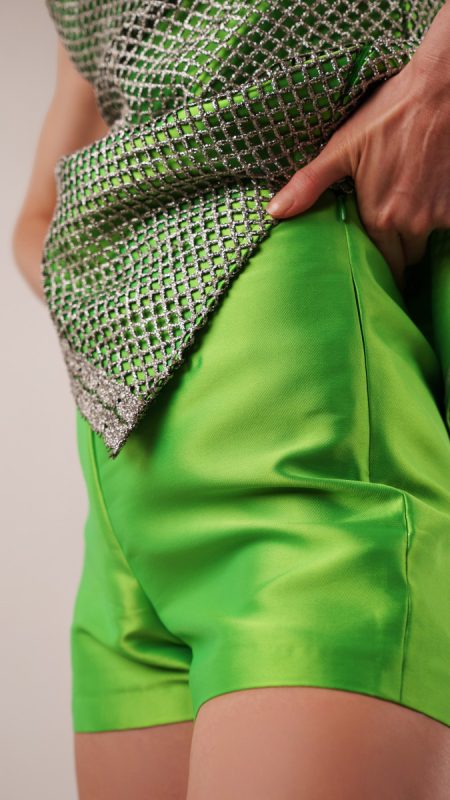
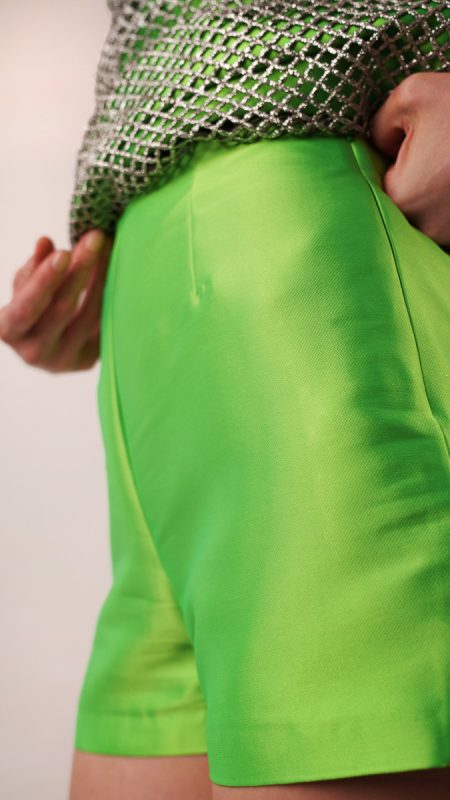
If mini dresses aren’t usually your thing, don’t worry. We’ve also included a free coordinating shorts pattern, shown here in the same lime green mikado, so you can wear your Lynx Dress with a little extra confidence and coverage.
Whether you recreate our sparkling lace version or opt for a more understated pairing of fabrics, the Lynx Mini Shift Dress is a versatile statement piece you’ll reach for all season long. Quick to sew, easy to wear, and impossible to ignore, this is one summer dress you’ll want in more than one fabric combination.


Essential Materials & Sizing Guide for the Lynx Mini Shift Dress
Continue reading for a breakdown of what knowledge and materials you need for creating your very own mini shift dress! We’ve got you covered with the recommended materials we used—if you want to follow along exactly—as well as a curated list of alternative fabric type recommendations if you want to customize your own version. The Lynx Mini Shift Dress free sewing pattern download includes technical drawings for seam and mini shift dress visibility, plus a size chart to help you find your perfect fit!
Purchase Products Used Below:
Quantities indicated are for sewing a size small* mini shift dress. Toggle the ‘SHOP THIS LOOK’ box to find quantity estimates for other sizes.
- 1.5 yards of Guipure Lace with Glitter – Mink Diamonds
- 2.5 yards of Polyester Mikado – Neon Green – Frances Collection
- 1 each of Invisible Zipper 24″ by YKK – 151 Grass
- 1 each of Invisible Zipper 9″ by YKK – 151 Grass
- 1 each of Gutermann Sew All Thread 250m – 710 Bright Green
- MDF539 – Lynx Mini Shift Dress Sewing Pattern (Free download below!)
Additional Products Used:
*Quick Tip! The ‘SHOP THIS LOOK’ box defaults to full-yard quantities. To order an exact half-yard quantity for any fabric, simply use the decrease quantity button (-) to subtract by the half yard. Then click “ADD TO CART” to add all materials to your cart. (Our system can only display full-yard quantities initially.)
Alternative Fabric Type Recommendations:
The Lynx Mini Shift Dress sewing pattern is best suited for light or medium weight fashion fabrics. Explore other fabric types or colors from our featured collections for your mini shift dress with the links below.
INNER LAYER
OUTER LAYER
Download Your Free Sewing Pattern
Submit your name and email in the form below to receive the download link for the Lynx Mini Shift Dress free sewing pattern directly in your inbox. Mood Sewciety Patterns will send your free download link via email with the subject line: ‘Your Free Download from Mood Sewciety – The Lynx Mini Shift Dress’ (in PDF format for A4 and letter-size printing).
© MoodFabrics.com / MoodSewciety.com – Mass production, resale, or distribution of this pattern in any form is strictly prohibited.
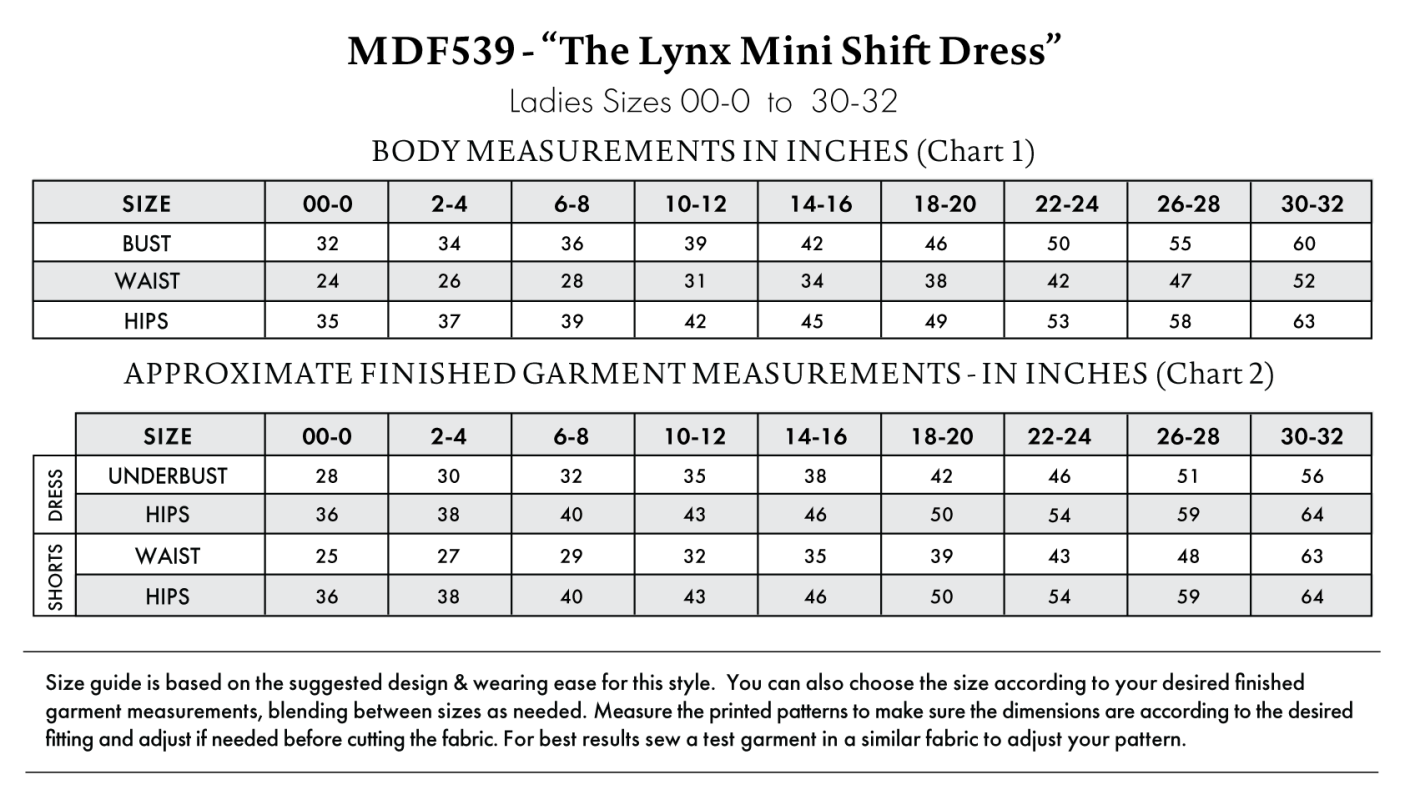
Find Your Perfect Fit
The Lynx Mini Shift Dress Sizing Guide is based on the suggested design & wearing ease for this style. You can also choose the size according to your desired finished garment measurements, blending between sizes as needed. Measure the printed patterns to make sure the dimensions are according to the desired fitting and adjust if needed before cutting the fabric. For best results, sew a test garment in a similar fabric to adjust your pattern.
Note: Always read all the instructions before cutting the fabric!
How to Sew The Lynx Mini Shift Dress
The instructions provided below are designed to guide you through sewing the Lynx Mini Shift Dress from start to finish.


3 Tips for Sewing with Mikado
⇒ If you have a serger, use it for this project. If not, make sure you are finishing the raw edges of your seam allowances as you go. This fabric frays a lot.
⇒ Use a sharp Microtex needle to prevent thread pulls in the fabric while you sew.
⇒ Make sure you identify which side of the fabric is the right side and which side is the wrong side. It can be hard to tell on Mikado because both sides are pretty, but one of the sides is a little shinier.


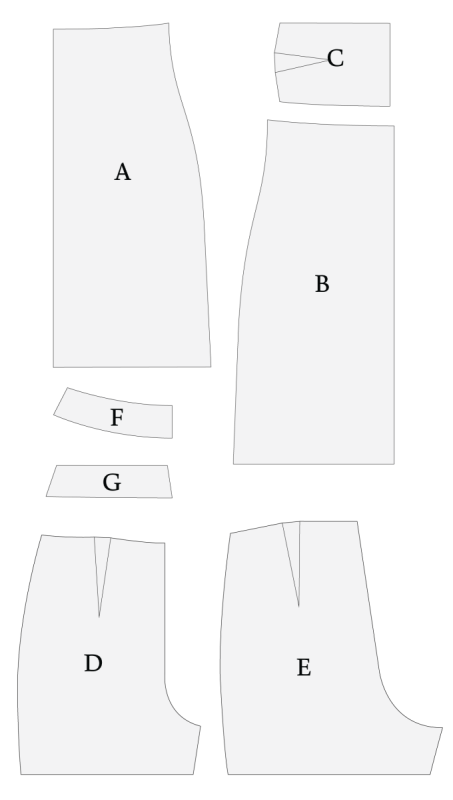
Pattern Pieces & Fabric Cuts Needed
- (A) DRESS BACK
- Inner Fabric – Cut 1 on Fold
- Outer Fabric – Cut 1 on Fold
- (B) DRESS FRONT
- Inner Fabric – Cut 1 on Fold
- Outer Fabric – Cut 1 on Fold
- (C) BUST PANEL
- Inner Fabric – Cut 2 on Fold
- Outer Fabric – See Note*
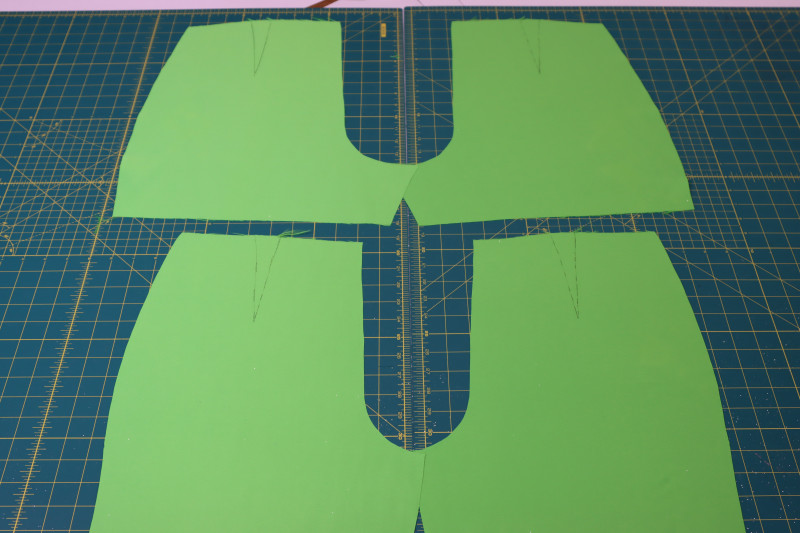
- (D) SHORTS FRONT
- Fabric – Cut 2 Mirrored
- (E) SHORTS BACK
- Fabric – Cut 2 Mirrored
- (F) SHORTS FRONT FACING
- Fabric – Cut 1 on Fold
- (G) SHORTS BACK FACING
- Fabric – Cut 1 on Fold
*Use the inner fabric piece after the darts have been sewn and pressed closed as the pattern for cutting the outer fabric layer.
Sew with a 1/2″ seam allowance for all seams unless otherwise specified.
Step 1
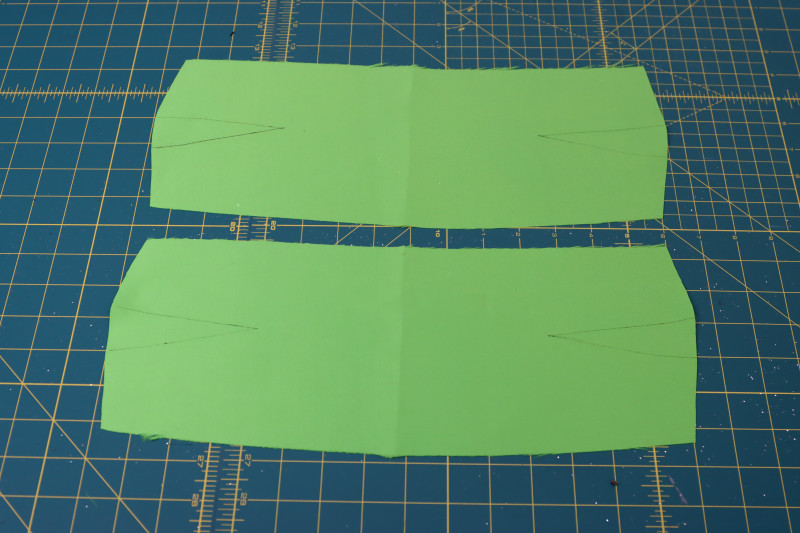
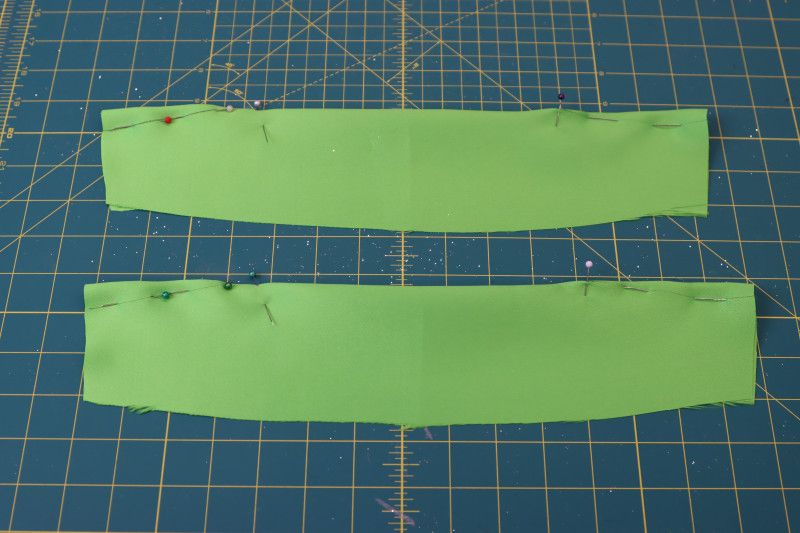
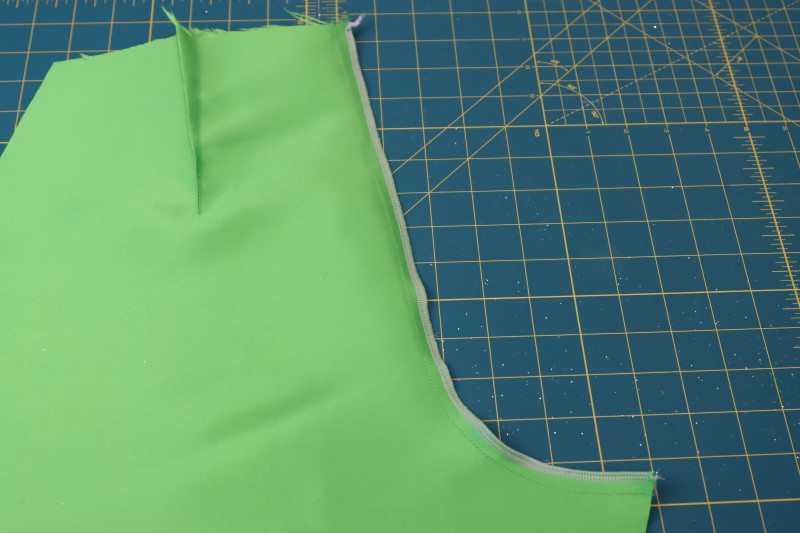
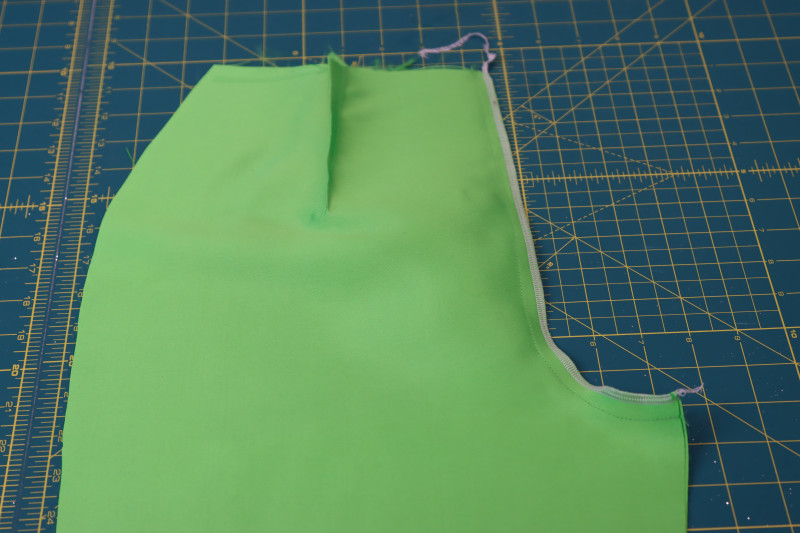
TOP DARTS
- Mark the bust darts on the front bust pieces using tailor’s chalk.
- Fold the front bust piece right sides together with the fold centered on the darts.
- Pin the dart lines after folding the bust.
- Sew along the dart lines.
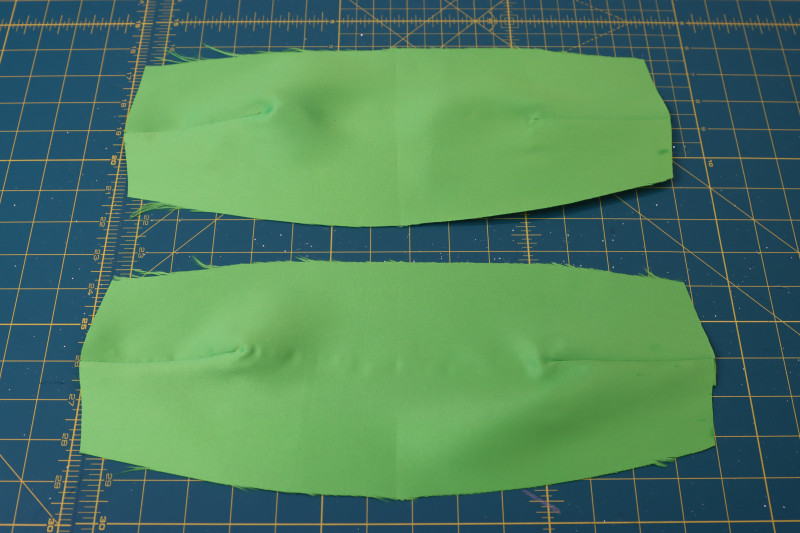
- Unfold the bust pieces and press the darts so that the bulk of the dart is laying down.
Step 2
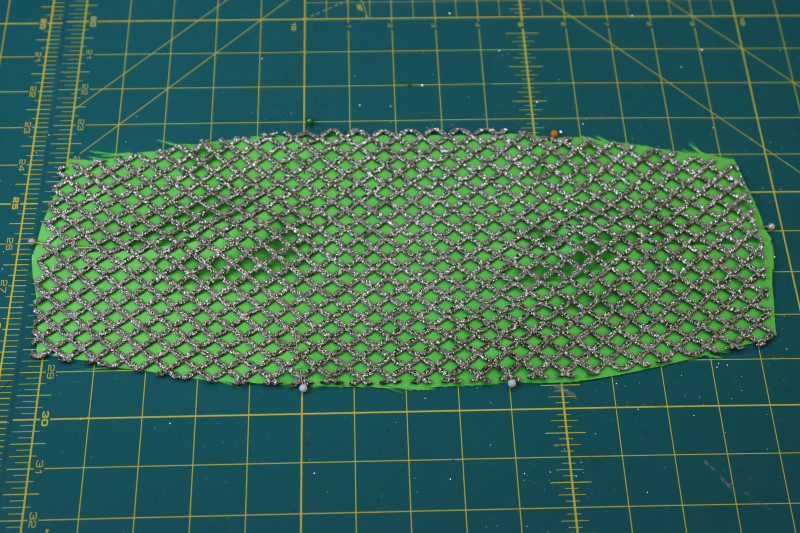
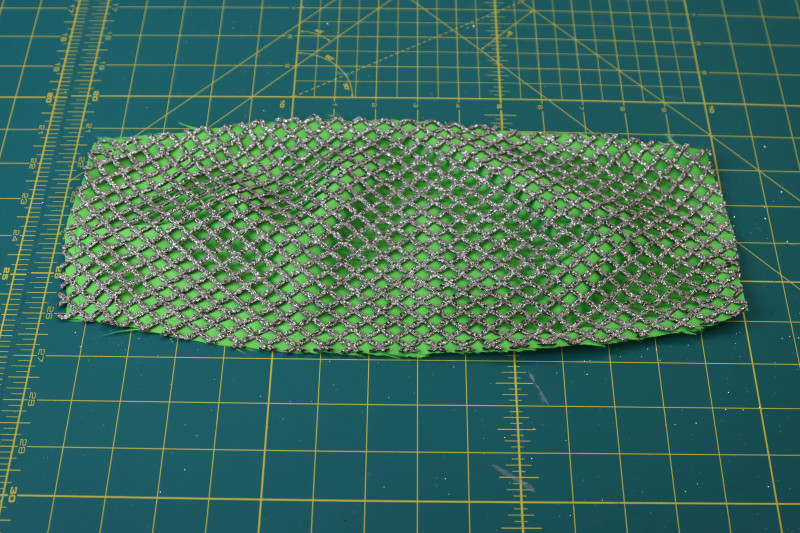
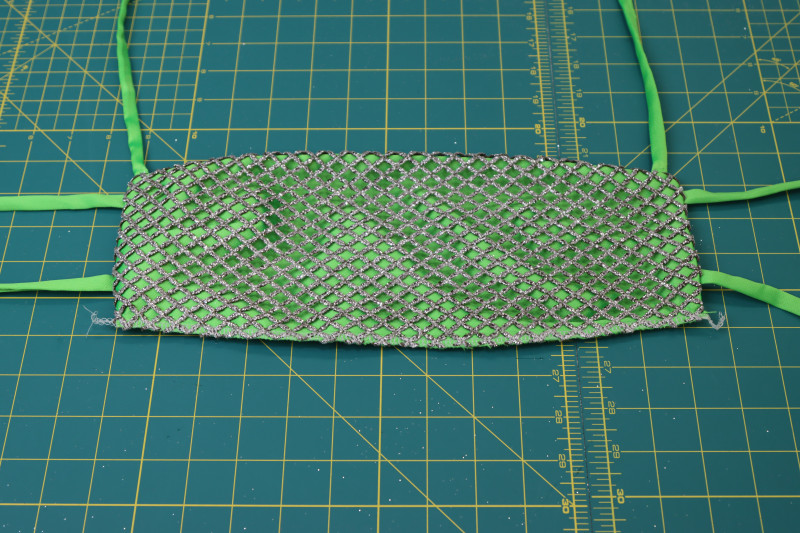
TOP OVERLAY
- Cut out a piece of the guipure lace that is the same size and shape as the dress top AFTER the darts have been sewn. In other words, don’t trace the paper pattern onto the lace, trace the actual bust piece onto the lace.
- Lay the wrong side of the lace on top of the right side of the front bust piece.
- Pin and sew the lace to the mikado around the perimeter of the front bust piece.
Step 3
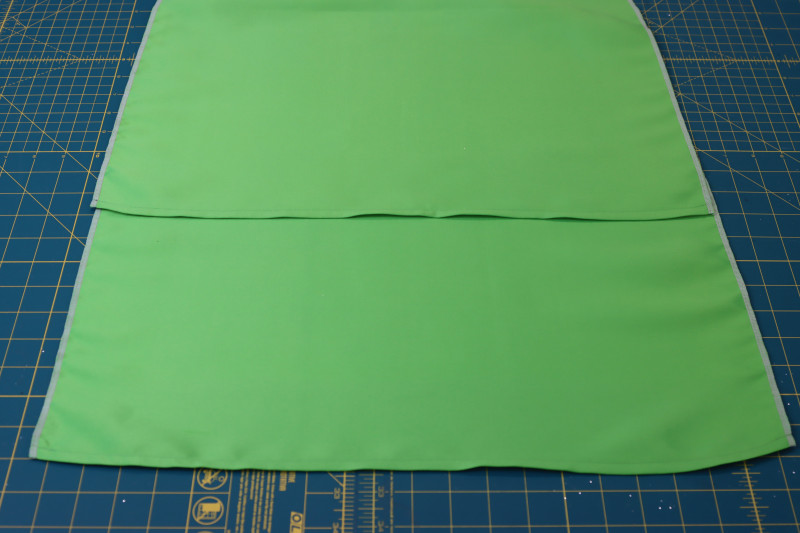
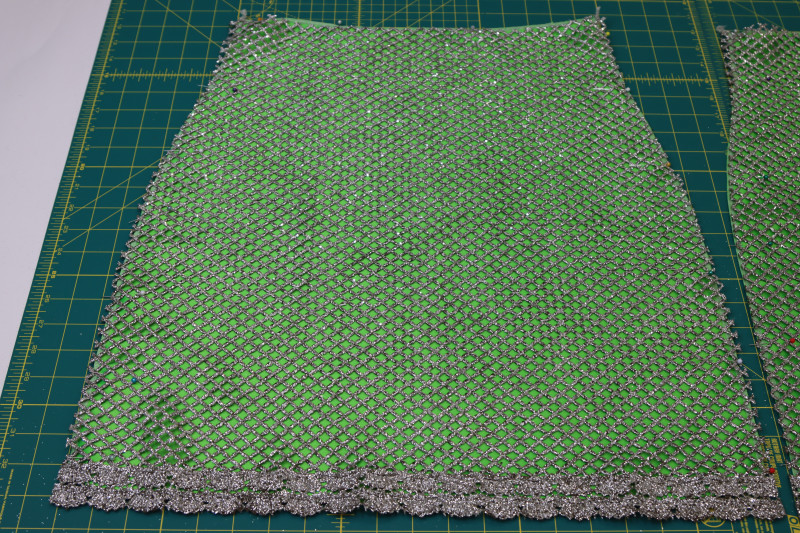
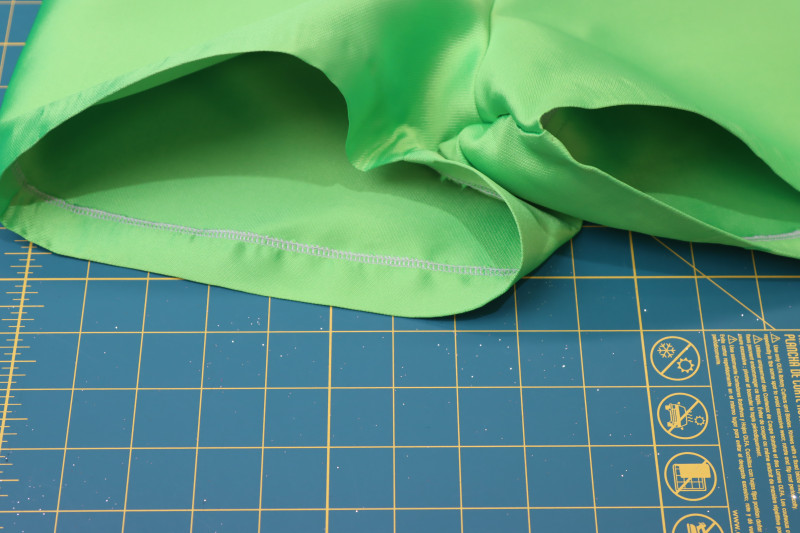
HEM SKIRT
- Serge or zigzag stitch all of the raw edges of the skirt pieces.
- Press a ½ inch fold into the bottom hems of both skirt pieces.
- Sew a hem into both skirt pieces with ⅜ inch seam allowance.
Step 4
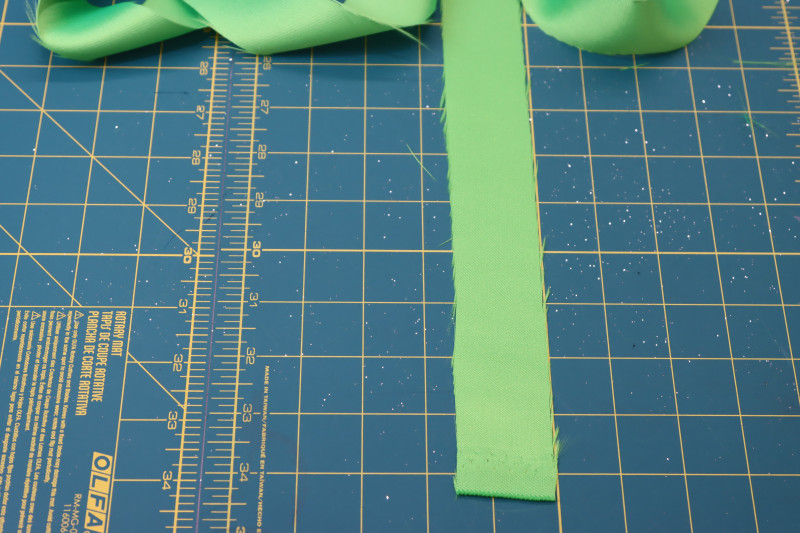
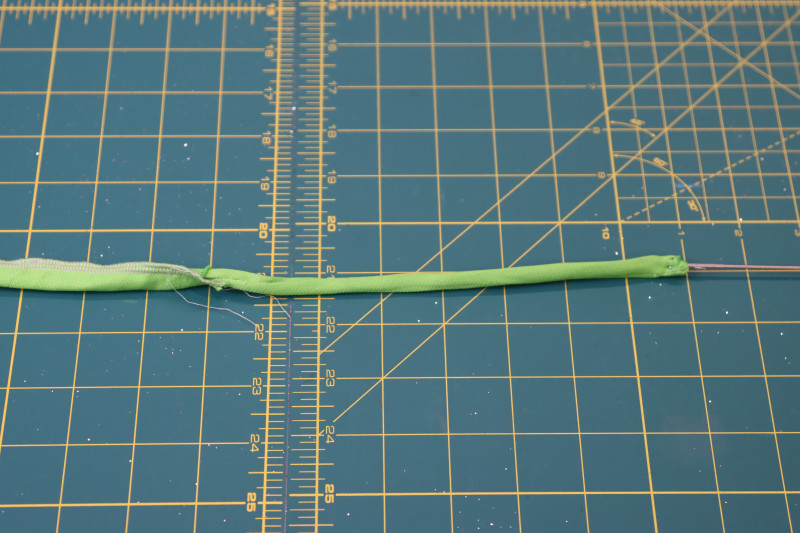
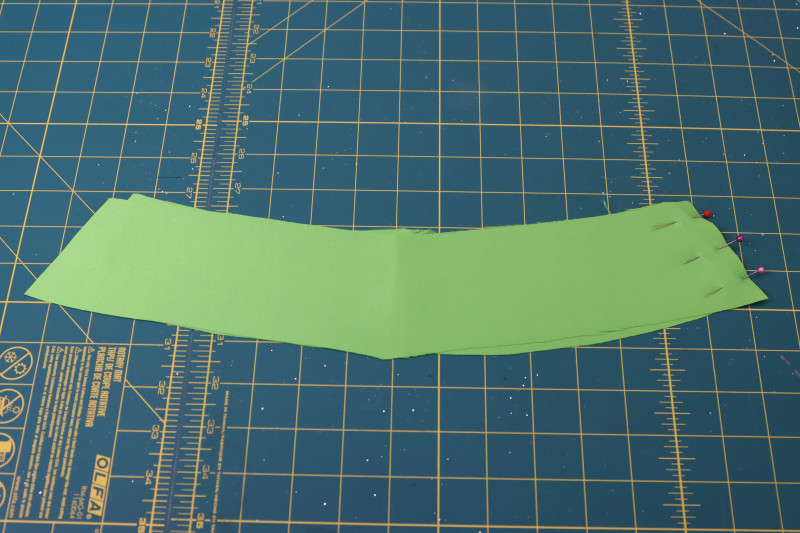
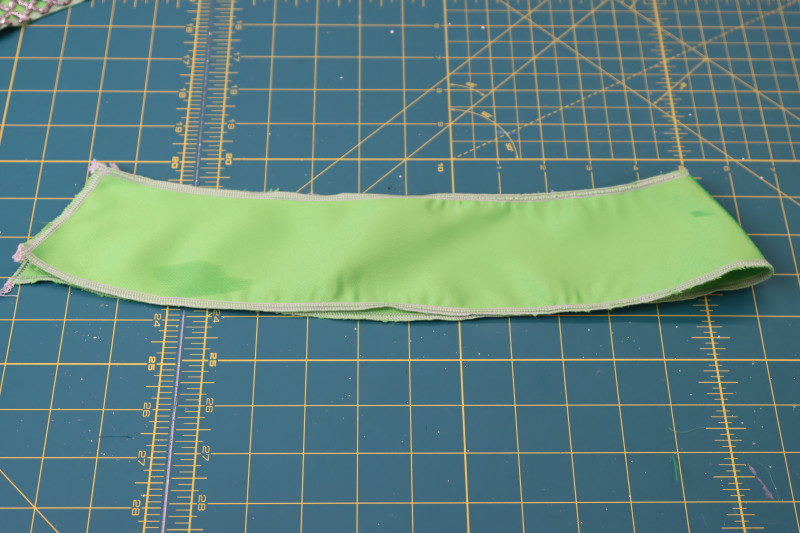
MAKE STRAPS
- Cut out 2 strips of fabric that are 1.5 inches wide and as long as the width of your fabric (in this case, the fabric is 59 inches wide).
- Fold the strips right sides together longways.
- Sew the strips of fabric into closed tunnels with a 1.4 inch seam allowance.
- Flip the straps right sides out using a loop turner.
Step 5
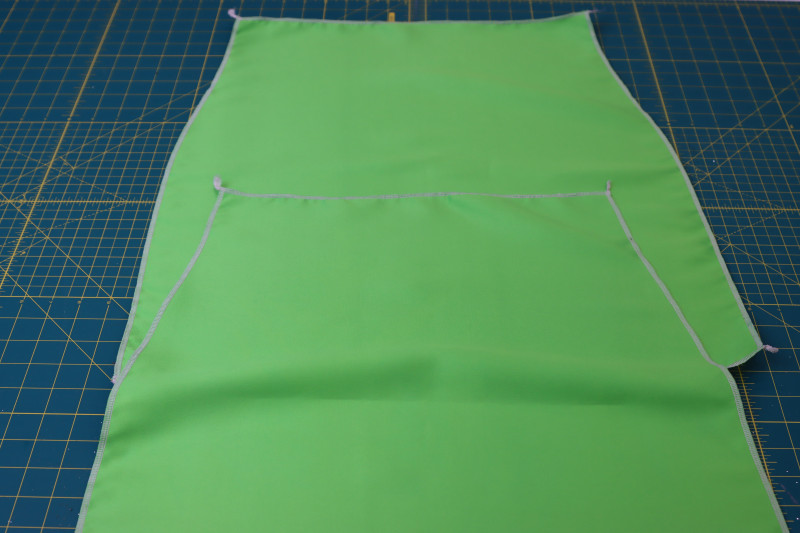
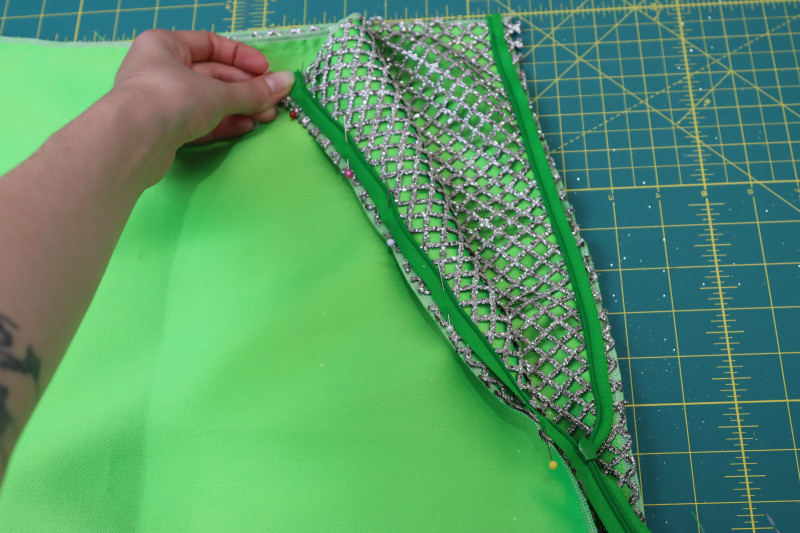
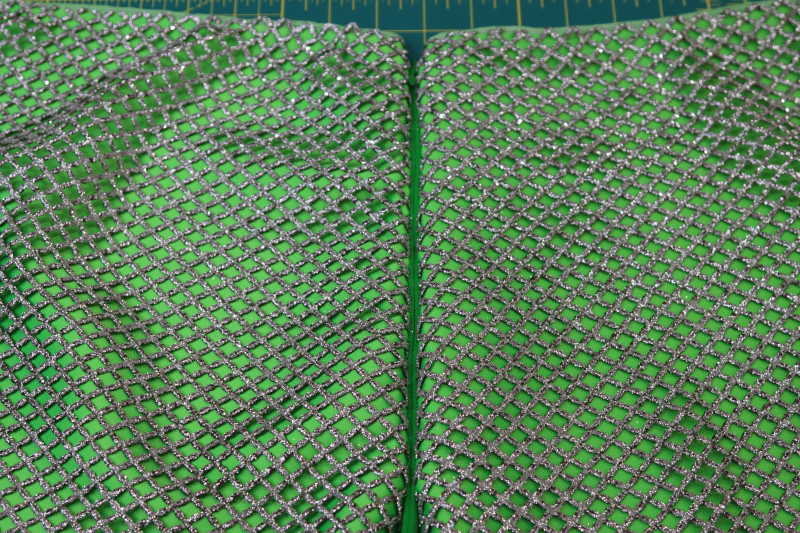
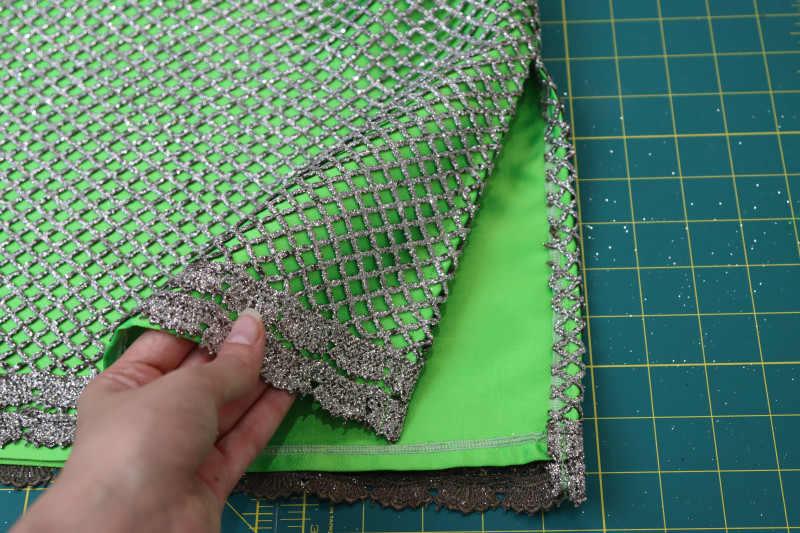
SKIRT OVERLAY
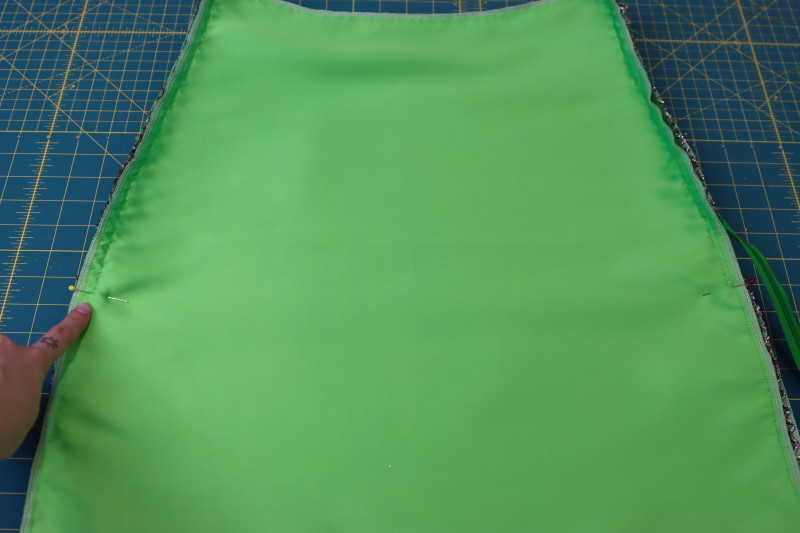
- Lay the wrong side of the front overlay skirt on top of the right side of the front under skirt.
- Pin around the sides and waistline of the skirts. Do not pin the skirts together at the hem.
- Sew the two skirts together at the sides and waistline.
- Repeat the same process with the back skirt piece.
Step 6
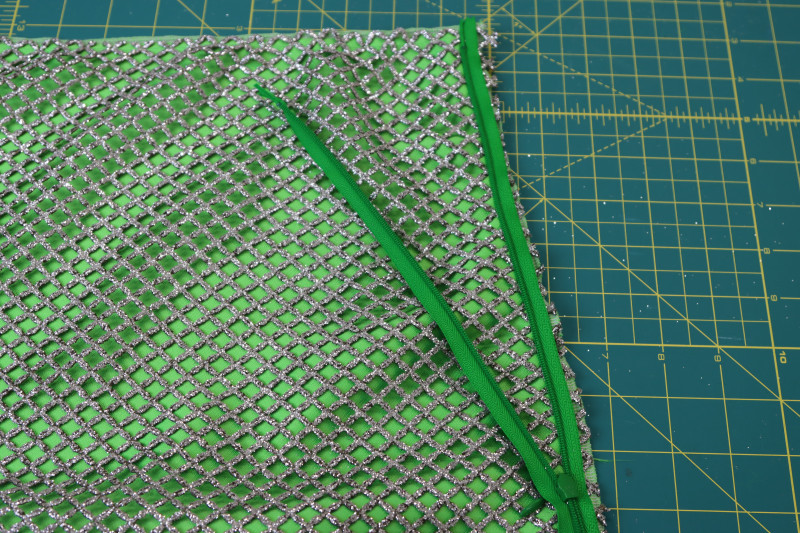
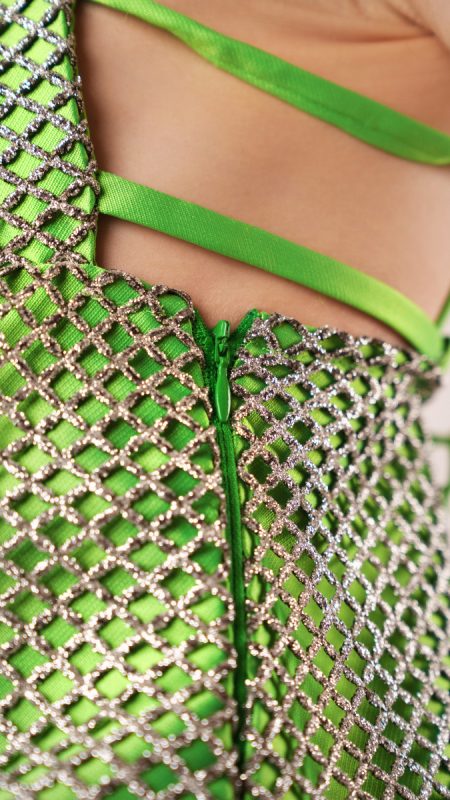
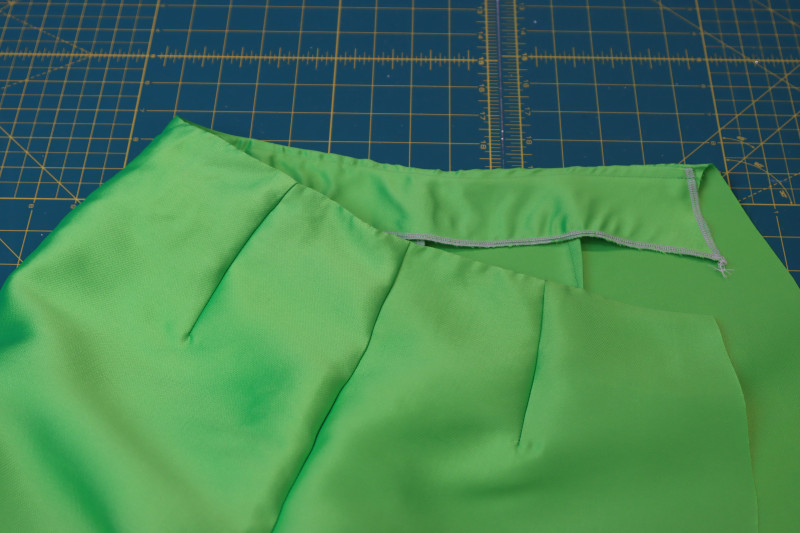
DRESS ZIPPER
- Place the zipper right sides together on top of the wearer’s front left side seam of the skirt.
- Pin and sew the side of the zipper tape closest to the raw edges of the front left side of the skirt (you might have to unzip the zipper to get it sewn all the way to the skirt between the thick fabric and the tight invisible zipper).
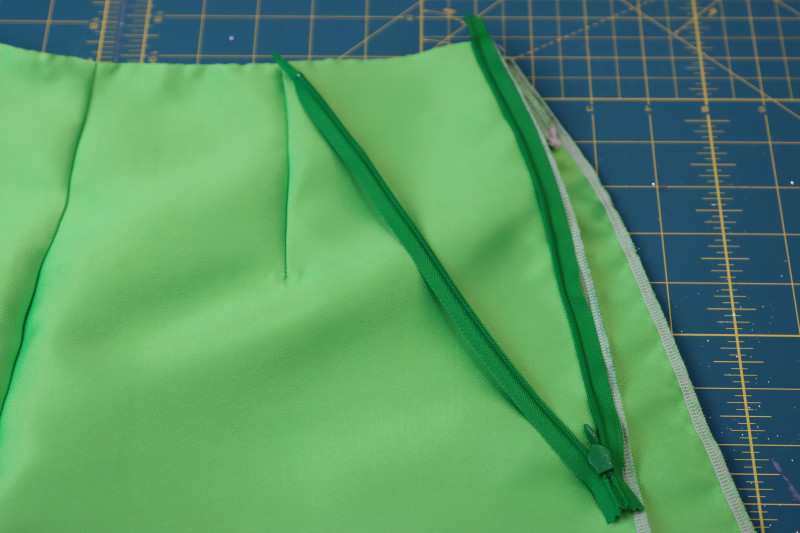
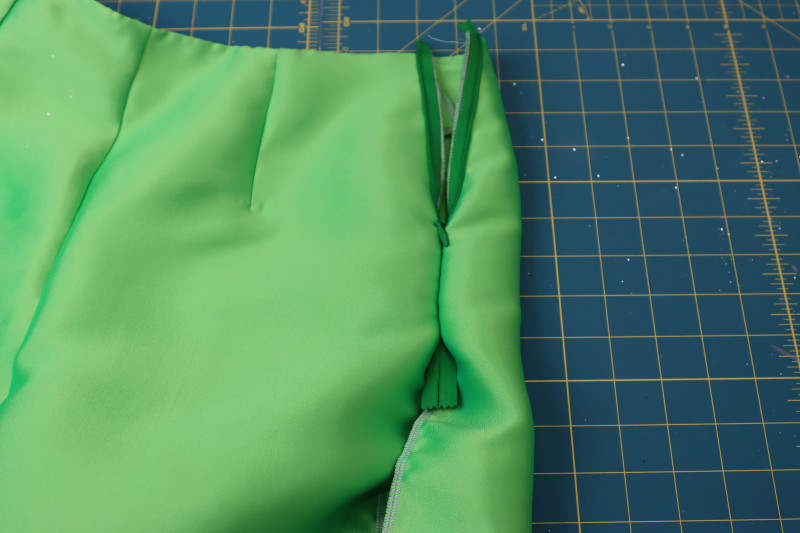
- Zip the zipper back up and place the other side of the zipper tape right sides together with the wearer’s back left side of the skirt.
- Pin and sew the opposite side of the zipper right sides together with the left back side seam of the skirt, making sure that the stoppers at the tops of the zipper tape are lined up with the seam at the top of the skirt, NOT the raw edge of the fabric at the top of the skirt.
Step 7
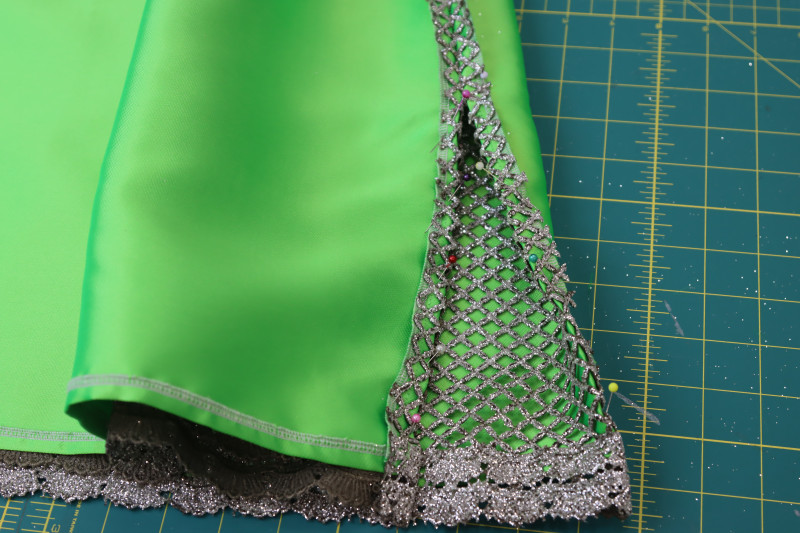
DRESS SLIT
- Mark with pins how high you want your side seam slits to be. Mine were 8 inches from the bottom hem of the skirt.
- Sew the side seams under the zipper, stopping where the pin marks the top of the slit.
- Sew the side seam opposite to the zipper making sure they are the same exact length.
- Fold the raw edges of the side seam slits toward the wrong side of the skirt.
- Press and pin the side slit folds into the skirt.
- Topstitch over the folded edges of the slits on both sides of the skirt with a ⅜ inch seam allowance.
Step 8
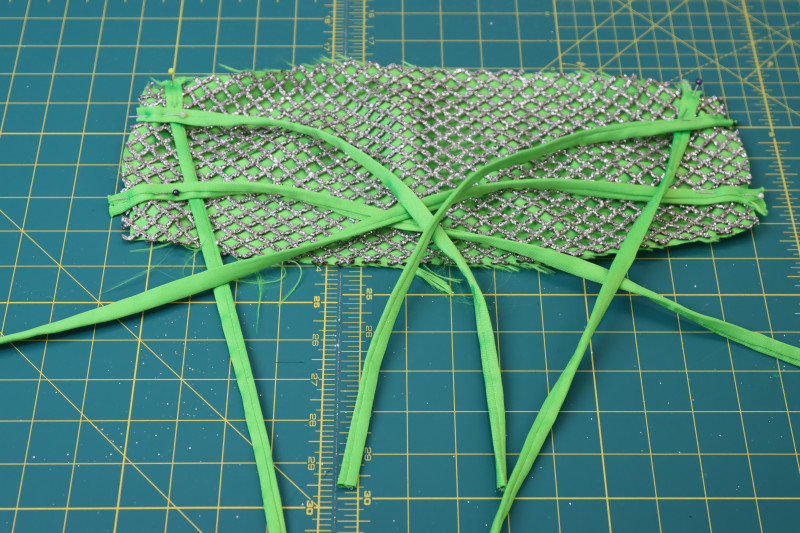
ATTACH STRAPS
- This part is a little complicated, but also totally allowed to be customized. Out of the straps I made, I cut 2 straps that were 18 inches long, two straps that were 8 inches long, and two straps that were 38 inches long. These lengths may need to be adjusted before sewing the straps into place, but you can start with these lengths for just this step.
- Pin the 18 inch straps at the top corners of the dress top.
- Pin the 8 inch straps towards the top half of the side seams of the dress top.
- Pin the 38 inch straps towards the bottom half of the side seams of the dress top.
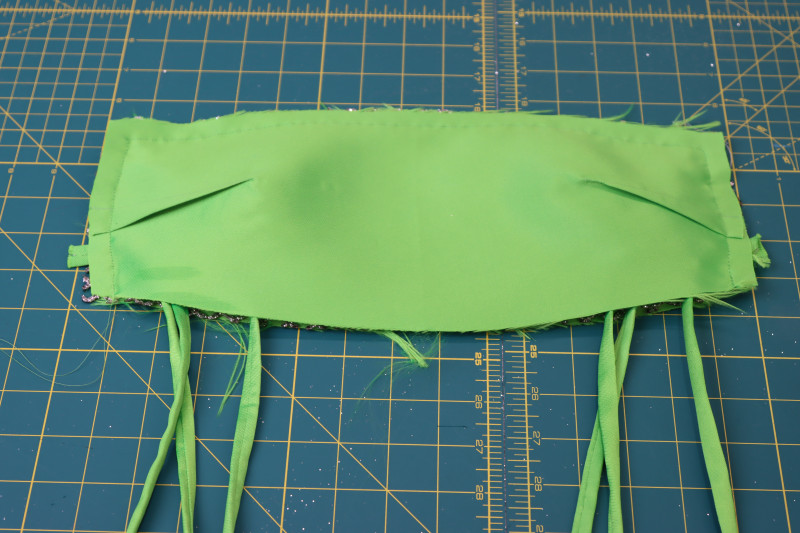
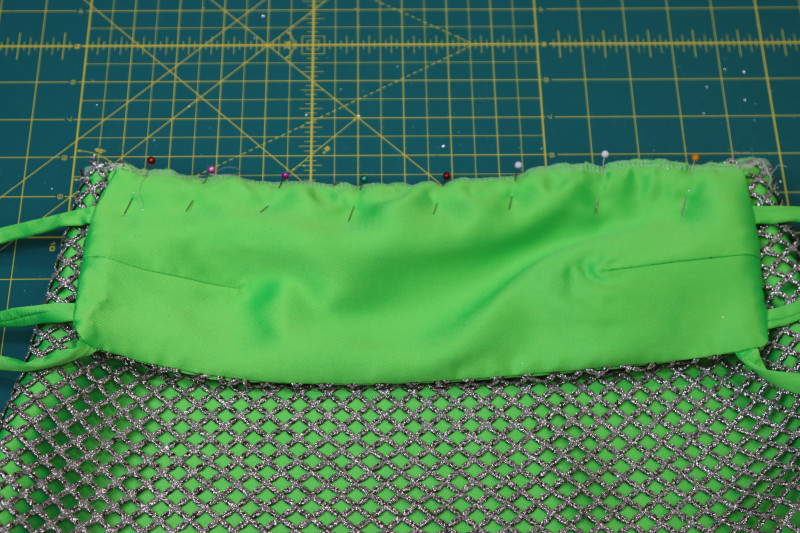
- After pinning the straps in place, place the top lining right sides together with the lace and the straps.
- Pin around the top and sides of the dress top, leaving the bottom edge open.
- Sew around the three edges of the dress top.
- Clip the corners of the dress top.
- Flip the dress top right sides out.
- Serge or zigzag the bottom raw edge of the dress top.


Step 9
ATTACH TOP
- Pin the serged raw edge of the dress top so that it is centered right sides together to the front waist of the skirt.
- Sew the dress top to the center front of the skirt.
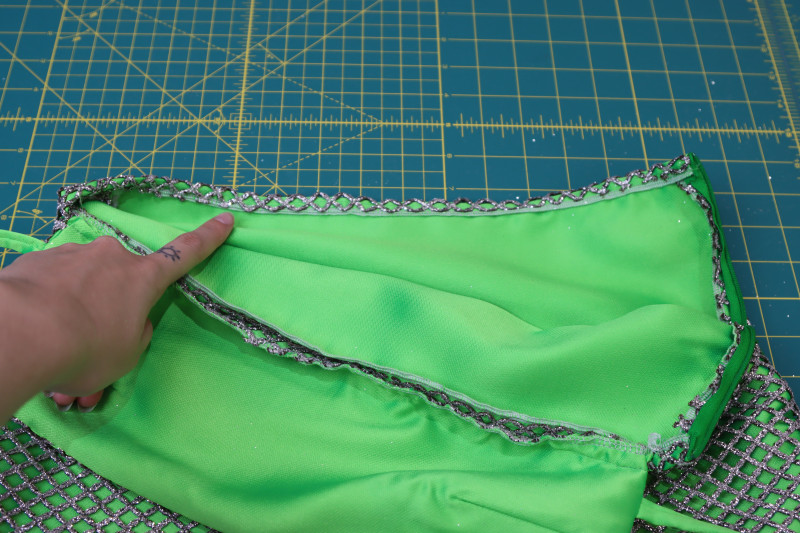
- Flip the dress top up and fold the serged raw edges of the skirt waistline toward the lining of the skirt.
- Press and pin the folded waistline of the skirt.
- Topstitch over the folded waistline of the skirt to hide the serged edge on the inside.
Step 10
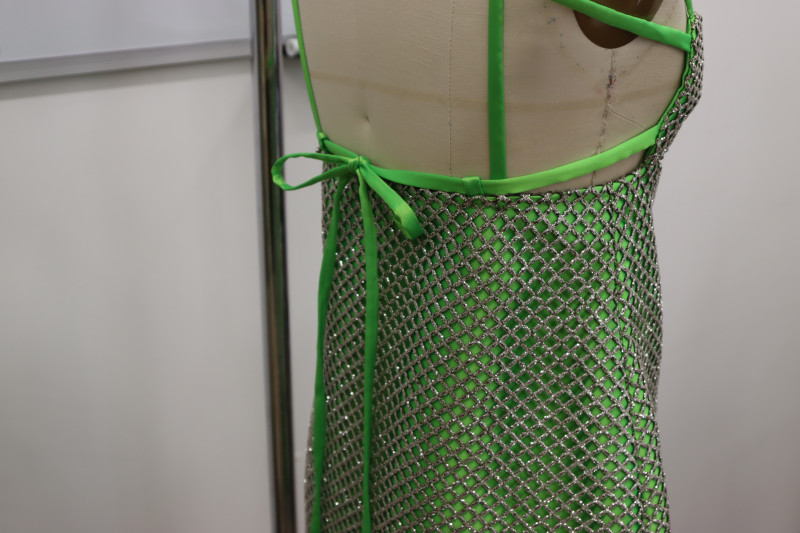
STRAP LOOPS
- Before starting this section, take a moment to finish the raw edges of your straps in any way you prefer. You can roll the edges and topstitch, burn the edges with a lighter if you’re using polyester, or turn the ends of the straps toward the inside of themselves and topstitch. I personally melted the ends with a lighter and it was very neat and secure.
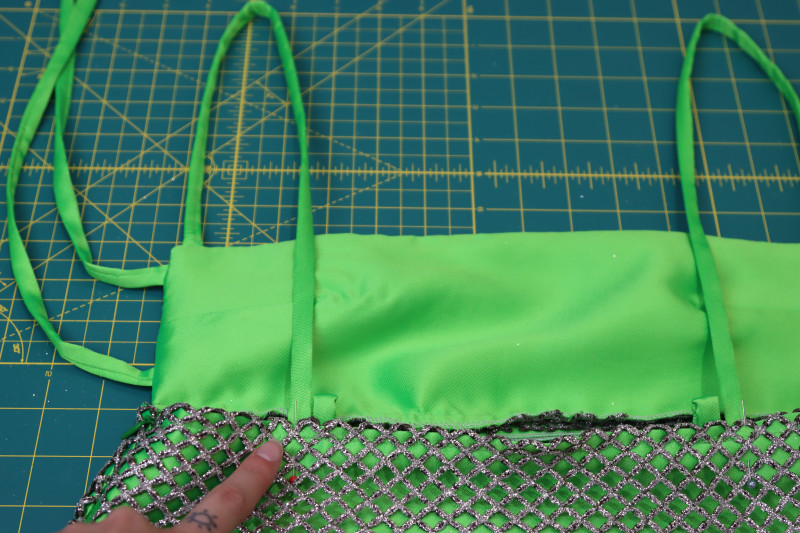
- Take two leftover pieces of your straps that are about 2 inches long each and fold them in half.
- Pin the folded short strap pieces to the back waistline of the dress skirt. I pinned mine 4 inches from the side seams on each side.
- Topstitch over the folded straps to secure them to the back of the dress.
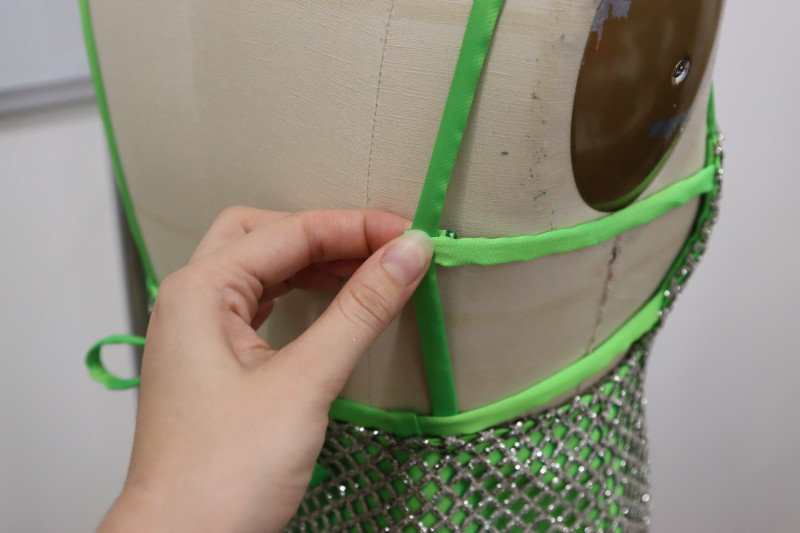
- At this point, I recommend trying on the dress. After you’ve tried it on and decided if your straps need to be shortened, pin the straps coming out of the top corners of the neckline (the ones that were 18 inches long) right next to the folded loops you just sewed to the back of the dress, as shown in the second photo below.
- Topstitch over the pinned straps to secure them next to the loops.
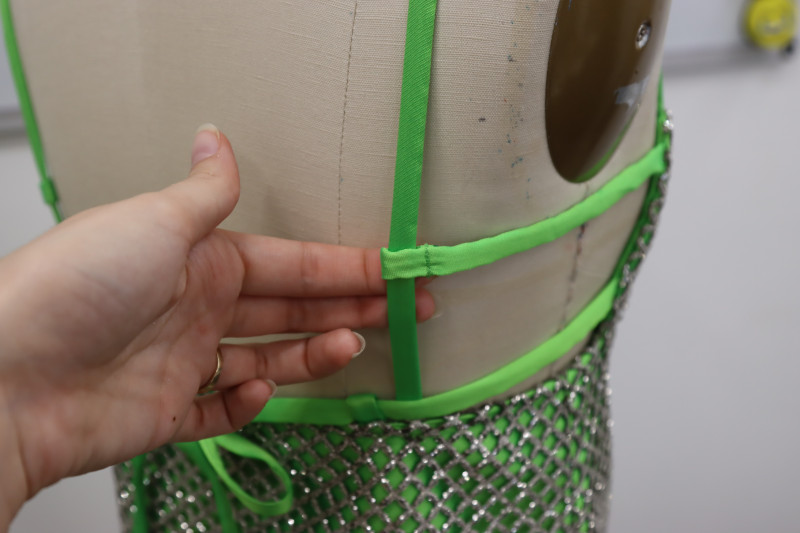
- Feed the longest straps (the ones that were 38 inches long) through the loops at the back of the dress. Once you’re wearing the dress, you can tie these two long straps together at the center back of the dress.
- Take the shortest straps, the 8 inch ones that are sticking out of the side of the dress top, and wrap them around the 18 inch straps as shown in the 4th photo below.
- Pin a loop into the 8 inch strap so that it is wrapped around the 18 inch strap.
- Sew the loop into the strap as shown in the last photo below.


Step 11
SHORTS FACING
- Place the front and back shorts facings right sides together and pin them together at one of the sides. Leave the other side unpinned.
- Sew the facings together at that side seam.
- Press the facing seam open and flat.
- Serge or zigzag around the raw edges of the facings.
Step 12
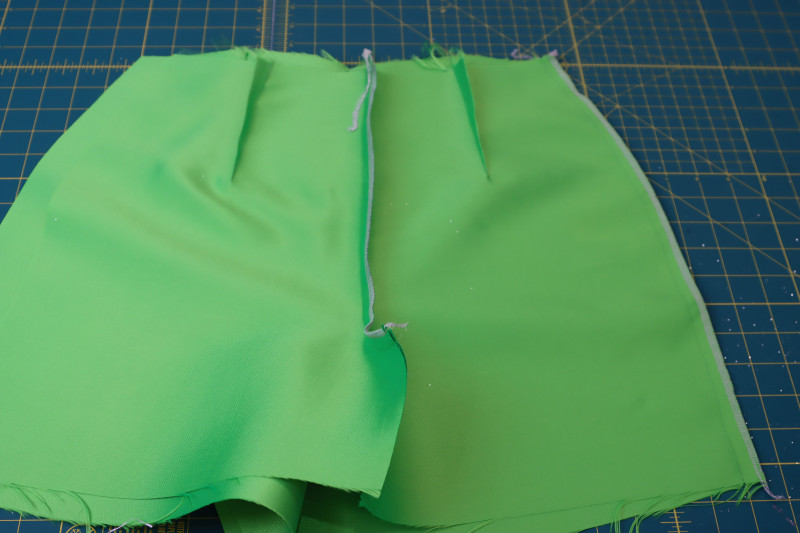
SHORTS DARTS
- Mark the front and back shorts darts with tailor’s chalk.
- Fold each shorts piece right sides together with the fold centered over the dart.
- Pin the dart lines to each other on either side of the fold.
- Sew along the dart lines.
- Open the darts and press them flat towards the shorts side seams.

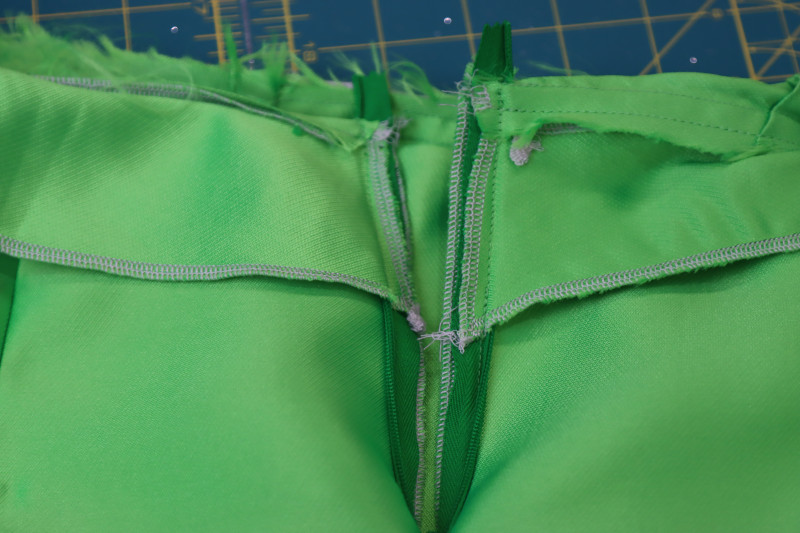
Step 13
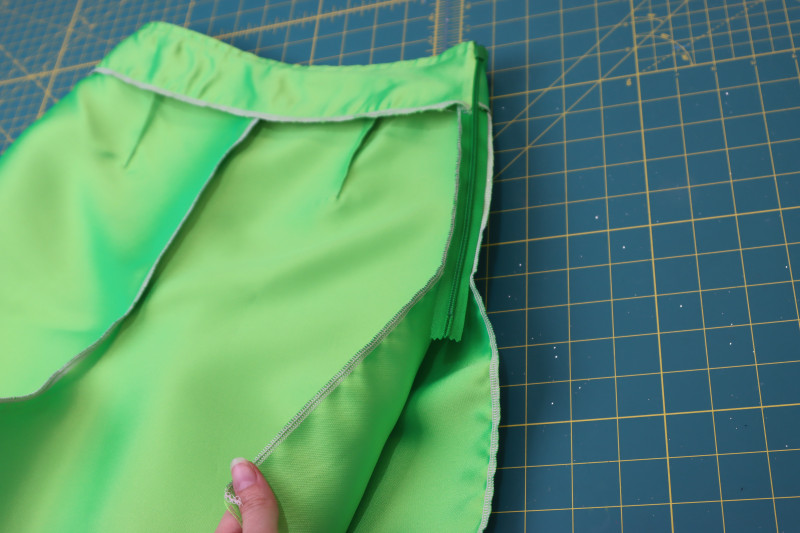
CROTCH SEAMS
- Place the back shorts pieces right sides together with the back crotch curves lined up.
- Sew and serge the back crotch seam.
- Repeat the same process with the front crotch seam.
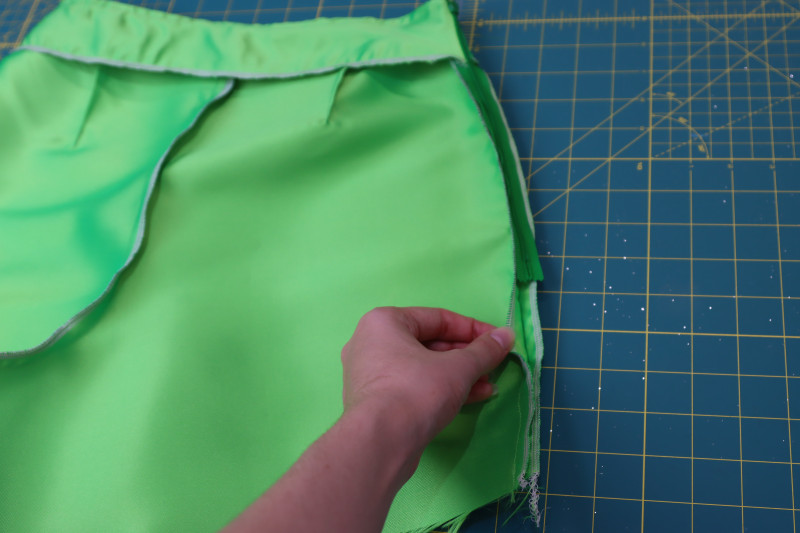
Step 14
SHORTS SIDE SEAM
- Place the back shorts right sides together on top of the front shorts.
- Pin, sew, and serge ONE OF the side seams, leaving the other one open so that we can insert a zipper. NOTE: Make sure that the side seam that you sew is on the same side of the garment as the side seam you sewed on the shorts facing.
Step 15
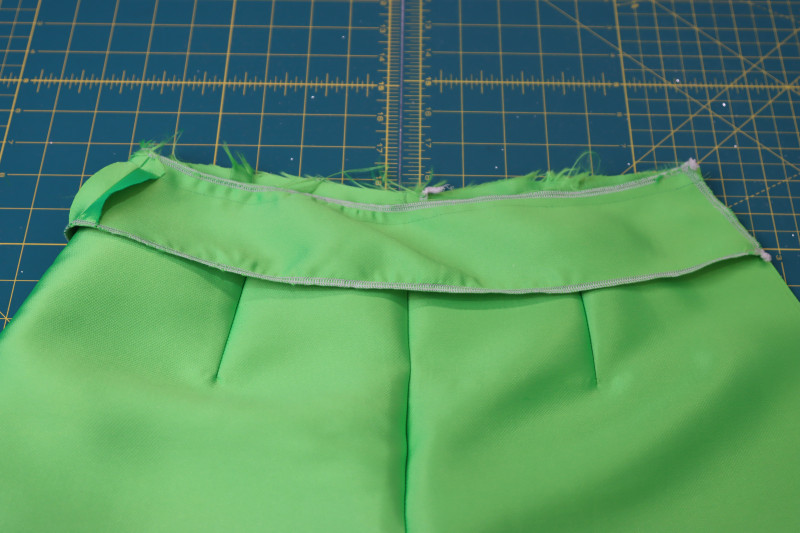
ATTACH WAISTLINE FACING
- Place the waistline facing right sides together on top of the waistline of the shorts, making sure the open side seam of the shorts facing is lined up with the open side seam of the shorts themselves.
- Pin and sew the facing to the waistline.
- Flip the facing toward the inside of the shorts and press the seam folded and flat.
- Understitch the waistline facing to the seam allowance to keep it hidden on the inside of the shorts.
Step 16
SHORTS ZIPPER
- Place the zipper right sides together on top of the wearer’s front right side seam of the shorts. I’m putting the zipper on the right side of the shorts instead of the left side so that it is opposite to the zipper in the dress.
- Pin the zipper so that the stopper at the top of the zipper lines up with the seam between the shorts and the facing at the waistline.
- Zip the zipper back up and place the other side of the zipper tape right sides together with the wearer’s back right side of the shorts.
- Pin and sew the opposite side of the zipper right sides together with the back right side of the shorts, making sure the stopper at the top of the zipper is lined up with the waistline seam.
- Fold the shorts facings so that they are right sides together with the outside of the shorts, sandwiching the zipper between the main shorts and the facing.
- Sew the facing side seams to the shorts side seams with the zipper sandwiched between the two layers.
- Clip the corners of the facings and the ends of the zipper.
- Flip that section of the shorts right sides out and poke out the corners of the facing and shorts waistline.
- Pin and sew the rest of the side seam under the zipper.
Step 17
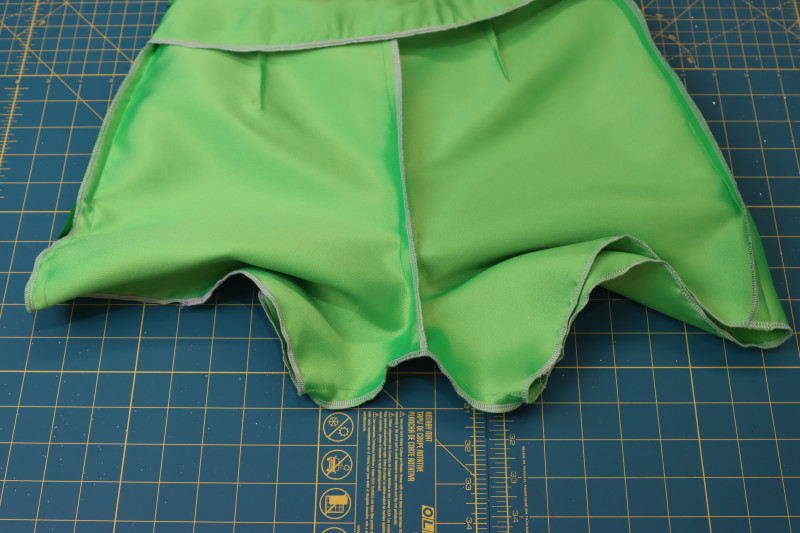
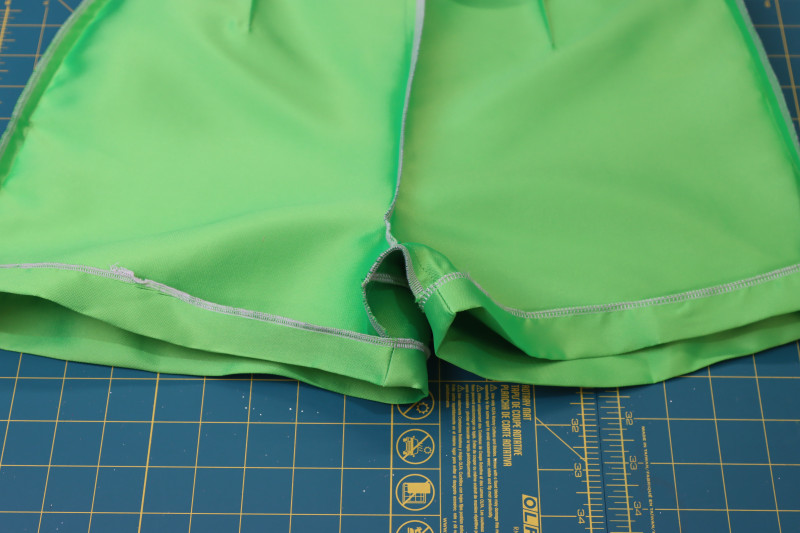
SHORTS INSEAM
- Line up the front and back crotch seams of the shorts and pin them right sides together.
- Pin, sew, and serge the shorts inseams.
Step 18
SHORTS HEM
- Press a 1 inch fold into the hem of the shorts.
- Hem the shorts with your preferred hemming method. I used Stitch Witchery hem tape for an invisible finish, but you can topstitch or use a blind hem foot on your sewing machine.
Sewing Success: The Finished Lynx Mini Shift Dress
Share this post with a friend (or two!), download the Lynx Mini Shift Dress free sewing pattern, and show us which fabrics and colors you choose, using the hashtags #MoodLynxPattern & #MadeWithMood—and don’t forget to tag us @MoodFabrics, too.


Free Sewing Pattern Inspiration for Your Next Project
With 530+ free sewing patterns and counting, your opportunities for sewing with Mood are endless!
We hope you had as much fun sewing this mini shift dress pattern as we did! As always, we want to hear from you—share your thoughts and comments below and let us know where you’ll be wearing the Lynx Mini Shift Dress free sewing pattern!
Can’t get enough sewing with Mood? Browse your next make with our latest free sewing patterns.